ASTM D4172-94(2016)
(Test Method)Standard Test Method for Wear Preventive Characteristics of Lubricating Fluid (Four-Ball Method)
Standard Test Method for Wear Preventive Characteristics of Lubricating Fluid (Four-Ball Method)
SIGNIFICANCE AND USE
5.1 This test method can be used to determine the relative wear preventive properties of lubricating fluids in sliding contact under the prescribed test conditions. No attempt has been made to correlate this test with balls in rolling contact. The user of this test method should determine to his own satisfaction whether results of this test procedure correlate with field performance or other bench test machines.
SCOPE
1.1 This test method covers a procedure for making a preliminary evaluation of the anti-wear properties of fluid lubricants in sliding contact by means of the Four-Ball Wear Test Machine. Evaluation of lubricating grease using the same machine is detailed in Test Method D2266.
1.2 The values stated in SI units are to be regarded as the standard. The values given in parentheses are for information only.
1.3 This standard does not purport to address all of the safety concerns, if any, associated with its use. It is the responsibility of the user of this standard to establish appropriate safety and health practices and determine the applicability of regulatory limitations prior to use.
General Information
Relations
Buy Standard
Standards Content (Sample)
NOTICE: This standard has either been superseded and replaced by a new version or withdrawn.
Contact ASTM International (www.astm.org) for the latest information
Designation: D4172 − 94 (Reapproved 2016)
Standard Test Method for
Wear Preventive Characteristics of Lubricating Fluid (Four-
Ball Method)
This standard is issued under the fixed designation D4172; the number immediately following the designation indicates the year of
original adoption or, in the case of revision, the year of last revision. A number in parentheses indicates the year of last reapproval. A
superscript epsilon (´) indicates an editorial change since the last revision or reapproval.
This standard has been approved for use by agencies of the U.S. Department of Defense.
1. Scope 4. Summary of Test Method
1.1 This test method covers a procedure for making a 4.1 Three 12.7 mm ( ⁄2 in.) diameter steel balls are clamped
preliminary evaluation of the anti-wear properties of fluid together and covered with the lubricant to be evaluated. A
lubricants in sliding contact by means of the Four-Ball Wear fourth 12.7 mm diameter steel ball, referred to as the top ball,
Test Machine. Evaluation of lubricating grease using the same is pressed with a force of 147 N or 392 N (15 kgf or 40 kgf)
machine is detailed in Test Method D2266. into the cavity formed by the three clamped balls for three-
point contact. The temperature of the test lubricant is regulated
1.2 The values stated in SI units are to be regarded as the
at 75 °C (167 °F) and then the top ball is rotated at 1200 r/min
standard. The values given in parentheses are for information
for 60 min. Lubricants are compared by using the average size
only.
of the scar diameters worn on the three lower clamped balls.
1.3 This standard does not purport to address all of the
NOTE 1—Because of differences in the construction of the various
safety concerns, if any, associated with its use. It is the
machines on which the four-ball test can be made, the manufacturer’s
responsibility of the user of this standard to establish appro-
instructions should be consulted for proper machine set up and operation.
priate safety and health practices and determine the applica-
NOTE 2—Although the test can be run under other parameters, the
bility of regulatory limitations prior to use.
precision noted in Section 10 may vary. No aqueous fluid was included in
the round-robin to establish the precision limits.
2. Referenced Documents
5. Significance and Use
2.1 ASTM Standards:
D2266 Test Method for Wear Preventive Characteristics of
5.1 This test method can be used to determine the relative
Lubricating Grease (Four-Ball Method)
wear preventive properties of lubricating fluids in sliding
2.2 ANSI Standard:
contact under the prescribed test conditions. No attempt has
B3.12 Specification for Metal Balls
been made to correlate this test with balls in rolling contact.
The user of this test method should determine to his own
3. Terminology
satisfaction whether results of this test procedure correlate with
3.1 Definitions:
field performance or other bench test machines.
3.1.1 lubricant, n—any material interposed between two
6. Apparatus
surfaces that reduces the friction or wear between them.
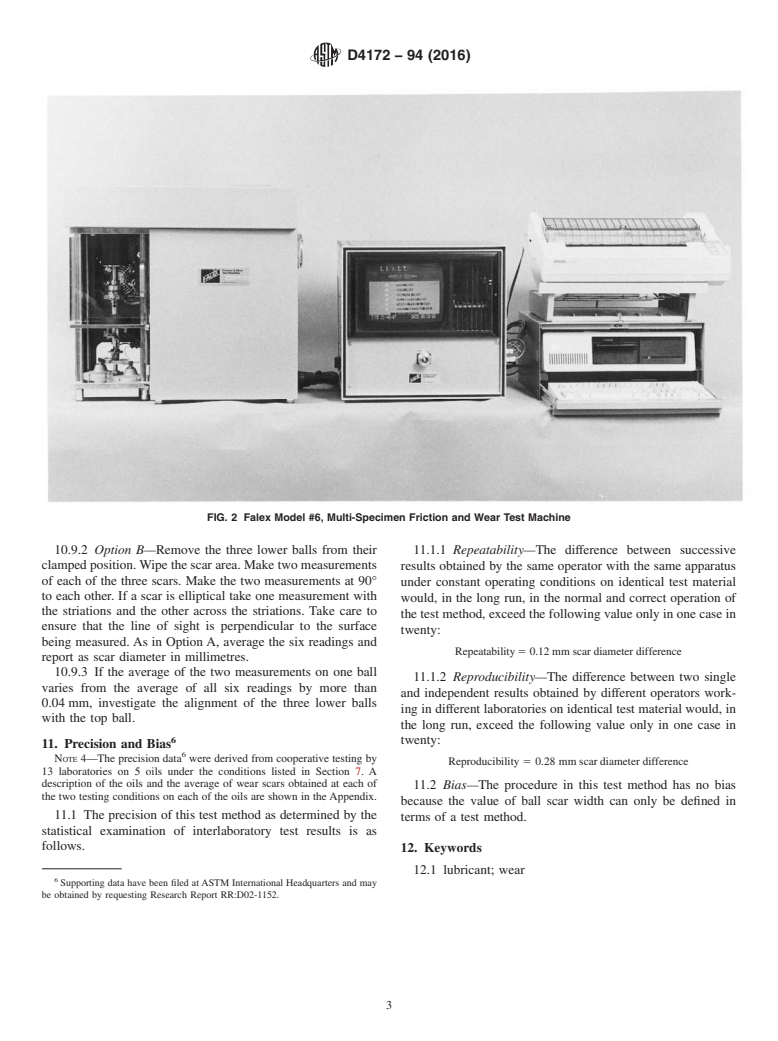
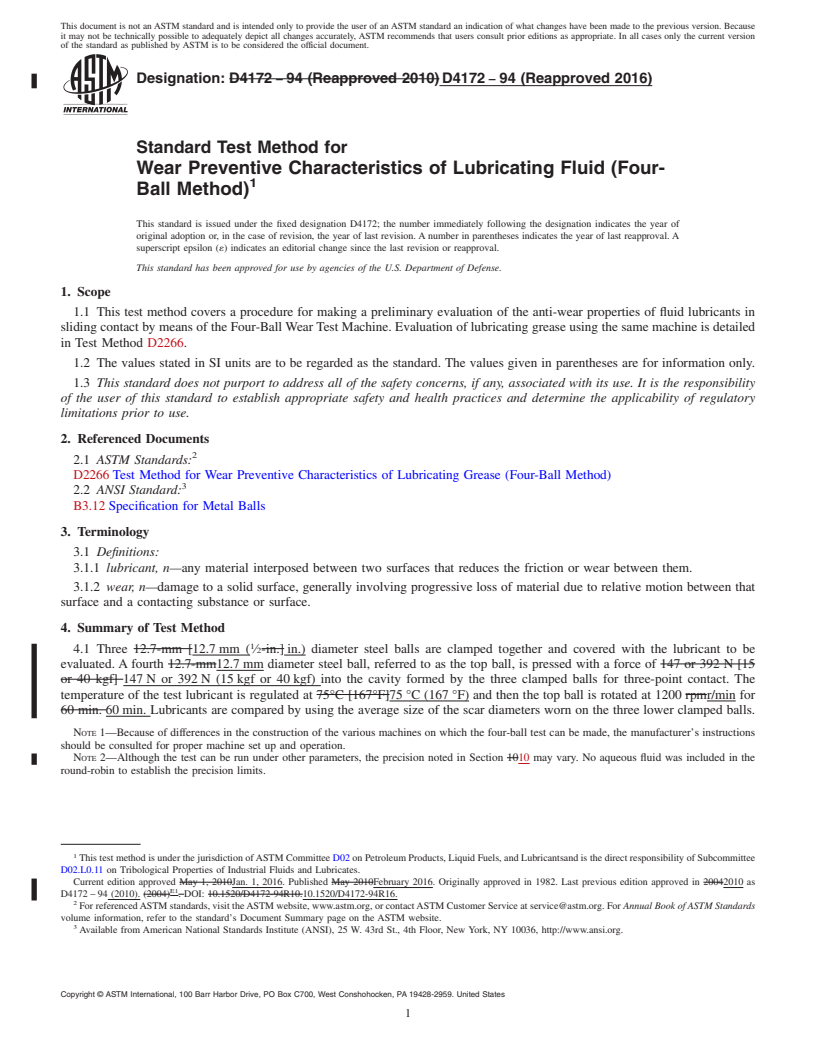
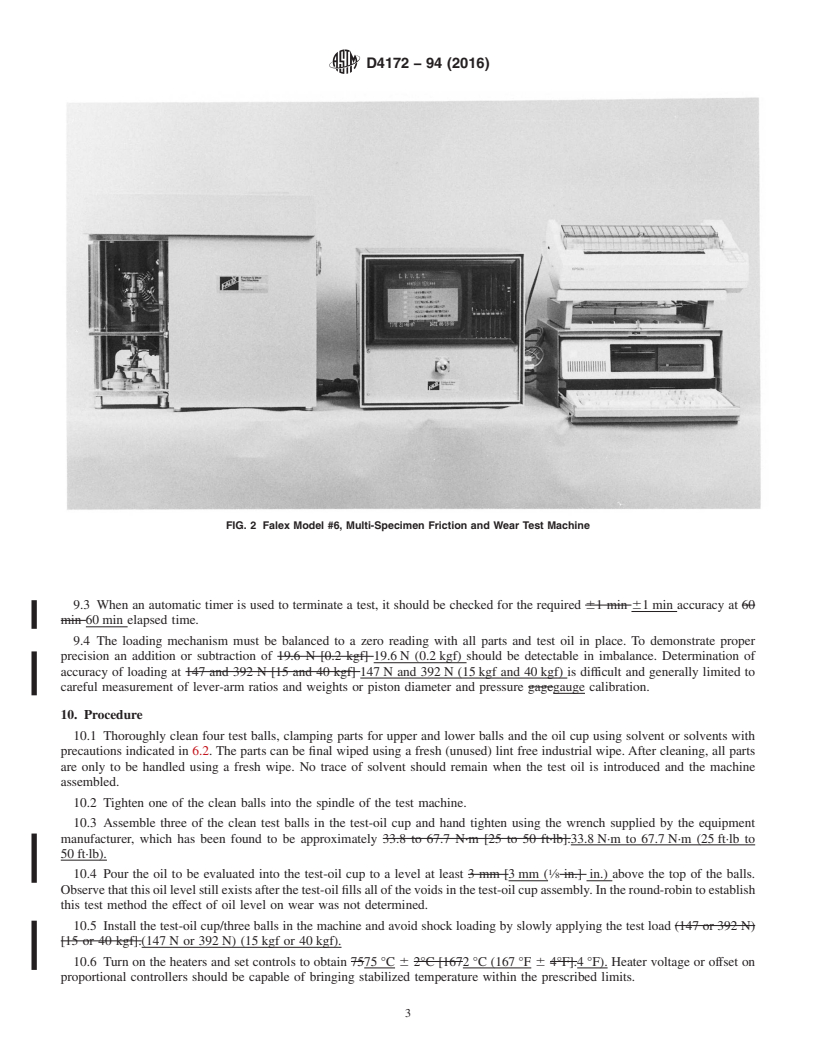
3.1.2 wear, n—damage to a solid surface, generally involv- 6.1 Four-Ball Wear Test Machine —See Figs. 1-3.
ing progressive loss of material due to relative motion between
NOTE 3—It is important to distinguish between the Four-Ball E.P. and
that surface and a contacting substance or surface.
the Four-Ball Wear Test Machines. The Four-Ball E.P. Test Machine is
designedfortestingunderheavierloadsandlacksthesensitivitynecessary
1 for wear tests.
This test method is under the jurisdiction of ASTM Committee D02 on
Petroleum Products, Liquid Fuels, and Lubricantsand is the direct responsibility of
6.2 Microscope, capable of measuring the diameters of the
Subcommittee D02.L0.11 on Tribological Properties of Industrial Fluids and
scars produced on the three stationary balls to an accuracy of
Lubricates.
Current edition approved Jan. 1, 2016. Published February 2016. Originally
approved in 1982. Last previous edition approved in 2010 as D4172 – 94 (2010).
DOI: 10.1520/D4172-94R16. The Four-Ball Wear Test Machine and the Falex Model #6, Multi-Specimen
For referenced ASTM standards, visit the ASTM website, www.astm.org, or Friction and Wear Test Machine, both made by Falex Corp., 1020 Airpark Drive,
contact ASTM Customer Service at service@astm.org. For Annual Book of ASTM SugarGrove,IL60554,havebeenfoundsatisfactoryforthispurpose.Thiscompany
Standards volume information, refer to the standard’s Document Summary page on can also furnish a microscope with a special base to measure the wear scars without
the ASTM website. removing the balls from the test-oil cup. Discontinued models of the Four-BallWear
Available from American National Standards Institute (ANSI), 25 W. 43rd St., Test Machine made by Precision Scientific Co. and Roxana MachineWorks are also
4th Floor, New York, NY 10036, http://www.ansi.org. satisfactory.
Copyright © ASTM International, 100 Barr Harbor Drive, PO Box C700, West Conshohocken, PA 19428-2959. United States
D4172 − 94 (2016)
9.4 The loading mechanism must be balanced to a zero
reading with all parts and test oil in place. To demonstrate
proper precision an addition or subtraction of 19.6 N (0.2 kgf)
should be detectable in imbalance. Determination of accuracy
of loading at 147 N and 392 N (15 kgf and 40 kgf) is difficult
and generally limited to careful measurement of lever-arm
ratios and weights or piston diameter and pressure gauge
calibration.
10. Procedure
10.1 Thoroughly clean four test balls, clamping parts for
FIG. 1 Schematic of a Four-Ball Wear Test Machine
upper and lower balls and the oil cup using solvent or solvents
with precautions indicated in 6.2. The parts can be final wiped
0.01 mm. It is more efficient to measure the scars without
using a fresh (unused) lint free industrial wipe.After cleaning,
removing the three balls from the holder. all parts are only to be handled using a fresh wipe. No trace of
solvent should remain when the test oil is introduced and the
7. Materials
machine assembled.
7.1 Test Balls, chrome alloy steel, made from AISI
10.2 Tighten one of the clean balls into the spindle of the
standard steel No. E-52100, with diameter of 12.7 mm (0.5 in.)
test machine.
Grade 25 EP (Extra Polish). Such balls are described in ANSI
10.3 Assemble three of the clean test balls in the test-oil cup
B3.12. The extra-polish finish is not described in that specifi-
and hand tighten using the wrench supplied by the equipment
cation. The Rockwell C hardness shall be 64 to 66, a closer
manufacturer, which has been found to be approximately
limit than is found in the ANSI requirement.
33.8 N·m to 67.7 N·m (25 ft·lb to 50 ft·lb).
7.2 Cleaning Fluids for preparing balls and apparatus for
10.4 Pour the oil to be evaluated into the test-oil cup to a
the test should be those approved as nontoxic, capable of
level at least 3 mm ( ⁄8 in.) above the top of the balls. Observe
removing antirust coatings from the balls, eliminating test-oil
thatthisoillevelstillexistsafterthetest-oilfillsallofthevoids
carryover from one test to the next, and not contribute to wear
in the test-oil cup assembly. In the round-robin to establish this
or antiwear of the test lu
...
This document is not an ASTM standard and is intended only to provide the user of an ASTM standard an indication of what changes have been made to the previous version. Because
it may not be technically possible to adequately depict all changes accurately, ASTM recommends that users consult prior editions as appropriate. In all cases only the current version
of the standard as published by ASTM is to be considered the official document.
Designation: D4172 − 94 (Reapproved 2010) D4172 − 94 (Reapproved 2016)
Standard Test Method for
Wear Preventive Characteristics of Lubricating Fluid (Four-
Ball Method)
This standard is issued under the fixed designation D4172; the number immediately following the designation indicates the year of
original adoption or, in the case of revision, the year of last revision. A number in parentheses indicates the year of last reapproval. A
superscript epsilon (´) indicates an editorial change since the last revision or reapproval.
This standard has been approved for use by agencies of the U.S. Department of Defense.
1. Scope
1.1 This test method covers a procedure for making a preliminary evaluation of the anti-wear properties of fluid lubricants in
sliding contact by means of the Four-Ball Wear Test Machine. Evaluation of lubricating grease using the same machine is detailed
in Test Method D2266.
1.2 The values stated in SI units are to be regarded as the standard. The values given in parentheses are for information only.
1.3 This standard does not purport to address all of the safety concerns, if any, associated with its use. It is the responsibility
of the user of this standard to establish appropriate safety and health practices and determine the applicability of regulatory
limitations prior to use.
2. Referenced Documents
2.1 ASTM Standards:
D2266 Test Method for Wear Preventive Characteristics of Lubricating Grease (Four-Ball Method)
2.2 ANSI Standard:
B3.12 Specification for Metal Balls
3. Terminology
3.1 Definitions:
3.1.1 lubricant, n—any material interposed between two surfaces that reduces the friction or wear between them.
3.1.2 wear, n—damage to a solid surface, generally involving progressive loss of material due to relative motion between that
surface and a contacting substance or surface.
4. Summary of Test Method
4.1 Three 12.7-mm [12.7 mm ( ⁄2-in.] in.) diameter steel balls are clamped together and covered with the lubricant to be
evaluated. A fourth 12.7-mm12.7 mm diameter steel ball, referred to as the top ball, is pressed with a force of 147 or 392 N [15
or 40 kgf] 147 N or 392 N (15 kgf or 40 kgf) into the cavity formed by the three clamped balls for three-point contact. The
temperature of the test lubricant is regulated at 75°C [167°F]75 °C (167 °F) and then the top ball is rotated at 1200 rpmr/min for
60 min. 60 min. Lubricants are compared by using the average size of the scar diameters worn on the three lower clamped balls.
NOTE 1—Because of differences in the construction of the various machines on which the four-ball test can be made, the manufacturer’s instructions
should be consulted for proper machine set up and operation.
NOTE 2—Although the test can be run under other parameters, the precision noted in Section 1010 may vary. No aqueous fluid was included in the
round-robin to establish the precision limits.
This test method is under the jurisdiction of ASTM Committee D02 on Petroleum Products, Liquid Fuels, and Lubricantsand is the direct responsibility of Subcommittee
D02.L0.11 on Tribological Properties of Industrial Fluids and Lubricates.
Current edition approved May 1, 2010Jan. 1, 2016. Published May 2010February 2016. Originally approved in 1982. Last previous edition approved in 20042010 as
E1
D4172 – 94 (2010). (2004) . DOI: 10.1520/D4172-94R10.10.1520/D4172-94R16.
For referenced ASTM standards, visit the ASTM website, www.astm.org, or contact ASTM Customer Service at service@astm.org. For Annual Book of ASTM Standards
volume information, refer to the standard’s Document Summary page on the ASTM website.
Available from American National Standards Institute (ANSI), 25 W. 43rd St., 4th Floor, New York, NY 10036, http://www.ansi.org.
Copyright © ASTM International, 100 Barr Harbor Drive, PO Box C700, West Conshohocken, PA 19428-2959. United States
D4172 − 94 (2016)
5. Significance and Use
5.1 This test method can be used to determine the relative wear preventive properties of lubricating fluids in sliding contact
under the prescribed test conditions. No attempt has been made to correlate this test with balls in rolling contact. The user of this
test method should determine to his own satisfaction whether results of this test procedure correlate with field performance or other
bench test machines.
6. Apparatus
6.1 Four-Ball Wear Test Machine —See Figs. 1-3.
NOTE 3—It is important to distinguish between the Four-Ball E.P. and the Four-Ball Wear Test Machines. The Four-Ball E.P. Test Machine is designed
for testing under heavier loads and lacks the sensitivity necessary for wear tests.
6.2 Microscope, capable of measuring the diameters of the scars produced on the three stationary balls to an accuracy of 0.01
mm. 0.01 mm. It is more efficient to measure the scars without removing the three balls from the holder.
7. Materials
7.1 Test Balls, chrome alloy steel, made from AISI standard steel No. E-52100, with diameter of 12.7 mm [0.5 in.] 12.7 mm
(0.5 in.) Grade 25 EP (Extra Polish). Such balls are described in ANSI B3.12. The extra-polish finish is not described in that
specification. The Rockwell C hardness shall be 64 to 66, a closer limit than is found in the ANSI requirement.
7.2 Cleaning Fluids for preparing balls and apparatus for the test should be those approved as nontoxic, capable of removing
antirust coatings from the balls, eliminating test-oil carryover from one test to the next, and not contribute to wear or antiwear of
the test lubricant. When the fluid(s) is flammable, appropriate precautions should be taken (see Note 1). In the round-robin tests
to determine repeatability and reproducibility no specific directions were given for cleaning balls and machine parts. Operators
reported using various solvents with and without a sonic cleaning bath. Cleaning techniques reported by some cooperators are
included in Research Report RR:D02-1152, see Note 4.
8. Test Conditions
8.1 The test conditions used to develop the precision data as stated in Section 1010 were:
A B
Temperature 75 ± 2°C [167 ± 4°C] 75 ± 2°C [167 ± 4°C]
Temperature 75 °C ± 2 °C (167 °F ± 4 °F) 75 °C ± 2 °C (167 °F ± 4 °F)
Speed 1200 ± 60 rpm 1200 ± 60 rpm
Speed 1200 r ⁄ min ± 60 r ⁄ min 1200 r ⁄ min ± 60 r ⁄ min
Duration 60 ± 1 min 60 ± 1 min
Duration 60 min ± 1 min 60 min ± 1 min
Load 147 ± 2 N [15 ± 0.2 kgf] 392 ± 2 N [40 ± 0.2 kgf]
Load 147 N ± 2 N (15 kgf ± 0.2 kgf) 392 N ± 2 N (40 kgf ± 0.2 kgf)
9. Preparation of Apparatus
9.1 Set up the drive of the machine to obtain a spindle speed of 12001200 r ⁄min 6 60 60 r rpm.⁄min.
9.2 Set temperature regulator to produce a test-oil temperature of 7575 °C 6 2°C [1672 °C (167 °F 6 4°F].4 °F).
The Four-Ball Wear Test Machine and the Falex Model #6, Multi-Specimen Friction and Wear Test Machine, both made by Falex Corp., 1020 Airpark Drive, Sugar
Grove, IL 60554, have been found satisfactory for this purpose. This company can also furnish a microscope with a special base to measure the wear scars without removing
the balls from the test-oil cup. Discontinued models of the Four-Ball Wear Test Machine made by Precision Scientific Co. and Roxana Machine Works are also satisfactory.
Steel balls meeting this description were used in developing the precision of the test. They are available from the manufacturer of the test machine and some ball
manufacturers. Some operators prefer to check a new box of balls by running an oil with a known result.
FIG
...


Questions, Comments and Discussion
Ask us and Technical Secretary will try to provide an answer. You can facilitate discussion about the standard in here.