ASTM C1513-18
(Specification)Standard Specification for Steel Tapping Screws for Cold-Formed Steel Framing Connections
Standard Specification for Steel Tapping Screws for Cold-Formed Steel Framing Connections
ABSTRACT
This specification covers steel self-drilling and self-piercing tapping screws for the connection of cold-formed steel members manufactured. This specification also covers test methods for determining performance requirements such as dimension, and total case depth; and physical properties such as hardness, ductility, torsional strength, drill drive performance, and self-drilling tapping screw drill capacity.
SCOPE
1.1 This specification covers steel self-drilling and self-piercing tapping screws for the connection of cold-formed steel members manufactured in accordance with Specifications C645 and C955. This specification also covers test methods for determining performance requirements and physical properties.
1.2 The values stated in inch-pound units are to be regarded as standard. The values given in parentheses are mathematical conversions to SI units that are provided for information only and are not considered standard.
1.3 The following safety hazards caveat pertains only to the test methods described in this specification. This standard does not purport to address all of the safety concerns, if any, associated with its use. It is the responsibility of the user of this standard to establish appropriate safety, health, and environmental practices and determine the applicability of regulatory limitations prior to use.
1.4 This international standard was developed in accordance with internationally recognized principles on standardization established in the Decision on Principles for the Development of International Standards, Guides and Recommendations issued by the World Trade Organization Technical Barriers to Trade (TBT) Committee.
General Information
- Status
- Published
- Publication Date
- 31-Mar-2018
- Technical Committee
- C11 - Gypsum and Related Building Materials and Systems
Relations
- Effective Date
- 01-Apr-2018
- Effective Date
- 01-Mar-2024
- Effective Date
- 01-Jan-2024
- Effective Date
- 01-Jul-2019
- Refers
ASTM C11-18a - Standard Terminology Relating to Gypsum and Related Building Materials and Systems - Effective Date
- 01-Oct-2018
- Effective Date
- 01-Jun-2018
- Refers
ASTM C11-18 - Standard Terminology Relating to Gypsum and Related Building Materials and Systems - Effective Date
- 01-Jun-2018
- Effective Date
- 01-Jun-2018
- Effective Date
- 01-Jun-2018
- Effective Date
- 01-Feb-2018
- Refers
ASTM A370-17a - Standard Test Methods and Definitions for Mechanical Testing of Steel Products - Effective Date
- 15-Nov-2017
- Refers
ASTM C11-17a - Standard Terminology Relating to Gypsum and Related Building Materials and Systems - Effective Date
- 01-Oct-2017
- Effective Date
- 01-Jun-2017
- Refers
ASTM C11-17 - Standard Terminology Relating to Gypsum and Related Building Materials and Systems - Effective Date
- 15-May-2017
- Effective Date
- 01-Jan-2017
Overview
ASTM C1513-18: Standard Specification for Steel Tapping Screws for Cold-Formed Steel Framing Connections establishes requirements for steel self-drilling and self-piercing tapping screws used to connect cold-formed steel members. Widely adopted in the construction industry, this standard ensures the structural reliability and quality of cold-formed steel framing assemblies through the specification of dimensions, mechanical properties, performance testing, and quality assurance criteria for fasteners applied to nonstructural and structural framing systems.
This standard is developed and maintained by ASTM International, reflecting globally recognized best practices in fastener manufacturing and testing. It applies specifically to screws connecting steel members manufactured to ASTM C645 and C955 specifications.
Key Topics
- Scope: Covers self-drilling and self-piercing tapping screws for cold-formed steel framing connections, detailing both dimensional and mechanical requirements.
- Types of Screws:
- Self-drilling tapping screws: Drill their own holes and form mating threads in steel.
- Self-piercing tapping screws: Pierce thin metallic material and form threads as driven.
- Physical and Mechanical Properties:
- Dimensions: Specifications for thread types and head styles.
- Hardness: Minimum Rockwell hardness for surface and core.
- Ductility: Ability to withstand bending without fracture.
- Torsional Strength: Minimum torque resistance to prevent failure during installation.
- Drill Capacity: Defined thickness that fasteners can penetrate effectively.
- Head Styles: Includes bugle head, pan head, hex washer head, modified truss, pancake head, wafer head, and others, each suited for specific construction applications.
- Packaging and Marking: Requirements for traceability, head markings, and commercial packaging standards to ensure product identification and protection during transport.
- Testing and Compliance: Reference to mandatory test methods (e.g., SAE J78, ANSI/ASME B18.6.4) for evaluating compliance with mechanical and performance criteria.
- Corrosion Resistance: Mandates finishes that meet ASTM F1941 and are evaluated via ASTM B117 salt spray testing for durability.
Applications
ASTM C1513-18 is central to the quality assurance of steel framing systems used in building construction, including:
- Nonstructural Steel Framing: Interior partition walls, ceilings, and soffits.
- Structural Steel Framing: Load-bearing walls, floors, and roofs, typically following ASTM C955 guidelines.
- Commercial, Residential, and Institutional Buildings: Ensures that fasteners used in cold-formed steel assemblies provide reliable long-term performance, especially where field-applied finishes and decorations are critical.
- Inspection and Certification: Provides a clear basis for inspection authorities and project teams to verify fastener compliance, traceability, and installation quality.
By following ASTM C1513-18, manufacturers, contractors, and project specifiers can ensure that only compliant steel fasteners are used, minimizing the risk of connection failures and increasing overall project integrity.
Related Standards
The following standards are referenced within or closely related to ASTM C1513-18 and may be of interest for comprehensive compliance:
- ASTM C645: Standard Specification for Nonstructural Steel Framing Members
- ASTM C955: Standard Specification for Cold-Formed Steel Structural Framing Members
- SAE J78: Steel Self-Drilling Tapping Screws - method for mechanical property testing
- SAE J933: Mechanical and Quality Requirements for Tapping Screws
- ANSI/ASME B18.6.4: Thread Forming and Thread-Cutting Screws
- ASTM F1941: Electrodeposited Coatings on Threaded Fasteners
- ASTM B117: Salt Spray (Fog) Testing for Corrosion Resistance
- ASTM F1470: Fastener Sampling for Mechanical Properties and Performance Inspection
Practical Value
ASTM C1513-18 provides the framework for specifying and assessing the critical fasteners integral to modern steel framing systems. By ensuring consistent performance and compatibility with other cold-formed steel standards, this specification supports safe, durable, and efficient steel construction. Its rigorous requirements for testing, marking, and corrosion protection deliver confidence to manufacturers, builders, inspectors, and end-users alike, making ASTM C1513-18 a key document in the steel construction industry.
Buy Documents
ASTM C1513-18 - Standard Specification for Steel Tapping Screws for Cold-Formed Steel Framing Connections
REDLINE ASTM C1513-18 - Standard Specification for Steel Tapping Screws for Cold-Formed Steel Framing Connections
Frequently Asked Questions
ASTM C1513-18 is a technical specification published by ASTM International. Its full title is "Standard Specification for Steel Tapping Screws for Cold-Formed Steel Framing Connections". This standard covers: ABSTRACT This specification covers steel self-drilling and self-piercing tapping screws for the connection of cold-formed steel members manufactured. This specification also covers test methods for determining performance requirements such as dimension, and total case depth; and physical properties such as hardness, ductility, torsional strength, drill drive performance, and self-drilling tapping screw drill capacity. SCOPE 1.1 This specification covers steel self-drilling and self-piercing tapping screws for the connection of cold-formed steel members manufactured in accordance with Specifications C645 and C955. This specification also covers test methods for determining performance requirements and physical properties. 1.2 The values stated in inch-pound units are to be regarded as standard. The values given in parentheses are mathematical conversions to SI units that are provided for information only and are not considered standard. 1.3 The following safety hazards caveat pertains only to the test methods described in this specification. This standard does not purport to address all of the safety concerns, if any, associated with its use. It is the responsibility of the user of this standard to establish appropriate safety, health, and environmental practices and determine the applicability of regulatory limitations prior to use. 1.4 This international standard was developed in accordance with internationally recognized principles on standardization established in the Decision on Principles for the Development of International Standards, Guides and Recommendations issued by the World Trade Organization Technical Barriers to Trade (TBT) Committee.
ABSTRACT This specification covers steel self-drilling and self-piercing tapping screws for the connection of cold-formed steel members manufactured. This specification also covers test methods for determining performance requirements such as dimension, and total case depth; and physical properties such as hardness, ductility, torsional strength, drill drive performance, and self-drilling tapping screw drill capacity. SCOPE 1.1 This specification covers steel self-drilling and self-piercing tapping screws for the connection of cold-formed steel members manufactured in accordance with Specifications C645 and C955. This specification also covers test methods for determining performance requirements and physical properties. 1.2 The values stated in inch-pound units are to be regarded as standard. The values given in parentheses are mathematical conversions to SI units that are provided for information only and are not considered standard. 1.3 The following safety hazards caveat pertains only to the test methods described in this specification. This standard does not purport to address all of the safety concerns, if any, associated with its use. It is the responsibility of the user of this standard to establish appropriate safety, health, and environmental practices and determine the applicability of regulatory limitations prior to use. 1.4 This international standard was developed in accordance with internationally recognized principles on standardization established in the Decision on Principles for the Development of International Standards, Guides and Recommendations issued by the World Trade Organization Technical Barriers to Trade (TBT) Committee.
ASTM C1513-18 is classified under the following ICS (International Classification for Standards) categories: 21.060.10 - Bolts, screws, studs. The ICS classification helps identify the subject area and facilitates finding related standards.
ASTM C1513-18 has the following relationships with other standards: It is inter standard links to ASTM C1513-13, ASTM A370-24, ASTM F1470-24, ASTM A370-19, ASTM C11-18a, ASTM C955-18e1, ASTM C11-18, ASTM C645-18, ASTM C955-18, ASTM F1470-18, ASTM A370-17a, ASTM C11-17a, ASTM C955-17, ASTM C11-17, ASTM A370-17. Understanding these relationships helps ensure you are using the most current and applicable version of the standard.
ASTM C1513-18 is available in PDF format for immediate download after purchase. The document can be added to your cart and obtained through the secure checkout process. Digital delivery ensures instant access to the complete standard document.
Standards Content (Sample)
This international standard was developed in accordance with internationally recognized principles on standardization established in the Decision on Principles for the
Development of International Standards, Guides and Recommendations issued by the World Trade Organization Technical Barriers to Trade (TBT) Committee.
Designation: C1513 −18
Standard Specification for
Steel Tapping Screws for Cold-Formed Steel Framing
Connections
This standard is issued under the fixed designation C1513; the number immediately following the designation indicates the year of
original adoption or, in the case of revision, the year of last revision. A number in parentheses indicates the year of last reapproval. A
superscript epsilon (´) indicates an editorial change since the last revision or reapproval.
1. Scope* A1040 Guide for Specifying Harmonized Standard Grade
Compositions for Wrought Carbon, Low-Alloy, andAlloy
1.1 This specification covers steel self-drilling and self-
Steels
piercingtappingscrewsfortheconnectionofcold-formedsteel
B117 Practice for Operating Salt Spray (Fog) Apparatus
members manufactured in accordance with Specifications
C11 Terminology Relating to Gypsum and Related Building
C645 and C955.This specification also covers test methods for
Materials and Systems
determining performance requirements and physical proper-
C645 Specification for Nonstructural Steel Framing Mem-
ties.
bers
1.2 The values stated in inch-pound units are to be regarded
C955 Specification for Cold-Formed Steel Structural Fram-
as standard. The values given in parentheses are mathematical
ing Members
conversions to SI units that are provided for information only
F1470 Practice for Fastener Sampling for Specified Me-
and are not considered standard.
chanical Properties and Performance Inspection
1.3 The following safety hazards caveat pertains only to the
F1941 Specification for Electrodeposited Coatings on
test methods described in this specification. This standard does Threaded Fasteners (Metric) F1941_F1941M
not purport to address all of the safety concerns, if any,
2.2 ANSI/ASME Documents:
associated with its use. It is the responsibility of the user of this
ANSI/ASME B18.6.4 Standard Specification for Thread
standard to establish appropriate safety, health, and environ- 3
Forming and Thread-Cutting Screws
mental practices and determine the applicability of regulatory
ANSI/ASME B18.18 Quality Assurance for Fasteners3
limitations prior to use.
2.3 SAE Standards:
1.4 This international standard was developed in accor-
SAE J78 Steel Self-Drilling Tapping Screws
dance with internationally recognized principles on standard-
SAE J933 Mechanical and Quality Requirements for Tap-
ization established in the Decision on Principles for the
ping Screws
Development of International Standards, Guides and Recom-
mendations issued by the World Trade Organization Technical
3. Terminology
Barriers to Trade (TBT) Committee.
3.1 Definitions—For definitions relating to gypsum and
2. Referenced Documents
related building materials and systems, use Terminology C11.
2.1 ASTM Standards:
3.2 Definitions of Terms Specific to This Standard:
A370 Test Methods and Definitions for Mechanical Testing
3.2.1 bearing surface (of the screw), n—the supporting or
of Steel Products
locating surface of a fastener with respect to the part which it
A510 Specification for General Requirements forWire Rods
fastens (mates). The loading of the fastener is usually through
and Coarse Round Wire, Carbon Steel
the bearing surface, (that is, the bearing surface of the hex
washer head style is under the head, the part that touches the
top material being fastened).
This specification is under the jurisdiction of ASTM Committee C11 on
3.2.2 case depth (of the screw), n—the thickness of the
Gypsum and Related Building Materials and Systems and is the direct responsibility
hardened surface of the screw.
of Subcommittee C11.02 on Specifications and Test Methods for Accessories and
Related Products.
Current edition approved April 1, 2018. Published April 2018. Originally
approved in 2001. Last previous edition approved in 2013 as C1513 – 13. DOI:
10.1520/C1513-18. Available from American Society of Mechanical Engineers (ASME), ASME
For referenced ASTM standards, visit the ASTM website, www.astm.org, or International Headquarters, Three Park Ave., New York, NY 10016-5990, http://
contact ASTM Customer Service at service@astm.org. For Annual Book of ASTM www.asme.org.
Standards volume information, refer to the standard’s Document Summary page on Available from Society of Automotive Engineers (SAE), 400 Commonwealth
the ASTM website. Dr., Warrendale, PA 15096-0001, http://www.sae.org.
*A Summary of Changes section appears at the end of this standard
Copyright © ASTM International, 100 Barr Harbor Drive, PO Box C700, West Conshohocken, PA 19428-2959. United States
C1513 − 18
3.2.3 countersunk head style (for a screw), n—all screw 3.2.12 tapping screw, n—externally threaded fasteners with
head designs that sink into the top material being fastened and the ability to “tap” their own internal mating threads when
that have the bearing surface (see 3.2.1), at the top of the head installed.
(that is, flat and bugle).
4. Classification
3.2.4 crest (of the screw thread), n—the highest point of the
4.1 Steel tapping screws covered by this specification are
screw thread.
two types:
3.2.5 drill capacity (of the self-drilling screw), n—the total
4.1.1 Self-drilling.
thickness of material the fastener is designed to drill through,
4.1.2 Self-piercing.
including any space between the layers.
3.2.6 head styles (of the screw), n—refer to Fig. 1 drawings.
5. Materials
3.2.6.1 bugle head, n—bugle shape countersinking head
5.1 Steel wire, Specification A510.
typically used for fastening gypsum panel products to wood
5.1.1 Chemical composition shall be in accordance with
and steel.
Specification A1040, minimum Grade 1018.
3.2.6.2 hex washer head, n—hasanindentedtopsurfaceand
6. Physical Properties
six flat sides formed integrally with a flat washer which
projects beyond the sides and provides a flat bearing surface.
6.1 Dimensions:
3.2.6.3 lath head, n—see modified truss. 6.1.1 Self-drilling tapping screws shall be in accordance
with SAE J78 based upon nominal size or basic diameter.
3.2.6.4 modified truss, n—low profile round washer head.
Threads per inch (TPI) shall be as shown in Table 1.
3.2.6.5 pan framing head, n—flat top surface rounding into
6.1.2 Self-piercing tapping screws shall be in accordance
cylindrical sides and a flat bearing surface.
with head dimensions as shown in ANSI/ASME B18.6.4.
3.2.6.6 pan head, n—a slightly rounded top surface round-
6.2 Total Case Depth—Screws shall have a total case depth
ing into cylindrical sides and a flat bearing surface.
conforming to the tabulation in Table 2.
3.2.6.7 pancake head, n—lower profile head style than the
6.2.1 Case depth shall be measured at the mid-point be-
hex washer and pan head with a larger flat bearing surface.
tween crest and root on the thread shank.
3.2.6.8 wafer head, n—a countersinking head style with a
7. Packaging and Head Marking
large lip at the top of the countersinking contour that will
“flush” with the substrate creating a greater bearing surface,
7.1 Screws shall be marked with manufacturer’s/supplier’s
therefore a greater pull-over/pull-through value.
head marking for traceability.
3.2.7 point style, n—of the self-drilling tapping screw is
7.2 Screws shall be packaged in substantial commercial
designated by a number (that is, 1, 2, 3, 4, or 5).The higher the
shipping containers, constructed so as to preserve the contents
3.2.5) of the screw.
number, the higher the drill capacity (see
in good condition and to ensure acceptance and safe delivery
3.2.8 root (of the screw thread), n—the lowest point of the by common or other carriers.
screw thread.
7.2.1 Individual packages shall be so constructed that the
contents shall be able to be partially removed without destroy-
3.2.9 self-drilling tapping screw, n—externally threaded fas-
ing the container’s ability to serve as a receptacle for the
teners with the ability to drill their own hole and form or cut
remainder of the contents.
their own internal mating threads without breaking.
7.2.2 Individual packages and shipping containers shall be
3.2.10 self-piercing tapping screw, n—externally threaded
marked with the type, size, use, and quantity of the screws
fasteners with the ability to pierce metallic material 33 mils
contained therein, the name brand headmarking example and
(0.84 mm), or less, form a sleeve by extruding metallic
trademark of the producer or supplier, the ASTM designation,
material and “tap” their own mating threads when driven.
and any or all appropriate evaluation reports. Boxes shall be
Self-piercingscrewshaveasharppointwiththepointanglenot
marked with the drill capacity of the self-drilling tapping
more than 30 degrees.
screws.
3.2.11 spin-out (for a screw), n—for a screw, the continued
rotation of a screw without further penetration into the sub-
8. Performance Requirements
strate.
8.1 Hardness:
TABLE 1 Threads Per Inch (TPI)
Nominal Threads Per Threads Per
Screw Size Inch, max Inch, min
620 10
820 12
10 24 12
12 24 14
⁄4 in. 28 14
FIG. 1 Head Styles
C1513 − 18
TABLE 2 Total Case Depth TABLE 4 Torsional Strength–Self-Piercing Tapping Screws
Nominal Screw Total Case Depth, Total Case Depth, Nominal Screw Size Minimum lb-in.
Size Maximum, in. (mm) Minimum, in. (mm)
8 through 12 0.009 (.2286 mm) 0.004 (
...
This document is not an ASTM standard and is intended only to provide the user of an ASTM standard an indication of what changes have been made to the previous version. Because
it may not be technically possible to adequately depict all changes accurately, ASTM recommends that users consult prior editions as appropriate. In all cases only the current version
of the standard as published by ASTM is to be considered the official document.
Designation: C1513 − 13 C1513 − 18
Standard Specification for
Steel Tapping Screws for Cold-Formed Steel Framing
Connections
This standard is issued under the fixed designation C1513; the number immediately following the designation indicates the year of
original adoption or, in the case of revision, the year of last revision. A number in parentheses indicates the year of last reapproval. A
superscript epsilon (´) indicates an editorial change since the last revision or reapproval.
1. Scope*
1.1 This specification covers steel self-drilling and self-piercing tapping screws for the connection of cold-formed steel
members manufactured in accordance with Specifications C645 and C955. This specification also covers test methods for
determining performance requirements and physical properties.
1.2 The values stated in inch-pound units are to be regarded as standard. The values given in parentheses are mathematical
conversions to SI units that are provided for information only and are not considered standard.
1.3 The following safety hazards caveat pertains only to the test methods described in this specification. This standard does not
purport to address all of the safety concerns, if any, associated with its use. It is the responsibility of the user of this standard to
establish appropriate safety safety, health, and healthenvironmental practices and determine the applicability of regulatory
requirementslimitations prior to use.
1.4 This international standard was developed in accordance with internationally recognized principles on standardization
established in the Decision on Principles for the Development of International Standards, Guides and Recommendations issued
by the World Trade Organization Technical Barriers to Trade (TBT) Committee.
2. Referenced Documents
2.1 ASTM Standards:
A370 Test Methods and Definitions for Mechanical Testing of Steel Products
A510 Specification for General Requirements for Wire Rods and Coarse Round Wire, Carbon Steel
A1040 Guide for Specifying Harmonized Standard Grade Compositions for Wrought Carbon, Low-Alloy, and Alloy Steels
B117 Practice for Operating Salt Spray (Fog) Apparatus
C11 Terminology Relating to Gypsum and Related Building Materials and Systems
C645 Specification for Nonstructural Steel Framing Members
C955 Specification for Cold-Formed Steel Structural Framing Members
F1470 Practice for Fastener Sampling for Specified Mechanical Properties and Performance Inspection
F1941 Specification for Electrodeposited Coatings on Threaded Fasteners (Metric) F1941_F1941M
2.2 ANSI/ASME Documents:
ANSI/ASME B18.6.4 Standard Specification for Thread Forming and Thread-Cutting Screws
ANSI/ASME B18.18 Quality Assurance for Fasteners3
2.3 SAE Standards:
SAE J78 Steel Self-Drilling Tapping Screws
SAE J933 Mechanical and Quality Requirements for Tapping Screws
3. Terminology
3.1 Definitions—For definitions relating to gypsum and related building materials and systems, use Terminology C11.
3.2 Definitions of Terms Specific to This Standard:
This specification is under the jurisdiction of ASTM Committee C11 on Gypsum and Related Building Materials and Systems and is the direct responsibility of
Subcommittee C11.02 on Specifications and Test Methods for Accessories and Related Products.
Current edition approved March 1, 2013April 1, 2018. Published April 2013April 2018. Originally approved in 2001. Last previous edition approved in 20122013 as
C1513C1513 – 13.–12a. DOI: 10.1520/C1513-13.10.1520/C1513-18.
For referenced ASTM standards, visit the ASTM website, www.astm.org, or contact ASTM Customer Service at service@astm.org. For Annual Book of ASTM Standards
volume information, refer to the standard’s Document Summary page on the ASTM website.
Available from American Society of Mechanical Engineers (ASME), ASME International Headquarters, Three Park Ave., New York, NY 10016-5990, http://
www.asme.org.
Available from Society of Automotive Engineers (SAE), 400 Commonwealth Dr., Warrendale, PA 15096-0001, http://www.sae.org.
*A Summary of Changes section appears at the end of this standard
Copyright © ASTM International, 100 Barr Harbor Drive, PO Box C700, West Conshohocken, PA 19428-2959. United States
C1513 − 18
3.2.1 bearing surface (of the screw), n—the supporting or locating surface of a fastener with respect to the part which it fastens
(mates). The loading of the fastener is usually through the bearing surface, (that is, the bearing surface of the hex washer head style
is under the head, the part that touches the top material being fastened).
3.2.2 case depth (of the screw), n—the thickness of the hardened surface of the screw.
3.2.3 countersunk head style (for a screw), n—all screw head designs that sink into the top material being fastened and that have
the bearing surface (see 3.2.1), at the top of the head (that is, flat and bugle).
3.2.4 crest (of the screw thread), n—the highest point of the screw thread.
3.2.5 drill capacity (of the self-drilling screw), n—the total thickness of material the fastener is designed to drill through,
including any space between the layers.
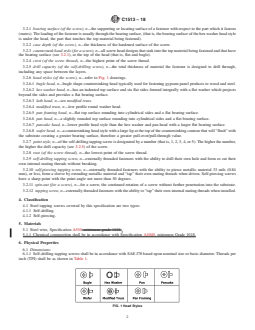
3.2.6 head styles (of the screw), n—refer to Fig. 1 drawings.
3.2.6.1 bugle head, n—bugle shape countersinking head typically used for fastening gypsum panel products to wood and steel.
3.2.6.2 hex washer head, n—has an indented top surface and six flat sides formed integrally with a flat washer which projects
beyond the sides and provides a flat bearing surface.
3.2.6.3 lath head, n—see modified truss.
3.2.6.4 modified truss, n—low profile round washer head.
3.2.6.5 pan framing head, n—flat top surface rounding into cylindrical sides and a flat bearing surface.
3.2.6.6 pan head, n—a slightly rounded top surface rounding into cylindrical sides and a flat bearing surface.
3.2.6.7 pancake head, n—lower profile head style than the hex washer and pan head with a larger flat bearing surface.
3.2.6.8 wafer head, n—a countersinking head style with a large lip at the top of the countersinking contour that will “flush” with
the substrate creating a greater bearing surface, therefore a greater pull-over/pull-through value.
3.2.7 point style, n—of the self-drilling tapping screw is designated by a number (that is, 1, 2, 3, 4, or 5). The higher the number,
the higher the drill capacity (see 3.2.5) of the screw.
3.2.8 root (of the screw thread), n—the lowest point of the screw thread.
3.2.9 self-drilling tapping screw, n—externally threaded fasteners with the ability to drill their own hole and form or cut their
own internal mating threads without breaking.
3.2.10 self-piercing tapping screw, n—externally threaded fasteners with the ability to pierce metallic material 33 mils (0.84
mm), or less, form a sleeve by extruding metallic material and “tap” their own mating threads when driven. Self-piercing screws
have a sharp point with the point angle not more than 30 degrees.
3.2.11 spin-out (for a screw), n—for a screw, the continued rotation of a screw without further penetration into the substrate.
3.2.12 tapping screw, n—externally threaded fasteners with the ability to “tap” their own internal mating threads when installed.
4. Classification
4.1 Steel tapping screws covered by this specification are two types:
4.1.1 Self-drilling.
4.1.2 Self-piercing.
5. Materials
5.1 Steel wire, Specification A510–minimum grade 1018.
5.1.1 Chemical composition shall be in accordance with Specification A1040, minimum Grade 1018.
6. Physical Properties
6.1 Dimensions:
6.1.1 Self-drilling tapping screws shall be in accordance with SAE J78 based upon nominal size or basic diameter. Threads per
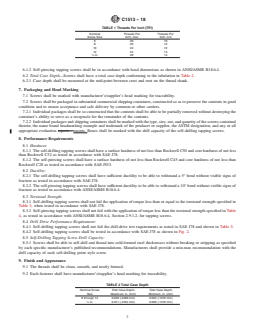
inch (TPI) shall be as shown in Table 1.
FIG. 1 Head Styles
C1513 − 18
TABLE 1 Threads Per Inch (TPI)
Nominal Threads Per Threads Per
Screw Size Inch, max Inch, min
6 20 10
8 20 12
10 24 12
12 24 14
⁄4 in. 28 14
6.1.2 Self-piercing tapping screws shall be in accordance with head dimensions as shown in ANSI/ASME B18.6.4.
6.2 Total Case Depth—Screws shall have a total case depth conforming to the tabulation in Table 2.
6.2.1 Case depth shall be measured at the mid-point between crest and root on the thread shank.
7. Packaging and Head Marking
7.1 Screws shall be marked with manufacturer’s/supplier’s head marking for traceability.
7.2 Screws shall be packaged in substantial commercial shipping containers, constructed so as to preserve the contents in good
condition and to ensure acceptance and safe delivery by common or other carriers.
7.2.1 Individual packages shall be so constructed that the contents shall be able to be partially removed without destroying the
container’s ability to serve as a receptacle for the remainder of the contents.
7.2.2 Individual packages and shipping containers shall be marked with the type, size, use, and quantity of the screws contained
therein, the name brand headmarking example and trademark of the producer or supplier, the ASTM designation, and any or all
appropriate evaluation reports . reports. Boxes shall be marked with the drill capacity of the self-drilling tapping screws.
8. Performance Requirements
8.1 Hardness:
8.1.1 The self-drilling tapping screws shall have a surface hardness of not less than Rockwell C50 and core hardness of not less
than Rockwell C32 as tested in accordance with SAE J78.
8.1.2 The self-piercing screws shall have a surface hardn
...
Questions, Comments and Discussion
Ask us and Technical Secretary will try to provide an answer. You can facilitate discussion about the standard in here.
Loading comments...