ASTM A295-98
(Specification)Standard Specification for High-Carbon Anti-Friction Bearing Steel
Standard Specification for High-Carbon Anti-Friction Bearing Steel
SCOPE
1.1 This specification covers high-carbon bearing-quality steel to be used in the manufacture of anti-friction bearings.
1.2 Supplementary requirements of an optional nature are provided and when desired shall be so stated in the order.
1.3 The values stated in inch-pound units are to be regarded as the standard.
General Information
Relations
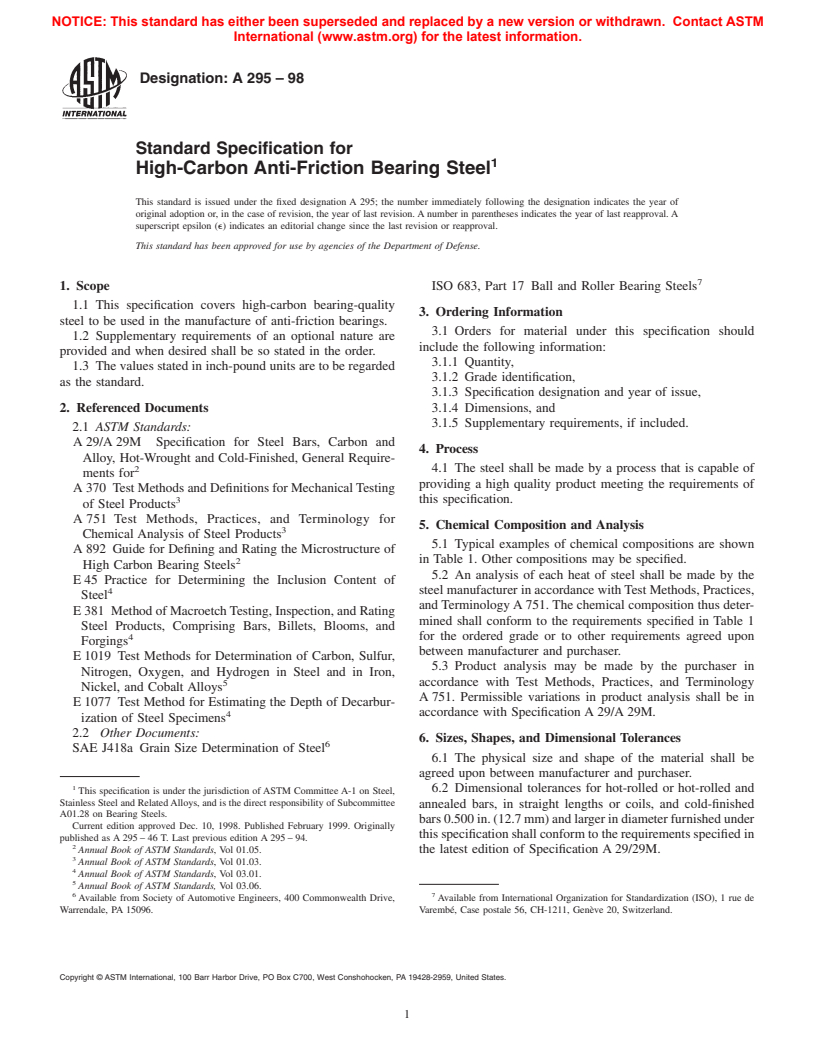
Standards Content (Sample)
NOTICE: This standard has either been superseded and replaced by a new version or withdrawn. Contact ASTM
International (www.astm.org) for the latest information.
Designation: A 295 – 98
Standard Specification for
High-Carbon Anti-Friction Bearing Steel
This standard is issued under the fixed designation A 295; the number immediately following the designation indicates the year of
original adoption or, in the case of revision, the year of last revision. A number in parentheses indicates the year of last reapproval. A
superscript epsilon (e) indicates an editorial change since the last revision or reapproval.
This standard has been approved for use by agencies of the Department of Defense.
1. Scope ISO 683, Part 17 Ball and Roller Bearing Steels
1.1 This specification covers high-carbon bearing-quality
3. Ordering Information
steel to be used in the manufacture of anti-friction bearings.
3.1 Orders for material under this specification should
1.2 Supplementary requirements of an optional nature are
include the following information:
provided and when desired shall be so stated in the order.
3.1.1 Quantity,
1.3 The values stated in inch-pound units are to be regarded
3.1.2 Grade identification,
as the standard.
3.1.3 Specification designation and year of issue,
2. Referenced Documents 3.1.4 Dimensions, and
3.1.5 Supplementary requirements, if included.
2.1 ASTM Standards:
A 29/A 29M Specification for Steel Bars, Carbon and
4. Process
Alloy, Hot-Wrought and Cold-Finished, General Require-
4.1 The steel shall be made by a process that is capable of
ments for
providing a high quality product meeting the requirements of
A 370 Test Methods and Definitions for MechanicalTesting
this specification.
of Steel Products
A 751 Test Methods, Practices, and Terminology for
5. Chemical Composition and Analysis
Chemical Analysis of Steel Products
5.1 Typical examples of chemical compositions are shown
A 892 Guide for Defining and Rating the Microstructure of
2 in Table 1. Other compositions may be specified.
High Carbon Bearing Steels
5.2 An analysis of each heat of steel shall be made by the
E 45 Practice for Determining the Inclusion Content of
4 steel manufacturer in accordance withTest Methods, Practices,
Steel
and TerminologyA 751. The chemical composition thus deter-
E 381 Method of MacroetchTesting, Inspection, and Rating
mined shall conform to the requirements specified in Table 1
Steel Products, Comprising Bars, Billets, Blooms, and
for the ordered grade or to other requirements agreed upon
Forgings
between manufacturer and purchaser.
E 1019 Test Methods for Determination of Carbon, Sulfur,
5.3 Product analysis may be made by the purchaser in
Nitrogen, Oxygen, and Hydrogen in Steel and in Iron,
5 accordance with Test Methods, Practices, and Terminology
Nickel, and Cobalt Alloys
A 751. Permissible variations in product analysis shall be in
E 1077 Test Method for Estimating the Depth of Decarbur-
4 accordance with Specification A 29/A 29M.
ization of Steel Specimens
2.2 Other Documents:
6. Sizes, Shapes, and Dimensional Tolerances
SAE J418a Grain Size Determination of Steel
6.1 The physical size and shape of the material shall be
agreed upon between manufacturer and purchaser.
6.2 Dimensional tolerances for hot-rolled or hot-rolled and
This specification is under the jurisdiction of ASTM Committee A-1 on Steel,
Stainless Steel and RelatedAlloys, and is the direct responsibility of Subcommittee
annealed bars, in straight lengths or coils, and cold-finished
A01.28 on Bearing Steels.
bars0.500in.(12.7mm)andlargerindiameterfurnishedunder
Current edition approved Dec. 10, 1998. Published February 1999. Originally
this specification shall conform to the requirements specified in
published as A 295 – 46 T. Last previous edition A 295 – 94.
Annual Book of ASTM Standards, Vol 01.05. the latest edition of Specification A 29/29M.
Annual Book of ASTM Standards, Vol 01.03.
Annual Book of ASTM Standards, Vol 03.01.
Annual Book of ASTM Standards, Vol 03.06.
6 7
Available from Society of Automotive Engineers, 400 Commonwealth Drive, Available from International Organization for Standardization (ISO), 1 rue de
Warrendale, PA 15096. Varembé, Case postale 56, CH-1211, Genève 20, Switzerland.
Copyright © ASTM International, 100 Barr Harbor Drive, PO Box C700, West Conshohocken, PA 19428-2959, United States.
NOTICE: This standard has either been superseded and replaced by a new version or withdrawn. Contact ASTM
International (www.astm.org) for the latest information.
A 295–98
A,B
TABLE 1 Composition
C
Element 52100 5195 UNS K19526 1070M 5160
Carbon 0.93-1.05 0.90-1.03 0.89-1.01 0.65-0.75 0.56-0.64
Manganese 0.25-0.45 0.75-1.00 0.50-0.80 0.80-1.10 0.75-1.00
Phosphorus (max) 0.025 0.025 0.025 0.025 0.025
Sulfur (max) 0.015 0.015 0.015 0.015 0.015
Silicon 0.15-0.35 0.15-0.35 0.15-0.35 0.15-0.35 0.15-0.35
Chromium 1.35-1.60 0.70-0.90 0.40-0.60 0.20 (max) 0.70-0.90
Nickel (max) 0.25 0.25 0.25 0.25 0.25
Copper (max) 0.30 0.30 0.30 0.30 0.30
Molybdenum 0.10 (max) 0.10 (max) 0.08-0.15 0.10 (max) 0.10 (max)
Aluminum (max) (total) 0.050 0.050 0.050 0.050 0.050
D
Oxygen (max) 0.0015 0.0015 0.0015 0.0015 0.0015
A
Elements not quoted shall not be intentionally added to the steel without the agreement of the purchaser.
B
Intentional additions of calcium or calcium alloys for deoxidation or inclusion shape control are not permitted unless specifically approved by the purchaser.
C
Specified element ranges meet the requirements of ISO 683, Part 17, Table 3, NO. B1, 100CR6.
D
Oxygen content applies to product analysis and shall be determined in accordance with Test Method E 1019.
6.3 Dimensional tolerances for cold-finished coils for ball 7.3 Macroetch—Specimens representative of cross sections
and roller material shall be as shown in Table 2. of billets shall be macroetched and rated in accordance with
6.4 Coil tolerances also apply to cold-finished straight Method E 381 in hydrochloric acid and water (1:1) at 160 to
lengths under 0.500 in. in diameter. 180°F (71 to 82°C). Such specimens shall not exceed S2, R2,
and C2 of Method E 381.
3 3
7. Quality Tests
7.4 Inclusion Rating—The specimens shall be ⁄8 by ⁄4 in.
(9.5 by 19.1 mm) and shall be taken from an area halfway
7.1 The supplier shall be held responsible for the quality of
between the center and outside of the billet. The polished face
the material furnished and shall make the necessary tests to
shall be longitudinal to the direction of rolling. The scale used
ensure this quality. The supplier shall be required to report
for rating the specimens shall be the Jernkontoret chart
results of the macroetch and micro-inclusion rating tests
described in Practice E 45, Plate I-r. Fields with sizes or
detailed below. Quality tests shown in 7.2 through 7.4 are
numbers of all types of inclusions intermediate between
based upon procedures established in Practice E 45.
configurations shown on the chart shall be classified as the
7.2 Sampling—Samples taken in accordance with the fol-
lesser of the rating number. The worst field of each inclusion
lowing paragraphs shall be obtained from 4 by 4-in. (102 by
type from each specimen shall be recorded as the rating for the
102-mm) rolled billets or forged sections. Tests may be made
specimen. Two thirds of all specimens and at least one from
on smaller or larger sections by agreement between manufac-
each ingot tested, or from the first, middle, and last portion of
turer and purchaser. A minimum 3 to 1 reduction of rolled
the strands tested, as well as the average of all specimens, shall
billets or forged sections is required for strand cast products.
not exceed the rating specified in Table 3. If specifically
7.2.1 For top poured products, a minimum of six samples
ordered and certified to Supplementary Requirement S4, Type
representing the top and bottom of the first, middle, and last
Ainclusion ratings shall not exceed 3.0 thin and 2.0 heavy. See
usable ingots shall be examined.
S4.1.
7.2.2 For bottom poured products, a minimum of six
samples shall be examined and they shall represent the top and
8. Grain Size
bottom of three ingots. One ingot shall be taken at random
8.1 The steels covered by this specification shall have the
from the first usable plate poured, one ingot, at random, from
the usable plate poured nearest to the middle of the heat, and capability of showing a fine fracture grain size (approximately
ASTM No. 8) (SAE J418a) when quenched from normal
one ingot, at random, from the last usable plate poured. When
two usable plates constitute a heat, two of the sample ingots austenitizing temperatures not exceeding 1550°F (843°C).
shall be selected from the second usable plate poured. Where a
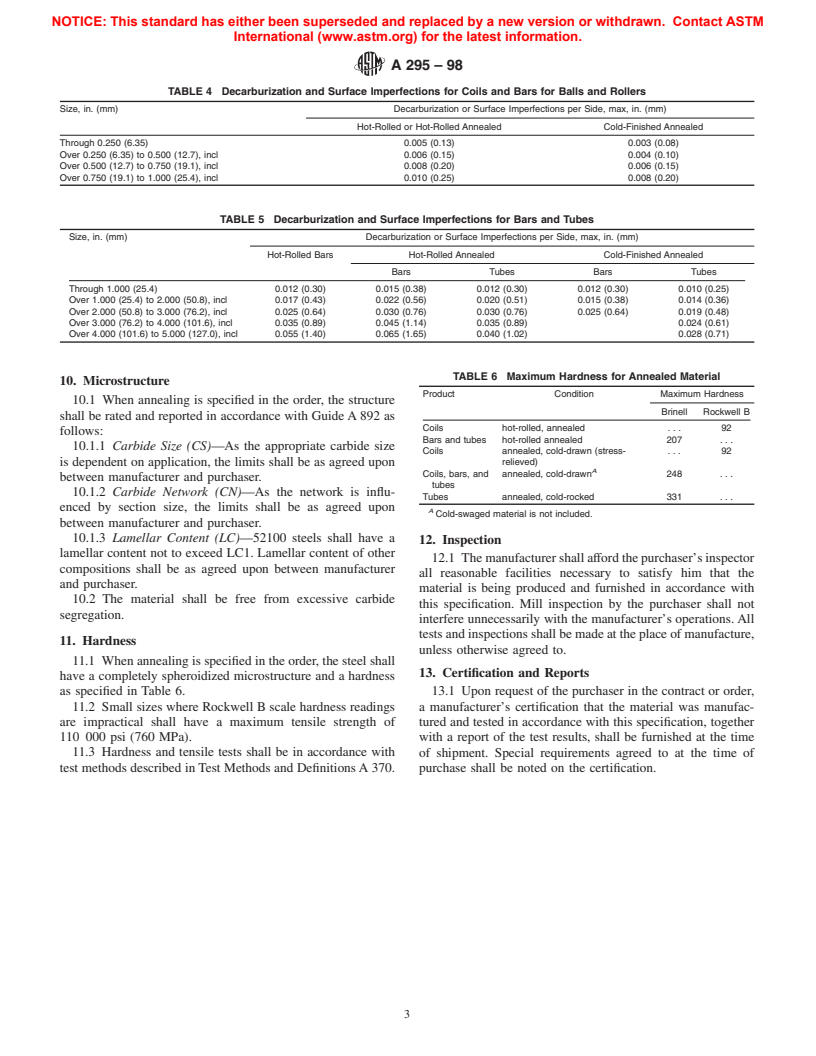
9. Decarburization and Surface Impe
...


Questions, Comments and Discussion
Ask us and Technical Secretary will try to provide an answer. You can facilitate discussion about the standard in here.