ASTM F2338-09
(Test Method)Standard Test Method for Nondestructive Detection of Leaks in Packages by Vacuum Decay Method
Standard Test Method for Nondestructive Detection of Leaks in Packages by Vacuum Decay Method
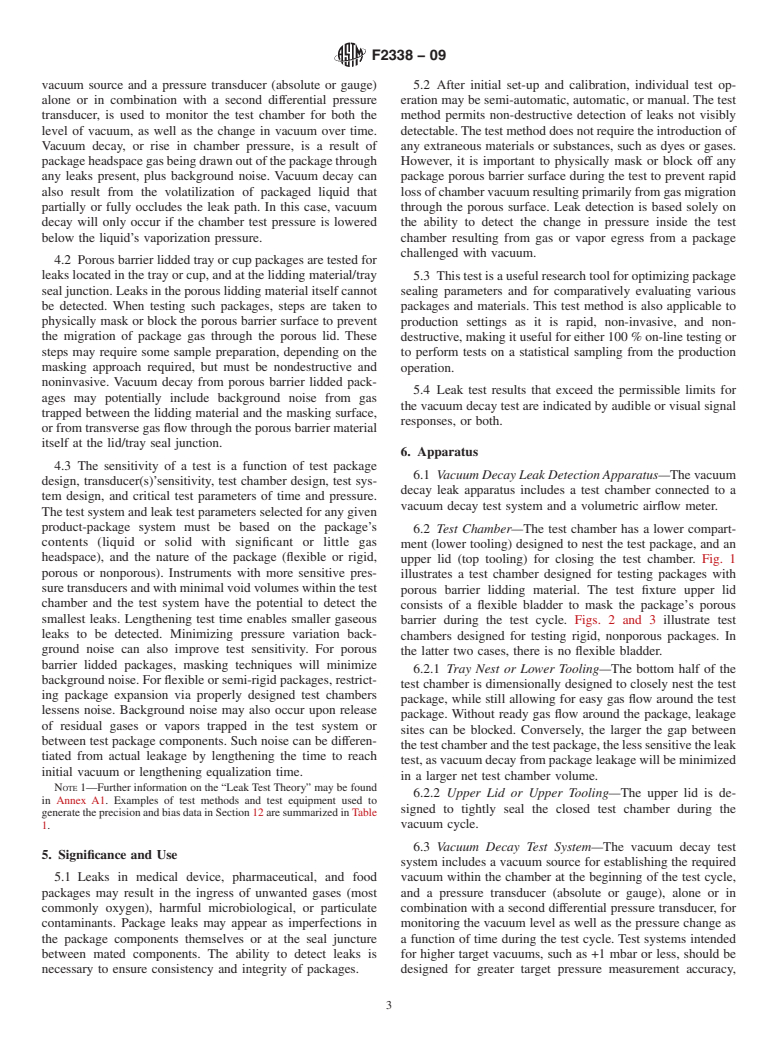
SIGNIFICANCE AND USE
Leaks in medical device, pharmaceutical, and food packages may result in the ingress of unwanted gases (most commonly oxygen), harmful microbiological, or particulate contaminants. Package leaks may appear as imperfections in the package components themselves or at the seal juncture between mated components. The ability to detect leaks is necessary to ensure consistency and integrity of packages.
After initial set-up and calibration, individual test operation may be semi-automatic, automatic, or manual. The test method permits non-destructive detection of leaks not visibly detectable. The test method does not require the introduction of any extraneous materials or substances, such as dyes or gases. However, it is important to physically mask or block off any package porous barrier surface during the test to prevent rapid loss of chamber vacuum resulting primarily from gas migration through the porous surface. Leak detection is based solely on the ability to detect the change in pressure inside the test chamber resulting from gas or vapor egress from a package challenged with vacuum.
This test is a useful research tool for optimizing package sealing parameters and for comparatively evaluating various packages and materials. This test method is also applicable to production settings as it is rapid, non-invasive, and non-destructive, making it useful for either 100 % on-line testing or to perform tests on a statistical sampling from the production operation.
Leak test results that exceed the permissible limits for the vacuum decay test are indicated by audible or visual signal responses, or both.
SCOPE
1.1 Test Packages—Packages that can be nondestructively evaluated by this test method include:
1.1.1 Rigid and semi-rigid non-lidded trays.
1.1.2 Trays or cups sealed with porous barrier lidding material.
1.1.3 Rigid, nonporous packages.
1.1.4 Flexible, nonporous packages.
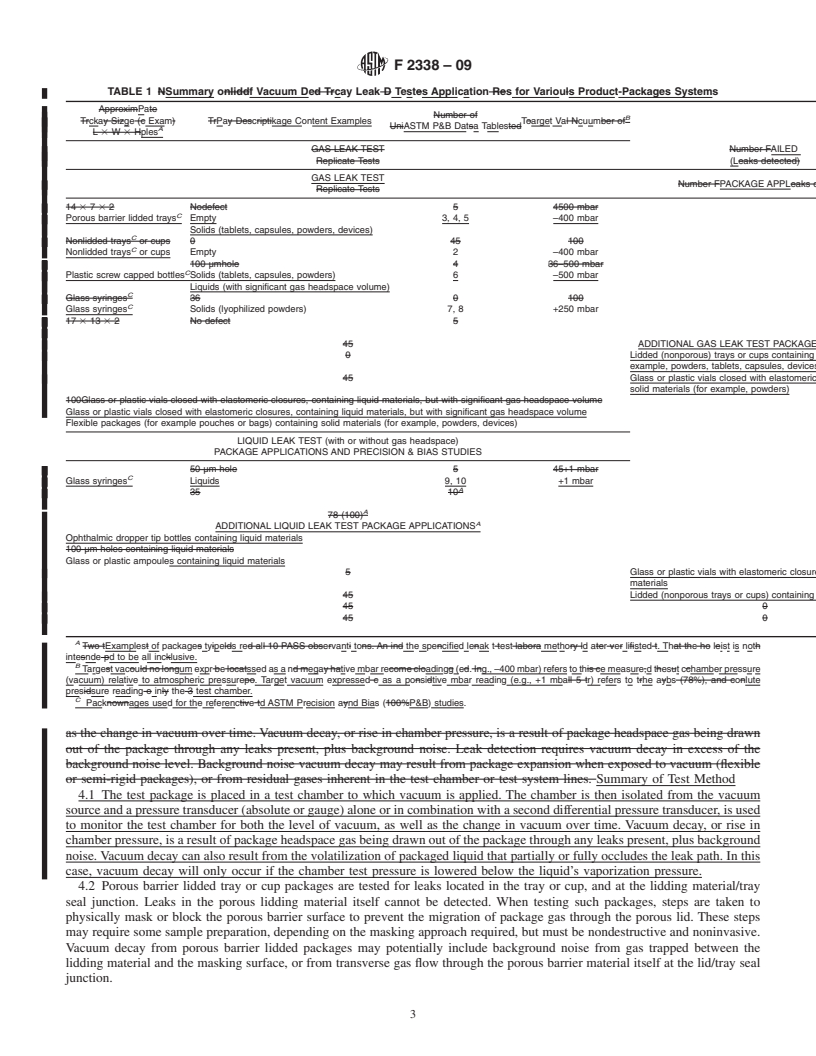
1.2 Leaks Detected—This test method detects package leaks by measuring the rise in pressure (vacuum loss) in an enclosed evacuated test chamber containing the test package. Vacuum loss results from leakage of test package headspace gases and/or volatilization of test package liquid contents located in or near the leak. When testing for leaks that may be partially or completely plugged with the package’s liquid contents, the test chamber is evacuated to a pressure below the liquid’s vaporization pressure. All methods require a test chamber to contain the test package and a leak detection system designed with one or more pressure transducers. Test method sensitivities cited below were determined using specific product-package systems selected for the precision and bias studies summarized in Table 1. Table 1 also lists other examples of relevant product-package systems that can be tested for leakage by vacuum decay.
1.2.1 Trays or Cups (Non-lidded) (Air Leakage)—Hole or crack defects in the wall of the tray/cup of at least 50 μm in diameter can be detected. Nonlidded trays were tested at a Target Vacuum of –4·E4 Pa (–400 mbar).
1.2.2 Trays Sealed with Porous Barrier Lidding Material (Headspace Gas Leakage)—Hole or crack defects in the wall of the tray/cup of at least 100 μm in diameter can be detected. Channel defects in the seal area (made using wires of 125 μm in diameter) can be detected. Severe seal bonding defects in both continuous adhesive and dot matrix adhesive package systems can be detected. Slightly incomplete dot matrix adhesive bonding defects can also be detected. All porous barrier lidding material packages were tested at a Target Vacuum of –4·E4 Pa (–400 mbar). The sensitivity of the test for porous lidded packages is approximately E-2 Pa·m3·s-1 using a calibrated volumetric airflow meter.
1.2.3 Rigid, Nonporous Packages (Headspace Gas Leakage)—Hole defects of at least 5 μm in diameter can be detected. Plastic bottles with screw caps were tested at a target vacuum of –5·E4 Pa (–500 mbar). U...
General Information
Relations
Buy Standard
Standards Content (Sample)
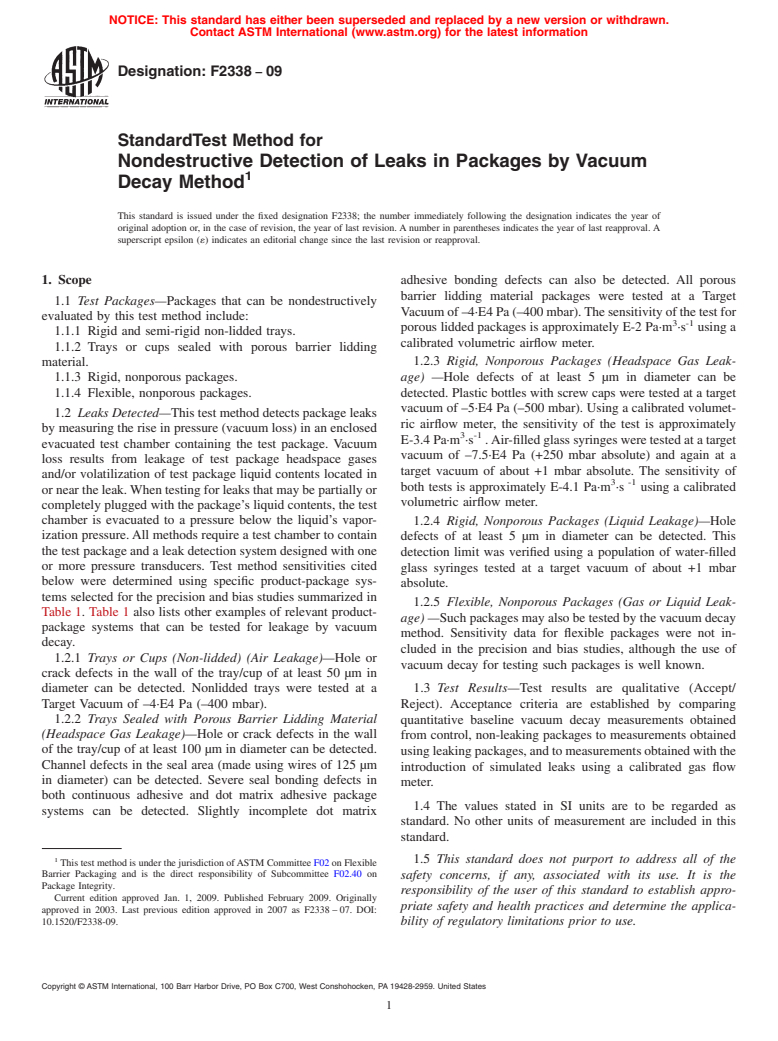
NOTICE: This standard has either been superseded and replaced by a new version or withdrawn.
Contact ASTM International (www.astm.org) for the latest information
Designation: F2338 − 09
StandardTest Method for
Nondestructive Detection of Leaks in Packages by Vacuum
1
Decay Method
This standard is issued under the fixed designation F2338; the number immediately following the designation indicates the year of
original adoption or, in the case of revision, the year of last revision. A number in parentheses indicates the year of last reapproval. A
superscript epsilon (´) indicates an editorial change since the last revision or reapproval.
1. Scope adhesive bonding defects can also be detected. All porous
barrier lidding material packages were tested at a Target
1.1 Test Packages—Packages that can be nondestructively
Vacuumof–4·E4Pa(–400mbar).Thesensitivityofthetestfor
evaluated by this test method include:
3 -1
porous lidded packages is approximately E-2 Pa·m ·s using a
1.1.1 Rigid and semi-rigid non-lidded trays.
calibrated volumetric airflow meter.
1.1.2 Trays or cups sealed with porous barrier lidding
material. 1.2.3 Rigid, Nonporous Packages (Headspace Gas Leak-
1.1.3 Rigid, nonporous packages. age) —Hole defects of at least 5 µm in diameter can be
1.1.4 Flexible, nonporous packages. detected. Plastic bottles with screw caps were tested at a target
vacuum of –5·E4 Pa (–500 mbar). Using a calibrated volumet-
1.2 Leaks Detected—This test method detects package leaks
ric airflow meter, the sensitivity of the test is approximately
by measuring the rise in pressure (vacuum loss) in an enclosed
3 -1
E-3.4 Pa·m ·s .Air-filled glass syringes were tested at a target
evacuated test chamber containing the test package. Vacuum
vacuum of –7.5·E4 Pa (+250 mbar absolute) and again at a
loss results from leakage of test package headspace gases
target vacuum of about +1 mbar absolute. The sensitivity of
and/or volatilization of test package liquid contents located in
3 -1
both tests is approximately E-4.1 Pa·m ·s using a calibrated
or near the leak.When testing for leaks that may be partially or
volumetric airflow meter.
completely plugged with the package’s liquid contents, the test
chamber is evacuated to a pressure below the liquid’s vapor-
1.2.4 Rigid, Nonporous Packages (Liquid Leakage)—Hole
ization pressure.All methods require a test chamber to contain defects of at least 5 µm in diameter can be detected. This
the test package and a leak detection system designed with one
detection limit was verified using a population of water-filled
or more pressure transducers. Test method sensitivities cited
glass syringes tested at a target vacuum of about +1 mbar
below were determined using specific product-package sys-
absolute.
tems selected for the precision and bias studies summarized in
1.2.5 Flexible, Nonporous Packages (Gas or Liquid Leak-
Table 1. Table 1 also lists other examples of relevant product-
age) —Such packages may also be tested by the vacuum decay
package systems that can be tested for leakage by vacuum
method. Sensitivity data for flexible packages were not in-
decay.
cluded in the precision and bias studies, although the use of
1.2.1 Trays or Cups (Non-lidded) (Air Leakage)—Hole or
vacuum decay for testing such packages is well known.
crack defects in the wall of the tray/cup of at least 50 µm in
diameter can be detected. Nonlidded trays were tested at a 1.3 Test Results—Test results are qualitative (Accept/
Target Vacuum of –4·E4 Pa (–400 mbar). Reject). Acceptance criteria are established by comparing
1.2.2 Trays Sealed with Porous Barrier Lidding Material
quantitative baseline vacuum decay measurements obtained
(Headspace Gas Leakage)—Hole or crack defects in the wall
from control, non-leaking packages to measurements obtained
of the tray/cup of at least 100 µm in diameter can be detected.
usingleakingpackages,andtomeasurementsobtainedwiththe
Channel defects in the seal area (made using wires of 125 µm
introduction of simulated leaks using a calibrated gas flow
in diameter) can be detected. Severe seal bonding defects in
meter.
both continuous adhesive and dot matrix adhesive package
1.4 The values stated in SI units are to be regarded as
systems can be detected. Slightly incomplete dot matrix
standard. No other units of measurement are included in this
standard.
1 1.5 This standard does not purport to address all of the
This test method is under the jurisdiction ofASTM Committee F02 on Flexible
Barrier Packaging and is the direct responsibility of Subcommittee F02.40 on
safety concerns, if any, associated with its use. It is the
Package Integrity.
responsibility of the user of this standard to establish appro-
Current edition approved Jan. 1, 2009. Published February 2009. Originally
priate safety and health practices and determine the applica-
approved in 2003. Last previous edition approved in 2007 as F2338 – 07. DOI:
10.1520/F2338-09. bility of regulatory limitations prior to use.
Copyright © ASTM Internation
...
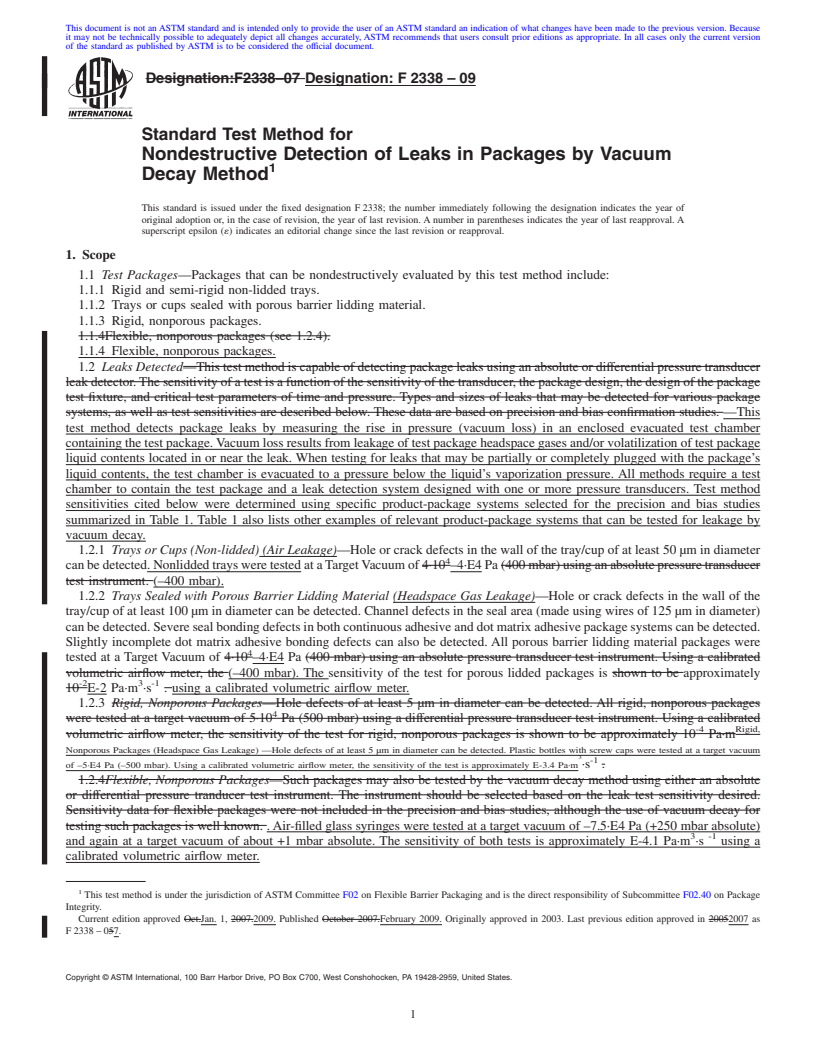
This document is not anASTM standard and is intended only to provide the user of anASTM standard an indication of what changes have been made to the previous version. Because
it may not be technically possible to adequately depict all changes accurately, ASTM recommends that users consult prior editions as appropriate. In all cases only the current version
of the standard as published by ASTM is to be considered the official document.
Designation:F2338–07 Designation: F 2338 – 09
Standard Test Method for
Nondestructive Detection of Leaks in Packages by Vacuum
1
Decay Method
This standard is issued under the fixed designation F 2338; the number immediately following the designation indicates the year of
original adoption or, in the case of revision, the year of last revision. A number in parentheses indicates the year of last reapproval. A
superscript epsilon (´) indicates an editorial change since the last revision or reapproval.
1. Scope
1.1 Test Packages—Packages that can be nondestructively evaluated by this test method include:
1.1.1 Rigid and semi-rigid non-lidded trays.
1.1.2 Trays or cups sealed with porous barrier lidding material.
1.1.3 Rigid, nonporous packages.
1.1.4Flexible, nonporous packages (see 1.2.4).
1.1.4 Flexible, nonporous packages.
1.2 Leaks Detected—Thistestmethodiscapableofdetectingpackageleaksusinganabsoluteordifferentialpressuretransducer
leakdetector.Thesensitivityofatestisafunctionofthesensitivityofthetransducer,thepackagedesign,thedesignofthepackage
test fixture, and critical test parameters of time and pressure. Types and sizes of leaks that may be detected for various package
systems, as well as test sensitivities are described below. These data are based on precision and bias confirmation studies. —This
test method detects package leaks by measuring the rise in pressure (vacuum loss) in an enclosed evacuated test chamber
containing the test package.Vacuum loss results from leakage of test package headspace gases and/or volatilization of test package
liquid contents located in or near the leak. When testing for leaks that may be partially or completely plugged with the package’s
liquid contents, the test chamber is evacuated to a pressure below the liquid’s vaporization pressure. All methods require a test
chamber to contain the test package and a leak detection system designed with one or more pressure transducers. Test method
sensitivities cited below were determined using specific product-package systems selected for the precision and bias studies
summarized in Table 1. Table 1 also lists other examples of relevant product-package systems that can be tested for leakage by
vacuum decay.
1.2.1 Trays or Cups (Non-lidded) (Air Leakage)—Hole or crack defects in the wall of the tray/cup of at least 50 µm in diameter
4
canbedetected.NonliddedtraysweretestedataTargetVacuumof4·10 –4·E4Pa(400mbar)usinganabsolutepressuretransducer
test instrument. (–400 mbar).
1.2.2 Trays Sealed with Porous Barrier Lidding Material (Headspace Gas Leakage)—Hole or crack defects in the wall of the
tray/cup of at least 100 µm in diameter can be detected. Channel defects in the seal area (made using wires of 125 µm in diameter)
canbedetected.Severesealbondingdefectsinbothcontinuousadhesiveanddotmatrixadhesivepackagesystemscanbedetected.
Slightly incomplete dot matrix adhesive bonding defects can also be detected. All porous barrier lidding material packages were
4
tested at a Target Vacuum of 4·10 –4·E4 Pa (400 mbar) using an absolute pressure transducer test instrument. Using a calibrated
volumetric airflow meter, the (–400 mbar). The sensitivity of the test for porous lidded packages is shown to be approximately
-2 3 -1
10 E-2 Pa·m ·s . using a calibrated volumetric airflow meter.
1.2.3 Rigid, Nonporous Packages—Hole defects of at least 5 µm in diameter can be detected. All rigid, nonporous packages
4
were tested at a target vacuum of 5·10 Pa (500 mbar) using a differential pressure transducer test instrument. Using a calibrated
-4 Rigid,
volumetric airflow meter, the sensitivity of the test for rigid, nonporous packages is shown to be approximately 10 Pa·m
Nonporous Packages (Headspace Gas Leakage) —Hole defects of at least 5 µm in diameter can be detected. Plastic bottles with screw caps were tested at a target vacuum
3
-1
of –5·E4 Pa (–500 mbar). Using a calibrated volumetric airflow meter, the sensitivity of the test is approximately E-3.4 Pa·m ·s .
1.2.4Flexible, Nonporous Packages—Such packages may also be tested by the vacuum decay method using either an absolute
or differential pressure tranducer test instrument. The instrument should be selected based on the leak test sensitivity desired.
Sensitivity data for flexible packages were not included in the precision and bias studies, although the use of vacuum decay for
testing such packages is well known. .Air-filled glass syringes were tested at a target vacuum of –7.5·E4 Pa (+250 mbar absolute)
3 -1
and again at a target vacuum of about +1 mbar absolute.
...


Questions, Comments and Discussion
Ask us and Technical Secretary will try to provide an answer. You can facilitate discussion about the standard in here.