ASTM E1304-97(2014)
(Test Method)Standard Test Method for Plane-Strain (Chevron-Notch) Fracture Toughness of Metallic Materials
Standard Test Method for Plane-Strain (Chevron-Notch) Fracture Toughness of Metallic Materials
SIGNIFICANCE AND USE
5.1 The fracture toughness determined by this test method characterizes the resistance of a material to fracture by a slowly advancing steady-state crack (see 3.2.5) in a neutral environment under severe tensile constraint. The state of stress near the crack front approaches plane strain, and the crack-tip plastic region is small compared with the crack size and specimen dimensions in the constraint direction. A KIv or KIvj value may be used to estimate the relation between failure stress and defect size when the conditions described above would be expected, although the relationship may differ from that obtained from a KIc value (see Note 1). Background information concerning the basis for development of this test method in terms of linear elastic fracture mechanics may be found in Refs (6-15).
5.1.1 The KIv, KIvj, or KIvM value of a given material can be a function of testing speed (strain rate) and temperature. Furthermore, cyclic forces can cause crack extension at KI values less than KIv, and crack extension can be increased by the presence of an aggressive environment. Therefore, application of KIv in the design of service components should be made with an awareness of differences that may exist between the laboratory tests and field conditions.
5.1.2 Plane-strain fracture toughness testing is unusual in that there can be no advance assurance that a valid KIv, KIvj, or KIvM will be determined in a particular test. Therefore, it is essential that all the criteria concerning the validity of results be carefully considered as described herein.
5.2 This test method can serve the following purposes:
5.2.1 To establish the effects of metallurgical variables such as composition or heat treatment, or of fabricating operations such as welding or forming, on the fracture toughness of new or existing materials.
5.2.2 For specifications of acceptance and manufacturing quality control, but only when there is a sound basis for specification of minimum ...
SCOPE
1.1 This test method covers the determination of plane-strain (chevron-notch) fracture toughnesses, KIv or KIvM, of metallic materials. Fracture toughness by this method is relative to a slowly advancing steady state crack initiated at a chevron-shaped notch, and propagating in a chevron-shaped ligament (Fig. 1). Some metallic materials, when tested by this method, exhibit a sporadic crack growth in which the crack front remains nearly stationary until a critical load is reached. The crack then becomes unstable and suddenly advances at high speed to the next arrest point. For these materials, this test method covers the determination of the plane-strain fracture toughness, KIvj or KIvM, relative to the crack at the points of instability. (A) See Fig. 6. (A) See Fig. 6.(B) See Note 1. (A) Compiled from Refs (1), (2), (3), and (4), and using the polynomials in Table 5.(B) Minimum value of Y*. (A) Compiled from Refs (1), (2), (3), and (4).(B) Y* = exp[C0 + C1 r + C2 r2 + C3 r3 + C4 r4 ], accuracy ±0.5 %.(C) Estimated from finite element analysis (3), and extrapolated equation from Ref (4). Accuracy for 0.3 ≤ r ≤ 0.85 is ±0.5 %.(D) Extrapolated from equations in Ref (4). Accuracy estimated to be ±0.5 % for 0.2 ≤ r ≤ 0.85.(E) Equation from Ref (4). Accuracy estimated to be± 0.5 % for 0.15 ≤ r ≤ 0.6.
General Information
Relations
Buy Standard
Standards Content (Sample)
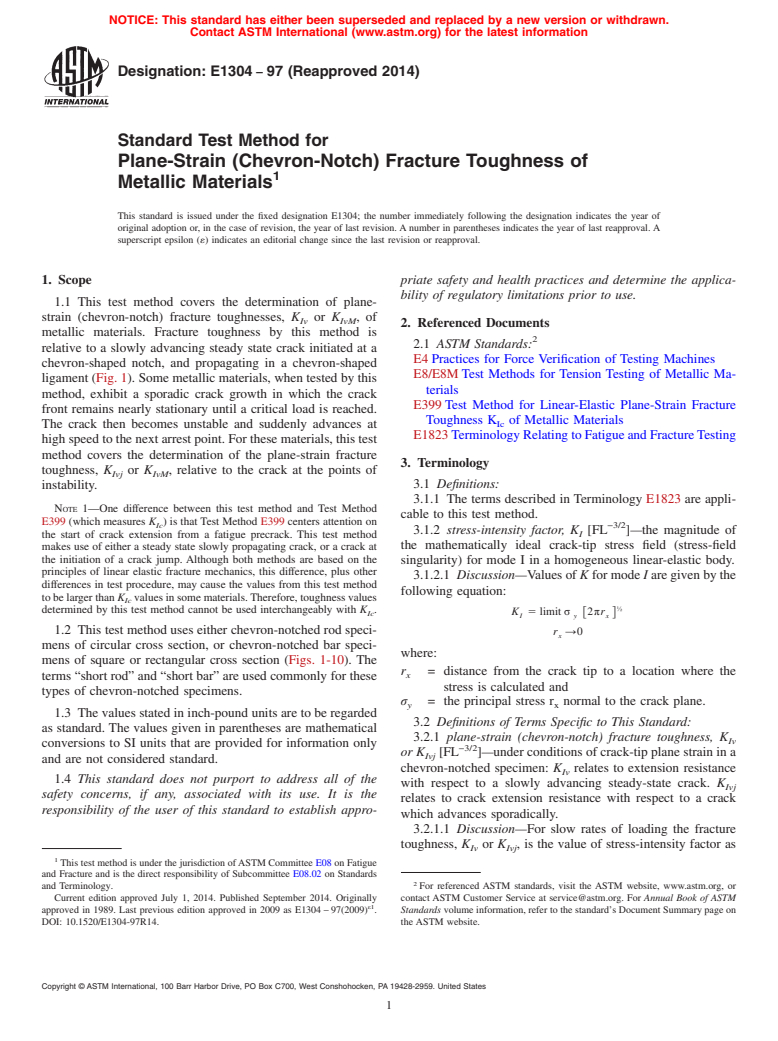
NOTICE: This standard has either been superseded and replaced by a new version or withdrawn.
Contact ASTM International (www.astm.org) for the latest information
Designation: E1304 − 97 (Reapproved 2014)
Standard Test Method for
Plane-Strain (Chevron-Notch) Fracture Toughness of
1
Metallic Materials
This standard is issued under the fixed designation E1304; the number immediately following the designation indicates the year of
original adoption or, in the case of revision, the year of last revision.Anumber in parentheses indicates the year of last reapproval.A
superscript epsilon (´) indicates an editorial change since the last revision or reapproval.
1. Scope priate safety and health practices and determine the applica-
bility of regulatory limitations prior to use.
1.1 This test method covers the determination of plane-
strain (chevron-notch) fracture toughnesses, K or K ,of
Iv IvM
2. Referenced Documents
metallic materials. Fracture toughness by this method is
2
2.1 ASTM Standards:
relative to a slowly advancing steady state crack initiated at a
E4Practices for Force Verification of Testing Machines
chevron-shaped notch, and propagating in a chevron-shaped
E8/E8MTest Methods for Tension Testing of Metallic Ma-
ligament (Fig. 1). Some metallic materials, when tested by this
terials
method, exhibit a sporadic crack growth in which the crack
E399Test Method for Linear-Elastic Plane-Strain Fracture
front remains nearly stationary until a critical load is reached.
Toughness K of Metallic Materials
Ic
The crack then becomes unstable and suddenly advances at
E1823TerminologyRelatingtoFatigueandFractureTesting
highspeedtothenextarrestpoint.Forthesematerials,thistest
method covers the determination of the plane-strain fracture
3. Terminology
toughness, K or K , relative to the crack at the points of
Ivj IvM
3.1 Definitions:
instability.
3.1.1 The terms described in Terminology E1823 are appli-
NOTE 1—One difference between this test method and Test Method
cable to this test method.
E399 (which measures K ) is that Test Method E399 centers attention on
Ic −3/2
3.1.2 stress-intensity factor, K [FL ]—the magnitude of
I
the start of crack extension from a fatigue precrack. This test method
the mathematically ideal crack-tip stress field (stress-field
makes use of either a steady state slowly propagating crack, or a crack at
the initiation of a crack jump. Although both methods are based on the
singularity) for mode I in a homogeneous linear-elastic body.
principles of linear elastic fracture mechanics, this difference, plus other
3.1.2.1 Discussion—Valuesof Kformode Iaregivenbythe
differences in test procedure, may cause the values from this test method
following equation:
tobelargerthan K valuesinsomematerials.Therefore,toughnessvalues
Ic
½
determined by this test method cannot be used interchangeably with K .
K 5 limit σ 2πr
Ic @ #
I y x
1.2 This test method uses either chevron-notched rod speci-
r →0
x
mens of circular cross section, or chevron-notched bar speci-
where:
mens of square or rectangular cross section (Figs. 1-10). The
r = distance from the crack tip to a location where the
x
terms “short rod” and “short bar” are used commonly for these
stress is calculated and
types of chevron-notched specimens.
σ = the principal stress r normal to the crack plane.
y x
1.3 The values stated in inch-pound units are to be regarded
3.2 Definitions of Terms Specific to This Standard:
as standard. The values given in parentheses are mathematical
3.2.1 plane-strain (chevron-notch) fracture toughness, K
Iv
conversions to SI units that are provided for information only
−3/2
or K [FL ]—under conditions of crack-tip plane strain in a
Ivj
and are not considered standard.
chevron-notched specimen: K relates to extension resistance
Iv
1.4 This standard does not purport to address all of the
with respect to a slowly advancing steady-state crack. K
Ivj
safety concerns, if any, associated with its use. It is the
relates to crack extension resistance with respect to a crack
responsibility of the user of this standard to establish appro-
which advances sporadically.
3.2.1.1 Discussion—For slow rates of loading the fracture
toughness, K or K , is the value of stress-intensity factor as
Iv Ivj
1
This test method is under the jurisdiction ofASTM Committee E08 on Fatigue
and Fracture and is the direct responsibility of Subcommittee E08.02 on Standards
2
and Terminology. For referenced ASTM standards, visit the ASTM website, www.astm.org, or
Current edition approved July 1, 2014. Published September 2014. Originally contact ASTM Customer Service at service@astm.org. For Annual Book of ASTM
ε1
approved in 1989. Last previous edition approved in 2009 as E1304–97(2009) . Standards volume information, refer to the standard’s Document Summary page on
DOI: 10.1520/E1304-97R14. the ASTM website.
Copyright © ASTM International, 100 Barr Harbor Drive, PO Box C700, West Conshohocken, PA 19428-2959. United States
1
---------------------- Page: 1 --------
...
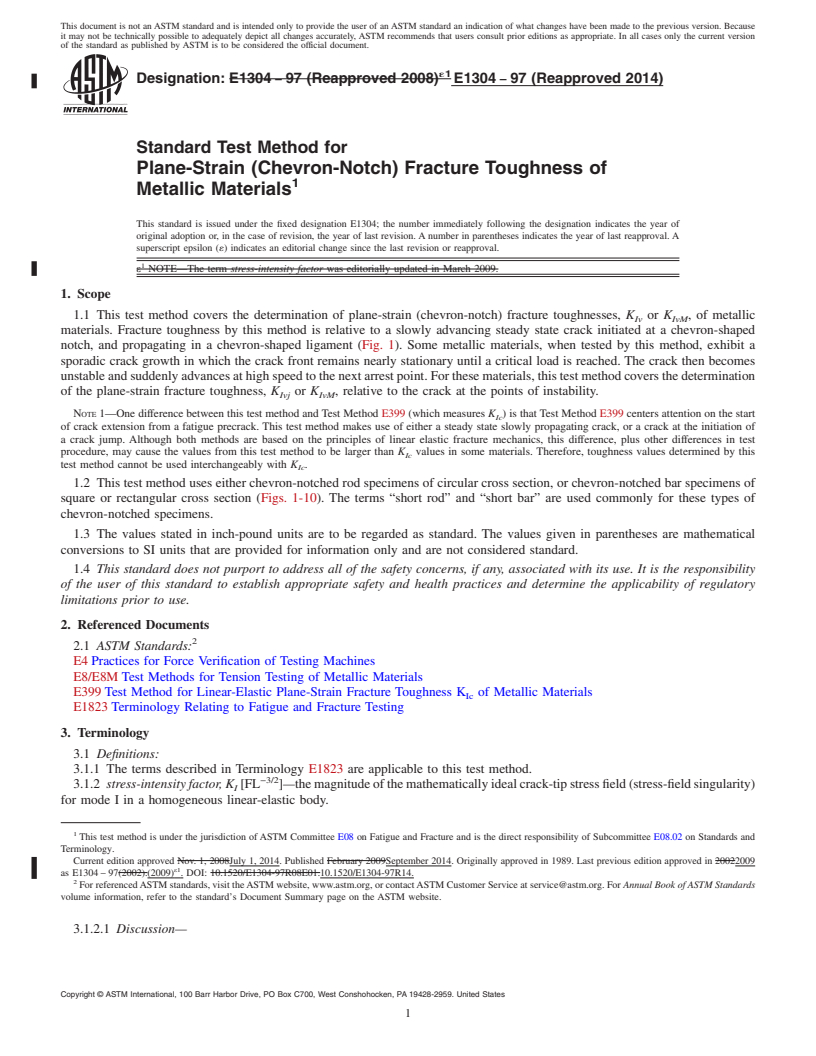
This document is not an ASTM standard and is intended only to provide the user of an ASTM standard an indication of what changes have been made to the previous version. Because
it may not be technically possible to adequately depict all changes accurately, ASTM recommends that users consult prior editions as appropriate. In all cases only the current version
of the standard as published by ASTM is to be considered the official document.
´1
Designation: E1304 − 97 (Reapproved 2008) E1304 − 97 (Reapproved 2014)
Standard Test Method for
Plane-Strain (Chevron-Notch) Fracture Toughness of
1
Metallic Materials
This standard is issued under the fixed designation E1304; the number immediately following the designation indicates the year of
original adoption or, in the case of revision, the year of last revision. A number in parentheses indicates the year of last reapproval. A
superscript epsilon (´) indicates an editorial change since the last revision or reapproval.
1
ε NOTE—The term stress-intensity factor was editorially updated in March 2009.
1. Scope
1.1 This test method covers the determination of plane-strain (chevron-notch) fracture toughnesses, K or K , of metallic
Iv IvM
materials. Fracture toughness by this method is relative to a slowly advancing steady state crack initiated at a chevron-shaped
notch, and propagating in a chevron-shaped ligament (Fig. 1). Some metallic materials, when tested by this method, exhibit a
sporadic crack growth in which the crack front remains nearly stationary until a critical load is reached. The crack then becomes
unstable and suddenly advances at high speed to the next arrest point. For these materials, this test method covers the determination
of the plane-strain fracture toughness, K or K , relative to the crack at the points of instability.
Ivj IvM
NOTE 1—One difference between this test method and Test Method E399 (which measures K ) is that Test Method E399 centers attention on the start
Ic
of crack extension from a fatigue precrack. This test method makes use of either a steady state slowly propagating crack, or a crack at the initiation of
a crack jump. Although both methods are based on the principles of linear elastic fracture mechanics, this difference, plus other differences in test
procedure, may cause the values from this test method to be larger than K values in some materials. Therefore, toughness values determined by this
Ic
test method cannot be used interchangeably with K .
Ic
1.2 This test method uses either chevron-notched rod specimens of circular cross section, or chevron-notched bar specimens of
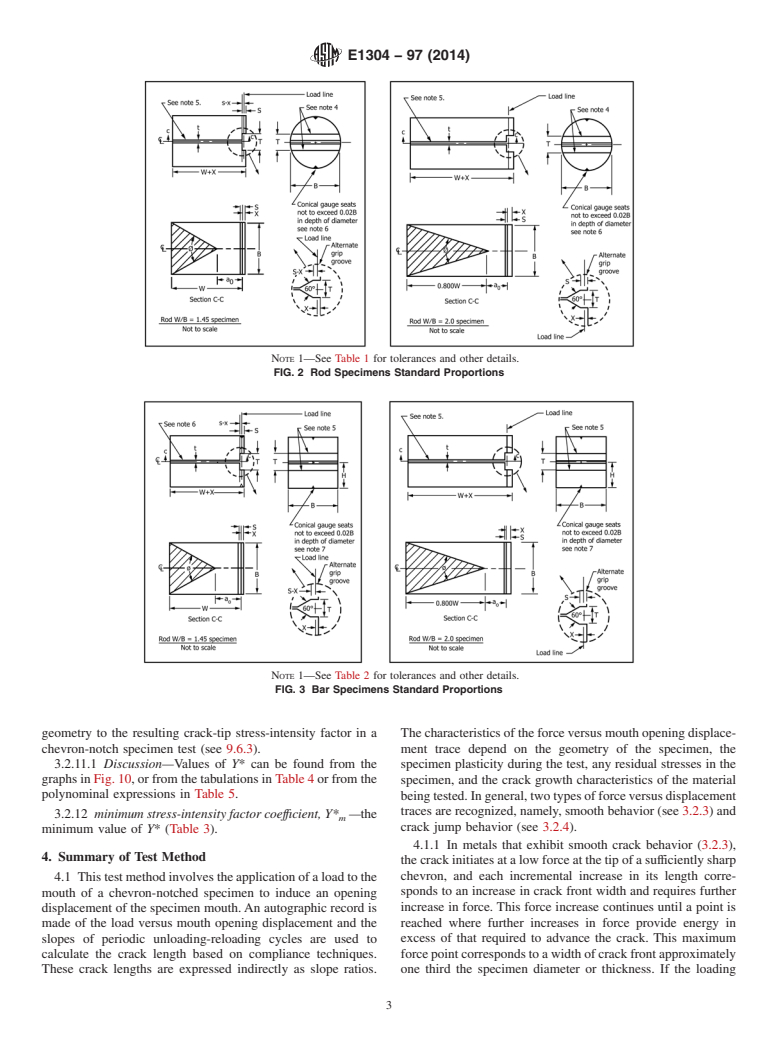
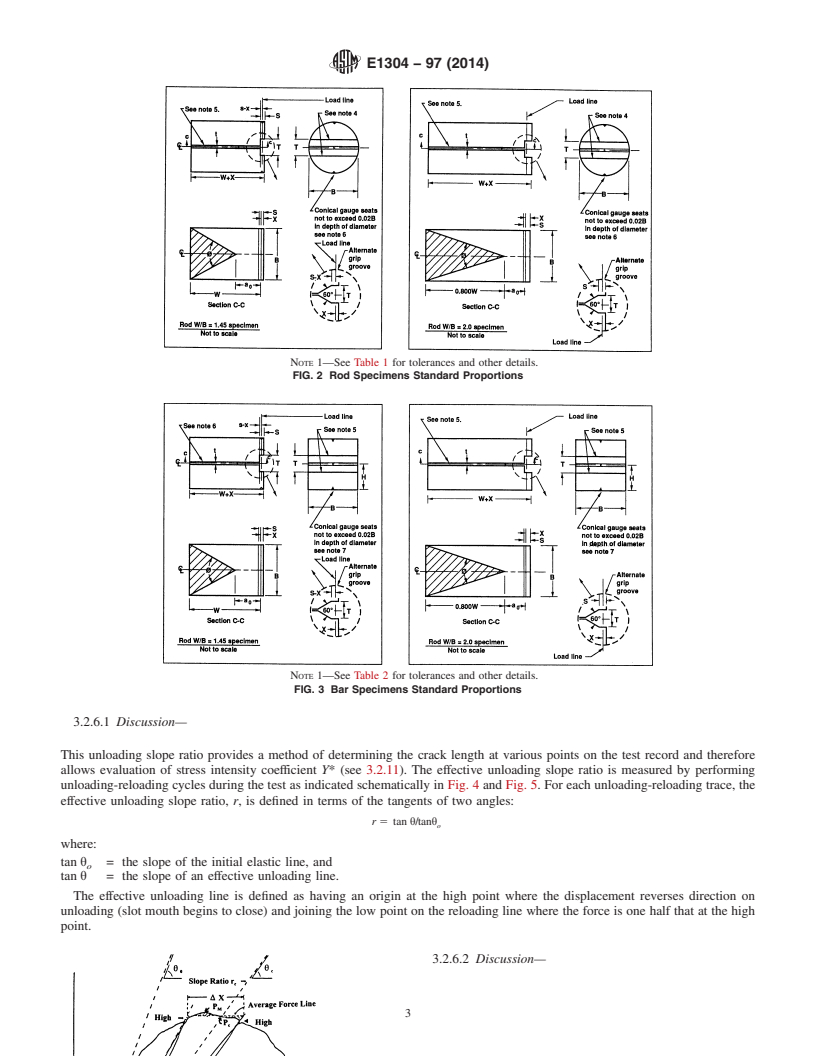
square or rectangular cross section (Figs. 1-10). The terms “short rod” and “short bar” are used commonly for these types of
chevron-notched specimens.
1.3 The values stated in inch-pound units are to be regarded as standard. The values given in parentheses are mathematical
conversions to SI units that are provided for information only and are not considered standard.
1.4 This standard does not purport to address all of the safety concerns, if any, associated with its use. It is the responsibility
of the user of this standard to establish appropriate safety and health practices and determine the applicability of regulatory
limitations prior to use.
2. Referenced Documents
2
2.1 ASTM Standards:
E4 Practices for Force Verification of Testing Machines
E8/E8M Test Methods for Tension Testing of Metallic Materials
E399 Test Method for Linear-Elastic Plane-Strain Fracture Toughness K of Metallic Materials
Ic
E1823 Terminology Relating to Fatigue and Fracture Testing
3. Terminology
3.1 Definitions:
3.1.1 The terms described in Terminology E1823 are applicable to this test method.
−3/2
3.1.2 stress-intensity factor, K [FL ]—the magnitude of the mathematically ideal crack-tip stress field (stress-field singularity)
I
for mode I in a homogeneous linear-elastic body.
1
This test method is under the jurisdiction of ASTM Committee E08 on Fatigue and Fracture and is the direct responsibility of Subcommittee E08.02 on Standards and
Terminology.
Current edition approved Nov. 1, 2008July 1, 2014. Published February 2009September 2014. Originally approved in 1989. Last previous edition approved in 20022009
ε1
as E1304 – 97(2002).(2009) . DOI: 10.1520/E1304-97R08E01.10.1520/E1304-97R14.
2
For referenced ASTM standards, visit the ASTM website, www.astm.org, or contact ASTM Customer Service at service@astm.org. For Annual Book of ASTM Standards
volume information, refer to the standard’s Document Summary page on the ASTM website.
3.1.2.1 Discussion—
Copyright © ASTM International, 100 Barr Harbor Drive, PO Box C700, West Conshohocken, PA 19428-2959. United States
1
---------------------- Page: 1 ----------------------
E1304 − 97 (2014)
NOTE 1—The crack commences at the tip of the chevron-shaped ligament and propagates (shaded area) along the ligament, and has the length “a”
shown. (Not to scale.)
FIG. 1 Schematic Diagrams of Chevron-Notched Short Rod (a) and Short Bar (b) Specim
...


Questions, Comments and Discussion
Ask us and Technical Secretary will try to provide an answer. You can facilitate discussion about the standard in here.