ASTM D5212-91(1997)
(Specification)Standard Specification for High Load Rotational Confined Elastomeric Bearings for Bridges and Structures
Standard Specification for High Load Rotational Confined Elastomeric Bearings for Bridges and Structures
SCOPE
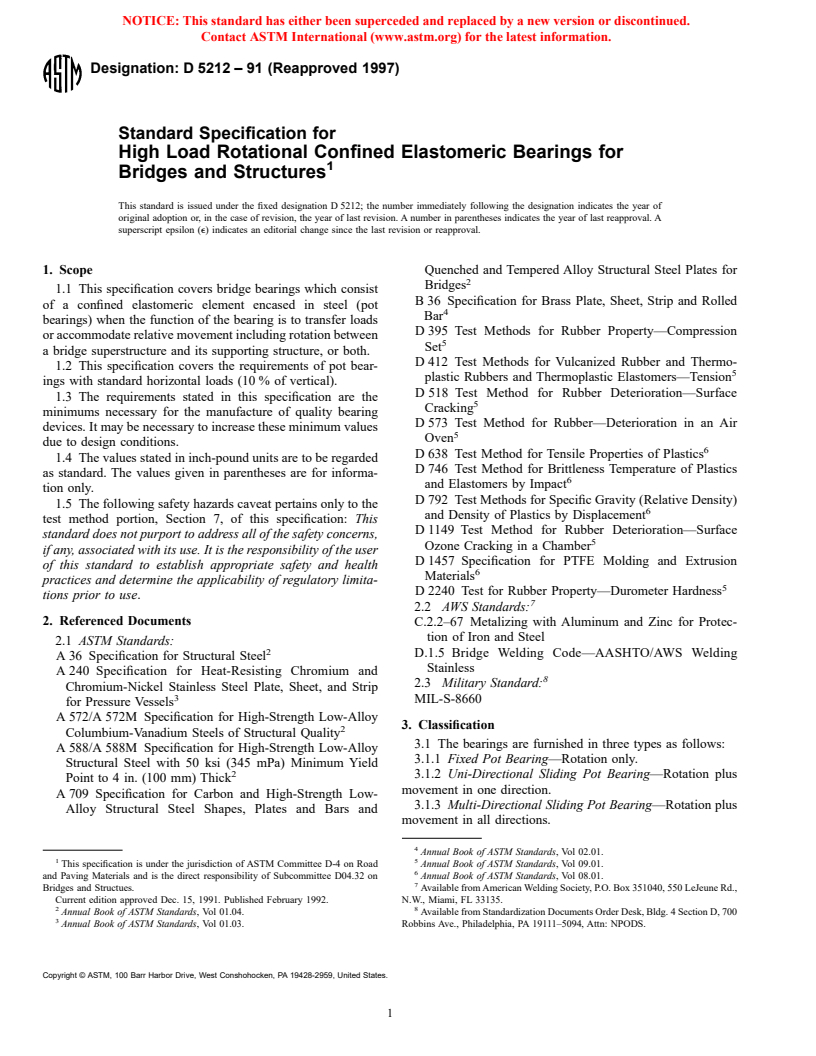
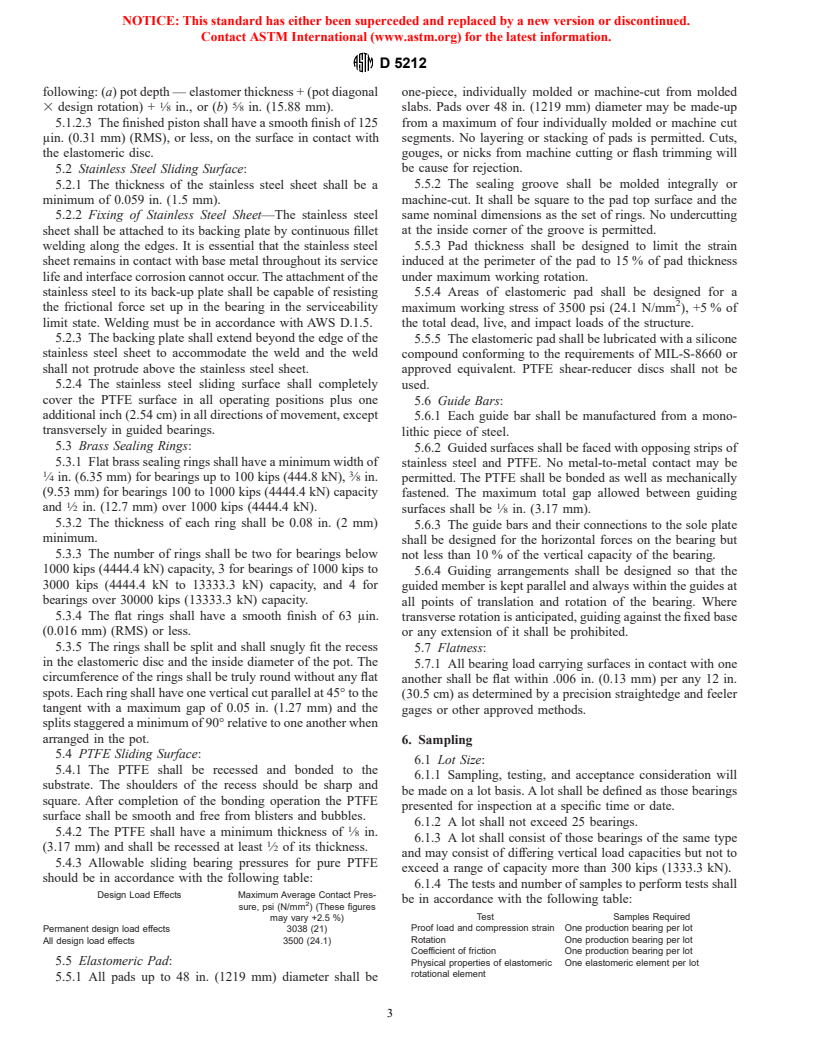
1.1 This specification covers bridge bearings which consist of a confined elastomeric element encased in steel (pot bearings) when the function of the bearing is to transfer loads or accommodate relative movement including rotation between a bridge superstructure and its supporting structure, or both.
1.2 This specification covers the requirements of pot bearings with standard horizontal loads (10% of vertical).
1.3 The requirements stated in this specification are the minimums necessary for the manufacture of quality bearing devices. It may be necessary to increase these minimum values due to design conditions.
1.4 The values stated in inch-pound units are to be regarded as standard. The values given in parentheses are for information only.
1.5 The following safety hazards caveat pertains only to the test method portion, Section 7, of this specification: This standard does not purport to address all of the safety problems, if any, associated with its use. It is the responsibility of the user of this standard to establish appropriate safety and health practices and determine the applicability of regulatory limitations prior to use.
General Information
Relations
Standards Content (Sample)
NOTICE: This standard has either been superceded and replaced by a new version or discontinued.
Contact ASTM International (www.astm.org) for the latest information.
Designation: D 5212 – 91 (Reapproved 1997)
Standard Specification for
High Load Rotational Confined Elastomeric Bearings for
Bridges and Structures
This standard is issued under the fixed designation D 5212; the number immediately following the designation indicates the year of
original adoption or, in the case of revision, the year of last revision. A number in parentheses indicates the year of last reapproval. A
superscript epsilon (e) indicates an editorial change since the last revision or reapproval.
1. Scope Quenched and Tempered Alloy Structural Steel Plates for
Bridges
1.1 This specification covers bridge bearings which consist
B 36 Specification for Brass Plate, Sheet, Strip and Rolled
of a confined elastomeric element encased in steel (pot
Bar
bearings) when the function of the bearing is to transfer loads
D 395 Test Methods for Rubber Property—Compression
or accommodate relative movement including rotation between
Set
a bridge superstructure and its supporting structure, or both.
D 412 Test Methods for Vulcanized Rubber and Thermo-
1.2 This specification covers the requirements of pot bear-
plastic Rubbers and Thermoplastic Elastomers—Tension
ings with standard horizontal loads (10 % of vertical).
D 518 Test Method for Rubber Deterioration—Surface
1.3 The requirements stated in this specification are the
Cracking
minimums necessary for the manufacture of quality bearing
D 573 Test Method for Rubber—Deterioration in an Air
devices. It may be necessary to increase these minimum values
Oven
due to design conditions.
D 638 Test Method for Tensile Properties of Plastics
1.4 The values stated in inch-pound units are to be regarded
D 746 Test Method for Brittleness Temperature of Plastics
as standard. The values given in parentheses are for informa-
and Elastomers by Impact
tion only.
D 792 Test Methods for Specific Gravity (Relative Density)
1.5 The following safety hazards caveat pertains only to the
and Density of Plastics by Displacement
test method portion, Section 7, of this specification: This
D 1149 Test Method for Rubber Deterioration—Surface
standard does not purport to address all of the safety concerns,
Ozone Cracking in a Chamber
if any, associated with its use. It is the responsibility of the user
D 1457 Specification for PTFE Molding and Extrusion
of this standard to establish appropriate safety and health
Materials
practices and determine the applicability of regulatory limita-
D 2240 Test for Rubber Property—Durometer Hardness
tions prior to use.
2.2 AWS Standards:
2. Referenced Documents C.2.2–67 Metalizing with Aluminum and Zinc for Protec-
tion of Iron and Steel
2.1 ASTM Standards:
D.1.5 Bridge Welding Code—AASHTO/AWS Welding
A 36 Specification for Structural Steel
Stainless
A 240 Specification for Heat-Resisting Chromium and
2.3 Military Standard:
Chromium-Nickel Stainless Steel Plate, Sheet, and Strip
MIL-S-8660
for Pressure Vessels
A 572/A 572M Specification for High-Strength Low-Alloy
3. Classification
Columbium-Vanadium Steels of Structural Quality
3.1 The bearings are furnished in three types as follows:
A 588/A 588M Specification for High-Strength Low-Alloy
3.1.1 Fixed Pot Bearing—Rotation only.
Structural Steel with 50 ksi (345 mPa) Minimum Yield
2 3.1.2 Uni-Directional Sliding Pot Bearing—Rotation plus
Point to 4 in. (100 mm) Thick
movement in one direction.
A 709 Specification for Carbon and High-Strength Low-
3.1.3 Multi-Directional Sliding Pot Bearing—Rotation plus
Alloy Structural Steel Shapes, Plates and Bars and
movement in all directions.
Annual Book of ASTM Standards, Vol 02.01.
1 5
This specification is under the jurisdiction of ASTM Committee D-4 on Road Annual Book of ASTM Standards, Vol 09.01.
and Paving Materials and is the direct responsibility of Subcommittee D04.32 on Annual Book of ASTM Standards, Vol 08.01.
Bridges and Structues. Available from American Welding Society, P.O. Box 351040, 550 LeJeune Rd.,
Current edition approved Dec. 15, 1991. Published February 1992. N.W., Miami, FL 33135.
2 8
Annual Book of ASTM Standards, Vol 01.04. Available from Standardization Documents Order Desk, Bldg. 4 Section D, 700
Annual Book of ASTM Standards, Vol 01.03. Robbins Ave., Philadelphia, PA 19111–5094, Attn: NPODS.
Copyright © ASTM, 100 Barr Harbor Drive, West Conshohocken, PA 19428-2959, United States.
NOTICE: This standard has either been superceded and replaced by a new version or discontinued.
Contact ASTM International (www.astm.org) for the latest information.
D 5212
TABLE 2 Physical Property Requirements for Pot Bearing
3.2 The elastomer for the manufacture of the confined
Elastomer
elastometric element is furnished in one of two materials as
follows:
NOTE 1—The elastomer meeting these requirements shall be plain, not
laminated or fiber reinforced.
3.2.1 Type CR—Polychloroprene (neoprene) rubber.
3.2.2 Type NR—Polyisoprene (natural) rubber.
Requirements
ASTM Test
Physical Properties
Method
Polychloroprene Natural
4. Material Specifications
Hardness, Shore A D 2240 50 6550 6 5
4.1 Steel—Steel used for the confining base plates or pot,
durometer (IRHD)
piston, and top or sole plates shall conform to Specifications Tensile strength, D 412 2250 (15.5) 2250
min, psi (mPa) (15.5)
A 36, A 588/A 588M, A 572/A 572M or A 709 as required. All
Ultimate elongation, D 412 400 400
exposed surfaces shall be zinc metallized according to AWS
min, %
Aged physicals after D573 . .
C.2.2 (with no chipping) having a minimum thickness of 6 mil
70 h at 100°C
(0.152 mm), or treated with other approved coating systems
(212°F)
such as coal tar epoxy or organic zinc. Internal surfaces shall
Hardness change, 0to+15 .
max
not be coated.
Tensile strength −15 . . .
4.2 Stainless Steel—Stainless steel used as the mating
change, max, %
sliding surface to the PTFE in sliding pot bearing shall conform
Elongation −40 . . .
change, max, %
to Specification A 240, Type 304, No. 8 mirror finish.
Aged physicals after D573 . .
4.3 Brass—Flat brass sealing rings shall conform to the
168 h at 70°C
requirements of Specification B 36 half hard, alloy 260. (158°F)
Hardness, . 0to+10
4.4 Polytetrafluoroethylene (PTFE)—The load bearing
change, max
PTFE shall be resistant to acids, alkalis and petroleum prod-
Tensile strength . −25
ucts, and nonabsorbing of water. It shall be stable for tempera- change, max, %
Elongation . −25
tures up to 260°C (500°F) and shall be nonflammable. The
change, max, %
PTFE shall be manufactured from pure virgin unfilled TFE
Compression set, 22 D395 . .
resin conforming to Specification D 1457. The PTFE shall h Method B, max, %
at 100°C (212°F) 35 . . .
conform to the physical requirements listed in Table 1.
at 70°C (158°F) . . . 25
4.5 Elastomer—The elastomer portion of the elastomeric
Ozone resistance
compound shall be 100 % virgin natural rubber or 100 % virgin Mounting at 20 % D 518 (Proce- . .
strain dure A)
polychloroprene with no reclaim or ground polymers reinforce-
Exposure D 1149 . . . . . .
ment allowed. These compounds shall meet the physical
40 62°C (104°F) . . . . . .
property requirements listed in Table 2. 100 h at 302 mPa No cracks . . .
ozone partial
pressure
5. Design Requirements
100 h at 500 mPa . . . No cracks
5.1 Steel Components: ozone partial
pressure
5.1.1 Pot—The pot shall consist of circular ring and a lower
(Using 73 magnification lens)
base plate. The plate and ring shall be fabricated from one
Low temperature D 746 (Proce- No failure . . .
piece of steel. brittleness at −40°C dure B)
(−40°F)
NOTE 1—Alternative methods of fabrication may be used provided the
. . . No failure
design is substantiated by calculations and other documentation.
5.1.1.1 Depth of the pot cavity shall be equal to or greater
5.1.1.4 The lower base plate shall be of sufficient thickness
than: pot inside diameter/2 3 1.05 3 (design rotation3 2) +
to ensure distribution of the bearing stress under full dead load
piston face width + elastomeric pad thickness.
applied at an eccentricity of 5 % of the inside diameter of the
5.1.1.2 The inside diameter of the pot shall be nominally the
pot combined with a horizontal load amounting to 10 % of the
same as the outside diameter of the elastomeric disc.
total vertical load. The thickness of the lower base plate shall
5.1.1.3 The thickness of the pot ring shall be designed to
1 3
be at least ⁄22 of the pot diameter but in no case less than ⁄4 in.
withstand the hydrostatic internal pressure caused by the
(19 mm).
elastomer considered as a fluid, and horizontal applied loads
5.1.1.5 Design calculations shall be submitted with shop
without consideration of the lower (base) plate.
drawings.
5.1.2 Piston—The piston shall be fully machined from a
TABLE 1 Physical Property Requirements for PTFE
single piece of steel. Machining shall include profiling the side
NOTE 1—15 % glass-filled PTFE may be used for guide bar surfaces
walls to allow 2 3 design rotation and sufficient bearing area
(see Specification D 1457).
against the pot wall to carry maximum lateral loads at a stress
ASTM Requirement
not exceeding 0.8 Fy.
Physical Property
Test Method Minimum
5.1.2.1 The piston diameter within the pot shall be 0.03 in.
Ultimate tensile strength, psi, (mPa) D 638 2800 (19.3)
(0.76 mm) to 0.05 in. (1.27 mm) less than the inside diameter
Ultimate elongation, min, % D 638 200
of the pot.
Specific gravity, min D 792 2.12
5.1.2.2 The piston thickness shall be the greater of the
NOTICE: This standard has either been superceded and replaced by a new version or discontinued.
Contact ASTM International (www.astm.org) for the latest information.
D 5212
following: (a) pot depth — elastomer thickness + (pot diagonal one-piece, individually molded or machine-cut from molded
1 5
3 design rotation) + ⁄8 in., or (b) ⁄8 in. (15.88 mm). slabs. Pads over 48 in. (1219 mm) diameter may be made-up
from a maximum of four individually molded or machine cut
5.1.2.3 The finished piston shall have a smooth finish of 125
μin. (0.31 mm) (RMS), or less, on the surface in contact with segments. No layering or stacking of pads is permitted. Cuts,
gouges, or nicks from machine cutting or flash trimming will
the elastomeric disc.
5.2 Stainless Steel Sliding Surface: be cause for rejection.
5.2.1 The thickness of the stainless steel sheet shall be a 5.5.2 The sealing groove shall be molded integrally or
minimum of 0.059 in. (1.5 mm). machine-cut. It shall
...


Questions, Comments and Discussion
Ask us and Technical Secretary will try to provide an answer. You can facilitate discussion about the standard in here.