ISO/TR 12134:2010
(Main)Rubber — Estimation of uncertainty for test methods — Non-functional parameters
Rubber — Estimation of uncertainty for test methods — Non-functional parameters
ISO/TR 12134:2010 provides guidance to scientists, engineers and technicians, working in the field of rubber materials and products, to supplement ISO/IEC Guide 98‑3 and to provide additional guidance in situations where functional relationships between input quantities (such as temperature, strain rate and time) and derived output quantities (such as tensile strength and compression set) are unknown and where no other guidance is available. The Technical Report provides a summary of the classical approach that is taken in the preparation of uncertainty budgets and provides a list of selected test methods and, for each, an indication of the factors that will make a contribution to the uncertainty budget.It also discusses how “non-functional” factors can be taken into account in the classical approach.
Caoutchouc — Estimation de l'incertitude des méthodes d'essai — Paramètres non fonctionnels
General Information
- Status
- Published
- Publication Date
- 01-Feb-2010
- Technical Committee
- ISO/TC 45/SC 2 - Testing and analysis
- Drafting Committee
- ISO/TC 45/SC 2/WG 4 - Application of statistical methods
- Current Stage
- 6060 - International Standard published
- Start Date
- 02-Feb-2010
- Due Date
- 15-Jul-2011
- Completion Date
- 15-Jul-2011
Overview
ISO/TR 12134:2010 - “Rubber - Estimation of uncertainty for test methods - Non-functional parameters” - is an informative Technical Report from ISO/TC 45 that supplements ISO/IEC Guide 98‑3. It gives practical guidance for preparing measurement uncertainty budgets in rubber testing when functional relationships between input quantities (temperature, strain rate, time, etc.) and output measurands (tensile strength, compression set, volume swell, etc.) are unknown. The report focuses on how to identify, quantify and combine both functional and non‑functional parameters that contribute to measurement uncertainty.
Key topics
- Purpose and scope: Guidance for scientists, engineers and technicians working with rubber materials and products to estimate uncertainty where standard functional models are not available.
- Step‑by‑step uncertainty budgeting: A seven‑step classical approach (define measurand, list contributors, estimate magnitudes, derive sensitivities, include non‑functional factors, combine uncertainties, report expanded uncertainty).
- Functional vs non‑functional parameters: Examples of functional inputs (force, width, thickness for tensile strength) and non‑functional contributors (alignment, test speed, ageing time, air flow, immersion liquid properties).
- Selected test methods: Clauses list common rubber tests and likely uncertainty sources - density, tensile strength/modulus, elongation at break, tear strength, compression set, hardness, heat ageing, volume swell, abrasion, low‑temperature stiffness, impact brittleness, ozone resistance, stress relaxation, etc.
- Methods for non‑functional factors: Practical approaches including empirical evaluation (type A), calculation (type B), expert opinion and interlaboratory testing to estimate uncertainties when direct functional relations are not available.
- Reporting: Combining standard uncertainties by root‑sum‑square and applying a coverage factor (conventionally k ≈ 2 for 95 % confidence) to report expanded uncertainty.
Applications
- Preparing uncertainty budgets for rubber test reports and certificates
- Supporting ISO/IEC 17025 laboratory accreditation and conformity assessment
- Quality control and materials specification for rubber compounds and products
- Test method development, validation and interlaboratory studies
- Research & development where measurement traceability and uncertainty are required
Who should use it
- Test laboratory managers and technical staff in rubber testing
- Materials scientists and product engineers working with elastomers
- Quality and compliance professionals preparing test reports and accreditation evidence
- Metrologists estimating measurement uncertainty in non‑functional test scenarios
Related standards
- ISO/IEC Guide 98‑3 (GUM) - primary guidance on measurement uncertainty
- ISO 23529 - specimen preparation and related tolerances referenced for test piece quality
- ISO/TS 21748, Eurolab Technical Report No. 1/2007 - supplemental guidance on uncertainty evaluation and use of R/R data
Keywords: ISO/TR 12134:2010, rubber testing, measurement uncertainty, uncertainty budget, non‑functional parameters, ISO/IEC Guide 98‑3, rubber materials.
Get Certified
Connect with accredited certification bodies for this standard

Smithers Quality Assessments
US management systems and product certification.

DIN CERTCO
DIN Group product certification.
Sponsored listings
Frequently Asked Questions
ISO/TR 12134:2010 is a technical report published by the International Organization for Standardization (ISO). Its full title is "Rubber — Estimation of uncertainty for test methods — Non-functional parameters". This standard covers: ISO/TR 12134:2010 provides guidance to scientists, engineers and technicians, working in the field of rubber materials and products, to supplement ISO/IEC Guide 98‑3 and to provide additional guidance in situations where functional relationships between input quantities (such as temperature, strain rate and time) and derived output quantities (such as tensile strength and compression set) are unknown and where no other guidance is available. The Technical Report provides a summary of the classical approach that is taken in the preparation of uncertainty budgets and provides a list of selected test methods and, for each, an indication of the factors that will make a contribution to the uncertainty budget.It also discusses how “non-functional” factors can be taken into account in the classical approach.
ISO/TR 12134:2010 provides guidance to scientists, engineers and technicians, working in the field of rubber materials and products, to supplement ISO/IEC Guide 98‑3 and to provide additional guidance in situations where functional relationships between input quantities (such as temperature, strain rate and time) and derived output quantities (such as tensile strength and compression set) are unknown and where no other guidance is available. The Technical Report provides a summary of the classical approach that is taken in the preparation of uncertainty budgets and provides a list of selected test methods and, for each, an indication of the factors that will make a contribution to the uncertainty budget.It also discusses how “non-functional” factors can be taken into account in the classical approach.
ISO/TR 12134:2010 is classified under the following ICS (International Classification for Standards) categories: 83.060 - Rubber. The ICS classification helps identify the subject area and facilitates finding related standards.
ISO/TR 12134:2010 is available in PDF format for immediate download after purchase. The document can be added to your cart and obtained through the secure checkout process. Digital delivery ensures instant access to the complete standard document.
Standards Content (Sample)
TECHNICAL ISO/TR
REPORT 12134
First edition
2010-02-15
Rubber — Estimation of uncertainty for
test methods — Non-functional
parameters
Caoutchouc — Estimation de l'incertitude des méthodes d'essai —
Paramètres non fonctionnels
Reference number
©
ISO 2010
PDF disclaimer
This PDF file may contain embedded typefaces. In accordance with Adobe's licensing policy, this file may be printed or viewed but
shall not be edited unless the typefaces which are embedded are licensed to and installed on the computer performing the editing. In
downloading this file, parties accept therein the responsibility of not infringing Adobe's licensing policy. The ISO Central Secretariat
accepts no liability in this area.
Adobe is a trademark of Adobe Systems Incorporated.
Details of the software products used to create this PDF file can be found in the General Info relative to the file; the PDF-creation
parameters were optimized for printing. Every care has been taken to ensure that the file is suitable for use by ISO member bodies. In
the unlikely event that a problem relating to it is found, please inform the Central Secretariat at the address given below.
© ISO 2010
All rights reserved. Unless otherwise specified, no part of this publication may be reproduced or utilized in any form or by any means,
electronic or mechanical, including photocopying and microfilm, without permission in writing from either ISO at the address below or
ISO's member body in the country of the requester.
ISO copyright office
Case postale 56 • CH-1211 Geneva 20
Tel. + 41 22 749 01 11
Fax + 41 22 749 09 47
E-mail copyright@iso.org
Web www.iso.org
Published in Switzerland
ii © ISO 2010 – All rights reserved
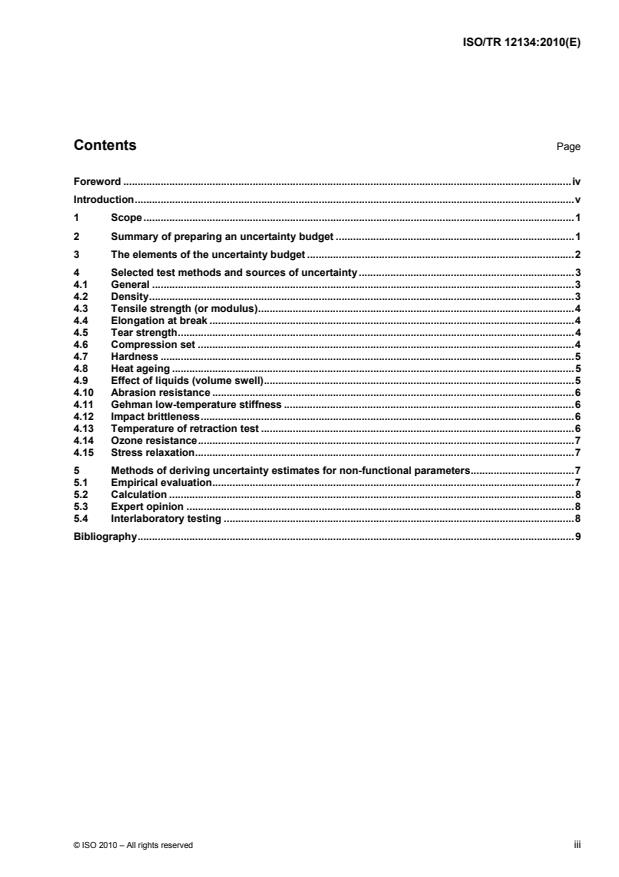
Contents Page
Foreword .iv
Introduction.v
1 Scope.1
2 Summary of preparing an uncertainty budget .1
3 The elements of the uncertainty budget .2
4 Selected test methods and sources of uncertainty.3
4.1 General .3
4.2 Density.3
4.3 Tensile strength (or modulus).4
4.4 Elongation at break .4
4.5 Tear strength.4
4.6 Compression set .4
4.7 Hardness .5
4.8 Heat ageing .5
4.9 Effect of liquids (volume swell).5
4.10 Abrasion resistance .6
4.11 Gehman low-temperature stiffness .6
4.12 Impact brittleness.6
4.13 Temperature of retraction test .6
4.14 Ozone resistance.7
4.15 Stress relaxation.7
5 Methods of deriving uncertainty estimates for non-functional parameters.7
5.1 Empirical evaluation.7
5.2 Calculation .8
5.3 Expert opinion .8
5.4 Interlaboratory testing .8
Bibliography.9
Foreword
ISO (the International Organization for Standardization) is a worldwide federation of national standards bodies
(ISO member bodies). The work of preparing International Standards is normally carried out through ISO
technical committees. Each member body interested in a subject for which a technical committee has been
established has the right to be represented on that committee. International organizations, governmental and
non-governmental, in liaison with ISO, also take part in the work. ISO collaborates closely with the
International Electrotechnical Commission (IEC) on all matters of electrotechnical standardization.
International Standards are drafted in accordance with the rules given in the ISO/IEC Directives, Part 2.
The main task of technical committees is to prepare International Standards. Draft International Standards
adopted by the technical committees are circulated to the member bodies for voting. Publication as an
International Standard requires approval by at least 75 % of the member bodies casting a vote.
In exceptional circumstances, when a technical committee has collected data of a different kind from that
which is normally published as an International Standard (“state of the art”, for example), it may decide by a
simple majority vote of its participating members to publish a Technical Report. A Technical Report is entirely
informative in nature and does not have to be reviewed until the data it provides are considered to be no
longer valid or useful.
Attention is drawn to the possibility that some of the elements of this document may be the subject of patent
rights. ISO shall not be held responsible for identifying any or all such patent rights.
ISO/TR 12134 was prepared by Technical Committee ISO/TC 45, Rubber and rubber products, Subcommittee
SC 2, Testing and analysis.
iv © ISO 2010 – All rights reserved
Introduction
[2]
It is now a requirement that laboratories accredited to ISO/IEC 17025 take into account the measurement or
calibration uncertainties associated with any work they have performed when assessing conformity of the
material or product to a given specification. As there is an increasing requirement for traceability of
measurement, more and more technical staff find themselves faced with the task of carrying out an
uncertainty evaluation on their reported measurement results.
[1]
Currently, the primary source document for guidance on measurement uncertainty is ISO/IEC Guide 98-3 , to
which the interested reader is referred for details.
[5]
Eurolab Technical Report No. 1/2007 is a very useful guide to alternative approaches to uncertainty
[3]
evaluation, whilst ISO/TS 21748 gives guidance on the use of repeatability/reproducibility data for
uncertainty estimation.
TECHNICAL REPORT ISO/TR 12134:2010(E)
Rubber — Estimation of uncertainty for test methods —
Non-functional parameters
1 Scope
This Technical Report provides guidance to scientists, engineers and technicians, working in the field of
rubber materials and products, to supplement ISO/IEC Guide 98-3 and to provide additional guidance in
situations where functional relationships between input quantities (such as temperature, strain rate and time)
and derived output quantities (such as tensile strength and compression set) are unknown and where no other
guidance is available.
This Technical Report provides a summary of the classical approach that is taken in the preparation of
uncertainty budgets and provides in Clause 4 a list of selected test methods and, for each, an indication of the
factors that will make a contribution to the uncertainty budget. Clause 5 discusses how “non-functional” factors
can be taken into account in the classical approach.
2 Summary of preparing an uncertainty budget
The analysis of most measurement uncertainties can be reduced to a step-by-step procedure. This procedure
comprises the following steps:
a) define the functional relationship between the input measurements and the measurand (the quantity
being measured, e.g. tensile strength);
b) compile a list of all the factors that are expected to contribute to the uncertainty in the measurand;
c) for each of the uncertainty sources, estimate the magnitude of the uncertainty;
d) from the relationship defined in step a), estimate the effect that each functional quantity has on the
measurement result, using direct mathematical techniques;
e) for the non-functional quantities, estimate their effect through other sources, such as secondary
experimentation or expert opinion;
f) combine the uncertainties in all the input quantities to obtain the uncertainty in the output quantity;
g) express the expanded uncertainty as an interval about the measurement result within which it is
anticipated, with a stated level of confidence, that the measurand will lie.
3 The elements of the uncertainty budget
Taking each of the seven steps in turn:
a) The functional relationship between the measurand and its input variables is given in the International
Standard for the test method being examined. For example, the functional relationship for tensile
strength, σ, is given by:
F
σ =
wt
where
F is the force at break;
w is the test piece width;
t the test piece thickness.
b) See Clause 4 for listings of factors that can be expected to have some influence on the result of the test.
c) Estimating the magnitude of the uncertainty, u(x), is often the most difficult part in preparing the
uncertainty budget. Two main types are identified in ISO/IEC Guide 98-3.
Type A uncertainties relate to random effects. Typically, the type A evaluation will be applied to the
material property data that has been determined by the test method, e.g. the tensile strength,
compression set or volume swell. Such data will generally be normally distributed about their mean (or
sufficiently close to a normal distribution for the deviation to be insignificant) so that an estimate of the
standard uncertainty can be deduced by means of the usual statistical procedures. The standard
uncertainty is given by the standard error of the mean.
The second, type B, relates to systematic effects and is applied to the analysis of such parameters as the
calibration of an instrument or the drift between calibrations. Such sources of uncertainty should be
evaluated on the basis of the information available, such as a calibration certificate, the manufacturer's
specifications or professional judgement and past experience. Part of that experience is in deciding what
kind of distribution the uncertainty will take. Often this is not a normal distribution, and rectangular or
sometimes triangular distributions are often encountered. Reference should be made to
ISO/IEC Guide 98-3 for further details, but in all cases the standard uncertainty is given by the standard
deviation of the distribution that has been chosen.
d) Once the standard uncertainty for each of the functional factors has been estimated, the sensitivity
coefficient for each must be found. This is the first derivative of the measurand with respect to the
parameter being considered. Thus, for tensile strength, the sensitivity coefficient, c, for the force is simply:
∂σ 1
c==
F
∂F wt
while for the width it is:
∂−σ F
c==
w
∂w
wt
An alternative to formal differentiation
...


Questions, Comments and Discussion
Ask us and Technical Secretary will try to provide an answer. You can facilitate discussion about the standard in here.
Loading comments...