ISO 16129:2018
(Main)Surface chemical analysis — X-ray photoelectron spectroscopy — Procedures for assessing the day-to-day performance of an X-ray photoelectron spectrometer
Surface chemical analysis — X-ray photoelectron spectroscopy — Procedures for assessing the day-to-day performance of an X-ray photoelectron spectrometer
This document is designed to allow the user to assess, on a regular basis, several key parameters of an X‑ray photoelectron spectrometer. It is not intended to provide an exhaustive performance check, but instead provides a rapid set of tests that can be conducted frequently. Aspects of instrument behaviour covered by this document include the vacuum, measurements of spectra of conductive or non-conductive test specimens and the current state of the X‑ray source. Other important aspects of the instrument performance (e.g. lateral resolution) fall outside the scope of this document. The document is intended for use with commercial X‑ray photoelectron spectrometers equipped with a monochromated Al Kα X‑ray source or with an unmonochromated Al or Mg Kα X‑ray source.
Analyse chimique des surfaces — Spectroscopie de photoélectrons X — Modes opératoires d'évaluation de la performance au jour le jour d'un spectromètre de photoélectrons X
General Information
Relations
Standards Content (Sample)
INTERNATIONAL ISO
STANDARD 16129
Second edition
2018-11
Surface chemical analysis — X-ray
photoelectron spectroscopy —
Procedures for assessing the day-
to-day performance of an X-ray
photoelectron spectrometer
Analyse chimique des surfaces — Spectroscopie de photoélectrons X
— Modes opératoires d'évaluation de la performance au jour le jour
d'un spectromètre de photoélectrons X
Reference number
©
ISO 2018
© ISO 2018
All rights reserved. Unless otherwise specified, or required in the context of its implementation, no part of this publication may
be reproduced or utilized otherwise in any form or by any means, electronic or mechanical, including photocopying, or posting
on the internet or an intranet, without prior written permission. Permission can be requested from either ISO at the address
below or ISO’s member body in the country of the requester.
ISO copyright office
CP 401 • Ch. de Blandonnet 8
CH-1214 Vernier, Geneva
Phone: +41 22 749 01 11
Fax: +41 22 749 09 47
Email: copyright@iso.org
Website: www.iso.org
Published in Switzerland
ii © ISO 2018 – All rights reserved
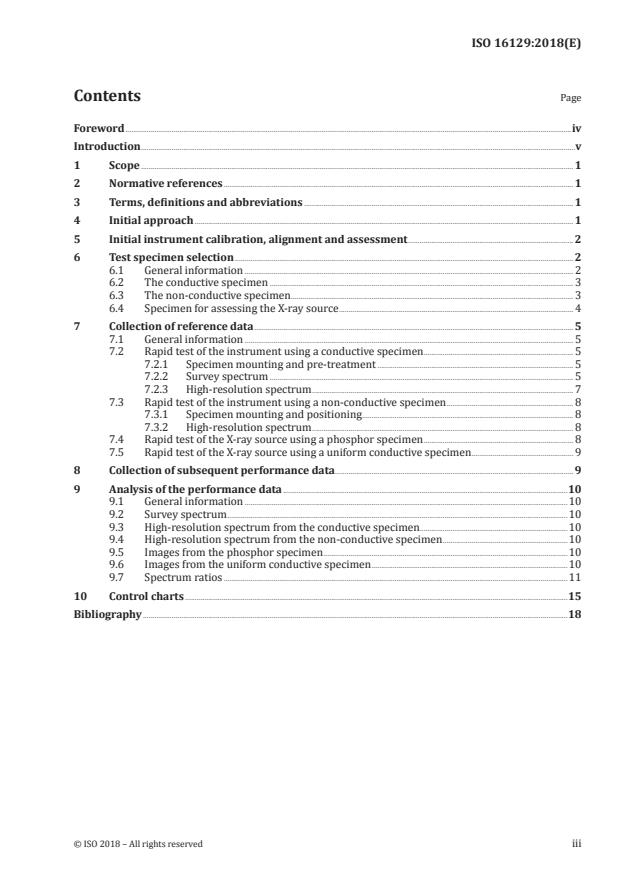
Contents Page
Foreword .iv
Introduction .v
1 Scope . 1
2 Normative references . 1
3 Terms, definitions and abbreviations . 1
4 Initial approach . 1
5 Initial instrument calibration, alignment and assessment . 2
6 Test specimen selection . 2
6.1 General information . 2
6.2 The conductive specimen . 3
6.3 The non-conductive specimen . 3
6.4 Specimen for assessing the X-ray source . 4
7 Collection of reference data . 5
7.1 General information . 5
7.2 Rapid test of the instrument using a conductive specimen . 5
7.2.1 Specimen mounting and pre-treatment . 5
7.2.2 Survey spectrum . 5
7.2.3 High-resolution spectrum . 7
7.3 Rapid test of the instrument using a non-conductive specimen . 8
7.3.1 Specimen mounting and positioning . 8
7.3.2 High-resolution spectrum . 8
7.4 Rapid test of the X-ray source using a phosphor specimen . 8
7.5 Rapid test of the X-ray source using a uniform conductive specimen . 9
8 Collection of subsequent performance data . 9
9 Analysis of the performance data .10
9.1 General information .10
9.2 Survey spectrum .10
9.3 High-resolution spectrum from the conductive specimen.10
9.4 High-resolution spectrum from the non-conductive specimen .10
9.5 Images from the phosphor specimen .10
9.6 Images from the uniform conductive specimen .10
9.7 Spectrum ratios .11
10 Control charts .15
Bibliography .18
Foreword
ISO (the International Organization for Standardization) is a worldwide federation of national standards
bodies (ISO member bodies). The work of preparing International Standards is normally carried out
through ISO technical committees. Each member body interested in a subject for which a technical
committee has been established has the right to be represented on that committee. International
organizations, governmental and non-governmental, in liaison with ISO, also take part in the work.
ISO collaborates closely with the International Electrotechnical Commission (IEC) on all matters of
electrotechnical standardization.
The procedures used to develop this document and those intended for its further maintenance are
described in the ISO/IEC Directives, Part 1. In particular, the different approval criteria needed for the
different types of ISO documents should be noted. This document was drafted in accordance with the
editorial rules of the ISO/IEC Directives, Part 2 (see www .iso .org/directives).
Attention is drawn to the possibility that some of the elements of this document may be the subject of
patent rights. ISO shall not be held responsible for identifying any or all such patent rights. Details of
any patent rights identified during the development of the document will be in the Introduction and/or
on the ISO list of patent declarations received (see www .iso .org/patents).
Any trade name used in this document is information given for the convenience of users and does not
constitute an endorsement.
For an explanation of the voluntary nature of standards, the meaning of ISO specific terms and
expressions related to conformity assessment, as well as information about ISO's adherence to the
World Trade Organization (WTO) principles in the Technical Barriers to Trade (TBT) see www .iso
.org/iso/foreword .html.
This document was prepared by Technical Committee ISO/TC 201, Surface chemical analysis,
Subcommittee SC 7, Electron spectroscopies.
This second edition cancels and replaces the first edition (ISO 16129:2012), which has been technically
revised.
Any feedback or questions on this document should be directed to the user’s national standards body. A
complete listing of these bodies can be found at www .iso .org/members .html.
iv © ISO 2018 – All rights reserved
Introduction
XPS instruments are complex, and unsatisfactory performance is not always obvious to an operator. It
is therefore necessary to provide a test for the correct operation of the system that can be performed
regularly and frequently without interfering excessively with the normal work of the laboratory.
A full diagnostic test can require many hours or even days; such a test can be appropriate only when
the instrument is known to have a fault that needs to be remedied or following a major maintenance
procedure. Data acquired before a problem is uncovered become suspect if the spectrometer has not
been routinely tested, leading to a loss of confidence in those data. If a regular check of the instrument
is made, changes in performance can be monitored and corrective action taken in good time to ensure
that the data supplied are fit for purpose. In the event that a serious fault is uncovered, then only the
data since the last check can be in doubt and need to be repeated.
The purpose of this document is to provide users with a procedure which is not excessively time-
consuming so that it can be completed on a regular and frequent basis – daily if required. The user will
then gain an awareness of the current characteristics of the instrument so that a decision can be made
as to whether or not a more complete and time-consuming action is required to return the instrument
to a satisfactory level of performance.
This procedure is intended to be applied to an XPS instrument that has been correctly calibrated and
aligned in accordance with ISO standards or manufacturer’s instructions. It is designed to highlight
aspects of the instrument’s characteristics that differ significantly from those that were measured
immediately following the calibration procedure. The procedure does not show how the instrument can
be returned to its original state. Instead, it guides the user to possible areas of concern. The procedure
provides data that can be used in control charts, allowing trends to be observed and acted upon before
data quality deteriorates to an unacceptable level for the needs of the analyst.
INTERNATIONAL STANDARD ISO 16129:2018(E)
Surface chemical analysis — X-ray photoelectron
spectroscopy — Procedures for assessing the day-to-day
performance of an X-ray photoelectron spectrometer
1 Scope
This document is designed to allow the user to assess, on a regular basis, several key parameters of an
X-ray photoelectron spectrometer. It is not intended to provide an exhaustive performance check, but
instead provides a rapid set of tests that can be conducted frequently.
Aspects of instrument behaviour covered by this document include the vacuum, measurements of
spectra of conductive or non-conductive test specimens and the current state of the X-ray source. Other
important aspects of the instrument performance (e.g. lateral resolution) fall outside the scope of this
document.
The document is intended for use with commercial X-ray photoelectron spectrometers equipped with a
monochromated Al Kα X-ray source or with an unmonochromated Al or Mg Kα X-ray source.
2 Normative references
The following documents are referred to in the text in such a way that some or all of their content
constitutes requirements of this document. For dated references, only the edition cited applies. For
undated references, the latest edition of the referenced document (including any amendments) applies.
ISO 18115-1, Surface chemical analysis — Vocabulary — Part 1: General terms and terms used in
spectroscopy
3 Terms, definitions and abbreviations
For the purposes of this document, the terms and definitions given in ISO 18115-1 apply.
ISO and IEC maintain terminological databases for use in standardization at the following addresses:
— ISO Online browsing platform: available at https: //www .iso .org/obp
— IEC Electropedia: available at http: //www .electropedia .org/
The following abbreviations are used:
FWHM full width at half maximum
PET poly(ethylene terephthalate)
PTFE polytetrafluoroethylene
XPS X-ray photoelectron spectroscopy
4 Initial approach
Most instruments are fitted with a vacuum gauge or gauges. These shall be read frequently and the
reasons for large variations understood. A large increase in the pressure can be due to the properties
of a test specimen inside the instrument, a fault in the pumping system, an increase in the temperature
of the vacuum system or a leak.
Similarly, most instruments have status indicators, either for the system as a whole or for sub-systems
or modules. Examples of such indicators include water flow rate, data system communications status
and electrical power. These can be visible as part of the instrument hardware itself
...


Questions, Comments and Discussion
Ask us and Technical Secretary will try to provide an answer. You can facilitate discussion about the standard in here.