ISO 16063-32:2016
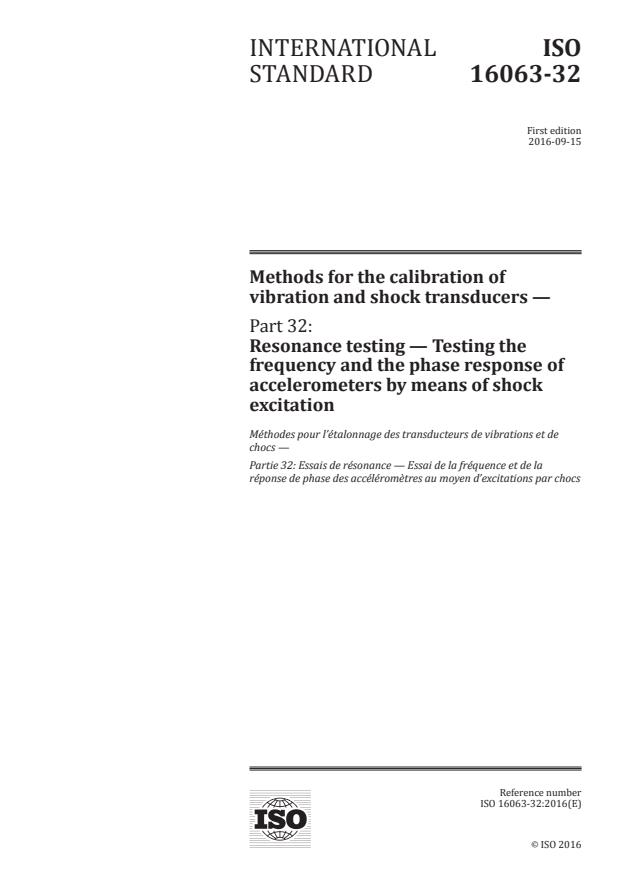
(Main)Methods for the calibration of vibration and shock transducers — Part 32: Resonance testing — Testing the frequency and the phase response of accelerometers by means of shock excitation
Methods for the calibration of vibration and shock transducers — Part 32: Resonance testing — Testing the frequency and the phase response of accelerometers by means of shock excitation
ISO 16063-32:2016 lays down detailed specification for instruments and procedures of testing the frequency and the phase response of accelerometers by means of shock excitation. It applies to the accelerometers of the piezoelectric, piezoresistive and variable capacitance types with the damping ratio less than critical and in the frequency range up to 150 kHz. The method presumes that the frequency and the phase responses of the accelerometer under test gained by this method are the best possible characteristics for the mounted accelerometer on the condition that the recommendations for mechanical mounting of accelerometer stated in ISO 5348 are fulfilled and that the mass of the reference shock ball exceeds at least three times the mass of the accelerometer under test. Phase response of the accelerometer under test gained by this method is considered to be some "virtual" characteristic of accelerometer presuming that there is zero phase shift between the input and output signals at a frequency of 0 Hz. NOTE 1 It is intended that the user be aware that for the same accelerometer in the field application, the frequency and the phase responses might be different, depending on the mass and compliance of the test structure and the method of mounting. The method allows just a qualitative evaluation of the frequency and the phase response of accelerometers. NOTE 2 It is intended that the user does not try to get better resolution of the initial parts of the frequency and phase responses of the accelerometer under test than the dynamic range of the adequate characteristic provides it. The best use of the frequency and the phase responses of the accelerometer gained by this method are to get the best fit lines for the initial parts of the mentioned characteristics.
Méthodes pour l'étalonnage des transducteurs de vibrations et de chocs — Partie 32: Essais de résonance — Essai de la fréquence et de la réponse de phase des accéléromètres au moyen d'excitations par chocs
General Information
- Status
- Published
- Publication Date
- 23-Aug-2016
- Technical Committee
- ISO/TC 108 - Mechanical vibration, shock and condition monitoring
- Drafting Committee
- ISO/TC 108/WG 34 - Calibration of vibration and shock transducers
- Current Stage
- 9093 - International Standard confirmed
- Start Date
- 17-Dec-2021
- Completion Date
- 12-Feb-2026
Relations
- Effective Date
- 28-Feb-2009
- Effective Date
- 28-Feb-2009
Overview - ISO 16063-32:2016 (Resonance testing, accelerometer calibration)
ISO 16063-32:2016 specifies instruments and procedures for resonance testing of accelerometers by means of shock excitation. The standard applies to piezoelectric, piezoresistive and variable‑capacitance accelerometers with damping ratios less than critical, and covers frequency and phase response assessment up to 150 kHz. It provides practical requirements for setup, reference elements and data processing to obtain the best possible mounted accelerometer characteristics when mechanical mounting follows ISO 5348.
Key topics and technical requirements
- Scope and limits
- Frequency range: up to 150 kHz.
- Applicable transducer types: piezoelectric, piezoresistive, variable capacitance (damping < critical).
- Method provides a qualitative evaluation of frequency and phase response; field responses may differ due to mounting and structure mass.
- Reference shock ball
- Hardened and polished steel (≥ HRC50); flat threaded mounting surface.
- Mass of reference shock ball must be at least 3× the mass of the accelerometer under test.
- Typical ball diameters recommended (practical examples): D = 32 mm (for <100 kHz) and D = 19 mm (for <150 kHz).
- Measurement and uncertainty
- Recommended minimum frequency-domain resolution: 400 lines.
- Typical standard uncertainty for resonance frequency ≈ 0.5% (depends on time-record length).
- Damping ratio (typical piezoelectric ≈ 0.01) standard uncertainty ≈ 1% with ~80 dB dynamic range.
- Phase resolution example: ~5° with 40 dB phase noise suppression.
- Apparatus & environment
- Key items: impact/guide tube, signal analyser, conditioning amplifier, reference shock ball.
- Environmental guidance: room temperature 23 ± 5 °C, relative humidity < 90%.
- Data interpretation
- Phase response is treated as a “virtual” characteristic (zero phase shift assumed at 0 Hz).
- Best used to derive fit lines for initial parts of frequency/phase characteristics.
Applications and users
- Uses: resonance testing, frequency response and phase response checks during production, laboratory calibration, R&D and quality assurance of accelerometers and vibration sensors.
- Who benefits: calibration laboratories, test houses, manufacturers of accelerometers, metrology institutes, and engineers performing sensor qualification for high‑frequency or shock environments.
Related standards
- ISO 5348 - Mechanical mounting of accelerometers (referenced).
- Other parts of ISO 16063 series cover primary calibration methods and related test procedures (e.g., ISO 16063‑1, ‑21, ‑22, ‑31).
Keywords: ISO 16063-32, resonance testing, accelerometer calibration, frequency response, phase response, shock excitation, reference shock ball, piezoelectric accelerometers.
Get Certified
Connect with accredited certification bodies for this standard

BSMI (Bureau of Standards, Metrology and Inspection)
Taiwan's standards and inspection authority.
Sponsored listings
Frequently Asked Questions
ISO 16063-32:2016 is a standard published by the International Organization for Standardization (ISO). Its full title is "Methods for the calibration of vibration and shock transducers — Part 32: Resonance testing — Testing the frequency and the phase response of accelerometers by means of shock excitation". This standard covers: ISO 16063-32:2016 lays down detailed specification for instruments and procedures of testing the frequency and the phase response of accelerometers by means of shock excitation. It applies to the accelerometers of the piezoelectric, piezoresistive and variable capacitance types with the damping ratio less than critical and in the frequency range up to 150 kHz. The method presumes that the frequency and the phase responses of the accelerometer under test gained by this method are the best possible characteristics for the mounted accelerometer on the condition that the recommendations for mechanical mounting of accelerometer stated in ISO 5348 are fulfilled and that the mass of the reference shock ball exceeds at least three times the mass of the accelerometer under test. Phase response of the accelerometer under test gained by this method is considered to be some "virtual" characteristic of accelerometer presuming that there is zero phase shift between the input and output signals at a frequency of 0 Hz. NOTE 1 It is intended that the user be aware that for the same accelerometer in the field application, the frequency and the phase responses might be different, depending on the mass and compliance of the test structure and the method of mounting. The method allows just a qualitative evaluation of the frequency and the phase response of accelerometers. NOTE 2 It is intended that the user does not try to get better resolution of the initial parts of the frequency and phase responses of the accelerometer under test than the dynamic range of the adequate characteristic provides it. The best use of the frequency and the phase responses of the accelerometer gained by this method are to get the best fit lines for the initial parts of the mentioned characteristics.
ISO 16063-32:2016 lays down detailed specification for instruments and procedures of testing the frequency and the phase response of accelerometers by means of shock excitation. It applies to the accelerometers of the piezoelectric, piezoresistive and variable capacitance types with the damping ratio less than critical and in the frequency range up to 150 kHz. The method presumes that the frequency and the phase responses of the accelerometer under test gained by this method are the best possible characteristics for the mounted accelerometer on the condition that the recommendations for mechanical mounting of accelerometer stated in ISO 5348 are fulfilled and that the mass of the reference shock ball exceeds at least three times the mass of the accelerometer under test. Phase response of the accelerometer under test gained by this method is considered to be some "virtual" characteristic of accelerometer presuming that there is zero phase shift between the input and output signals at a frequency of 0 Hz. NOTE 1 It is intended that the user be aware that for the same accelerometer in the field application, the frequency and the phase responses might be different, depending on the mass and compliance of the test structure and the method of mounting. The method allows just a qualitative evaluation of the frequency and the phase response of accelerometers. NOTE 2 It is intended that the user does not try to get better resolution of the initial parts of the frequency and phase responses of the accelerometer under test than the dynamic range of the adequate characteristic provides it. The best use of the frequency and the phase responses of the accelerometer gained by this method are to get the best fit lines for the initial parts of the mentioned characteristics.
ISO 16063-32:2016 is classified under the following ICS (International Classification for Standards) categories: 17.160 - Vibrations, shock and vibration measurements. The ICS classification helps identify the subject area and facilitates finding related standards.
ISO 16063-32:2016 has the following relationships with other standards: It is inter standard links to ISO 5347-14:1993, ISO 5347-22:1997. Understanding these relationships helps ensure you are using the most current and applicable version of the standard.
ISO 16063-32:2016 is available in PDF format for immediate download after purchase. The document can be added to your cart and obtained through the secure checkout process. Digital delivery ensures instant access to the complete standard document.
Standards Content (Sample)
INTERNATIONAL ISO
STANDARD 16063-32
First edition
2016-09-15
Methods for the calibration of
vibration and shock transducers —
Part 32:
Resonance testing — Testing the
frequency and the phase response of
accelerometers by means of shock
excitation
Méthodes pour l’étalonnage des transducteurs de vibrations et de
chocs —
Partie 32: Essais de résonance — Essai de la fréquence et de la
réponse de phase des accéléromètres au moyen d’excitations par chocs
Reference number
©
ISO 2016
© ISO 2016, Published in Switzerland
All rights reserved. Unless otherwise specified, no part of this publication may be reproduced or utilized otherwise in any form
or by any means, electronic or mechanical, including photocopying, or posting on the internet or an intranet, without prior
written permission. Permission can be requested from either ISO at the address below or ISO’s member body in the country of
the requester.
ISO copyright office
Ch. de Blandonnet 8 • CP 401
CH-1214 Vernier, Geneva, Switzerland
Tel. +41 22 749 01 11
Fax +41 22 749 09 47
copyright@iso.org
www.iso.org
ii © ISO 2016 – All rights reserved
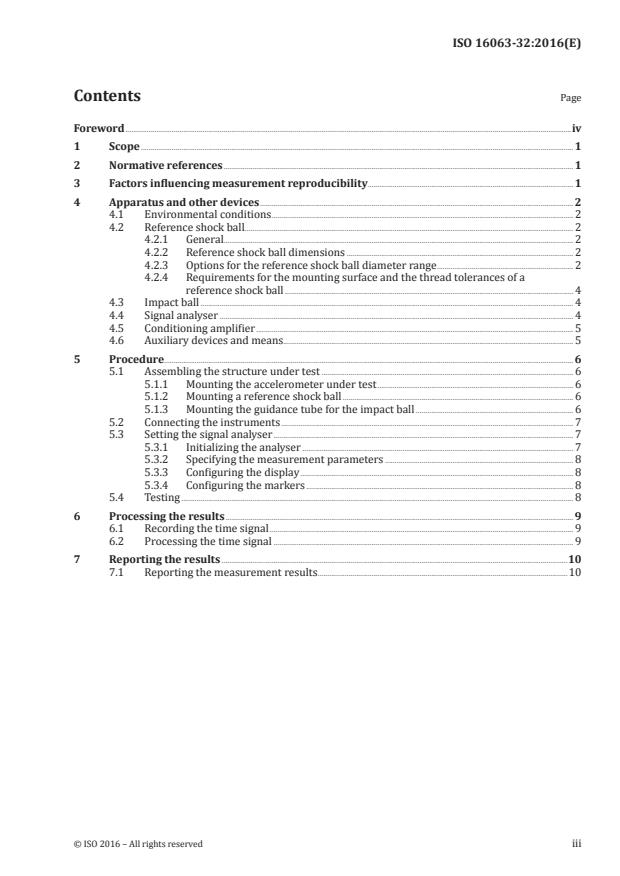
Contents Page
Foreword .iv
1 Scope . 1
2 Normative references . 1
3 Factors influencing measurement reproducibility . 1
4 Apparatus and other devices . 2
4.1 Environmental conditions . 2
4.2 Reference shock ball . 2
4.2.1 General. 2
4.2.2 Reference shock ball dimensions . 2
4.2.3 Options for the reference shock ball diameter range . 2
4.2.4 Requirements for the mounting surface and the thread tolerances of a
reference shock ball . 4
4.3 Impact ball . 4
4.4 Signal analyser . 4
4.5 Conditioning amplifier . 5
4.6 Auxiliary devices and means. 5
5 Procedure. 6
5.1 Assembling the structure under test . 6
5.1.1 Mounting the accelerometer under test . 6
5.1.2 Mounting a reference shock ball . 6
5.1.3 Mounting the guidance tube for the impact ball . 6
5.2 Connecting the instruments . 7
5.3 Setting the signal analyser . 7
5.3.1 Initializing the analyser . 7
5.3.2 Specifying the measurement parameters . 8
5.3.3 Configuring the display . 8
5.3.4 Configuring the markers . 8
5.4 Testing . 8
6 Processing the results . 9
6.1 Recording the time signal . 9
6.2 Processing the time signal . 9
7 Reporting the results .10
7.1 Reporting the measurement results .10
Foreword
ISO (the International Organization for Standardization) is a worldwide federation of national standards
bodies (ISO member bodies). The work of preparing International Standards is normally carried out
through ISO technical committees. Each member body interested in a subject for which a technical
committee has been established has the right to be represented on that committee. International
organizations, governmental and non-governmental, in liaison with ISO, also take part in the work.
ISO collaborates closely with the International Electrotechnical Commission (IEC) on all matters of
electrotechnical standardization.
The procedures used to develop this document and those intended for its further maintenance are
described in the ISO/IEC Directives, Part 1. In particular the different approval criteria needed for the
different types of ISO documents should be noted. This document was drafted in accordance with the
editorial rules of the ISO/IEC Directives, Part 2 (see www.iso.org/directives).
Attention is drawn to the possibility that some of the elements of this document may be the subject of
patent rights. ISO shall not be held responsible for identifying any or all such patent rights. Details of
any patent rights identified during the development of the document will be in the Introduction and/or
on the ISO list of patent declarations received (see www.iso.org/patents).
Any trade name used in this document is information given for the convenience of users and does not
constitute an endorsement.
For an explanation on the meaning of ISO specific terms and expressions related to conformity assessment,
as well as information about ISO’s adherence to the World Trade Organization (WTO) principles in the
Technical Barriers to Trade (TBT) see the following URL: www.iso.org/iso/foreword.html.
The committee responsible for this document is ISO/TC 108, Mechanical vibration, shock and condition
monitoring, Subcommittee SC 3, Use and calibration of vibration and shock measuring instruments.
This first edition of ISO 16063-32 cancels and replaces the first edition of ISO 5347-14:1993, which has
been technically revised.
ISO 16063 consists of the following parts, under the general title Methods for the calibration of vibration
and shock transducers:
— Part 1: Basic concepts
— Part 11: Primary vibration calibration by laser interferometry
— Part 12: Primary vibration calibration by the reciprocity method
— Part 13: Primary shock calibration using laser interferometry
— Part 15: Primary angular vibration calibration by laser interferometry
— Part 16: Calibration by Earth’s gravitation
— Part 17: Primary calibration by centrifuge
— Part 21: Vibration calibration by comparison to a reference transducer
— Part 22: Shock calibration by comparison to a reference transducer
— Part 31: Testing of transverse vibration sensitivity
— Part 32: Resonance testing — Testing the frequency and the phase response of accelerometers by means
of shock excitation
— Part 41: Calibration of laser vibrometers
— Part 42: Calibration of seismometers with high accuracy using acceleration of gravity
iv © ISO 2016 – All rights reserved
— Part 43: Calibration of accelerometers by model-based parameter identification
The following parts are under preparation:
— Part 33: Testing of magnetic field sensitivity
INTERNATIONAL STANDARD ISO 16063-32:2016(E)
Methods for the calibration of vibration and shock
transducers —
Part 32:
Resonance testing — Testing the frequency and the phase
response of accelerometers by means of shock excitation
1 Scope
This part of ISO 16063 lays down detailed specification for instruments and procedures of testing the
frequency and the phase response of accelerometers by means of shock excitation. It applies to the
accelerometers of the piezoelectric, piezoresistive and variable capacitance types with the damping
ratio less than critical and in the frequency range up to 150 kHz.
The method presumes that the frequency and the phase responses of the accelerometer under test
gained by this method are the best possible characteristics for the mounted accelerometer on the
condition that the recommendations for mechanical mounting of accelerometer stated in ISO 5348
are fulfilled and that the mass of the reference shock ball exceeds at least three times the mass of the
accelerometer under test.
Phase response of the accelerometer under test gained by this method is considered to be some “virtual”
characteristic of accelerometer presuming that there is zero phase shift between the input and output
signals at a frequency of 0 Hz.
NOTE 1 It is intended that the user be aware that for the same accelerometer in the field application, the
frequency and the phase responses might be different, depending on the mass and compliance of the test
structure and the method of mounting. The method allows just a qualitative evaluation of the frequency and the
phase response of accelerometers.
NOTE 2 It is intended that the user does not try to get better resolution of the initial parts of the frequency and
phase responses of the accelerometer under test than the dynamic range of the adequate characteristic provides
it. The best use of the frequency and the phase responses of the accelerometer gained by this method are to get
the best fit lines for the initial parts of the mentioned characteristics.
2 Normative references
The following documents, in whole or in part, are normatively referenced in this document and are
indispensable for its application. For dated references, only the edition cited applies. For updated
references, the latest edition of the referenced document (including any amendments) applies.
ISO 2041, Mechanical vibration, shock and condition monitoring — Vocabulary
ISO 5347-22, Methods for the calibration of vibration and shock pick-ups — Part 22: Accelerometer
resonance testing — General methods
ISO 5348, Mechanical vibration and shock — Mechanical mounting of accelerometers
3 Factors influencing measurement reproducibility
The limits of the uncertainty of the frequency response measurement shall be as follows.
For the resonance frequency of the accelerometer under test, the absolute uncertainty is equal to
the frequency analysis resolution and is an inverse value relative to the time-record length of the
accelerometer signal. The recommended minimum number of lines in the frequency domain for this
method is 400. Assuming that the resonance frequency is in the middle of the frequency span, the
standard uncertainty for the resonance frequency is about 0,5 %.
NOTE 1 This uncertainty is presumed to have a uniform distribution within the frequency resolution band.
For the damping ratio of the accelerometer under test, the uncertainty is dependent on the signal-to-
noise ratio of the measurement in a time domain.
Assuming that the measurements are carried out so that the maximum signal value is close to
the upper limit of the dynamic range of measuring instrument and that the typical damping ratio
for the piezoelectric accelerometers is about 0,01, the standard uncertainty for the damping ratio
measurements is about 1 %.
NOTE 2 The signal analyser used for the damping ratio measurements is supposed to have at least an 80 dB
dynamic range.
For the phase response of the accelerometer under test, the absolute uncertainty is equal to the
amplitude resolution in phase; that means resolution in the amplitude of the measuring instrument,
corrected by the phase noise suppression procedure for the unwrapped phase. For a typical 40 dB phase
noise suppression, the resulting resolution in phase appears to be about 1 % or about 5° in phase domain.
The mentioned uncertainties are the lowest values provided by the instruments, used for the acquisition
of the time signal and the frequency analysis. The expanded uncertainties can be larger, depending on
the complexity of the frequency response of the accelerometer under test.
NOTE 3 To prove the robustness of the measurements of the resonance frequency and damping ratio of the
accelerometer under test, multiple measurements can be carried out.
4 Apparatus and other devices
4.1 Environmental conditions
The equipment shall be capable of maintaining the following environmental conditions:
— room temperature (23 ± 5) °C;
— relative humidity should be less than 90 %.
4.2 Reference shock ball
4.2.1 General
A reference shock ball for mounting an accelerometer under test shall be made of steel hardened to
more than HRC50 and polished.
NOTE A typical ball from a ball bearing is very convenient to answer this requirement.
4.2.2 Reference shock ball dimensions
The reference shock ball shall have a flat surface with a thread to mount the accelerometer under test
(see Figure 1).
4.2.3 Options for the reference shock ball diameter range
The requirements related to the actual dimensions to the shock balls are not very strict.
On one hand, the diameter of the shock ball shall be small enough to provide its highest possible natural
frequency.
2 © ISO 2016 – All rights reserved
On the other hand, the diameter of the shock ball shall be large enough to get a mass of the reference
shock ball that exceeds three times the mass of the accelerometer under test.
From the practical point of view for the majority of the accelerometers, the diameters of two balls are
preferable:
— a ball with the dimensions D = 32 mm, B = 20 mm, L = 10 mm for the accelerometers with the natural
frequencies lower than 100 kHz;
— a ball with the dimensions D =
...


Questions, Comments and Discussion
Ask us and Technical Secretary will try to provide an answer. You can facilitate discussion about the standard in here.
Loading comments...