ISO 1920-3:2004
(Main)Testing of concrete — Part 3: Making and curing test specimens
Testing of concrete — Part 3: Making and curing test specimens
ISO 1920-3:2004 specifies the shape and dimensions of concrete test specimens for strength tests and the methods of making and curing these test specimens.
Essais du béton — Partie 3: Confection et prise des éprouvettes
General Information
- Status
- Withdrawn
- Publication Date
- 30-Sep-2004
- Withdrawal Date
- 30-Sep-2004
- Technical Committee
- ISO/TC 71/SC 1 - Test methods for concrete
- Drafting Committee
- ISO/TC 71/SC 1 - Test methods for concrete
- Current Stage
- 9599 - Withdrawal of International Standard
- Start Date
- 20-Nov-2019
- Completion Date
- 12-Feb-2026
Relations
- Effective Date
- 03-Sep-2016
- Effective Date
- 15-Apr-2008
- Effective Date
- 15-Apr-2008
Get Certified
Connect with accredited certification bodies for this standard

ICC Evaluation Service
Building products evaluation and certification.

QAI Laboratories
Building and construction product testing and certification.

Aboma Certification B.V.
Specialized in construction, metal, and transport sectors.
Sponsored listings
Frequently Asked Questions
ISO 1920-3:2004 is a standard published by the International Organization for Standardization (ISO). Its full title is "Testing of concrete — Part 3: Making and curing test specimens". This standard covers: ISO 1920-3:2004 specifies the shape and dimensions of concrete test specimens for strength tests and the methods of making and curing these test specimens.
ISO 1920-3:2004 specifies the shape and dimensions of concrete test specimens for strength tests and the methods of making and curing these test specimens.
ISO 1920-3:2004 is classified under the following ICS (International Classification for Standards) categories: 91.100.30 - Concrete and concrete products. The ICS classification helps identify the subject area and facilitates finding related standards.
ISO 1920-3:2004 has the following relationships with other standards: It is inter standard links to ISO 1920-3:2019, ISO 1920:1976, ISO 2736-2:1986. Understanding these relationships helps ensure you are using the most current and applicable version of the standard.
ISO 1920-3:2004 is available in PDF format for immediate download after purchase. The document can be added to your cart and obtained through the secure checkout process. Digital delivery ensures instant access to the complete standard document.
Standards Content (Sample)
INTERNATIONAL ISO
STANDARD 1920-3
First edition
2004-10-01
Testing of concrete —
Part 3:
Making and curing test specimens
Essais du béton —
Partie 3: Confection et prise des éprouvettes
Reference number
©
ISO 2004
PDF disclaimer
This PDF file may contain embedded typefaces. In accordance with Adobe's licensing policy, this file may be printed or viewed but
shall not be edited unless the typefaces which are embedded are licensed to and installed on the computer performing the editing. In
downloading this file, parties accept therein the responsibility of not infringing Adobe's licensing policy. The ISO Central Secretariat
accepts no liability in this area.
Adobe is a trademark of Adobe Systems Incorporated.
Details of the software products used to create this PDF file can be found in the General Info relative to the file; the PDF-creation
parameters were optimized for printing. Every care has been taken to ensure that the file is suitable for use by ISO member bodies. In
the unlikely event that a problem relating to it is found, please inform the Central Secretariat at the address given below.
© ISO 2004
All rights reserved. Unless otherwise specified, no part of this publication may be reproduced or utilized in any form or by any means,
electronic or mechanical, including photocopying and microfilm, without permission in writing from either ISO at the address below or
ISO's member body in the country of the requester.
ISO copyright office
Case postale 56 • CH-1211 Geneva 20
Tel. + 41 22 749 01 11
Fax + 41 22 749 09 47
E-mail copyright@iso.org
Web www.iso.org
Published in Switzerland
ii © ISO 2004 – All rights reserved
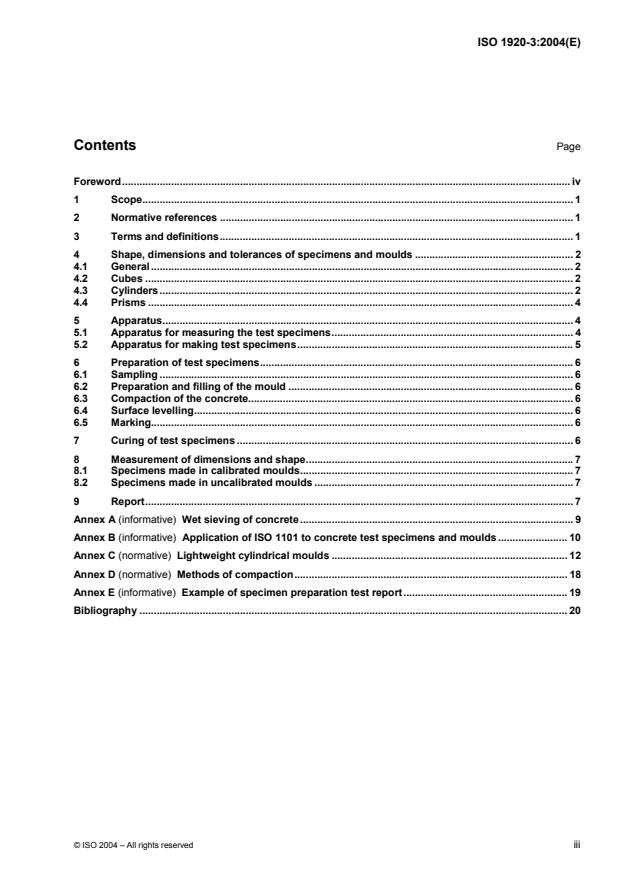
Contents Page
Foreword. iv
1 Scope. 1
2 Normative references . 1
3 Terms and definitions. 1
4 Shape, dimensions and tolerances of specimens and moulds . 2
4.1 General. 2
4.2 Cubes . 2
4.3 Cylinders. 2
4.4 Prisms . 4
5 Apparatus. 4
5.1 Apparatus for measuring the test specimens. 4
5.2 Apparatus for making test specimens. 5
6 Preparation of test specimens. 6
6.1 Sampling . 6
6.2 Preparation and filling of the mould . 6
6.3 Compaction of the concrete. 6
6.4 Surface levelling. 6
6.5 Marking. 6
7 Curing of test specimens . 6
8 Measurement of dimensions and shape.7
8.1 Specimens made in calibrated moulds. 7
8.2 Specimens made in uncalibrated moulds . 7
9 Report. 7
Annex A (informative) Wet sieving of concrete. 9
Annex B (informative) Application of ISO 1101 to concrete test specimens and moulds . 10
Annex C (normative) Lightweight cylindrical moulds . 12
Annex D (normative) Methods of compaction. 18
Annex E (informative) Example of specimen preparation test report. 19
Bibliography . 20
Foreword
ISO (the International Organization for Standardization) is a worldwide federation of national standards bodies
(ISO member bodies). The work of preparing International Standards is normally carried out through ISO
technical committees. Each member body interested in a subject for which a technical committee has been
established has the right to be represented on that committee. International organizations, governmental and
non-governmental, in liaison with ISO, also take part in the work. ISO collaborates closely with the
International Electrotechnical Commission (IEC) on all matters of electrotechnical standardization.
International Standards are drafted in accordance with the rules given in the ISO/IEC Directives, Part 2.
The main task of technical committees is to prepare International Standards. Draft International Standards
adopted by the technical committees are circulated to the member bodies for voting. Publication as an
International Standard requires approval by at least 75 % of the member bodies casting a vote.
Attention is drawn to the possibility that some of the elements of this document may be the subject of patent
rights. ISO shall not be held responsible for identifying any or all such patent rights.
ISO 1920-3 was prepared by Technical Committee ISO/TC 71, Concrete, reinforced concrete and prestressed
concrete, Subcommittee SC 1, Test methods for concrete.
This first edition of ISO 1920-3 cancels and replaces ISO 1920:1976 and ISO 2736-2:1986 which have been
technically revised.
ISO 1920 consists of the following parts, under the general title Testing of concrete:
Part 1: Sampling of fresh concrete
Part 2: Properties of fresh concrete
Part 3: Making and curing test specimens
Part 4: Strength of hardened concrete
Part 5: Properties of hardened concrete other than strength
Part 6: Sampling, preparing and testing of concrete cores
Part 7: Non-destructive tests on hardened of concrete
iv © ISO 2004 – All rights reserved
INTERNATIONAL STANDARD ISO 1920-3:2004(E)
Testing of concrete —
Part 3:
Making and curing test specimens
WARNING — Some concrete specimens might be too heavy for one person to carry and it is
necessary that appropriate means be arranged to carry them.
The use of vibrating equipment, such as vibration tables, can cause damage to joints and loss of
sensation due to nerve damage. It is necessary that moulds, density containers, etc. be clamped to
the table and not held in position using one's hands while they are being vibrated.
1 Scope
This part of ISO 1920 specifies the shape and dimensions of concrete test specimens for strength tests and
the methods of making and curing these test specimens.
2 Normative references
The following referenced documents are essential for the application of this document. For dated references,
only the edition cited applies. For undated references, the latest edition of the referenced document (including
any amendments) applies.
ISO 1920-1, Testing of concrete — Part 1: Sampling of fresh concrete
ISO 1101:1983, Technical drawings — Geometrical tolerancing — Tolerancing of form, orientation, location
and run-out — Generalities, definitions, symbols, indications on drawings
3 Terms and definitions
For the purpose of this document, the terms and definitions given in ISO 1101:1983 and the following apply.
3.1
nominal sizes of specimens
range of commonly used specimen sizes amongst which a preferred size is specified in this part of ISO 1920
3.2
designated size of specimens
specimen size selected and declared by the user of this part of ISO 1920 from amongst the permitted range of
nominal sizes
NOTE The size of specimens is designated in millimetres.
4 Shape, dimensions and tolerances of specimens and moulds
4.1 General
For each shape of test specimen, e.g. cube, cylinder, and prism, the basic dimensions, l or d, should be
chosen to be at least four times the maximum size of the aggregate in the concrete.
NOTE A procedure for wet screening as described in Annex A can be used when the maximum size of the aggregate
is larger than 1/4 of the basic dimension, l or d.
4.2 Cubes
4.2.1 Nominal sizes
The nominal sizes are as shown in Figure 1, where l (= l or l or l ) equals 100 mm, 120 mm, 150 mm,
1 2 3
200 mm, 250 mm or 300 mm.
Figure 1 — Nominal sizes of a cube
The preferred sizes are 100 mm and 150 mm.
4.2.2 Designated sizes
The designated size shall be selected from one of the nominal sizes given in 4.2.1.
4.2.3 Tolerances
The following tolerances apply.
a) The tolerance on the designated size shall be ± 0,5 %.
b) The tolerance on the flatness of the load-bearing surfaces shall be ± 0,000 5 l, expressed in millimetres.
c) The load-bearing surfaces shall be parallel to a tolerance of not greater than 1,0 mm.
d) The tolerance on the perpendicularity of the sides of the cube with reference to the base shall be
± 0,5 mm.
For the definitions of flatness, parallelism, perpendicularity and straightness, see Annex B.
4.3 Cylinders
4.3.1 Nominal sizes
The nominal sizes are as shown in Figure 2, where d equals 100 mm, 113 mm, 125 mm, 150 mm, 200 mm,
250 mm or 300 mm.
2 © ISO 2004 – All rights reserved
Figure 2 — Nominal sizes of a cylinder
NOTE The diameter of 113 mm corresponds to a load-bearing area of 10 000 mm .
The preferred sizes are 100 mm × 200 mm, 125 mm × 250 mm and 150 mm × 300 mm.
The height, h, of the cylinder shall be 2d except for specimens used for the tensile splitting test. In the latter
case, the height of the specimen shall be between d and 2d.
4.3.2 Designated sizes
Designated sizes may be selected within ± 10 % of a nominal size.
4.3.3 Tolerances
The following tolerances apply.
a) The tolerance on the designated diameter, d, shall be ± 0,5 %.
b) The tolerance on the flatness of the load-bearing surfaces shall be ± 0,000 5 d, expressed in millimetres,
except for cylinders tested by unbonded capping methods.
c) The tolerance on the flatness of the load-bearing surfaces of cylinders tested by unbonded capping
methods, such as sand box or elastomeric pads, shall be ± 0,02 d, expressed in millimetres.
d) The load-bearing surfaces shall be parallel to a tolerance of not greater than 1,0 millimetres.
e) The tolerance on the perpendicularity of the sides of the cylinder with reference to the end faces shall be
± 0,5 mm.
f) The tolerance on the height, h, of the cylinders shall be ± 5 %.
g) The straightness tolerance on any surface parallel to the centre line of the cylinders to be used in
compression tests shall be ± 0,5 mm.
h) The straightness tolerance of any surface parallel to the centre line of the cylinders to be used in tensile
splitting tests shall be ± 0,2 mm.
4.4 Prisms
4.4.1 Nominal sizes
The nominal sizes are as shown in Figure 3, where l (=l or l ) equals 100 mm, 150 mm, 200 mm, 250 mm or
1 2
300 mm and L W 3,5 l.
Figure 3 — Nominal sizes of prisms
The preferred sizes are l = 100 mm and L = 400 mm or l = 150 mm and L = 600 mm.
4.4.2 Designated sizes
The designated depth, l , and width, l , of prisms shall be selected from one of the nominal sizes given in
1 2
4.4.1.
The designated length, L, of prisms shall be not less than 3,5 l.
4.4.3 Tolerances
The following tolerances apply.
a) The tolerance on the designated depth, l , and width, l , shall be ± 0,5 %.
1 2
b) The tolerance on the designated length, L, shall be ± 5 %.
c) The load-bearing surfaces shall be parallel to a tolerance not greater than 1,0 mm.
d) The tolerance on the perpendicularity of the sides of the prism with reference to the base shall be
± 0,5 mm.
e) The tolerance on the straightness of the load-bearing area for specimens to be used for bending (flexural)
tests shall be ± 0,2 mm.
5 Apparatus
5.1 Apparatus for measuring the test specimens.
5.1.1 Callipers and/or rules, capable of establishing that the relevant dimensions of specimens or moulds
are within ± 0,5 % of the dimension.
5.1.2 Gauge, capable of establishing that the relevant flatness of specimens or moulds is within ± 0,000 5 l
or d.
5.1.3 Squares and gauges (or other similar means), capable of establishing the perpendicularity and
parallelism of specimens and moulds within ± 0,5 mm.
4 © ISO 2004 – All rights reserved
5.2 Apparatus for making test specimens
5.2.1 Moulds, capable of providing test specimens with the dimensions and tolerances that conform to this
part of ISO 1920.
The moulds shall be made of steel or cast-iron, which shall be the reference materials. If moulds are
manufactured from other materials, performance test data shall be available that demonstrate equivalence
with the steel or cast-iron moulds. Lightweight cylindrical moulds shall conform to the requirements in
Annex C.
Moulds shall be watertight and shall be non-absorbent.
Moulds shall be checked at intervals of not more than 1 year. If the mould is in calibration at time of use, the
checking of parallelism, verticality and flatness of specimens is not required, provided the size measurements
are within tolerance.
Individual moulds shall be identifiable. The designation should be an identification number either welded on
the mould body or securely tagged to the moulds.
5.2.2 Filling frame, fitted tightly to the mould and used to simplify the filling of the moulds.
The use of a filling frame is optional, but if used, this shall be stated in the test report (see Clause 9).
5.2.3 Means of compacting the concrete in the mould, which shall be one of the following:
5.2.3.1 internal vibrator, with a minimum frequency of 120 Hz (7 200 cycles per minutes). The diameter
of the tube shall not exceed one-quarter of the smallest dimension of the test specimen;
5.2.3.2 vibrating table, with a minimum frequency of 40 Hz (2 400 cycles per minute);
5.2.3.3 compacting rod, of circular cross-section, straight, made of steel, having a diameter of
16 mm ± 1 mm and a length of 600 mm ± 5 mm, and with rounded, roughly hemispherical, ends;
5.2.3.4 compacting bar, made of steel having a square or circular cross-section and a mass greater
than 1,8 kg.
5.2.4 General tools, including the following:
a) scoop, approximately 100 mm wide;
b) steel floats, two;
c) sampling tray, with minimum dimensions of 900 mm × 900 mm × 50 mm deep, of rigid construction and
made from a non-absorbent material not readily attacked by cement paste;
d) shovel, square-bladed;
e) release material, non-reactive;
f) mallet;
g) timer, having an accuracy of ± 1 s;
6 Preparation of test specimens
6.1 Sampling
The samples shall be taken in accordance with ISO 1920-1.
The samples shall be remixed before filling the mould. Concrete mixed in a laboratory need not be remixed.
6.2 Preparation and filling of the mould
Before filling, cover the inner surface of the mould with a thin film of mineral oil or any other material to prevent
the concrete from adhering to the mould.
Place the mould on a firm and level area.
If a filling frame is used, the amount of concrete used to fill the mould shall be such that a layer of concrete
remains in the filling frame after compaction. The thickness of this layer shall be 10 % to 20 % of the height of
the test specimen.
Place the concrete in the mould by means of a scoop, in such a way as to remove as much entrapped air as
possible (without significantly reducing the amount of entrained air, if present). The concrete shall be placed in
a minimum of two layers approximately equal in depth and each not more than 100 mm thick.
Use the quantity of material in the final layer that, as nearly as possible, is just sufficient to fill the container
without having to remove excess material. A small quantity of additional concrete may be added if necessary
and further compacted in order to just fill the container, but the removal of excess material should be avoided.
6.3 Compaction of the concrete
Compact the concrete immediately after each layer is placed in the moulds in such a way as to produce full
compaction of the concrete with neither excessive segregation nor laitance. Compact each layer by using one
of the methods described in Annex D.
6.4 Surface levelling
If a filling frame is used, remove it immediately after compaction.
Remove the concrete above the upper edge of the mould using the two steel floats brought together
...


Questions, Comments and Discussion
Ask us and Technical Secretary will try to provide an answer. You can facilitate discussion about the standard in here.
Loading comments...