ASTM C368-88(1999)
(Test Method)Standard Test Method for Impact Resistance of Ceramic Tableware
Standard Test Method for Impact Resistance of Ceramic Tableware
SCOPE
1.1 This test method covers the following tests:
1.1.1 Impact tests at the center of both flatware and hollow ware and at the rim of hollow ware, and
1.1.2 Chipping tests at the rim of flatware. Specimens may be either glazed or unglazed. Note 1-The impact test at the center of the specimen is employed to determine: ( ) the magnitude of a blow that will produce initial fracture, and ( ) the amount of energy necessary to produce complete failure. In the first case, the initial fracture shows on the side of the piece opposite from that being struck, and appears to be a function of the square of the thickness and of the inherent brittleness of the body or body-glaze combination; it is relatively independent of the size or design of the specimen. The second factor is more dependent upon design and often is subject to wide variation within a given group of pieces. Note 2-The impact test at the rim of hollow ware is similar to a chipping test, and the type of failure that is obtained is useful in evaluating the effect of the shape of the object. Note 3-In addition to the inherent strength of the body, chipping test results are greatly affected by contour of rim and to a lesser extent by thickness of rim, inclination of leaf, and fit of glaze.
1.2 The values stated in inch-pound units are to be regarded as the standard. The SI (metric) units given in parentheses are for information purposes only.
1.3 This standard may involve hazardous materials, operations, and equipment. This standard does not purport to address all of the safety problems associated with its use. It is the responsibility of the user of this standard to establish appropriate safety and health practices and determine the applicability of regulatory limitations prior to use.
General Information
Relations
Standards Content (Sample)
NOTICE: This standard has either been superseded and replaced by a new version or withdrawn.
Contact ASTM International (www.astm.org) for the latest information
Designation:C368–88(Reapproved 1999)
Standard Test Method for
Impact Resistance of Ceramic Tableware
This standard is issued under the fixed designation C 368; the number immediately following the designation indicates the year of
original adoption or, in the case of revision, the year of last revision. A number in parentheses indicates the year of last reapproval. A
superscript epsilon (e) indicates an editorial change since the last revision or reapproval.
1. Scope 3.1.1 Asteel tup of specified size and of hardness Rockwell
C 55,
1.1 This test method covers the following tests:
3.1.2 Support of a tup by a V-suspension,
1.1.1 Impact tests at the center of both flatware and hollow
3.1.3 Provision for a means of release from fixed heights so
ware and at the rim of hollow ware, and
astogivereproducibleresults,independentoftheoperator,and
1.1.2 Chipping tests at the rim of flatware. Specimens may
3.1.4 Provision for holding the test specimen in place by
be either glazed or unglazed.
spring clamps against rigid metal supports.
NOTE 1—The impact test at the center of the specimen is used to
3.2 Micrometer—For measuring thickness of test speci-
determine: (1) the magnitude of a blow that will produce initial fracture,
mens, a micrometer caliper that can be read to 0.001 in. (0.03
and (2) the amount of energy necessary to produce complete failure. In the
mm) shall be used.
first case, the initial fracture shows on the side of the piece opposite from
that being struck and appears to be a function of the square of the
4. Test Specimens
thickness and of the inherent brittleness of the body or body-glaze
combination; it is relatively independent of the size or design of the 4.1 Specimens shall be selected so as to be representative of
specimen. The second factor is more dependent upon design and often is
thelotbeingsampled.Ingeneral,impacttestsshallbebasedon
subject to wide variation within a given group of pieces.
a minimum of ten specimens and chipping tests on at least five
NOTE 2—The impact test at the rim of hollow ware is similar to a
specimens. Specimens shall be inspected for soundness and
chipping test, and the type of failure that is obtained is useful in evaluating
obvious physical defects before testing.
the effect of the shape of the object.
NOTE 3—In addition to the inherent strength of the body, chipping test
5. Procedure for Impact Testing of Flatware
results are greatly affected by contour of rim and to a lesser extent by
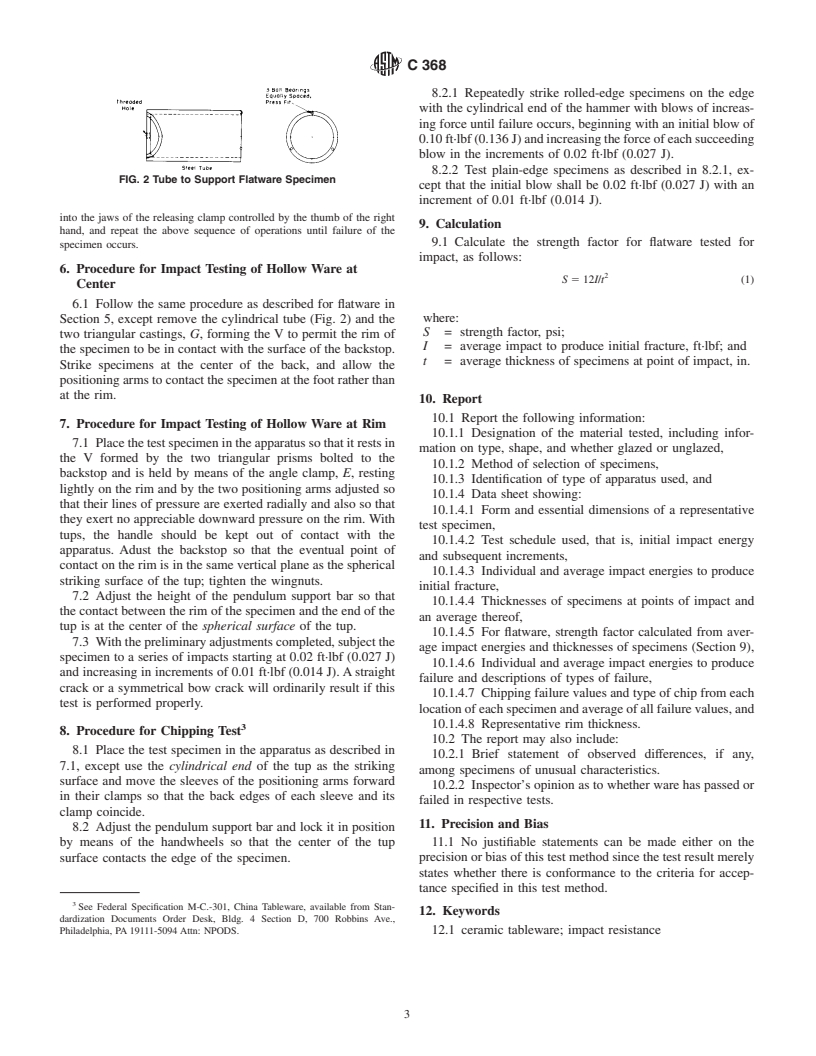
thickness of rim, inclination of leaf, and fit of glaze. 5.1 Mount the cylindrical tube shown in Fig. 2 (Note 4) on
the backstop, C, Fig. 1, and set at a height such that the three
1.2 The values stated in inch-pound units are to be regarded
ball bearings mounted in the end of the cylindrical tube are in
as the standard. The SI (metric) units given in parentheses are
contact and symmetrical with the central portion of the
for information purposes only.
specimen, which shall be stood on edge on the base plate. The
1.3 This standard does not purport to address all of the
specimen may be tested with either the face or the back toward
safety concerns, if any, associated with its use. It is the
the hammer; in general, a lower failure value is obtained when
responsibility of the user of this standard to establish appro-
the face is struck. Adjust the backstop so that the spherical
priate safety and health practices and determine the applica-
surface of the tup, D, just touches the surface of the specimen
bility of regulatory limitations prior to use.
when the tup is hanging free (vertically). Tighten the two wing
2. Significance and Use
nuts at the base of the backstop.
2.1 The purpose of this test method is to predict product
NOTE 4—In this portion of the test, the cylindrical tube replaces the
resistance to impact breakage in service.
angle clamp, E, shown in position on the backstop, C, in Fig. 1.
5.2 Adjust the positioning arms,F, held in retracted position
3. Apparatus
by means of their cotter keys so that the forward edges of the
3.1 Impact Tester, Pendulum Type—The impact test appa-
sleeve and of the clamp coincide. Adjust the clamps on the
ratus (Figs. 1 and 2) shall consist of a device having the
vertical posts to grip the specimen at the same height that the
following essential features:
pendulum will strike it; that is, halfway up.Adjust the arms so
that the rubber-covered surface at right angles to its rod will
1 contact the rim of the sample; remove the cotter keys to permit
This test method is under the jurisdiction of ASTM Committee C-21 on
Ceramic Whitewares and Related Products and is the direct responsibility of the positioning arms to hold the specimen against the cylindri-
Subcommittee C21.03 on Test Methods of Whiteware Properties.
cal tube. Adjust the pendulum support bar, B, and lock it in
Current edition approved Sept. 30, 1988. Published February 1989. Originally
position by means of the handwheels, A, so that the tup strikes
published as C 368 – 55 T. Last previous edition C 368 – 88 (1994).
the center of the specimen.
Detailed working drawings of the apparatus are available from ASTM
Headquarters. Request Adjunct No. ADJC0368.
Copyright © ASTM International, 100 Barr Harbor Drive, PO Box C700, West Conshohocken, PA 19428-2959, United States.
C368
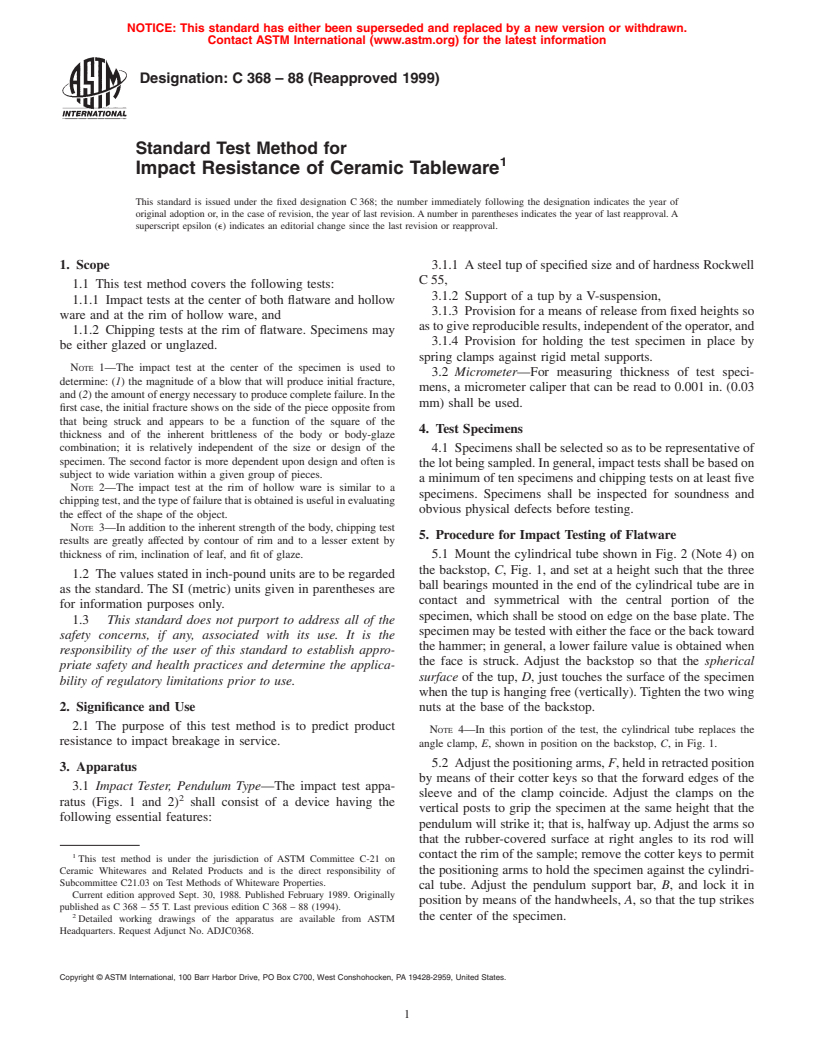
FIG. 1 Impact Test Apparatus
NOTE 5—Thetestsmaybeperformedrapidlybygraspingtheportionof
5.3 With the preliminary adjustments completed, subject the
the releasing device that lies below the dial segment from beneath with the
specimen to a schedule of impacts starting at 0.02 ft·lbf (0.027
tip of the middle finger of the right hand and moving it back to the correct
J) and increasing in increments of 0.01 ft·lbf (0.014 J) until
notch for the next blow immediately after the tup has been released. Catch
initial fracture, and in increments of 0.02 ft·lbf thereafter to
the pendulum on the rebound with the left hand, reseat the tip of th
...


Questions, Comments and Discussion
Ask us and Technical Secretary will try to provide an answer. You can facilitate discussion about the standard in here.