ASTM B903-15(2022)
(Specification)Standard Specification for Seamless Copper Heat Exchanger Tubes With Internal Enhancement
Standard Specification for Seamless Copper Heat Exchanger Tubes With Internal Enhancement
ABSTRACT
This specification covers seamless, internally enhanced copper tube, in straight lengths or coils, suitable for use in refrigeration and air-conditioning products or other heat exchangers. The material of manufacture shall be cast billet, bar, tube, or so forth of copper UNS No. C12200 and shall be of such purity and soundness as to be suitable for processing into the tubular product described. The tube shall be manufactured by such hot- and cold-working processes needed to produce a homogenous, uniform wrought structure in the finished product. The material shall conform to the chemical composition requirements specified. The grain size shall be determined in the wall beneath the ridges. The microstructure shall show complete recrystallization and shall have an average grain size within the limits specified. As-fabricated and O (annealed) temper tube shall conform to the mechanical properties specified. The specimens of annealed product shall withstand the specified expansion tested as specified. Each tube shall be subjected to an eddy-current test. Tubes shall be tested normally in the fabricated temper; however, they may be tested in the annealed temper at the option of the manufacturer.
SCOPE
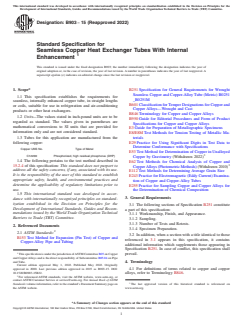
1.1 This specification establishes the requirements for seamless, internally enhanced copper tube, in straight lengths or coils, suitable for use in refrigeration and air-conditioning products or other heat exchangers.
1.2 Units—The values stated in inch-pound units are to be regarded as standard. The values given in parentheses are mathematical conversions to SI units that are provided for information only and are not considered standard.
1.3 Tubes for this application are manufactured from the following copper:
Copper UNS No.
Type of Metal
C12200
Phosphorized, high residual phosphorus (DHP)
1.4 The following pertains to the test method described in 15.2.4 of this specification: This standard does not purport to address all the safety concerns, if any, associated with its use. It is the responsibility of the user of this standard to establish appropriate safety, health, and environmental practices and determine the applicability of regulatory limitations prior to use.
1.5 This international standard was developed in accordance with internationally recognized principles on standardization established in the Decision on Principles for the Development of International Standards, Guides and Recommendations issued by the World Trade Organization Technical Barriers to Trade (TBT) Committee.
General Information
- Status
- Published
- Publication Date
- 30-Apr-2022
- Technical Committee
- B05 - Copper and Copper Alloys
- Drafting Committee
- B05.04 - Pipe and Tube
Relations
- Effective Date
- 01-Jan-2024
- Effective Date
- 01-Oct-2023
- Effective Date
- 01-Aug-2019
- Effective Date
- 01-Jan-2019
- Effective Date
- 01-Oct-2018
- Effective Date
- 01-Jun-2018
- Effective Date
- 01-Mar-2018
- Effective Date
- 01-Oct-2017
- Effective Date
- 01-Oct-2016
- Effective Date
- 15-Jul-2016
- Effective Date
- 01-Apr-2016
- Effective Date
- 15-Mar-2015
- Effective Date
- 01-Feb-2015
- Effective Date
- 01-Dec-2013
- Effective Date
- 01-Oct-2013
Overview
ASTM B903-15(2022): Standard Specification for Seamless Copper Heat Exchanger Tubes With Internal Enhancement establishes the requirements for seamless, internally enhanced copper tubes. These tubes, available in straight lengths or coils, are specifically designed for use in refrigeration, air-conditioning systems, and other heat exchanger applications. The standard covers tubes made from copper UNS No. C12200, known for its excellent thermal conductivity and corrosion resistance. ASTM B903-15(2022) outlines the processes, mechanical properties, chemical composition, dimensional tolerances, and quality assurance practices essential for producing high-quality copper tubes with enhanced internal surfaces to improve heat transfer performance.
Key Topics
Material Requirements
- Tubes must be produced from copper UNS No. C12200 (phosphorized, high residual phosphorus).
- Material must meet strict chemical and purity standards suitable for the manufacturing process.
Manufacturing Processes
- Tubes are produced by hot- and cold-working processes to ensure a homogeneous, uniform wrought structure.
- Internal enhancements are created by cold forming to optimize heat transfer within heat exchangers.
Mechanical and Physical Properties
- Tubes are supplied in as-fabricated and annealed (O50, O60) tempers.
- Mechanical requirements include tensile strength, yield strength, and elongation.
- Specified grain size and microstructure are verified for product reliability.
Quality Control and Testing
- Mechanical property tests (tension, expansion/pin test)
- Nondestructive eddy-current testing for detecting discontinuities or defects.
- Strict tolerances on diameter, wall thickness, roundness, and straightness.
- Cleanness requirement for interior surfaces, ensuring suitability for heat exchanger service.
Ordering and Identification
- Orders should specify product dimensions, enhancement configurations, temper, and quantity.
- Packaging and marking guidelines ensure traceability and protection during transport.
Applications
Seamless copper heat exchanger tubes with internal enhancement are vital components in:
- Refrigeration Systems
- Used in evaporators, condensers, and other refrigeration components where efficient heat transfer is required.
- Air-Conditioning Units
- Essential for coils and core components that demand high thermal efficiency and corrosion resistance.
- General Heat Exchangers
- Applied in a range of commercial and industrial heat exchangers for water heating and cooling, as well as process equipment.
- OEM and Custom Engineering Projects
- The internal enhancement features allow for custom design to meet specific thermal performance requirements.
The seamless structure and enhanced internal surface of these copper tubes greatly increase heat transfer efficiency while maintaining the durability and corrosion resistance required for long service life.
Related Standards
ASTM B903-15(2022) references and complements several other ASTM standards in the copper tubing and heat exchanger field, including:
- ASTM B251 - Specification for General Requirements for Wrought Seamless Copper and Copper-Alloy Tube
- ASTM B601 - Classification for Temper Designations for Copper and Copper Alloys
- ASTM B846 - Terminology for Copper and Copper Alloys
- ASTM E3, E8/E8M, E112 - Guidelines and methods for metallographic specimen preparation, tension testing, and determining average grain size
- ASTM E243 - Practice for Electromagnetic (Eddy Current) Examination of Copper and Copper-Alloy Tubes
Adhering to ASTM B903-15(2022) helps ensure compatibility, safety, and performance in heat exchanger applications, aligning with international principles on standardization and supporting global trade in copper heat exchanger components.
Keywords: seamless copper tubes, internal enhancement, copper heat exchanger, ASTM B903, C12200, refrigeration tubing, air-conditioning tubes, eddy-current testing, mechanical properties, heat exchanger standards
Buy Documents
ASTM B903-15(2022) - Standard Specification for Seamless Copper Heat Exchanger Tubes With Internal Enhancement
Get Certified
Connect with accredited certification bodies for this standard

Institut za varilstvo d.o.o. (Welding Institute)
Slovenia's leading welding institute since 1952. ISO 3834, EN 1090, pressure equipment certification, NDT personnel, welder qualification. Only IIW Au
Sponsored listings
Frequently Asked Questions
ASTM B903-15(2022) is a technical specification published by ASTM International. Its full title is "Standard Specification for Seamless Copper Heat Exchanger Tubes With Internal Enhancement". This standard covers: ABSTRACT This specification covers seamless, internally enhanced copper tube, in straight lengths or coils, suitable for use in refrigeration and air-conditioning products or other heat exchangers. The material of manufacture shall be cast billet, bar, tube, or so forth of copper UNS No. C12200 and shall be of such purity and soundness as to be suitable for processing into the tubular product described. The tube shall be manufactured by such hot- and cold-working processes needed to produce a homogenous, uniform wrought structure in the finished product. The material shall conform to the chemical composition requirements specified. The grain size shall be determined in the wall beneath the ridges. The microstructure shall show complete recrystallization and shall have an average grain size within the limits specified. As-fabricated and O (annealed) temper tube shall conform to the mechanical properties specified. The specimens of annealed product shall withstand the specified expansion tested as specified. Each tube shall be subjected to an eddy-current test. Tubes shall be tested normally in the fabricated temper; however, they may be tested in the annealed temper at the option of the manufacturer. SCOPE 1.1 This specification establishes the requirements for seamless, internally enhanced copper tube, in straight lengths or coils, suitable for use in refrigeration and air-conditioning products or other heat exchangers. 1.2 Units—The values stated in inch-pound units are to be regarded as standard. The values given in parentheses are mathematical conversions to SI units that are provided for information only and are not considered standard. 1.3 Tubes for this application are manufactured from the following copper: Copper UNS No. Type of Metal C12200 Phosphorized, high residual phosphorus (DHP) 1.4 The following pertains to the test method described in 15.2.4 of this specification: This standard does not purport to address all the safety concerns, if any, associated with its use. It is the responsibility of the user of this standard to establish appropriate safety, health, and environmental practices and determine the applicability of regulatory limitations prior to use. 1.5 This international standard was developed in accordance with internationally recognized principles on standardization established in the Decision on Principles for the Development of International Standards, Guides and Recommendations issued by the World Trade Organization Technical Barriers to Trade (TBT) Committee.
ABSTRACT This specification covers seamless, internally enhanced copper tube, in straight lengths or coils, suitable for use in refrigeration and air-conditioning products or other heat exchangers. The material of manufacture shall be cast billet, bar, tube, or so forth of copper UNS No. C12200 and shall be of such purity and soundness as to be suitable for processing into the tubular product described. The tube shall be manufactured by such hot- and cold-working processes needed to produce a homogenous, uniform wrought structure in the finished product. The material shall conform to the chemical composition requirements specified. The grain size shall be determined in the wall beneath the ridges. The microstructure shall show complete recrystallization and shall have an average grain size within the limits specified. As-fabricated and O (annealed) temper tube shall conform to the mechanical properties specified. The specimens of annealed product shall withstand the specified expansion tested as specified. Each tube shall be subjected to an eddy-current test. Tubes shall be tested normally in the fabricated temper; however, they may be tested in the annealed temper at the option of the manufacturer. SCOPE 1.1 This specification establishes the requirements for seamless, internally enhanced copper tube, in straight lengths or coils, suitable for use in refrigeration and air-conditioning products or other heat exchangers. 1.2 Units—The values stated in inch-pound units are to be regarded as standard. The values given in parentheses are mathematical conversions to SI units that are provided for information only and are not considered standard. 1.3 Tubes for this application are manufactured from the following copper: Copper UNS No. Type of Metal C12200 Phosphorized, high residual phosphorus (DHP) 1.4 The following pertains to the test method described in 15.2.4 of this specification: This standard does not purport to address all the safety concerns, if any, associated with its use. It is the responsibility of the user of this standard to establish appropriate safety, health, and environmental practices and determine the applicability of regulatory limitations prior to use. 1.5 This international standard was developed in accordance with internationally recognized principles on standardization established in the Decision on Principles for the Development of International Standards, Guides and Recommendations issued by the World Trade Organization Technical Barriers to Trade (TBT) Committee.
ASTM B903-15(2022) is classified under the following ICS (International Classification for Standards) categories: 23.040.15 - Non-ferrous metal pipes. The ICS classification helps identify the subject area and facilitates finding related standards.
ASTM B903-15(2022) has the following relationships with other standards: It is inter standard links to ASTM E8/E8M-24, ASTM B950-23, ASTM B846-19a, ASTM B846-19, ASTM B601-18a, ASTM E243-18, ASTM B601-18, ASTM B950-17, ASTM B601-16, ASTM E8/E8M-16, ASTM B950-16, ASTM B950-15, ASTM E8/E8M-15, ASTM E243-13, ASTM B950-13. Understanding these relationships helps ensure you are using the most current and applicable version of the standard.
ASTM B903-15(2022) is available in PDF format for immediate download after purchase. The document can be added to your cart and obtained through the secure checkout process. Digital delivery ensures instant access to the complete standard document.
Standards Content (Sample)
This international standard was developed in accordance with internationally recognized principles on standardization established in the Decision on Principles for the
Development of International Standards, Guides and Recommendations issued by the World Trade Organization Technical Barriers to Trade (TBT) Committee.
Designation:B903 −15 (Reapproved 2022)
Standard Specification for
Seamless Copper Heat Exchanger Tubes With Internal
Enhancement
This standard is issued under the fixed designation B903; the number immediately following the designation indicates the year of
original adoption or, in the case of revision, the year of last revision. A number in parentheses indicates the year of last reapproval. A
superscript epsilon (´) indicates an editorial change since the last revision or reapproval.
1. Scope* B251 Specification for General Requirements for Wrought
Seamless Copper and Copper-Alloy Tube (Metric) B0251
1.1 This specification establishes the requirements for
_B0251M
seamless, internally enhanced copper tube, in straight lengths
B601 Classification forTemper Designations for Copper and
or coils, suitable for use in refrigeration and air-conditioning
Copper Alloys—Wrought and Cast
products or other heat exchangers.
B846 Terminology for Copper and Copper Alloys
1.2 Units—The values stated in inch-pound units are to be
B950 Guide for Editorial Procedures and Form of Product
regarded as standard. The values given in parentheses are
Specifications for Copper and Copper Alloys
mathematical conversions to SI units that are provided for
E3 Guide for Preparation of Metallographic Specimens
information only and are not considered standard.
E8/E8M Test Methods for Tension Testing of Metallic Ma-
1.3 Tubes for this application are manufactured from the terials
E29 Practice for Using Significant Digits in Test Data to
following copper:
Determine Conformance with Specifications
Copper UNS No. Type of Metal
E53 Test Method for Determination of Copper in Unalloyed
C12200 Phosphorized, high residual phosphorus (DHP)
Copper by Gravimetry (Withdrawn 2022)
1.4 The following pertains to the test method described in
E62 Test Methods for Chemical Analysis of Copper and
15.2.4 of this specification: This standard does not purport to
CopperAlloys (Photometric Methods) (Withdrawn 2010)
address all the safety concerns, if any, associated with its use.
E112 Test Methods for Determining Average Grain Size
It is the responsibility of the user of this standard to establish
E243 Practice for Electromagnetic (Eddy Current) Examina-
appropriate safety, health, and environmental practices and
tion of Copper and Copper-Alloy Tubes
determine the applicability of regulatory limitations prior to
E255 Practice for Sampling Copper and Copper Alloys for
use.
the Determination of Chemical Composition
1.5 This international standard was developed in accor-
3. General Requirements
dance with internationally recognized principles on standard-
ization established in the Decision on Principles for the
3.1 The following sections of Specification B251 constitute
Development of International Standards, Guides and Recom-
a part of this specification:
mendations issued by the World Trade Organization Technical
3.1.1 Workmanship, Finish, and Appearance.
Barriers to Trade (TBT) Committee.
3.1.2 Sampling.
3.1.3 Number of Tests and Retests.
2. Referenced Documents
3.1.4 Specimen Preparation.
2.1 ASTM Standards:
3.2 In addition, when a section with a title identical to those
B153 Test Method for Expansion (Pin Test) of Copper and
referenced in 3.1 appears in this specification, it contains
Copper-Alloy Pipe and Tubing
additional information which supplements those appearing in
Specification B251. In case of conflict, this specification shall
ThisspecificationisunderthejurisdictionofASTMCommitteeB05onCopper prevail.
and CopperAlloys and is the direct responsibility of Subcommittee B05.04 on Pipe
and Tube.
4. Terminology
Current edition approved May 1, 2022. Published May 2022. Originally
4.1 For definitions of terms related to copper and copper
approved in 2000. Last previous edition approved in 2015 as B903-15. DOI:
10.1520/B0903-15R22.
alloys, refer to Terminology B846.
For referenced ASTM standards, visit the ASTM website, www.astm.org, or
contact ASTM Customer Service at service@astm.org. For Annual Book of ASTM
Standards volume information, refer to the standard’s Document Summary page on The last approved version of this historical standard is referenced on
the ASTM website. www.astm.org.
*A Summary of Changes section appears at the end of this standard
Copyright © ASTM International, 100 Barr Harbor Drive, PO Box C700, West Conshohocken, PA 19428-2959. United States
B903−15 (2022)
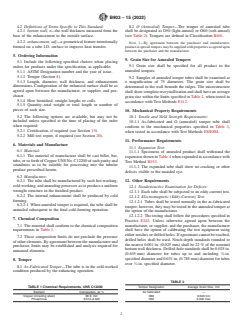
4.2 Definitions of Terms Specific to This Standard: 8.2 O (Annealed) Temper—The temper of annealed tube
4.2.1 bottom wall, n—the wall thickness measured from the shall be designated as O50 (light-anneal) or O60 (soft-anneal)
base of the enhancement to the outside surface. (see Table 2). Tempers are defined in Classification B601.
4.2.2 enhancement, adj—a geometrical feature intentionally
NOTE 1—By agreement between the purchaser and manufacturer,
formed on a tube I.D. surface to improve heat transfer. productinspecialtempersmaybesuppliedwithpropertiesasagreedupon
between the purchaser and the manufacturer.
5. Ordering Information
9. Grain Size for Annealed Tempers
5.1 Include the following specified choices when placing
9.1 Grain size shall be specified for all product in the
orders for products under this specification, as applicable:
annealed tempers.
5.1.1 ASTM Designation number and the year of issue.
5.1.2 Temper (Section 8).
9.2 Samples of annealed temper tubes shall be examined at
5.1.3 Length, diameter, wall thickness, and enhancement
a magnification of 75 diameters. The grain size shall be
dimensions. Configuration of the enhanced surface shall be as
determined in the wall beneath the ridges. The microstructure
agreed upon between the manufacturer, or supplier, and pur-
shallshowcompleterecrystallizationandshallhaveanaverage
chaser.
grain size within the limits specified in Table 2, when tested in
5.1.4 How furnished: straight lengths or coils.
accordance with Test Methods E112.
5.1.5 Quantity–total weight or total length or number of
pieces of each size.
10. Mechanical Property Requirements
5.2 The following options are available, but may not be
10.1 Tensile and Yield Strength Requirements:
included unless specified at the time of placing of the order
10.1.1 As-fabricated and O (annealed) temper tube shall
when required:
conform to the mechanical properties specified in Table 3,
5.2.1 Certification, if required (see Section 19).
when tested in accordance with Test Methods E8/E8M.
5.2.2 Mill test report, if required (see Section 20).
11. Performance Requirements
6. Materials and Manufacture
11.1 Expansion Test:
6.1 Material:
11.1.1 Specimens of annealed product shall withstand the
6.1.1 The material of manufacture shall be cast billet, bar,
expansionshowninTable4whenexpandedinaccordancewith
tube,orsoforthofCopperUNSNo.C12200ofsuchpurityand
Test Method B153.
soundness as to be suitable for processing into the tubular
11.1.2 The expanded tube shall show no cracking or other
product prescribed herein.
defects visible to the unaided eye.
6.2 Manufacture:
12. Other Requirements
6.2.1 The tube shall be manufactured by such hot-working,
cold-working, and annealing processes as to produce a uniform
12.1 Nondestructive Examination for Defects:
wrought structure in the finished product.
12.1.1 Each tube shall be subjected to an eddy-current test.
6.2.2 The internal enhancement shall be produced by cold
12.1.2 Electromagnetic (Eddy-Current) Test:
forming.
12.1.2.1 Tubes shall be tested normally in the as-fabricated
6.2.2.1 When annealed temper is required, the tube shall be
temper; however, they may be tested in the annealed temper at
annealed subsequent to the final cold-forming operation.
the option of the manufacturer.
12.1.2.2 The testing shall follow the procedures specified in
7. Chemical Composition
Practice E243. Unless otherwise agreed upon between the
7.1 The material shall conform to the chemical composition
manufacturer, or supplier, and the purchaser, the manufacturer
requirements in Table 1. shall have the option of calibrating the test equipment using
either notches or drilled holes. If agreement cannot be reached,
7.2 These composition limits do not preclude the presence
drilled holes shall be used. Notch depth standards rounded to
ofotherelements.Byagreementbetweenthemanufacturerand
the nearest 0.001 in. (0.025 mm) shall be 22 % of the nominal
purchaser, limits may be established and analysis required for
bottomwallthickness.Drilled-holestandardsshallbe0.025 in.
unnamed elements.
(0.635 mm) diameter for tubes up to and including ⁄4 in.
specified diameter and 0.031 in. (0.785 mm) diameter for tubes
8. Temper
over ⁄4 in. specified diameter.
8.1 As-Fabricated Temper—The tube is in the cold-worked
condition produced by the enhancing operation.
TABLE 2
TABLE 1 Chemical Requirements, UNS C12200
Temper Designation Average Grain Size, mm
Element Composition, wt % As fabricated —
Copper (including silver) 99.9, min O60 0.040 min
Phosphorus 0.015–0.040 O50 0.040 max
B903−15 (2022)
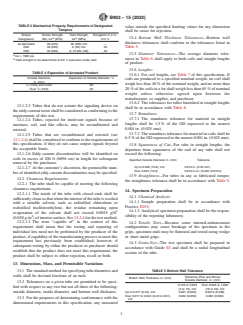
TABLE 3 Mechanical Property Requirements of Designated
value outside the specified limiting values for any dimension
Tempers
shall be cause for rejection.
Temper Tensile Strength, Yield Strength, Elongation in 2 in.,
A B 13.4 Bottom Wall Thickness Tolerances—Bottom wall
Designation Min, ksi (MPa) ksi (MPa) min %
thickness tolerances shall conform to the tolerances listed in
As-fabricated 36 (245) 30 (205) min —
O60 30 (205) 6 (40) min 40 Table 5.
O50 30 (205) 9–15 (60–105) 40
13.5 Diameter Tolerances—The average diameter toler-
A
ksi = 1000 psi.
B ances in Table 6 shall apply to both coils and straight lengths
Yield strength to be determined at 0.5 % extension under load.
of product.
13.6 Lengths:
TABLE 4 Expansion of Annealed Product
13.6.1 For coil lengths, see Table 7 of this specification. If
Outside Diameter, Expansion of Outside Diameter, %
coils are produced to a specified nominal weight, no coil shall
in. (mm)
3 weigh less than 40 % of the nominal weight, and no more than
⁄4 (19.0) and under 30
Over ⁄4 (19.0) 20 20 % of the coils in a lot shall weigh less than 65 % of nominal
weight unless otherwise agreed upon between the
manufacturer, or supplier, and purchaser.
13.6.2 The tolerances for tubes furnished in straight lengths
12.1.2.3 Tubes that do not actuate the signaling device on
shall be in accordance with Table 8.
theeddy-currenttestershallbeconsideredasconformingtothe
13.7 Roundness:
requirements of this test.
13.7.1 The roundness tolerance for material in straight
12.1.2.4 Tubes, rejected for irrelevant signals because of
lengths shall be 1.5 % of the OD expressed to the nearest
moisture, soil, and like effects, may be reconditioned and
0.001 in. (0.025 mm).
retested.
13.7.2 The roundness tolerance for material in coils shall be
12.1.2.5 Tubes that are reconditioned and retested (see
6.5 %oftheODexpressedtothenearest0.001in.(0.025mm).
12.1.2.4) shall be considered to conform to the requirements of
this specification, if they do not cause output signals beyond
13.8 Squareness of Cut—For tube in straight lengths, the
the acceptable limits.
departure from squareness of the end of any tube shall not
12.1.2.6 Eddy-current discontinuities will be identified on
exceed the following:
coils in excess of 200 ft (6096 cm) in length for subsequent
Specified Outside Diameter in. (mm) Tolerance
removal by the purchaser.
Up to 0.625 (15.9), incl. 0.010 in. (0.25 mm)
12.1.2.7 At the customer’s discretion, the permissible num-
Over 0.625 (15.9) 0.016 in./in. (0.406 mm/mm)
ber of identified eddy-current discontinuities may be specified.
13.9 Straightness—For tubes in any as fabricated temper,
12.2 Cleanness Requirements:
the straightness tolerance shall be in accordance with Table 9.
12.2.1 The tube shall be capable of meeting the following
cleanness requirement:
14. Specimen Preparation
12.2.1.1 The inside of the tube with closed ends shall be
14.1 Chemical Analysis:
sufficientlycleansothatwhentheinteriorofthetubeiswashed
14.1.1 Sample preparation shall be in accordance with
with a suitable solvent, such as redistilled chloroform or
Practice E255.
redistilled trichloroethylene, the residue remaining upon
2 14.1.2 Analytical specimen preparation shall be the respon-
evaporation of the solvent shall not exceed 0.0035 g/ft
sibility of the reporting laborato
...


Questions, Comments and Discussion
Ask us and Technical Secretary will try to provide an answer. You can facilitate discussion about the standard in here.
Loading comments...