ASTM F1362-97
(Test Method)Standard Test Method for Shear Strength and Shear Modulus of Aerospace Glazing Interlayer Materials
Standard Test Method for Shear Strength and Shear Modulus of Aerospace Glazing Interlayer Materials
SCOPE
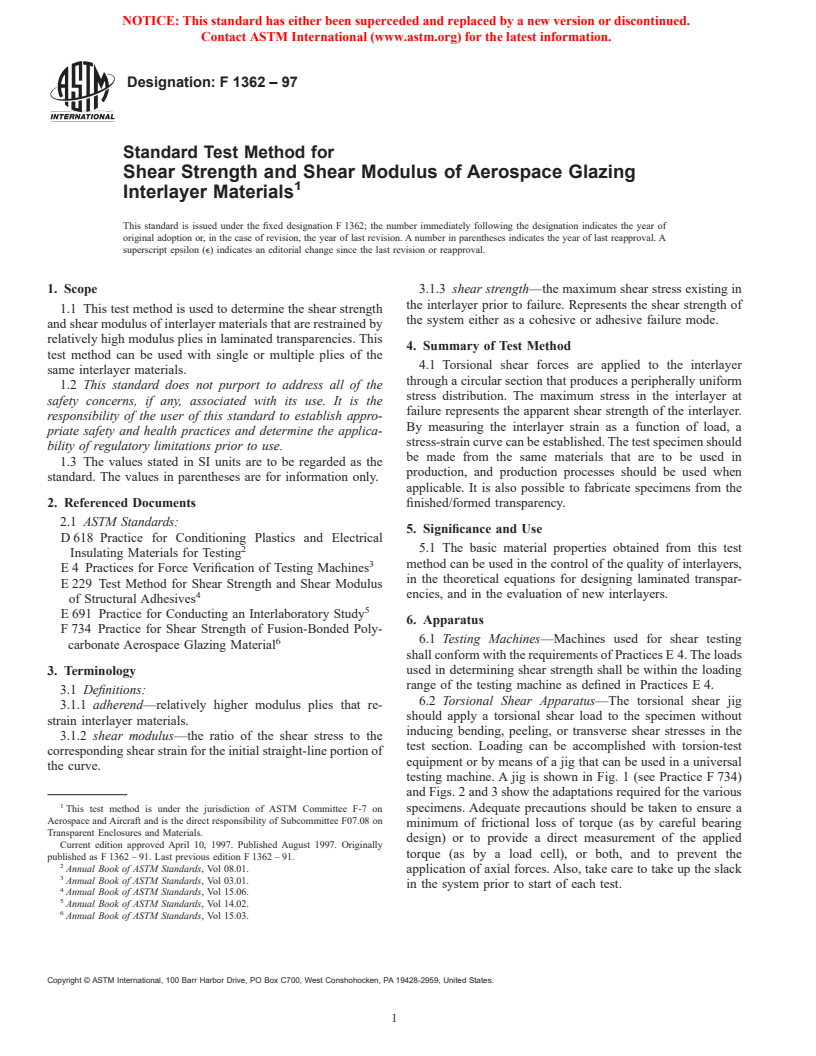
1.1 This test method is used to determine the shear strength and shear modulus of interlayer materials that are restrained by relatively high modulus plies in laminated transparencies. This test method can be used with single or multiple plies of the same interlayer materials.
1.2 This standard does not purport to address all of the safety concerns, if any, associated with its use. It is the responsibility of the user of this standard to establish appropriate safety and health practices and determine the applicability of regulatory limitations prior to use.
1.3 The values stated in SI units are to be regarded as the standard. The values in parentheses are for information only.
General Information
Relations
Standards Content (Sample)
NOTICE: This standard has either been superceded and replaced by a new version or discontinued.
Contact ASTM International (www.astm.org) for the latest information.
Designation: F 1362 – 97
Standard Test Method for
Shear Strength and Shear Modulus of Aerospace Glazing
Interlayer Materials
This standard is issued under the fixed designation F 1362; the number immediately following the designation indicates the year of
original adoption or, in the case of revision, the year of last revision. A number in parentheses indicates the year of last reapproval. A
superscript epsilon (e) indicates an editorial change since the last revision or reapproval.
1. Scope 3.1.3 shear strength—the maximum shear stress existing in
the interlayer prior to failure. Represents the shear strength of
1.1 This test method is used to determine the shear strength
the system either as a cohesive or adhesive failure mode.
and shear modulus of interlayer materials that are restrained by
relatively high modulus plies in laminated transparencies. This
4. Summary of Test Method
test method can be used with single or multiple plies of the
4.1 Torsional shear forces are applied to the interlayer
same interlayer materials.
through a circular section that produces a peripherally uniform
1.2 This standard does not purport to address all of the
stress distribution. The maximum stress in the interlayer at
safety concerns, if any, associated with its use. It is the
failure represents the apparent shear strength of the interlayer.
responsibility of the user of this standard to establish appro-
By measuring the interlayer strain as a function of load, a
priate safety and health practices and determine the applica-
stress-strain curve can be established. The test specimen should
bility of regulatory limitations prior to use.
be made from the same materials that are to be used in
1.3 The values stated in SI units are to be regarded as the
production, and production processes should be used when
standard. The values in parentheses are for information only.
applicable. It is also possible to fabricate specimens from the
2. Referenced Documents finished/formed transparency.
2.1 ASTM Standards:
5. Significance and Use
D 618 Practice for Conditioning Plastics and Electrical
5.1 The basic material properties obtained from this test
Insulating Materials for Testing
3 method can be used in the control of the quality of interlayers,
E 4 Practices for Force Verification of Testing Machines
in the theoretical equations for designing laminated transpar-
E 229 Test Method for Shear Strength and Shear Modulus
4 encies, and in the evaluation of new interlayers.
of Structural Adhesives
E 691 Practice for Conducting an Interlaboratory Study
6. Apparatus
F 734 Practice for Shear Strength of Fusion-Bonded Poly-
6 6.1 Testing Machines—Machines used for shear testing
carbonate Aerospace Glazing Material
shall conform with the requirements of Practices E 4. The loads
3. Terminology used in determining shear strength shall be within the loading
range of the testing machine as defined in Practices E 4.
3.1 Definitions:
6.2 Torsional Shear Apparatus—The torsional shear jig
3.1.1 adherend—relatively higher modulus plies that re-
should apply a torsional shear load to the specimen without
strain interlayer materials.
inducing bending, peeling, or transverse shear stresses in the
3.1.2 shear modulus—the ratio of the shear stress to the
test section. Loading can be accomplished with torsion-test
corresponding shear strain for the initial straight-line portion of
equipment or by means of a jig that can be used in a universal
the curve.
testing machine. A jig is shown in Fig. 1 (see Practice F 734)
and Figs. 2 and 3 show the adaptations required for the various
This test method is under the jurisdiction of ASTM Committee F-7 on specimens. Adequate precautions should be taken to ensure a
Aerospace and Aircraft and is the direct responsibility of Subcommittee F07.08 on
minimum of frictional loss of torque (as by careful bearing
Transparent Enclosures and Materials.
design) or to provide a direct measurement of the applied
Current edition approved April 10, 1997. Published August 1997. Originally
torque (as by a load cell), or both, and to prevent the
published as F 1362 – 91. Last previous edition F 1362 – 91.
Annual Book of ASTM Standards, Vol 08.01.
application of axial forces. Also, take care to take up the slack
Annual Book of ASTM Standards, Vol 03.01.
in the system prior to start of each test.
Annual Book of ASTM Standards, Vol 15.06.
Annual Book of ASTM Standards, Vol 14.02.
Annual Book of ASTM Standards, Vol 15.03.
Copyright © ASTM International, 100 Barr Harbor Drive, PO Box C700, West Conshohocken, PA 19428-2959, United States.
NOTICE: This standard has either been superceded and replaced by a new version or discontinued.
Contact ASTM International (www.astm.org) for the latest information.
F1362–97
FIG. 1 Torsional Shear Test Fixture (See Fig. 1, Practice F 734).
FIG. 2 Adapters Required for Testing Type I and Type II
6.3 Measurement of Angular Displacement—Since the
Specimens
shear strains of an interlayer will normally be very large, the
angular displacement should be measured using an angular
displacement transducer. This transducer can be either internal
curved sheet should be sized to limit the effects of curvature.
to the torsion-test machine or attached to the jig.
Guidelines are provided in Table 1.
7. Test Specimens
8. Conditioning
7.1 The specimen shall consist of laminated transparency
material machined in such a way as to produce an annular test 8.1 Condition the test specimens at 23 6 2°C (73.4 6
ring. The laminated transparency material can be either flat or 3.6°F) and 50 6 5 % relative humidity for not less than 40 h
curved, and typical of the materials used in production where
prior to test in accordance with Procedure A of Practice D 618
applicable. Take adequate precautions to ensure test specimen
unless otherwise specified.
uniformity.
7.2 Determine the interlayer thickness within an accuracy of
9. Procedure
5 %. This can be determined by subtracting the thickness of the
9.1 Measurement of Specimens—Measure the loading fix-
structural plies from the total thickness, except when all plies
turing and specimens to ensure concentricity and conformance
are not loaded (see Fig. 3, Type II).
to the dimensional tolerances.
7.3 Specimens are to be fabricated using one of the three
specimen geometries shown in Figs. 4-6. The test specimen 9.2 Load and Deflection—Make simultaneous measure-
geometry should be selected to maximize the accuracy of the ments of load (torque) and deflection and record the data. Take
results within the guidelines. Types 1 and 2 specimens are
care to correct for jig deflections if any occur.
smaller and can be used to test curved materials. The type 3
9.3 Speed of Testing—Load the specimen so as to produce
specimens are to be used in the testing of flat material where
failure in 2 to 5 min for static properties. This test method is
larger specimen sizes are desirable.
valid for high strain rate testing conducted using a constant
7.4 Other specimens not conforming to 7.3 can be sized in
displacement rate.
accordance with the capability of the test machine in order to
9.4 Test Conditions—Conduct tests in the standard labora-
ensure failure of the specimen; this can be either a load
tory atmosphere of 23 6 2°C (73.4 6 3.6°F) and 50 6 5%
limitation or displacement limitation. Generally, for flat mate-
relative humidity unless otherwise specified.
rial, the larger the specimen size the greater the consistency and
accuracy of the test results. Test specimens removed from a
NOTICE: This standard has either been superceded and replaced by a new version or discontinued.
Contact ASTM International (www.astm.org) for the latest information.
F1362–97
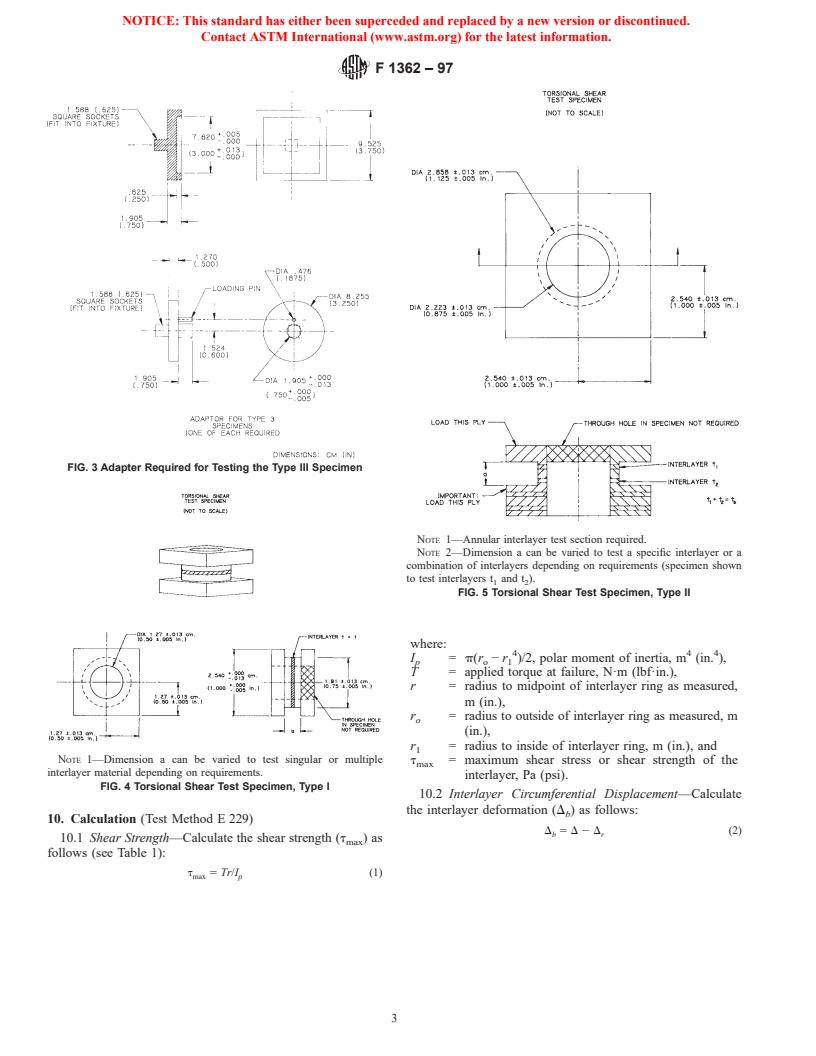
FIG. 3 Adapter Required for Testing the Type III Specimen
NOTE 1—Annular interlayer test section required.
NOTE 2—Dimension a can be varied to test a specific interlayer or a
combination of interlayers depending on requirements (specimen shown
to test interlayers t and t ).
1 2
FIG. 5 Torsional Shear Test Specimen, Type II
where:
4 4 4
I = p(r − r )/2, p
...


Questions, Comments and Discussion
Ask us and Technical Secretary will try to provide an answer. You can facilitate discussion about the standard in here.