ASTM E340-15
(Practice)Standard Practice for Macroetching Metals and Alloys
Standard Practice for Macroetching Metals and Alloys
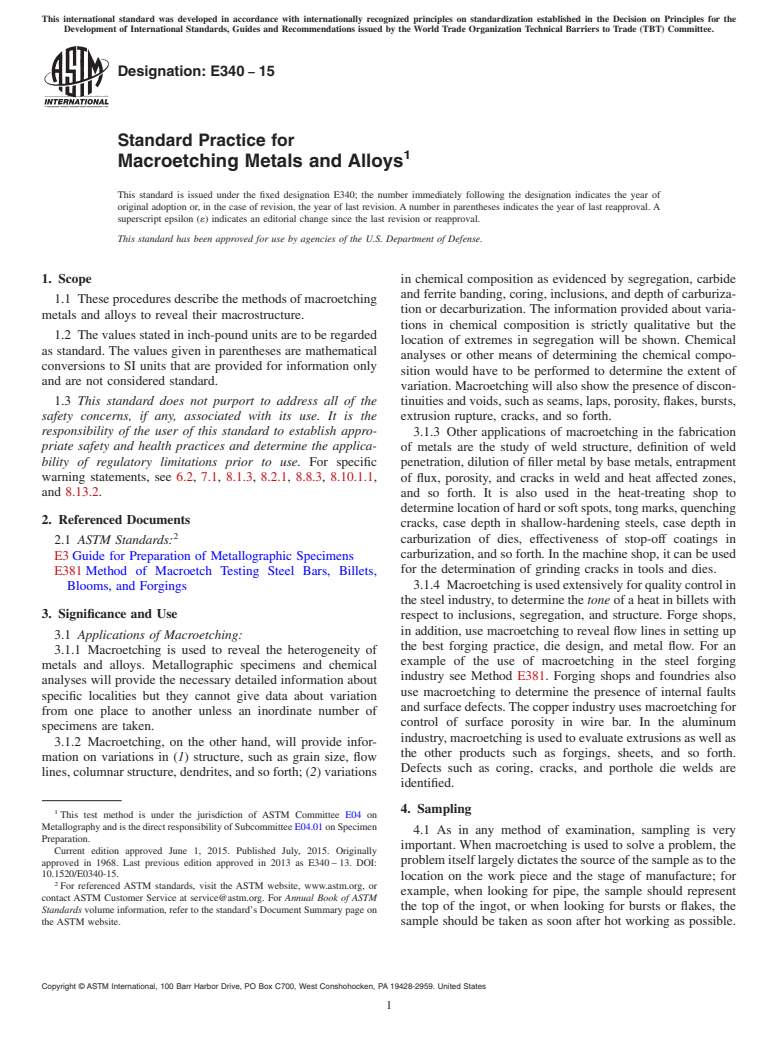
SIGNIFICANCE AND USE
3.1 Applications of Macroetching:
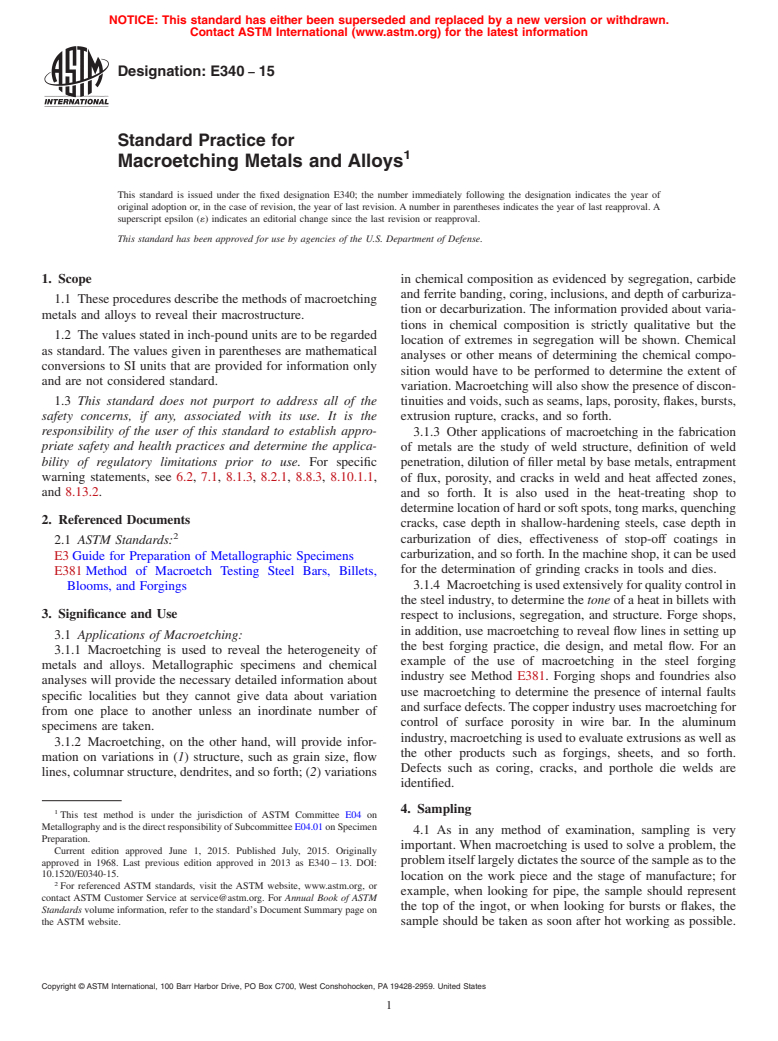
3.1.1 Macroetching is used to reveal the heterogeneity of metals and alloys. Metallographic specimens and chemical analyses will provide the necessary detailed information about specific localities but they cannot give data about variation from one place to another unless an inordinate number of specimens are taken.
3.1.2 Macroetching, on the other hand, will provide information on variations in (1) structure, such as grain size, flow lines, columnar structure, dendrites, and so forth; (2) variations in chemical composition as evidenced by segregation, carbide and ferrite banding, coring, inclusions, and depth of carburization or decarburization. The information provided about variations in chemical composition is strictly qualitative but the location of extremes in segregation will be shown. Chemical analyses or other means of determining the chemical composition would have to be performed to determine the extent of variation. Macroetching will also show the presence of discontinuities and voids, such as seams, laps, porosity, flakes, bursts, extrusion rupture, cracks, and so forth.
3.1.3 Other applications of macroetching in the fabrication of metals are the study of weld structure, definition of weld penetration, dilution of filler metal by base metals, entrapment of flux, porosity, and cracks in weld and heat affected zones, and so forth. It is also used in the heat-treating shop to determine location of hard or soft spots, tong marks, quenching cracks, case depth in shallow-hardening steels, case depth in carburization of dies, effectiveness of stop-off coatings in carburization, and so forth. In the machine shop, it can be used for the determination of grinding cracks in tools and dies.
3.1.4 Macroetching is used extensively for quality control in the steel industry, to determine the tone of a heat in billets with respect to inclusions, segregation, and structure. Forge shops, in addition, use macroetching to reve...
SCOPE
1.1 These procedures describe the methods of macroetching metals and alloys to reveal their macrostructure.
1.2 The values stated in inch-pound units are to be regarded as standard. The values given in parentheses are mathematical conversions to SI units that are provided for information only and are not considered standard.
1.3 This standard does not purport to address all of the safety concerns, if any, associated with its use. It is the responsibility of the user of this standard to establish appropriate safety and health practices and determine the applicability of regulatory limitations prior to use. For specific warning statements, see 6.2, 7.1, 8.1.3, 8.2.1, 8.8.3, 8.10.1.1, and 8.13.2.
General Information
Relations
Buy Standard
Standards Content (Sample)
This international standard was developed in accordance with internationally recognized principles on standardization established in the Decision on Principles for the
Development of International Standards, Guides and Recommendations issued by the World Trade Organization Technical Barriers to Trade (TBT) Committee.
Designation: E340 − 15
Standard Practice for
1
Macroetching Metals and Alloys
This standard is issued under the fixed designation E340; the number immediately following the designation indicates the year of
original adoption or, in the case of revision, the year of last revision. A number in parentheses indicates the year of last reapproval. A
superscript epsilon (´) indicates an editorial change since the last revision or reapproval.
This standard has been approved for use by agencies of the U.S. Department of Defense.
1. Scope in chemical composition as evidenced by segregation, carbide
and ferrite banding, coring, inclusions, and depth of carburiza-
1.1 These procedures describe the methods of macroetching
tion or decarburization. The information provided about varia-
metals and alloys to reveal their macrostructure.
tions in chemical composition is strictly qualitative but the
1.2 The values stated in inch-pound units are to be regarded
location of extremes in segregation will be shown. Chemical
as standard. The values given in parentheses are mathematical
analyses or other means of determining the chemical compo-
conversions to SI units that are provided for information only
sition would have to be performed to determine the extent of
and are not considered standard.
variation. Macroetching will also show the presence of discon-
1.3 This standard does not purport to address all of the
tinuities and voids, such as seams, laps, porosity, flakes, bursts,
safety concerns, if any, associated with its use. It is the extrusion rupture, cracks, and so forth.
responsibility of the user of this standard to establish appro-
3.1.3 Other applications of macroetching in the fabrication
priate safety and health practices and determine the applica- of metals are the study of weld structure, definition of weld
bility of regulatory limitations prior to use. For specific
penetration, dilution of filler metal by base metals, entrapment
warning statements, see 6.2, 7.1, 8.1.3, 8.2.1, 8.8.3, 8.10.1.1, of flux, porosity, and cracks in weld and heat affected zones,
and 8.13.2.
and so forth. It is also used in the heat-treating shop to
determinelocationofhardorsoftspots,tongmarks,quenching
2. Referenced Documents
cracks, case depth in shallow-hardening steels, case depth in
2
carburization of dies, effectiveness of stop-off coatings in
2.1 ASTM Standards:
carburization, and so forth. In the machine shop, it can be used
E3 Guide for Preparation of Metallographic Specimens
for the determination of grinding cracks in tools and dies.
E381 Method of Macroetch Testing Steel Bars, Billets,
3.1.4 Macroetchingisusedextensivelyforqualitycontrolin
Blooms, and Forgings
the steel industry, to determine the tone of a heat in billets with
3. Significance and Use respect to inclusions, segregation, and structure. Forge shops,
in addition, use macroetching to reveal flow lines in setting up
3.1 Applications of Macroetching:
the best forging practice, die design, and metal flow. For an
3.1.1 Macroetching is used to reveal the heterogeneity of
example of the use of macroetching in the steel forging
metals and alloys. Metallographic specimens and chemical
industry see Method E381. Forging shops and foundries also
analyses will provide the necessary detailed information about
use macroetching to determine the presence of internal faults
specific localities but they cannot give data about variation
and surface defects.The copper industry uses macroetching for
from one place to another unless an inordinate number of
control of surface porosity in wire bar. In the aluminum
specimens are taken.
industry, macroetching is used to evaluate extrusions as well as
3.1.2 Macroetching, on the other hand, will provide infor-
the other products such as forgings, sheets, and so forth.
mation on variations in (1) structure, such as grain size, flow
Defects such as coring, cracks, and porthole die welds are
lines, columnar structure, dendrites, and so forth; (2) variations
identified.
4. Sampling
1
This test method is under the jurisdiction of ASTM Committee E04 on
MetallographyandisthedirectresponsibilityofSubcommitteeE04.01onSpecimen
4.1 As in any method of examination, sampling is very
Preparation.
important. When macroetching is used to solve a problem, the
Current edition approved June 1, 2015. Published July, 2015. Originally
problemitselflargelydictatesthesourceofthesampleastothe
approved in 1968. Last previous edition approved in 2013 as E340 – 13. DOI:
10.1520/E0340-15.
location on the work piece and the stage of manufacture; for
2
For referenced ASTM standards, visit the ASTM website, www.astm.org, or
example, when looking for pipe, the sample should r
...
This document is not an ASTM standard and is intended only to provide the user of an ASTM standard an indication of what changes have been made to the previous version. Because
it may not be technically possible to adequately depict all changes accurately, ASTM recommends that users consult prior editions as appropriate. In all cases only the current version
of the standard as published by ASTM is to be considered the official document.
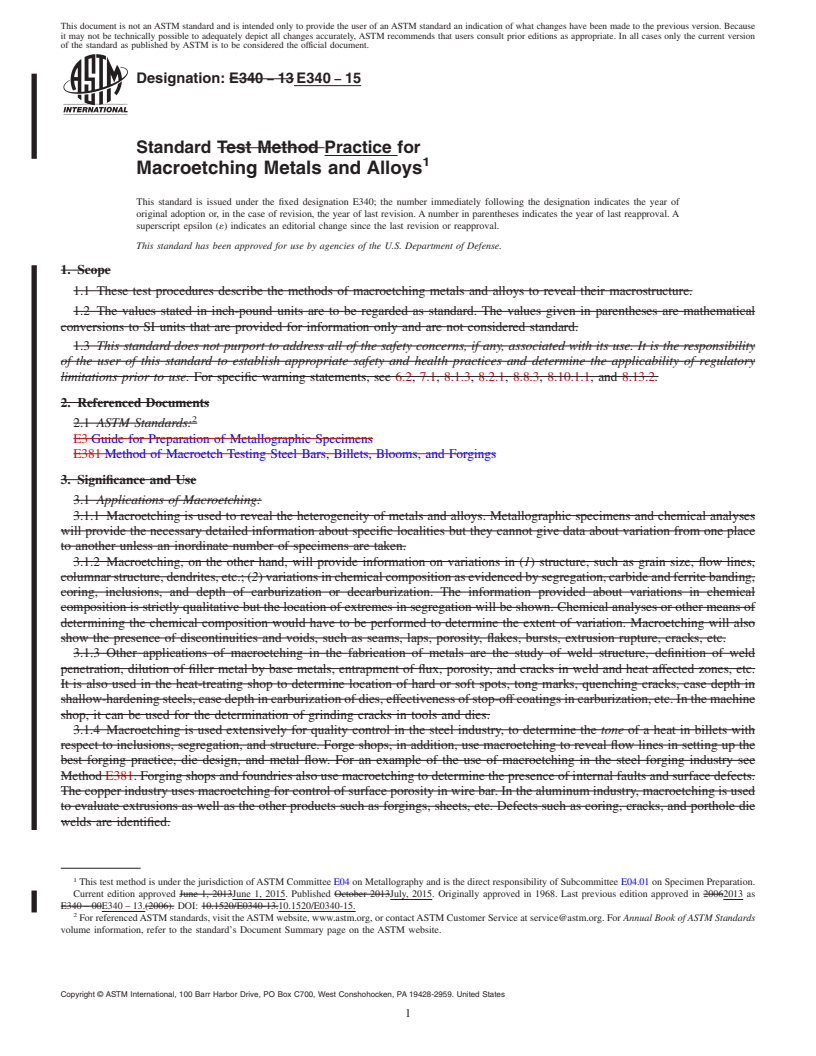
Designation: E340 − 13 E340 − 15
Standard Test Method Practice for
1
Macroetching Metals and Alloys
This standard is issued under the fixed designation E340; the number immediately following the designation indicates the year of
original adoption or, in the case of revision, the year of last revision. A number in parentheses indicates the year of last reapproval. A
superscript epsilon (´) indicates an editorial change since the last revision or reapproval.
This standard has been approved for use by agencies of the U.S. Department of Defense.
1. Scope
1.1 These test procedures describe the methods of macroetching metals and alloys to reveal their macrostructure.
1.2 The values stated in inch-pound units are to be regarded as standard. The values given in parentheses are mathematical
conversions to SI units that are provided for information only and are not considered standard.
1.3 This standard does not purport to address all of the safety concerns, if any, associated with its use. It is the responsibility
of the user of this standard to establish appropriate safety and health practices and determine the applicability of regulatory
limitations prior to use. For specific warning statements, see 6.2, 7.1, 8.1.3, 8.2.1, 8.8.3, 8.10.1.1, and 8.13.2.
2. Referenced Documents
2
2.1 ASTM Standards:
E3 Guide for Preparation of Metallographic Specimens
E381 Method of Macroetch Testing Steel Bars, Billets, Blooms, and Forgings
3. Significance and Use
3.1 Applications of Macroetching:
3.1.1 Macroetching is used to reveal the heterogeneity of metals and alloys. Metallographic specimens and chemical analyses
will provide the necessary detailed information about specific localities but they cannot give data about variation from one place
to another unless an inordinate number of specimens are taken.
3.1.2 Macroetching, on the other hand, will provide information on variations in (1) structure, such as grain size, flow lines,
columnar structure, dendrites, etc.; (2) variations in chemical composition as evidenced by segregation, carbide and ferrite banding,
coring, inclusions, and depth of carburization or decarburization. The information provided about variations in chemical
composition is strictly qualitative but the location of extremes in segregation will be shown. Chemical analyses or other means of
determining the chemical composition would have to be performed to determine the extent of variation. Macroetching will also
show the presence of discontinuities and voids, such as seams, laps, porosity, flakes, bursts, extrusion rupture, cracks, etc.
3.1.3 Other applications of macroetching in the fabrication of metals are the study of weld structure, definition of weld
penetration, dilution of filler metal by base metals, entrapment of flux, porosity, and cracks in weld and heat affected zones, etc.
It is also used in the heat-treating shop to determine location of hard or soft spots, tong marks, quenching cracks, case depth in
shallow-hardening steels, case depth in carburization of dies, effectiveness of stop-off coatings in carburization, etc. In the machine
shop, it can be used for the determination of grinding cracks in tools and dies.
3.1.4 Macroetching is used extensively for quality control in the steel industry, to determine the tone of a heat in billets with
respect to inclusions, segregation, and structure. Forge shops, in addition, use macroetching to reveal flow lines in setting up the
best forging practice, die design, and metal flow. For an example of the use of macroetching in the steel forging industry see
Method E381. Forging shops and foundries also use macroetching to determine the presence of internal faults and surface defects.
The copper industry uses macroetching for control of surface porosity in wire bar. In the aluminum industry, macroetching is used
to evaluate extrusions as well as the other products such as forgings, sheets, etc. Defects such as coring, cracks, and porthole die
welds are identified.
1
This test method is under the jurisdiction of ASTM Committee E04 on Metallography and is the direct responsibility of Subcommittee E04.01 on Specimen Preparation.
Current edition approved June 1, 2013June 1, 2015. Published October 2013July, 2015. Originally approved in 1968. Last previous edition approved in 20062013 as
E340 – 00E340 – 13.(2006). DOI: 10.1520/E0340-13.10.1520/E0340-15.
2
For referenced ASTM standards, visit the ASTM website, www.astm.org, or contact ASTM Customer Service at service@astm.org. For Annual Book of ASTM Standards
volume information, refer to th
...
NOTICE: This standard has either been superseded and replaced by a new version or withdrawn.
Contact ASTM International (www.astm.org) for the latest information
Designation: E340 − 15
Standard Practice for
1
Macroetching Metals and Alloys
This standard is issued under the fixed designation E340; the number immediately following the designation indicates the year of
original adoption or, in the case of revision, the year of last revision. A number in parentheses indicates the year of last reapproval. A
superscript epsilon (´) indicates an editorial change since the last revision or reapproval.
This standard has been approved for use by agencies of the U.S. Department of Defense.
1. Scope in chemical composition as evidenced by segregation, carbide
and ferrite banding, coring, inclusions, and depth of carburiza-
1.1 These procedures describe the methods of macroetching
tion or decarburization. The information provided about varia-
metals and alloys to reveal their macrostructure.
tions in chemical composition is strictly qualitative but the
1.2 The values stated in inch-pound units are to be regarded
location of extremes in segregation will be shown. Chemical
as standard. The values given in parentheses are mathematical
analyses or other means of determining the chemical compo-
conversions to SI units that are provided for information only
sition would have to be performed to determine the extent of
and are not considered standard.
variation. Macroetching will also show the presence of discon-
1.3 This standard does not purport to address all of the tinuities and voids, such as seams, laps, porosity, flakes, bursts,
safety concerns, if any, associated with its use. It is the
extrusion rupture, cracks, and so forth.
responsibility of the user of this standard to establish appro- 3.1.3 Other applications of macroetching in the fabrication
priate safety and health practices and determine the applica-
of metals are the study of weld structure, definition of weld
bility of regulatory limitations prior to use. For specific penetration, dilution of filler metal by base metals, entrapment
warning statements, see 6.2, 7.1, 8.1.3, 8.2.1, 8.8.3, 8.10.1.1,
of flux, porosity, and cracks in weld and heat affected zones,
and 8.13.2. and so forth. It is also used in the heat-treating shop to
determine location of hard or soft spots, tong marks, quenching
2. Referenced Documents
cracks, case depth in shallow-hardening steels, case depth in
2
carburization of dies, effectiveness of stop-off coatings in
2.1 ASTM Standards:
carburization, and so forth. In the machine shop, it can be used
E3 Guide for Preparation of Metallographic Specimens
for the determination of grinding cracks in tools and dies.
E381 Method of Macroetch Testing Steel Bars, Billets,
3.1.4 Macroetching is used extensively for quality control in
Blooms, and Forgings
the steel industry, to determine the tone of a heat in billets with
3. Significance and Use
respect to inclusions, segregation, and structure. Forge shops,
in addition, use macroetching to reveal flow lines in setting up
3.1 Applications of Macroetching:
the best forging practice, die design, and metal flow. For an
3.1.1 Macroetching is used to reveal the heterogeneity of
example of the use of macroetching in the steel forging
metals and alloys. Metallographic specimens and chemical
industry see Method E381. Forging shops and foundries also
analyses will provide the necessary detailed information about
use macroetching to determine the presence of internal faults
specific localities but they cannot give data about variation
and surface defects. The copper industry uses macroetching for
from one place to another unless an inordinate number of
control of surface porosity in wire bar. In the aluminum
specimens are taken.
industry, macroetching is used to evaluate extrusions as well as
3.1.2 Macroetching, on the other hand, will provide infor-
the other products such as forgings, sheets, and so forth.
mation on variations in (1) structure, such as grain size, flow
Defects such as coring, cracks, and porthole die welds are
lines, columnar structure, dendrites, and so forth; (2) variations
identified.
4. Sampling
1
This test method is under the jurisdiction of ASTM Committee E04 on
Metallography and is the direct responsibility of Subcommittee E04.01 on Specimen
4.1 As in any method of examination, sampling is very
Preparation.
important. When macroetching is used to solve a problem, the
Current edition approved June 1, 2015. Published July, 2015. Originally
problem itself largely dictates the source of the sample as to the
approved in 1968. Last previous edition approved in 2013 as E340 – 13. DOI:
10.1520/E0340-15.
location on the work piece and the stage of manufacture; for
2
For referenced ASTM standards, visit the ASTM website, www.astm.org, or
example, when looking for pipe, the sample should represent
contact ASTM Customer Service at service@astm.org. For Annual Book of ASTM
the top of the ingot, o
...


Questions, Comments and Discussion
Ask us and Technical Secretary will try to provide an answer. You can facilitate discussion about the standard in here.