Standard Test Method for Flexural Strength of Advanced Ceramics at Elevated Temperatures

SIGNIFICANCE AND USE
This test method may be used for material development, quality control, characterization, and design data generation purposes. This test method is intended to be used with ceramics whose flexural strength is ∼ 50 MPa (∼ 7 ksi) or greater.
The flexure stress is computed based on simple beam theory, with assumptions that the material is isotropic and homogeneous, the moduli of elasticity in tension and compression are identical, and the material is linearly elastic. The average grain size should be no greater than 1/50 of the beam thickness. The homogeneity and isotropy assumptions in the test method rule out the use of it for continuous fiber-reinforced composites for which Test Method C 1341 is more appropriate.
The flexural strength of a group of test specimens is influenced by several parameters associated with the test procedure. Such factors include the testing rate, test environment, specimen size, specimen preparation, and test fixtures. Specimen and fixture sizes were chosen to provide a balance between the practical configurations and resulting errors as discussed in MIL-STD 1942(A), Test Method C 1161, and Refs (1–3). Specific fixture and specimen configurations were designated in order to permit the ready comparison of data without the need for Weibull size scaling.
The flexural strength of a ceramic material is dependent on both its inherent resistance to fracture and the size and severity of flaws. Variations in these cause a natural scatter in test results for a sample of test specimens. Fractographic analysis of fracture surfaces, although beyond the scope of this test method, is highly recommended for all purposes, especially if the data will be used for design as discussed in MIL STD 1942 (A) and Ref (4) and Practices C 1322 and C 1239.
This method determines the flexural strength at elevated temperature and ambient environmental conditions at a nominal, moderately fast testing rate. The flexural strength under these conditions may or may not...
SCOPE
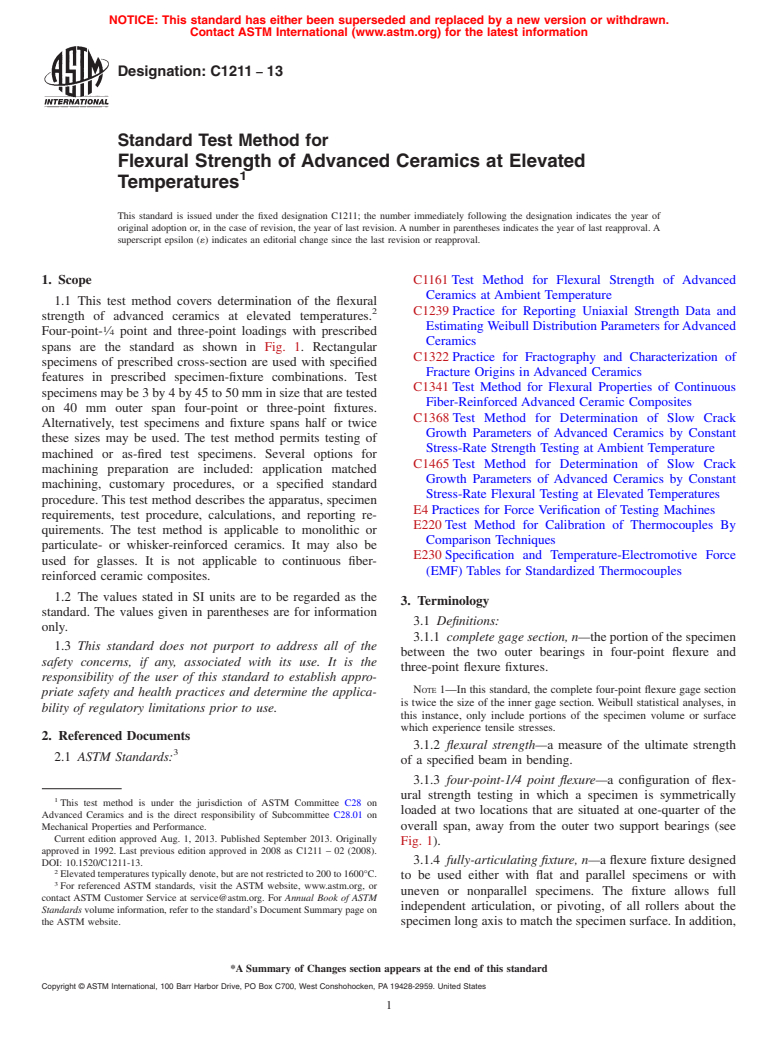
1.1 This test method covers determination of the flexural strength of advanced ceramics at elevated temperatures. Four-point-¼ point and three-point loadings with prescribed spans are the standard. Rectangular specimens of prescribed cross-section are used with specified features in prescribed specimen-fixture combinations.
1.2 The values stated in SI units are to be regarded as the standard. The values given in parentheses are for information only.  
1.3 This standard does not purport to address all of the safety concerns, if any, associated with its use. It is the responsibility of the user of this standard to establish appropriate safety and health practices and determine the applicability of regulatory limitations prior to use.

General Information

Status
Historical
Publication Date
31-Dec-2007
Current Stage
Ref Project

Relations

Buy Standard

Standard
ASTM C1211-02(2008) - Standard Test Method for Flexural Strength of Advanced Ceramics at Elevated Temperatures
English language
17 pages
sale 15% off
Preview
sale 15% off
Preview
Standard
REDLINE ASTM C1211-02(2008) - Standard Test Method for Flexural Strength of Advanced Ceramics at Elevated Temperatures
English language
17 pages
sale 15% off
Preview
sale 15% off
Preview

Standards Content (Sample)


NOTICE: This standard has either been superseded and replaced by a new version or withdrawn.
Contact ASTM International (www.astm.org) for the latest information
Designation:C1211 −02(Reapproved 2008)
Standard Test Method for
Flexural Strength of Advanced Ceramics at Elevated
Temperatures
This standard is issued under the fixed designation C1211; the number immediately following the designation indicates the year of
original adoption or, in the case of revision, the year of last revision.Anumber in parentheses indicates the year of last reapproval.A
superscript epsilon (´) indicates an editorial change since the last revision or reapproval.
1. Scope Growth Parameters of Advanced Ceramics by Constant
Stress-Rate Flexural Testing at Elevated Temperatures
1.1 This test method covers determination of the flexural
2 E4Practices for Force Verification of Testing Machines
strength of advanced ceramics at elevated temperatures.
E220Test Method for Calibration of Thermocouples By
Four-point- ⁄4 point and three-point loadings with prescribed
Comparison Techniques
spans are the standard. Rectangular specimens of prescribed
E230Specification and Temperature-Electromotive Force
cross-section are used with specified features in prescribed
(EMF) Tables for Standardized Thermocouples
specimen-fixture combinations.
2.2 Military Standard:
1.2 The values stated in SI units are to be regarded as the
MIL-STD1942(A) Flexural Strength of High Performance
standard. The values given in parentheses are for information
Ceramics at Ambient Temperature
only.
1.3 This standard does not purport to address all of the
3. Terminology
safety concerns, if any, associated with its use. It is the
3.1 Definitions:
responsibility of the user of this standard to establish appro-
3.1.1 complete gage section, n—theportionofthespecimen
priate safety and health practices and determine the applica-
between the two outer bearings in four-point flexure and
bility of regulatory limitations prior to use.
three-point flexure fixtures.
2. Referenced Documents
NOTE 1—In this standard, the complete four-point flexure gage section
3 is twice the size of the inner gage section. Weibull statistical analyses, in
2.1 ASTM Standards:
this instance, only include portions of the specimen volume or surface
C1161Test Method for Flexural Strength of Advanced
which experience tensile stresses.
Ceramics at Ambient Temperature
3.1.2 flexural strength—a measure of the ultimate strength
C1239Practice for Reporting Uniaxial Strength Data and
of a specified beam in bending.
Estimating Weibull Distribution Parameters forAdvanced
3.1.3 four-point-1/4 point flexure—a configuration of flex-
Ceramics
ural strength testing in which a specimen is symmetrically
C1322Practice for Fractography and Characterization of
loaded at two locations that are situated at one-quarter of the
Fracture Origins in Advanced Ceramics
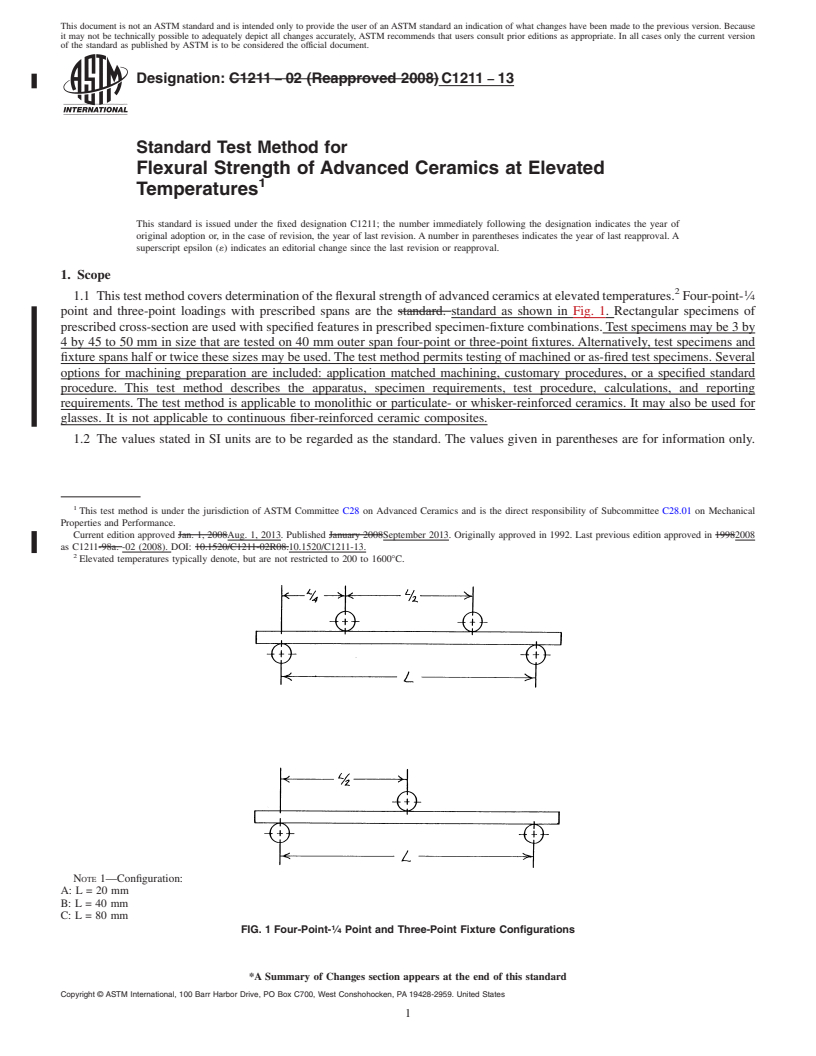
overall span, away from the outer two support bearings (see
C1341Test Method for Flexural Properties of Continuous
Fig. 1).
Fiber-Reinforced Advanced Ceramic Composites
C1368 Test Method for Determination of Slow Crack 3.1.4 fully-articulating fixture, n—a flexure fixture designed
Growth Parameters of Advanced Ceramics by Constant to be used either with flat and parallel specimens or with
Stress-Rate Strength Testing at Ambient Temperature uneven or nonparallel specimens. The fixture allows full
C1465 Test Method for Determination of Slow Crack independent articulation, or pivoting, of all rollers about the
specimenlongaxistomatchthespecimensurface.Inaddition,
the upper or lower pairs are free to pivot to distribute force
This test method is under the jurisdiction of ASTM Committee C28 on
evenly to the bearing cylinders on either side.
Advanced Ceramics and is the direct responsibility of Subcommittee C28.01 on
Mechanical Properties and Performance. NOTE 2—See Annex A2 for schematic illustrations of the required
Current edition approved Jan. 1, 2008. Published January 2008. Originally pivoting movements.
approved in 1992. Last previous edition approved in 1998 as C1211-98a. DOI:
10.1520/C1211-02R08.
Elevatedtemperaturestypicallydenote,butarenotrestrictedto200to1600°C.
3 4
For referenced ASTM standards, visit the ASTM website, www.astm.org, or Available from Standardization Documents Order Desk, DODSSP, Bldg. 4,
contact ASTM Customer Service at service@astm.org. For Annual Book of ASTM Section D, 700 Robbins Ave., Philadelphia, PA 19111-5098, http://
Standards volume information, refer to the standard’s Document Summary page on www.dodssp.daps.mil. This document is a 1990 update of the original MIL-STD
the ASTM website. 1942(MR), dated November 1983.
*A Summary of Changes section appears at the end of this standard
Copyright © ASTM International, 100 Barr Harbor Drive, PO Box C700, West Conshohocken, PA 19428-2959. United States
C1211−02 (2008)
4. Significance and Use
4.1 Thistestmethodmaybeusedformaterialdevelopment,
quality control, characterization, and design data generation
purposes.Thistestmethodisintendedtobeusedwithceramics
whose flexural strength is ; 50 MPa (; 7 ksi) or greater.
4.2 The flexure stress is computed based on simple beam
theory, with assumptions that the material is isotropic and
homogeneous,themoduliofelasticityintensionandcompres-
sion are identical, and the material is linearly elastic. The
average grain size should be no greater than ⁄50 of the beam
thickness. The homogeneity and isotropy assumptions in the
testmethodruleouttheuseofitforcontinuousfiber-reinforced
composites for whichTest Method C1341 is more appropriate.
4.3 The flexural strength of a group of test specimens is
influenced by several parameters associated with the test
procedure. Such factors include the testing rate, test environ-
ment, specimen size, specimen preparation, and test fixtures.
Specimen and fixture sizes were chosen to provide a balance
NOTE 1—Configuration:
between the practical configurations and resulting errors as
A: L = 20 mm
discussedinMIL-STD1942(A),TestMethodC1161,andRefs
B: L = 40 mm
(1-3). Specific fixture and specimen configurations were
C: L = 80 mm
designated in order to permit the ready comparison of data
FIG. 1Four-Point- ⁄4 Point and Three-Point Fixture Configurations
without the need for Weibull size scaling.
4.4 The flexural strength of a ceramic material is dependent
NOTE 3—A three-point fixture has the inner pair of bearing cylinders
on both its inherent resistance to fracture and the size and
replaced by a single bearing cylinder.
severity of flaws. Variations in these cause a natural scatter in
3.1.5 inert flexural strength, n—ameasureofthestrengthof
test results for a sample of test specimens. Fractographic
a specified beam specimen in bending as determined in an
analysisoffracturesurfaces,althoughbeyondthescopeofthis
appropriate inert condition whereby no slow crack growth
test method, is highly recommended for all purposes, espe-
occurs.
cially if the data will be used for design as discussed in MIL
3.1.6 inherent flexural strength, n—theflexuralstrengthofa
STD 1942 (A) and Ref (4) and Practices C1322 and C1239.
material in the absence of any effect of surface grinding or
4.5 Thismethoddeterminestheflexuralstrengthatelevated
other surface finishing process, or of extraneous damage that
temperature and ambient environmental conditions at a nomi-
may be present.The measured inherent strength is in general a
nal, moderately fast testing rate. The flexural strength under
function of the flexure test method, test conditions, and
these conditions may or may not necessarily be the inert
specimen size.
flexural strength. Flexure strength at elevated temperature may
3.1.7 inner gage section, n—the portion of the specimen
be strongly dependent on testing rate, a consequence of creep,
between the inner two bearings in a four-point flexure fixture.
stresscorrosion,orslowcrackgrowth.Ifthepurposeofthetest
3.1.8 semi-articulating fixture, n—a flexure fixture designed
is to measure the inert flexural strength, then extra precautions
to be used with flat and parallel specimens. The fixture allows
are required and faster testing rates may be necessary.
somearticulation,orpivoting,toensurethetoppair(orbottom
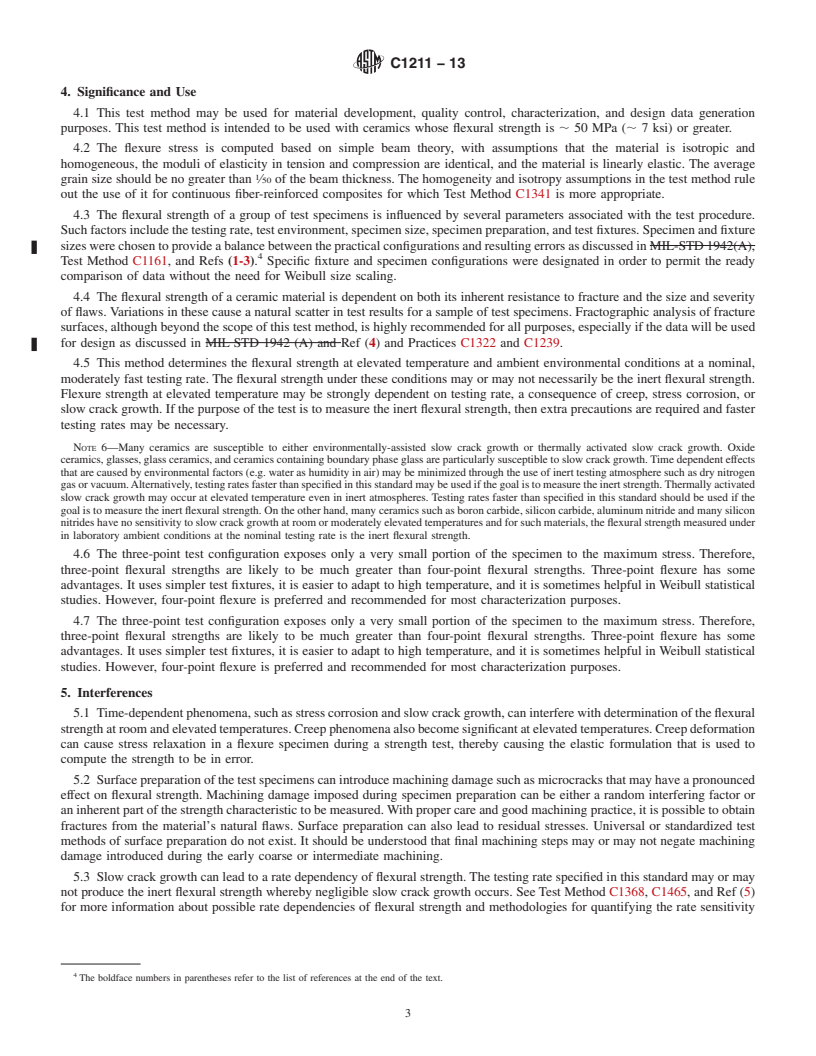
NOTE 6—Many ceramics are susceptible to either environmentally-
pair) of bearing cylinders pivot together about an axis parallel
assisted slow crack growth or thermally activated slow crack growth.
to the specimen long axis, in order to match the specimen
Oxide ceramics, glasses, glass ceramics, and ceramics containing bound-
surfaces. In addition, the upper or lower pairs are free to pivot
ary phase glass are particularly susceptible to slow crack growth. Time
to distribute force evenly to the bearing cylinders on either dependent effects that are caused by environmental factors (e.g. water as
humidity in air) may be minimized through the use of inert testing
side.
atmosphere such as dry nitrogen gas or vacuum. Alternatively, testing
NOTE 4—See Annex A2 for schematic illustrations of the required
rates faster than specified in this standard may be used if the goal is to
pivoting movements. measure the inert strength. Thermally activated slow crack growth may
NOTE 5—A three-point fixture has the inner pair of bearing cylinders
occur at elevated temperature even in inert atmospheres. Testing rates
replaced by a single bearing cylinder. faster than specified in this standard should be used if the goal is to
measuretheinertflexuralstrength.Ontheotherhand,manyceramicssuch
3.1.9 slow crack growth (SCG), n—Subcriticalcrackgrowth
as boron carbide, silicon carbide, aluminum nitride and many silicon
(extension)whichmayresultfrom,butisnotrestrictedto,such
nitrides have no sensitivity to slow crack growth at room or moderately
mechanisms as environmentally-assisted stress corrosion or
elevated temperatures and for such materials, the flexural strength
diffusive crack growth.
3.1.10 three-point flexure—a configuration of flexural
strength testing in which a specimen is loaded at a position
Theboldfacenumbersinparenthesesrefertothelistofreferencesattheendof
midway between two support bearings (see Fig. 1). the text.
C1211−02 (2008)
measured under in laboratory ambient conditions at the nominal testing TABLE 1 Fixture Spans
rate is the inert flexural strength.
Configuration Support Span Loading Span,
(L), mm mm
4.6 The three-point test configuration exposes only a very
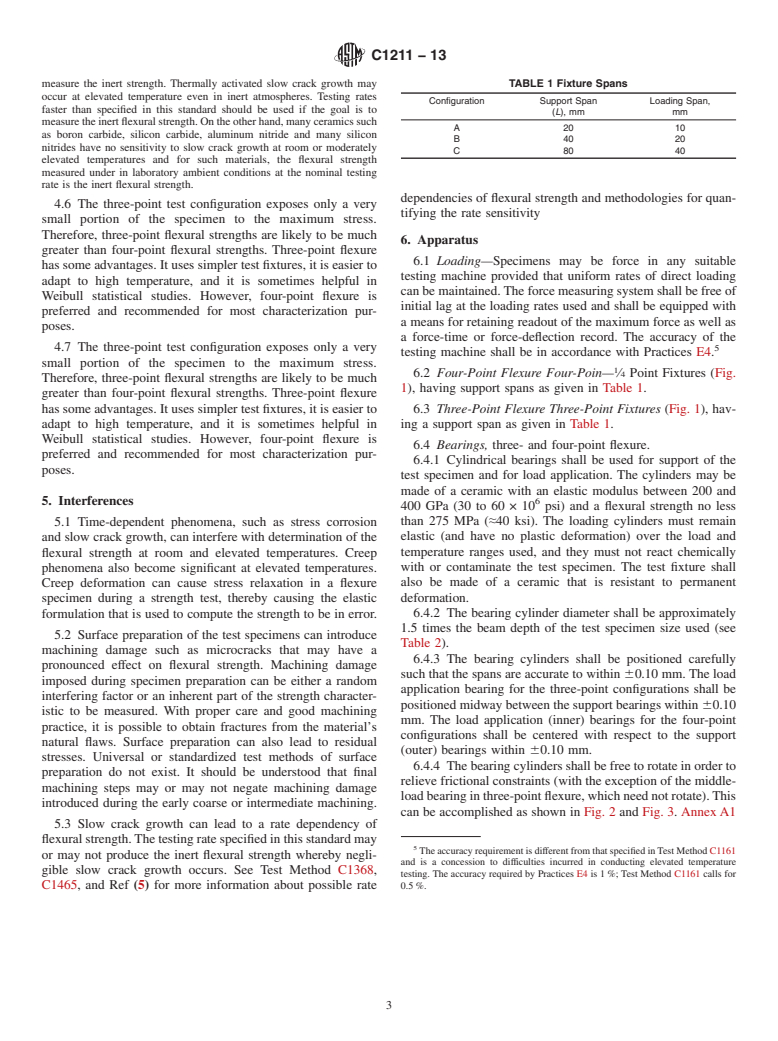
A20 10
small portion of the specimen to the maximum stress. There-
B40 20
fore,three-pointflexuralstrengthsarelikelytobemuchgreater
C80 40
thanfour-pointflexuralstrengths.Three-pointflexurehassome
advantages. It uses simpler test fixtures, it is easier to adapt to
high temperature, and it is sometimes helpful in Weibull
6. Apparatus
statistical studies. However, four-point flexure is preferred and
recommended for most characterization purposes. 6.1 Loading—Specimens may be force in any suitable
testing machine provided that uniform rates of direct loading
4.7 The three-point test configuration exposes only a very
canbemaintained.Theforcemeasuringsystemshallbefreeof
small portion of the specimen to the maximum stress. There-
initial lag at the loading rates used and shall be equipped with
fore,three-pointflexuralstrengthsarelikelytobemuchgreater
a means for retaining readout of the maximum force as well as
thanfour-pointflexuralstrengths.Three-pointflexurehassome
a force-time or force-deflection record. The accuracy of the
advantages. It uses simpler test fixtures, it is easier to adapt to
testing machine shall be in accordance with Practices E4.
high temperature, and it is sometimes helpful in Weibull
statistical studies. However, four-point flexure is preferred and
6.2 Four-Point Flexure Four-Poin— ⁄4 Point Fixtures (Fig.
recommended for most characterization purposes.
1), having support spans as given in Table 1.
6.3 Three-Point Flexure Three-Point Fixtures (Fig. 1), hav-
5. Interferences
ing a support span as given in Table 1.
5.1 Time-dependent phenomena, such as stress corrosion
6.4 Bearings, three- and four-point flexure.
and slow crack growth, can interfere with determination of the
6.4.1 Cylindrical bearings shall be used for support of the
flexural strength at room and elevated temperatures. Creep
test specimen and for load application. The cylinders may be
phenomena also become significant at elevated temperatures.
made of a ceramic with an elastic modulus between 200 and
Creep deformation can cause stress relaxation in a flexure
400 GPa (30 to 60 × 10 psi) and a flexural strength no less
specimen during a strength test, thereby causing the elastic
than 275 MPa (≈40 ksi). The loading cylinders must remain
formulation that is used to compute the strength to be in error.
elastic (and have no plastic deformation) over the load and
5.2 Surface preparation of the test specimens can introduce
temperature ranges used, and they must not react chemically
machining damage such as microcracks that may have a
with or contaminate the test specimen. The test fixture shall
pronounced effect on flexural strength. Machining damage
also be made of a ceramic that is resistant to permanent
imposed during specimen preparation can be either a random
deformation.
interfering factor or an inherent part of the strength character-
6.4.2 The bearing cylinder diameter shall be approximately
istic to be measured. With proper care and good machining
1.5 times the beam depth of the test specimen size used (see
practice, it is possible to obtain fractures from the material’s
Table 2).
natural flaws. Surface preparation can also lead to residual
6.4.3 The bearing cylinders shall be positioned carefully
stresses. Universal or standardized test methods of surface
such that the spans are accurate to within 60.10 mm.The load
preparation do not exist. It should be understood that final
application bearing for the three-point configurations shall be
machining steps may or may not negate machining damage
positionedmidwaybetweenthesupportbearingswithin 60.10
introduced during the early coarse or intermediate machining.
mm. The load application (inner) bearings for the four-point
5.3 Slow crack growth can lead to a rate dependency of
configurations shall be centered with respect to the support
flexuralstrength.Thetestingratespecifiedinthisstandardmay (outer) bearings within 60.10 mm.
or may not produce the inert flexural strength whereby negli-
gible slow crack growth occurs. See Test Method C1368,
TheaccuracyrequirementisdifferentfromthatspecifiedinTestMethodC1161
C1465, and Ref (5) for more information about possible rate
and is a concession to difficulties incurred in conducting elevated temperature
dependencies of flexural strength and methodologies for quan-
testing. The accuracy required by Practices E4 is 1%; Test Method C1161 calls for
tifying the rate sensitivity 0.5%.
C1211−02 (2008)
TABLE 2 Nominal Bearing Diameters
Config
...


This document is not anASTM standard and is intended only to provide the user of anASTM standard an indication of what changes have been made to the previous version. Because
it may not be technically possible to adequately depict all changes accurately, ASTM recommends that users consult prior editions as appropriate. In all cases only the current version
of the standard as published by ASTM is to be considered the official document.
Designation:C 1211–98a Designation: C 1211 – 02 (Reapproved 2008)
Standard Test Method for
Flexural Strength of Advanced Ceramics at Elevated
Temperatures
This standard is issued under the fixed designation C 1211; the number immediately following the designation indicates the year of
original adoption or, in the case of revision, the year of last revision. A number in parentheses indicates the year of last reapproval. A
superscript epsilon (e) indicates an editorial change since the last revision or reapproval.
1. Scope *
1.1 Thistestmethodcoversdeterminationoftheflexuralstrengthofadvancedceramicsatelevatedtemperatures. Four-point- ⁄4
point and three-point loadings with prescribed spans are the standard. Rectangular specimens of prescribed cross-section are used
with specified features in prescribed specimen-fixture combinations.
1.2 The values stated in SI units are to be regarded as the standard. The values given in parentheses are for information only.
1.3 This standard does not purport to address all of the safety concerns, if any, associated with its use. It is the responsibility
of the user of this standard to establish appropriate safety and health practices and determine the applicability of regulatory
limitations prior to use.
2. Referenced Documents
2.1 ASTM Standards:
C 1161 Test Method for Flexural Strength of Advanced Ceramics at Ambient Temperature
C 1239 Practice for Reporting Uniaxial Strength Data and Estimating Weibull Distribution Parameters forAdvanced Ceramics
C 1322 Practice for Fractography and Characterization of Fracture Origins in Advanced Ceramics
C 1341 Test Method for Flexural Properties of Continuous Fiber-Reinforced Advanced Ceramic Composites
C 1368Test Method for Determination of Slow Crack Growth Parameters of Advanced Ceramics by Constant Stress-Rate
Flexural Testing at Ambient Temperature Test Method for Determination of Slow Crack Growth Parameters of Advanced
Ceramics by Constant Stress-Rate Flexural Testing at Ambient Temperature
C 1465 Test Method for Determination of Slow Crack Growth Parameters of Advanced Ceramics by Constant Stress-Rate
Flexural Testing at Elevated Temperatures
E 4 Practices for Force Verification of Testing Machines
E 220Method for Calibration of Thermocouples by Comparison Techniques
E230Temperature Electromotive Force (EMF) Tables for Standardized Thermocouples Test Method for Calibration of
Thermocouples By Comparison Techniques
E 230 Specification and Temperature-Electromotive Force (EMF) Tables for Standardized Thermocouples
2.2 Military Standard:
MIL-STD 1942(A) Flexural Strength of High Performance Ceramics at Ambient Temperature
3. Terminology
3.1 Definitions:
3.1.1 complete gage section, n—theportionofthespecimenbetweenthetwoouterbearingsinfour-pointflexureandthree-point
flexure fixtures.
NOTE 1—In this standard, the complete four-point flexure gage section is twice the size of the inner gage section. Weibull statistical analyses, in this
instance, only include portions of the specimen volume or surface which experience tensile stresses.
This test method is under the jurisdiction ofASTM Committee C-28 onAdvanced Ceramics and is the direct responsibility of Subcommittee C28.01 on Properties and
Performance.
Current edition approved June 10, 1998. Published December 1998. Originally published as C 1211-92. Last previous edition C 1211-98.
This test method is under the jurisdiction of ASTM Committee C28 on Advanced Ceramics and is the direct responsibility of Subcommittee C28.01 on Mechanical
Properties and Performance.
Current edition approved Jan. 1, 2008. Published January 2008. Originally approved in 1992. Last previous edition approved in 1998 as C 1211-98a.
Elevated temperatures typically denote, but are not restricted to 200 to 1600°C.
For referencedASTM standards, visit theASTM website, www.astm.org, or contactASTM Customer Service at service@astm.org. For Annual Book of ASTM Standards
, Vol 15.01.volume information, refer to the standard’s Document Summary page on the ASTM website.
Annual Book of ASTM Standards, Vol 03.01.
AvailablefromStandardizationDocumentsOrderDesk,DODSSP,Bldg.4,SectionD,700RobbinsAve.,Philadelphia,PA19111-5098,http://www.dodssp.daps.mil.This
document is a 1990 update of the original MIL-STD 1942(MR), dated November 1983.
*A Summary of Changes section appears at the end of this standard.
Copyright © ASTM International, 100 Barr Harbor Drive, PO Box C700, West Conshohocken, PA 19428-2959, United States.
C 1211 – 02 (2008)
3.1.2 flexural strength—a measure of the ultimate strength of a specified beam in bending.
3.1.2
3.1.3 four-point-1/4 point flexure—a configuration of flexural strength testing in which a specimen is symmetrically loaded at
two locations that are situated at one-quarter of the overall span, away from the outer two support bearings (see Fig. 1).
3.1.3
3.1.4 fully-articulating fixture, n—a flexure fixture designed to be used either with flat and parallel specimens or with uneven
or nonparallel specimens. The fixture allows full independent articulation, or pivoting, of all rollers about the specimen long axis
to match the specimen surface. In addition, the upper or lower pairs are free to pivot to distribute force evenly to the bearing
cylinders on either side.
NOTE 2—See Annex A2 for schematic illustrations of the required pivoting movements.
NOTE 3—A three-point fixture has the inner pair of bearing cylinders replaced by a single bearing cylinder.
3.1.5 inert flexural strength, n—a measure of the strength of a specified beam specimen in bending as determined in an
appropriate inert condition whereby no slow crack growth occurs.
3.1.4
3.1.6 inherent flexural strength, n—the flexural strength of a material in the absence of any effect of surface grinding or other
surface finishing process, or of extraneous damage that may be present. The measured inherent strength is in general a function
of the flexure test method, test conditions, and specimen size.
3.1.7 inner gage section, n—the portion of the specimen between the inner two bearings in a four-point flexure fixture.
3.1.8 semi-articulating fixture, n—aflexurefixturedesignedtobeusedwithflatandparallelspecimens.Thefixtureallowssome
articulation, or pivoting, to ensure the top pair (or bottom pair) of bearing cylinders pivot together about an axis parallel to the
specimen long axis, in order to match the specimen surfaces. In addition, the upper or lower pairs are free to pivot to distribute
force evenly to the bearing cylinders on either side.
NOTE 4—See Annex A2 for schematic illustrations of the required pivoting movements.
NOTE 5—A three-point fixture has the inner pair of bearing cylinders replaced by a single bearing cylinder.
3.1.9 slow crack growth (SCG), n—Subcritical crack growth (extension) which may result from, but is not restricted to, such
mechanisms as environmentally-assisted stress corrosion or diffusive crack growth.
3.1.5
3.1.10 three-point flexure—a configuration of flexural strength testing in which a specimen is loaded at a position midway
between two support bearings (see Fig. 1).
4. Significance and Use
4.1 This test method may be used for material development, quality control, characterization, and design data generation
purposes. This test method is intended to be used with ceramics whose flexural strength is ; 50 MPa (; 7 ksi) or greater.
NOTE 1—Configuration:
A: L = 20 mm
B: L = 40 mm
C: L = 80 mm
FIG. 1 Four-Point- ⁄4 Point and Three-Point Fixture Configurations
C 1211 – 02 (2008)
4.2 The flexure stress is computed based on simple beam theory, with assumptions that the material is isotropic and
homogeneous, the moduli of elasticity in tension and compression are identical, and the material is linearly elastic. The average
grain size should be no greater than ⁄50 of the beam thickness. The homogeneity and isotropy assumptions in the test method rule
out the use of it for continuous fiber-reinforced composites for which Test Method C 1341 is more appropriate.
4.3 The flexural strength of a group of test specimens is influenced by several parameters associated with the test procedure.
Suchfactorsincludethetestingrate,testenvironment,specimensize,specimenpreparation,andtestfixtures.Specimenandfixture
sizeswerechosentoprovideabalancebetweenthepracticalconfigurationsandresultingerrorsasdiscussedinMIL-STD1942(A),
Test Method C 1161, and Refs (1–3). Specific fixture and specimen configurations were designated in order to permit the ready
comparison of data without the need for Weibull size scaling.
4.4The flexural strength of a ceramic material is dependent on both its inherent resistance to fracture and the size and severity
of flaws that are present. Fractographic analysis of fracture surfaces, although beyond the scope of this test method, is highly
recommended for all purposes, especially for design data. See Practice C1322
4.4 The flexural strength of a ceramic material is dependent on both its inherent resistance to fracture and the size and severity
of flaws. Variations in these cause a natural scatter in test results for a sample of test specimens. Fractographic analysis of fracture
surfaces, although beyond the scope of this test method, is highly recommended for all purposes, especially if the data will be used
for design as discussed in MIL STD 1942 (A) and Ref (4) and Practices C 1322 and C 1239.
4.5Flexure strength at elevated temperature may be strongly dependent on testing rate, a consequence of creep, stress corrosion,
or slow crack growth. This test method measures the flexural strength at high loading rates in order to minimize these effects.
4.5 This method determines the flexural strength at elevated temperature and ambient environmental conditions at a nominal,
moderately fast testing rate. The flexural strength under these conditions may or may not necessarily be the inert flexural strength.
Flexure strength at elevated temperature may be strongly dependent on testing rate, a consequence of creep, stress corrosion, or
slow crack growth. If the purpose of the test is to measure the inert flexural strength, then extra precautions are required and faster
testing rates may be necessary.
NOTE 6—Many ceramics are susceptible to either environmentally-assisted slow crack growth or thermally activated slow crack growth. Oxide
ceramics,glasses,glassceramics,andceramicscontainingboundaryphaseglassareparticularlysusceptibletoslowcrackgrowth.Timedependenteffects
thatarecausedbyenvironmentalfactors(e.g.waterashumidityinair)maybeminimizedthroughtheuseofinerttestingatmospheresuchasdrynitrogen
gasorvacuum.Alternatively,testingratesfasterthanspecifiedinthisstandardmaybeusedifthegoalistomeasuretheinertstrength.Thermallyactivated
slow crack growth may occur at elevated temperature even in inert atmospheres. Testing rates faster than specified in this standard should be used if the
goal is to measure the inert flexural strength. On the other hand, many ceramics such as boron carbide, silicon carbide, aluminum nitride and many silicon
nitrideshavenosensitivitytoslowcrackgrowthatroomormoderatelyelevatedtemperaturesandforsuchmaterials,theflexuralstrengthmeasuredunder
in laboratory ambient conditions at the nominal testing rate is the inert flexural strength.
4.6 The three-point test configuration exposes only a very small portion of the specimen to the maximum stress. Therefore,
three-point flexural strengths are likely to be much greater than four-point flexural strengths. Three-point flexure has some
advantages. It uses simpler test fixtures, it is easier to adapt to high temperature, and it is sometimes helpful in Weibull statistical
studies. However, four-point flexure is preferred and recommended for most characterization purposes.
4.7 The three-point test configuration exposes only a very small portion of the specimen to the maximum stress. Therefore,
three-point flexural strengths are likely to be much greater than four-point flexural strengths. Three-point flexure has some
advantages. It uses simpler test fixtures, it is easier to adapt to high temperature, and it is sometimes helpful in Weibull statistical
studies. However, four-point flexure is preferred and recommended for most characterization purposes.
5. Interferences
5.1 Time-dependentphenomena,suchasstresscorrosionandslowcrackgrowth,caninterferewithdeterminationoftheflexural
strengthatroomandelevatedtemperatures.Creepphenomenaalsobecomesignificantatelevatedtemperatures.Creepdeformation
can cause stress relaxation in a flexure specimen during a strength test, thereby causing the elastic formulation that is used to
compute the strength to be in error.
5.2 Surface preparation of the test specimens can introduce machining flaws damage such as microcracks that may have a
pronouncedeffectonflexuralstrength.Machiningdamageimposedduringspecimenpreparationcanbeeitherarandominterfering
Annual Book of ASTM Standards, Vol 14.03.
The boldface numbers in parentheses refer to the list of references at the end of the text.
TABLE 1 Fixture Spans
Configuration Support Span Loading Span,
(L), mm mm
A20 10
B40 20
C80 40
C 1211 – 02 (2008)
factor or an inherent part of the strength characteristic to be measured.With proper care and good machining practice, it is possible
to obtain fractures from the material’s natural flaws. Surface preparation can also lead to residual stresses. Universal or
standardized test methods of surface preparation do not exist. It should be understood that final machining steps may or may not
negate machining damage introduced during the early coarse or intermediate machining.
5.3Slow5.3 Slow crack growth can lead to a rate dependency of flexural strength.The testing rate specified in this standard may
or may not produce the inert flexural strength whereby negligible slow crack growth occurs. See Test Method C1368.C 1368, C
1465, and Ref (5) for more information about possible rate dependencies of flexural strength and methodologies for quantifying
the rate sensitivity
6. Apparatus
6.1 Loading—Specimens may be force in any suitable testing machine provided that uniform rates of direct loading can be
maintained. The force measuring system shall be free of initial lag at the loading rates used and shall be equipped with a means
for retaining readout of the maximum force as well as a force-time or force-deflection record.The accuracy of the testing machine
shall be in accordance with Practices E 4.
6.2
...

Questions, Comments and Discussion

Ask us and Technical Secretary will try to provide an answer. You can facilitate discussion about the standard in here.