ASTM B891/B891M-19
(Specification)Standard Specification for Seamless and Welded Titanium and Titanium Alloy Condenser and Heat Exchanger Tubes with Enhanced Surface for Improved Heat Transfer
Standard Specification for Seamless and Welded Titanium and Titanium Alloy Condenser and Heat Exchanger Tubes with Enhanced Surface for Improved Heat Transfer
ABSTRACT
This specification covers seamless and welded titanium and titanium alloy tubing on which the external or internal surface, or both, has been modified by a cold forming process to produce an integral enhanced surface for improved heat transfer. The tubes are used in surface condensers, evaporators, heat exchangers and similar heat transfer apparatus in unfinned end diameters of a specific size. Tubes shall be furnished with unenhanced ends in the annealed condition and shall be suitable for rolling-in operations. Each tube shall be subject to a nondestructive eddy current test, and either a pneumatic or hydrostatic test.
SCOPE
1.1 This specification covers seamless and welded titanium and titanium alloy tubing on which at least part of the external or internal surface has been enhanced by cold forming for improved heat transfer. The tubes are used in surface condensers, evaporators, heat exchangers, coils, and similar heat transfer apparatus in diameters up to and including 1 in. [25.4 mm]. The base tube wall thickness is typically at least 0.049 in. [1.245 mm] average, but lighter gauge may be negotiated with the manufacturer.
1.2 Tubing purchased to this specification will typically be inserted through close-fitting holes in tubesheets, baffles, or support plates spaced along the tube length such as defined in the Tubular Exchanger Manufacturer’s Association (TEMA) Standard.2 The tube ends will also be expanded, and may then be welded. Tube may also be bent to form U-tubes or be coiled or otherwise formed, although tight radii may require unenhanced length for the bends.
1.3 The values stated in either SI units or inch-pound units are to be regarded separately as standard. The values stated in each system may not be exact equivalents; therefore, each system shall be used independently of the order. Combining values from the two systems may result in non-conformance. Within the text, the SI units are shown in brackets. The inch-pound units shall apply unless the “M” designation of this specification is specified in the order.
1.4 The following precautionary statement pertains to the test method portion only: Section 8, 9, 10 and S1 of this specification:This standard does not purport to address all of the safety concerns, if any, associated with its use. It is the responsibility of the user of this standard to establish appropriate safety, health, and environmental practices and determine the applicability of regulatory limitations prior to use.
1.5 This international standard was developed in accordance with internationally recognized principles on standardization established in the Decision on Principles for the Development of International Standards, Guides and Recommendations issued by the World Trade Organization Technical Barriers to Trade (TBT) Committee.
General Information
- Status
- Published
- Publication Date
- 31-Mar-2019
- Technical Committee
- B10 - Reactive and Refractory Metals and Alloys
- Drafting Committee
- B10.01 - Titanium
Relations
- Effective Date
- 01-Apr-2019
- Effective Date
- 01-Feb-2024
- Effective Date
- 01-Dec-2019
- Effective Date
- 01-Mar-2019
- Effective Date
- 01-Jan-2018
- Effective Date
- 01-Jul-2017
- Effective Date
- 15-Jun-2017
- Effective Date
- 01-Feb-2017
- Effective Date
- 01-Aug-2016
- Effective Date
- 01-Feb-2016
- Effective Date
- 01-Dec-2015
- Effective Date
- 01-Sep-2015
- Effective Date
- 01-Jun-2014
- Effective Date
- 01-Jun-2014
- Effective Date
- 01-Mar-2014
Overview
ASTM B891/B891M-19 is the internationally recognized standard specification developed by ASTM International for seamless and welded titanium and titanium alloy condenser and heat exchanger tubes with enhanced surfaces. This standard addresses tubes that have been mechanically enhanced-internally, externally, or both-through cold forming, resulting in improved heat transfer performance. ASTM B891/B891M-19 is highly relevant for industries utilizing condensers, evaporators, and heat exchangers where efficient and reliable heat transfer is crucial.
The specification covers tubes with outside diameters up to 1 inch (25.4 mm), ensuring dimensional consistency and material integrity for demanding applications, while providing requirements for mechanical property conformance, heat treatment, dimensional tolerances, and non-destructive testing.
Key Topics
Scope and Coverage
- Applies to seamless and welded titanium and titanium alloy tubes enhanced by cold forming for increased heat transfer.
- Tubes are intended for use in heat transfer equipment such as surface condensers, evaporators, and heat exchangers.
Tube Construction and Enhancement
- Enhancement can occur on the internal or external surface, or both, increasing the integral surface area.
- Tubes are supplied with plain, unenhanced ends for ease of installation and rolling-in operations.
Material and Manufacturing
- Manufactured from grades of titanium and titanium alloys conforming to ASTM B338.
- Available as straight tubes, U-tubes, or coiled for specialized installation requirements.
- Typically supplied in the as-enhanced, annealed, or stress-relieved condition.
Testing and Quality Assurance
- Mandatory non-destructive eddy current inspection per ASTM E426.
- Pneumatic or hydrostatic pressure tests are performed to assure tube integrity.
- Additional chemical and mechanical testing ensures compliance with safety and performance criteria.
Ordering and Documentation
- Purchase orders should specify grade, dimensions, enhancement details, length, and required condition.
- Certification and reporting requirements provide traceability for chemical composition and mechanical test results.
Applications
ASTM B891/B891M-19 tubes are widely used in:
- Surface Condensers: Cooling and condensing of steam or vapor in power generation and chemical processing.
- Evaporators: Used in desalination, refrigeration, and waste heat recovery.
- Heat Exchangers: Found in the oil and gas, chemical, and food processing industries for efficient thermal energy transfer.
- Industrial Cooling Systems: Suitable for corrosive environments due to titanium’s exceptional corrosion resistance.
- Coils and U-tube Assemblies: Used where compact installation and reliable performance are required.
The enhanced surface area produced by cold forming increases heat transfer efficiency, reduces material volume, and offers energy savings-all while leveraging titanium’s light weight and excellent resistance to corrosion, scaling, and fouling.
Related Standards
- ASTM B338 - Specification for seamless and welded titanium and titanium alloy tubes for condensers and heat exchangers.
- ASTM A1047/A1047M - Test method for pneumatic leak testing of tubing.
- ASTM E426 - Practice for electromagnetic (eddy current) examination of seamless and welded tubular products.
- ASTM E1316 - Terminology for nondestructive examinations.
- TEMA (Tubular Exchanger Manufacturers Association) Standards - For tube exchanger design and construction guidelines.
Keywords: ASTM B891, titanium heat exchanger tubes, enhanced surface tubes, titanium condenser tubes, welded titanium tube, seamless titanium tube, titanium alloy tubing, heat transfer, surface condenser standards, ASTM titanium specification, non-destructive testing titanium tubes.
Adopting ASTM B891/B891M-19 ensures that titanium heat exchanger and condenser tubes meet stringent international standards, contributing to improved operational efficiency, safety, and longevity in critical heat transfer applications.
Buy Documents
ASTM B891/B891M-19 - Standard Specification for Seamless and Welded Titanium and Titanium Alloy Condenser and Heat Exchanger Tubes with Enhanced Surface for Improved Heat Transfer
REDLINE ASTM B891/B891M-19 - Standard Specification for Seamless and Welded Titanium and Titanium Alloy Condenser and Heat Exchanger Tubes with Enhanced Surface for Improved Heat Transfer
Get Certified
Connect with accredited certification bodies for this standard

DNV
DNV is an independent assurance and risk management provider.

Lloyd's Register
Lloyd's Register is a global professional services organisation specialising in engineering and technology.

DNV Energy Systems
Energy and renewable energy certification.
Sponsored listings
Frequently Asked Questions
ASTM B891/B891M-19 is a technical specification published by ASTM International. Its full title is "Standard Specification for Seamless and Welded Titanium and Titanium Alloy Condenser and Heat Exchanger Tubes with Enhanced Surface for Improved Heat Transfer". This standard covers: ABSTRACT This specification covers seamless and welded titanium and titanium alloy tubing on which the external or internal surface, or both, has been modified by a cold forming process to produce an integral enhanced surface for improved heat transfer. The tubes are used in surface condensers, evaporators, heat exchangers and similar heat transfer apparatus in unfinned end diameters of a specific size. Tubes shall be furnished with unenhanced ends in the annealed condition and shall be suitable for rolling-in operations. Each tube shall be subject to a nondestructive eddy current test, and either a pneumatic or hydrostatic test. SCOPE 1.1 This specification covers seamless and welded titanium and titanium alloy tubing on which at least part of the external or internal surface has been enhanced by cold forming for improved heat transfer. The tubes are used in surface condensers, evaporators, heat exchangers, coils, and similar heat transfer apparatus in diameters up to and including 1 in. [25.4 mm]. The base tube wall thickness is typically at least 0.049 in. [1.245 mm] average, but lighter gauge may be negotiated with the manufacturer. 1.2 Tubing purchased to this specification will typically be inserted through close-fitting holes in tubesheets, baffles, or support plates spaced along the tube length such as defined in the Tubular Exchanger Manufacturer’s Association (TEMA) Standard.2 The tube ends will also be expanded, and may then be welded. Tube may also be bent to form U-tubes or be coiled or otherwise formed, although tight radii may require unenhanced length for the bends. 1.3 The values stated in either SI units or inch-pound units are to be regarded separately as standard. The values stated in each system may not be exact equivalents; therefore, each system shall be used independently of the order. Combining values from the two systems may result in non-conformance. Within the text, the SI units are shown in brackets. The inch-pound units shall apply unless the “M” designation of this specification is specified in the order. 1.4 The following precautionary statement pertains to the test method portion only: Section 8, 9, 10 and S1 of this specification:This standard does not purport to address all of the safety concerns, if any, associated with its use. It is the responsibility of the user of this standard to establish appropriate safety, health, and environmental practices and determine the applicability of regulatory limitations prior to use. 1.5 This international standard was developed in accordance with internationally recognized principles on standardization established in the Decision on Principles for the Development of International Standards, Guides and Recommendations issued by the World Trade Organization Technical Barriers to Trade (TBT) Committee.
ABSTRACT This specification covers seamless and welded titanium and titanium alloy tubing on which the external or internal surface, or both, has been modified by a cold forming process to produce an integral enhanced surface for improved heat transfer. The tubes are used in surface condensers, evaporators, heat exchangers and similar heat transfer apparatus in unfinned end diameters of a specific size. Tubes shall be furnished with unenhanced ends in the annealed condition and shall be suitable for rolling-in operations. Each tube shall be subject to a nondestructive eddy current test, and either a pneumatic or hydrostatic test. SCOPE 1.1 This specification covers seamless and welded titanium and titanium alloy tubing on which at least part of the external or internal surface has been enhanced by cold forming for improved heat transfer. The tubes are used in surface condensers, evaporators, heat exchangers, coils, and similar heat transfer apparatus in diameters up to and including 1 in. [25.4 mm]. The base tube wall thickness is typically at least 0.049 in. [1.245 mm] average, but lighter gauge may be negotiated with the manufacturer. 1.2 Tubing purchased to this specification will typically be inserted through close-fitting holes in tubesheets, baffles, or support plates spaced along the tube length such as defined in the Tubular Exchanger Manufacturer’s Association (TEMA) Standard.2 The tube ends will also be expanded, and may then be welded. Tube may also be bent to form U-tubes or be coiled or otherwise formed, although tight radii may require unenhanced length for the bends. 1.3 The values stated in either SI units or inch-pound units are to be regarded separately as standard. The values stated in each system may not be exact equivalents; therefore, each system shall be used independently of the order. Combining values from the two systems may result in non-conformance. Within the text, the SI units are shown in brackets. The inch-pound units shall apply unless the “M” designation of this specification is specified in the order. 1.4 The following precautionary statement pertains to the test method portion only: Section 8, 9, 10 and S1 of this specification:This standard does not purport to address all of the safety concerns, if any, associated with its use. It is the responsibility of the user of this standard to establish appropriate safety, health, and environmental practices and determine the applicability of regulatory limitations prior to use. 1.5 This international standard was developed in accordance with internationally recognized principles on standardization established in the Decision on Principles for the Development of International Standards, Guides and Recommendations issued by the World Trade Organization Technical Barriers to Trade (TBT) Committee.
ASTM B891/B891M-19 is classified under the following ICS (International Classification for Standards) categories: 27.060.30 - Boilers and heat exchangers. The ICS classification helps identify the subject area and facilitates finding related standards.
ASTM B891/B891M-19 has the following relationships with other standards: It is inter standard links to ASTM B891-12, ASTM E1316-24, ASTM E1316-19b, ASTM E1316-19, ASTM E1316-18, ASTM B338-17, ASTM E1316-17a, ASTM E1316-17, ASTM E1316-16a, ASTM E1316-16, ASTM E1316-15a, ASTM E1316-15, ASTM E1316-14, ASTM E1316-14e1, ASTM A1047/A1047M-05(2014). Understanding these relationships helps ensure you are using the most current and applicable version of the standard.
ASTM B891/B891M-19 is available in PDF format for immediate download after purchase. The document can be added to your cart and obtained through the secure checkout process. Digital delivery ensures instant access to the complete standard document.
Standards Content (Sample)
This international standard was developed in accordance with internationally recognized principles on standardization established in the Decision on Principles for the
Development of International Standards, Guides and Recommendations issued by the World Trade Organization Technical Barriers to Trade (TBT) Committee.
Designation:B891/B891M −19
Standard Specification for
Seamless and Welded Titanium and Titanium Alloy
Condenser and Heat Exchanger Tubes with Enhanced
Surface for Improved Heat Transfer
This standard is issued under the fixed designation B891/B891M; the number immediately following the designation indicates the year
of original adoption or, in the case of revision, the year of last revision.Anumber in parentheses indicates the year of last reapproval.
A superscript epsilon (´) indicates an editorial change since the last revision or reapproval.
1. Scope* priate safety, health, and environmental practices and deter-
mine the applicability of regulatory limitations prior to use.
1.1 This specification covers seamless and welded titanium
1.5 This international standard was developed in accor-
and titanium alloy tubing on which at least part of the external
dance with internationally recognized principles on standard-
or internal surface has been enhanced by cold forming for
ization established in the Decision on Principles for the
improved heat transfer. The tubes are used in surface
Development of International Standards, Guides and Recom-
condensers, evaporators, heat exchangers, coils, and similar
mendations issued by the World Trade Organization Technical
heat transfer apparatus in diameters up to and including 1 in.
Barriers to Trade (TBT) Committee.
[25.4 mm]. The base tube wall thickness is typically at least
0.049 in. [1.245mm] average, but lighter gauge may be
2. Referenced Documents
negotiated with the manufacturer.
2.1 ASTM Standards:
1.2 Tubing purchased to this specification will typically be
A1047/A1047MTestMethodforPneumaticLeakTestingof
inserted through close-fitting holes in tubesheets, baffles, or
Tubing
support plates spaced along the tube length such as defined in
B338Specification for Seamless and Welded Titanium and
the Tubular Exchanger Manufacturer’s Association (TEMA)
TitaniumAlloy Tubes for Condensers and Heat Exchang-
Standard. The tube ends will also be expanded, and may then
ers
bewelded.TubemayalsobebenttoformU-tubesorbecoiled
E426PracticeforElectromagnetic(EddyCurrent)Examina-
or otherwise formed, although tight radii may require unen-
tion of Seamless and Welded Tubular Products, Titanium,
hanced length for the bends.
Austenitic Stainless Steel and Similar Alloys
E1316Terminology for Nondestructive Examinations
1.3 The values stated in either SI units or inch-pound units
are to be regarded separately as standard. The values stated in
3. Terminology
each system may not be exact equivalents; therefore, each
system shall be used independently of the order. Combining
3.1 Definitions of Terms Specific to This Standard:
values from the two systems may result in non-conformance.
3.1.1 base tube, n—theseamlessorweldedtubeconforming
Within the text, the SI units are shown in brackets. The
to Specification B338 prior to enhancing.
inch-poundunitsshallapplyunlessthe“M”designationofthis
3.1.2 finished tube, n—the tube following enhancement and
specification is specified in the order.
any heat treatment, forming, or other processing specified.
1.4 The following precautionary statement pertains to the
3.1.3 enhanced tube or section, n—all or sections of tube
test method portion only: Section 8, 9, 10 and S1 of this
length that have been mechanically worked inside, outside, or
specification:This standard does not purport to address all of
both, to produce increased surface area for improved heat
the safety concerns, if any, associated with its use. It is the
transfer.
responsibility of the user of this standard to establish appro-
3.1.4 finned section, n—sections of tube exterior length that
have been mechanically worked to produce increased surface
area for improved heat transfer; see Table 1 for nomenclature
This specification is under the jurisdiction of ASTM Committee B10 on
of finning details.
Reactive and Refractory Metals and Alloys and is the direct responsibility of
Subcommittee B10.01 on Titanium.
Current edition approved April 1, 2019. Published May 2019. Originally
approved in 1998. Last previous edition approved in 2012 as B891–12. DOI: For referenced ASTM standards, visit the ASTM website, www.astm.org, or
10.1520/B0891_B0891M-19. contact ASTM Customer Service at service@astm.org. For Annual Book of ASTM
Available from Tubular Exchanger Manufacturers Association, Inc. 25 North Standards volume information, refer to the standard’s Document Summary page on
Broadway Tarrytown, NY 10591, www.tema.org. the ASTM website.
*A Summary of Changes section appears at the end of this standard
Copyright © ASTM International, 100 Barr Harbor Drive, PO Box C700, West Conshohocken, PA 19428-2959. United States
B891/B891M−19
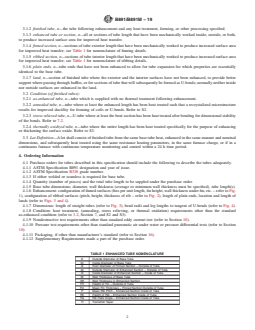
TABLE 1 ENHANCED TUBE NOMENCLATURE
3.2.4 thermally oxidized tube, n—tube where the entire
D Outside Diameter of Base Tube length has been heat treated specifically for the purpose of
Di Inside Diameter of Base Tube
enhancing or thickening the surface oxide. Refer to S3.
dr Root Diameter of Finned Section – Outside of Tube
do Outside Diameter of Enhanced Section – Outside of Tube
3.3 Lot Definition—Alot shall consist of finished tube from
di Inside Diameter of Enhanced Section – Inside of Tube
the same base tube heat, enhanced in the same manner and
W Wall Thickness of Base Tube
nominal dimensions, and subsequently heat treated using the
Wf Wall Thickness in Enhanced Section
Fh Height of Fin – Outside of Tube
same resistance heating parameters, in the same furnace
Fm Mean Fin Thickness – Finned Section Outside of Tube
charge, or if in a continuous furnace with continuous tempera-
P Mean Rib Pitch – Enhanced Section Inside of Tube
ture monitoring and control within a 24 h time period.
Rh Height of Rib – Enhanced Section Inside of Tube
Ha Rib Helix Angle – Enhanced Section Inside of Tube
Tt Transition Taper
4. Ordering Information
4.1 Purchase orders for tubes described in this specification
should include the following to describe the tubes adequately.
4.1.1 ASTM Specification B891 designation and year of
issue.
4.1.2 ASTM Specification B338 grade number.
4.1.3 If either welded or seamless is required for base tube.
4.1.4 Quantity (number of pieces) and the total tube length
to be suppled under the purchase order.
4.1.5 Base tube dimensions; diameter, wall thickness (aver-
age or minimum wall thickness must be specified), tube
length(s).
FIG. 1Outside Finning Only
4.1.6 Enhancement: configuration of finned surfaces (fins
per unit length, fin height, wall thickness under fin, etc. – refer
to Fig. 1), configuration of ribbed surfaces (pitch, height,
thickness of rib – refer to Fig. 2), length of plain ends, location
and length of lands (refer to Figs. 3 and 4).
4.1.7 Dimensions: length of straight tubes (refer to Fig. 3),
bend radii and leg lengths to tangent of U-bends (refer to Fig.
4).
4.1.8 Condition: heat treatment, (annealing, stress relieving,
or thermal oxidation) requirements other than the standard
as-enhanced condition (refer to 3.2, Section 7, and S2 and S3).
FIG. 2Outside Finning and Inside Ribbing
4.1.9 Nondestructive test requirements other than standard
eddy current test (refer to Section 10).
3.1.5 ribbed section, n—sections of tube interior length that
4.1.10 Pressure test requirements other than standard pneu-
have been mechanically worked to produce increased surface
matic air under water or pressure differential tests (refer to
area for improved heat transfer; see Table 1 for nomenclature
Section 10).
of ribbing details.
4.1.11 Packaging, if other than manufacturer’s standard
(refer to Section 16).
3.1.6 plain ends, n—tube ends that have not been enhanced
4.1.12 Supplementary Requirements made a part of the
toallowfortubeexpansionforwhichpropertiesareessentially
purchase order.
identical to the base tube.
3.1.7 land, n—section of finished tube where the exterior
5. General Requirements
and the interior surfaces have not been enhanced, to provide
5.1 Tubes described by this specification shall be furnished
better support where passing through baffles, or for sections of
with plain ends.
tube that will subsequently be formed as U-bends; normally
neither inside nor outside surfaces are enhanced in the land.
5.2 Enhanced sections of the tube shall be supplied in the
cold worked condition produced by the enhancing operation
3.2 Condition (of finished tubes):
unless specified otherwise in the purchase order (refer to
3.2.1 as-enhanced tube, n—tube which is supplied with no
Supplementary Requirements S2 and S3.)
thermal treatment following enhancement.
3.2.2 annealed tube, n—tube where at least the enhanced 5.3 The tubes shall be able to stand properly conducted
length has been heat treated such that a recrystalized micro- expansion and bending without showing cracks or other flaws.
structure results for improved ductility for forming of coils or
6. Materials and Manufacture
U-bends. Refer to S2.
3.2.3 stress relieved tube, n—U-tube where at least the bent 6.1 The enhanced tubes shall be manufactured from an-
section has been heat treated after bending for dimensional nealed seamless or stress relieved or annealed welded base
stability of the bends. Refer to 7.2. tubes that conform to the requirements of Specification B338.
B891/B891M−19
FIG. 3Straight Tube Dimensional Tolerances
FIG. 4U-Tube Dimensional Tolerances
6.2 Enhanced sections shall be produced by cold forming. 7.2 U-bendsshallbestressrelievedinthebentlengthandat
least1in.[25.4mm]ofmaterialbeyondthetangentofeachleg
6.3 Plainendsandlandsshallnotbecoldworkedduringthe
usingparameterssufficienttomaintaindimensionalstabilityof
enhancing operations.
the bend.
6.4 The following titanium grades are considered suitable
7.2.1 U-bends shall include a minimum of 2 in. [50.8 mm]
for enhancing: Grade 1 (11, 17, 27), 2, (7, 16, 26), 2H (7H,
landorunfinnedlengthlocatedoneachstraightlegbeyondthe
16H, 26H), and 3.
tangentofthebendtoallowforclampingsurfacewhenelectric
6.4.1 Enhancing of other grades may be considered by
resistance method is used for heat treatment.
negotiation with the manufacturer.
7.2.2 Stress relieving shall be conducted in air or in a
7. Condition and/or Heat Treatment
protectiveinertgasatmospheresuchthattheoperationdoesnot
result in excessive surface oxidation. Surface oxidation indi-
7.1 Straight tubes and the straight sections of U-tubes shall
be supplied in the as-enhanced condition as described in 3.2.1, cated by an iridescent straw to dark blue surface color is
normal following stress in relieving in air. Matte gray, or loose
unless specified otherwise by the purchaser (see Supplemen-
tary Requirements S2 and S3). white or yellow scale is unacceptable.
B891/B891M−19
8. Chemical Composition 10.2.5 Tubes causing relevant signals because of injurious
defects that reduce the wall thickness below the minimum
8.1 The composition of the titanium or titanium alloy shall
specified shall be rejected. If, after retest and examination, no
conformtothechemicalrequirementsforthegradespecifiedas
source for the reject signal can be discerned, the tube shall be
listed in Specification B338.
rejected.
9. Tensile Requirements
10.3 Pneumatic Pressure Test—Each tube in the finished
9.1 The base tube prior to the enhancing operation shall
condition, except for bending if that is required, shall be
conform to the tensile properties and other applicable require-
subjected to a pneumatic pressure test. Each tube shall with-
ments of Specification B338 for the grade specified.
stand a minimum internal pressure of 250 psi [1.72 MPa] for a
minimumof5swithoutshowingevidenceofleakage.Thetest
10. Nondestructive, Pressure, and Other Tests
method used shall permit easy detection of any leakage by
10.1 Nondestructive, pressure, and other tests other than
placing the tube underwater or by using the pressure differen-
those made mandatory in 10.2 or 10.3 shall be specified in the
tial method as defined in Test Method A1047/A1047M. Any
purchase order.
evidence of leakage shall be cause for rejection of that tube.
10.2 Eddy Current Test—Each tube in the finished
10.4 Hydrostatic Pressure Test:
condition, except for bending if that is required, shall be
10.4.1 Hydrostatictestofstraighttubeisnotrequiredunless
subjected to an eddy current test in accordance with Practice
Supplementary Requirement S1 is made part of the purchase
E426 by passing it through an encircling coil designed to test
order.
the entire cross section of the tube.
10.4.2 Hydrostatic test of U-bend tube is required. Testing
10.2.1 The reference standard tube used to calibrate the
eddy current test equipment shall be sound and of the same shall be completed for each U-tube.Testing shall be conducted
grade, condition, nominal dimensions, and enhanced configu- in accordance with Supplementary Requirement S1.
ration as the lot of tubes to be tested on a production basis.
10.4.3 Hydrostatic testing shall be conducted after all re-
Drill four holes not larger than 0.031 in. [0.787 mm] in
quired enhancing, bending, and heat treatment is completed.
diameter radially through the enhanced wall in each of four
successive planes at 0, 90, 180 and 270°. Use EDM or a
11. Permissible Variations in Dimensions
suitable drill and jig to guide the drill, taking care to avoid
11.1 Diameter:
distortion of the adjacent fins. Locate one hole in the weld for
welded material. Artificial discontinuities shall be spaced at 11.1.1 The outside diameter of plain ends and lands shall
least 16 in. [406 mm] apart to provide signal resolution not vary by more than the amount in Table 2, as measured by
adequate for interpretation. Discard the reference standard and “go” and “no go” ring gauges. The dimensions of the ring
replacewhenerroneoussignalsareproducedfrommechanical, gauges shall be as described in 11.1.3 and 11.1.4.
metallurgical or other damage to the reference tube.
11.1.2 The diameter over the enhanced sections shall not
10.2.2 Adjust the eddy current test unit to obtain an opti-
exceed the diameter of the plain sections involved, as deter-
mum signal-to-noise ratio with the minimum sensitivity re-
mined by a “go” ring gauge unless otherwise specified.
quired to detect all four artificial defects in the reference
11.1.3 The inside diameter dimension of the “go” ring
standard on a repeatable basis. Equipment adjustments and
gaugeshallbeequaltothenominaltubediameter,plustheplus
tube speed maintained during calibration shall be the same for
tolerance from Table 2, plus 0.002 in. [0.051 mm]. The length
production tubes.
of the “go” ring gauge shall be 1 in. [25.4 mm] minimum.
10.2.3 Setasidetubesshowinganeddycurrentindicationin
11.1.4 The inside diameter dimension of the “no go” ring or
excess of any signal obtained from artificial defects in the
snap-on gauge shall be equal to the nominal tube diameter
reference standard and subject them to retest or rejection.
minus the minus tolerance from Table 2.The length of the “no
10.2.4 Tubescausingirrelevantsignalsbecauseofmoisture,
go” ring gauge shall be 1 in. [25.4 mm] minimum.
debris and like effects shall be considered to conform, should
11.1.5 Permissible variations from the specified outside
they not cause output signals beyond acceptable limits when
retested. Tubes causing irrelevant signals because of visible diameter in the bent portion of the U-tube for bend radius R =
2× D or greater, neither the major nor minor diameter of the
and identifiable handling marks shall be considered to
conform, provided the wall thickness in the enhanced and tube shall deviate from the nominal diameter prior to bending
unenhanced areas is not less than the minimum specified. by more than 10%.
TABLE 2 Permissible Variations in Outside Dimensions and Wall Thickness Based on Individual Measurements
A
Permissible Variations in
A
Diameter Tolerance
Permissible Variations in
Outside Diameter, in. [mm] Minimimum Wall Thickness,
A
Wall Thickness, t, %
in. [mm]
t, %
Under 1 [25.4], excl ±0.004 [±0.102] ±10 ±20, –0
1 [25.4] ±0.005 [±0.127] ±10 ±20, –0
A
These permissible variations in outside diameter apply only to tubes as finished at the mill before subsequent swaging, expanding, bending, polishing or other fabricating
operations.
B891/B891M−19
TABLE 4 Straightness Tolerances
11.1.6 Permissible variations from the specified outside
diameter in the bent portion of
...
This document is not an ASTM standard and is intended only to provide the user of an ASTM standard an indication of what changes have been made to the previous version. Because
it may not be technically possible to adequately depict all changes accurately, ASTM recommends that users consult prior editions as appropriate. In all cases only the current version
of the standard as published by ASTM is to be considered the official document.
Designation: B891 − 12 B891/B891M − 19
Standard Specification for
Seamless and Welded Titanium and Titanium Alloy
Condenser and Heat Exchanger Tubes with Enhanced
Surface for Improved Heat Transfer
This standard is issued under the fixed designation B891;B891/B891M; the number immediately following the designation indicates the
year of original adoption or, in the case of revision, the year of last revision. A number in parentheses indicates the year of last
reapproval. A superscript epsilon (´) indicates an editorial change since the last revision or reapproval.
1. Scope*
1.1 This specification covers seamless and welded titanium and titanium alloy tubing on which at least part of the external or
internal surface has been enhanced by cold forming for improved heat transfer. The tubes are used in surface condensers,
evaporators, heat exchangers, coils, and similar heat transfer apparatus in diameters up to and including 1 in. (25.4 mm).[25.4 mm].
The base tube wall thickness is typically at least 0.049 in. [1.245 mm] average, but lighter gauge may be negotiated with the
manufacturer.
1.2 Tubing purchased to this specification will typically be inserted through close-fitting holes in tubesheets, baffles, or support
plates spaced along the tube length such as defined in the Tubular Exchanger Manufacturer’s Association (TEMA) Standard. The
tube ends will also be expanded, and may then be welded. Tube may also be bent to form U-tubes or be coiled or otherwise formed,
although tight radii may require unenhanced length for the bends.
1.3 The values stated in either SI units or inch-pound units are to be regarded separately as standard. The values given in
parentheses are mathematical conversions to SI units that are provided for information only and are not considered standard.stated
in each system may not be exact equivalents; therefore, each system shall be used independently of the order. Combining values
from the two systems may result in non-conformance. Within the text, the SI units are shown in brackets. The inch-pound units
shall apply unless the “M” designation of this specification is specified in the order.
1.4 The following precautionary statement pertains to the test method portion only: Section 8, 9, 10 and S1 of this
specification:This standard does not purport to address all of the safety concerns, if any, associated with its use. It is the
responsibility of the user of this standard to establish appropriate safety safety, health, and healthenvironmental practices and
determine the applicability of regulatory limitations prior to use.
1.5 This international standard was developed in accordance with internationally recognized principles on standardization
established in the Decision on Principles for the Development of International Standards, Guides and Recommendations issued
by the World Trade Organization Technical Barriers to Trade (TBT) Committee.
2. Referenced Documents
2.1 ASTM Standards:
A1047/A1047M Test Method for Pneumatic Leak Testing of Tubing
B338 Specification for Seamless and Welded Titanium and Titanium Alloy Tubes for Condensers and Heat Exchangers
E426 Practice for Electromagnetic (Eddy Current) Examination of Seamless and Welded Tubular Products, Titanium, Austenitic
Stainless Steel and Similar Alloys
E1316 Terminology for Nondestructive Examinations
3. Terminology
3.1 Definitions of Terms Specific to This Standard:
3.1.1 base tube, n—the seamless or welded tube conforming to Specification B338 prior to enhancing.
This specification is under the jurisdiction of ASTM Committee B10 on Reactive and Refractory Metals and Alloys and is the direct responsibility of Subcommittee
B10.01 on Titanium.
Current edition approved March 1, 2012April 1, 2019. Published March 2012May 2019. Originally approved in 1998. Last previous edition approved in 20042012 as
B891B891 – 12. – (2004). DOI: 10.1520/B0891-12.10.1520/B0891_B0891M-19.
Available from Tubular Exchanger Manufacturers Association, Inc. 25 North Broadway Tarrytown, NY 10591, www.tema.org.
For referenced ASTM standards, visit the ASTM website, www.astm.org, or contact ASTM Customer Service at service@astm.org. For Annual Book of ASTM Standards
volume information, refer to the standard’s Document Summary page on the ASTM website.
*A Summary of Changes section appears at the end of this standard
Copyright © ASTM International, 100 Barr Harbor Drive, PO Box C700, West Conshohocken, PA 19428-2959. United States
B891/B891M − 19
3.1.2 finished tube, n—the tube following enhancement and any heat treatment, forming, or other processing specified.
3.1.3 enhanced tube or section, n—all or sections of tube length that have been mechanically worked inside, outside, or both,
to produce increased surface area for improved heat transfer.
3.1.4 finned section, n—sections of tube exterior length that have been mechanically worked to produce increased surface area
for improved heat transfer; see Table 1 for nomenclature of finning details.
3.1.5 ribbed section, n—sections of tube interior length that have been mechanically worked to produce increased surface area
for improved heat transfer; see Table 1 for nomenclature of ribbing details.
3.1.6 plain ends, n—tube ends that have not been enhanced to allow for tube expansion for which properties are essentially
identical to the base tube.
3.1.7 land, n—section of finished tube where the exterior and the interior surfaces have not been enhanced, to provide better
support where passing through baffles, or for sections of tube that will subsequently be formed as U-bends; normally neither inside
nor outside surfaces are enhanced in the land.
3.2 Condition (of finished tubes):
3.2.1 as-enhanced tube, n—tube which is supplied with no thermal treatment following enhancement.
3.2.2 annealed tube, n—tube where at least the enhanced length has been heat treated such that a recrystalized microstructure
results for improved ductility for forming of coils or U-bends. Refer to S2.
3.2.3 stress relieved tube, n—U-tube where at least the bent section has been heat treated after bending for dimensional stability
of the bends. Refer to 7.2.
3.2.4 thermally oxidized tube, n—tube where the entire length has been heat treated specifically for the purpose of enhancing
or thickening the surface oxide. Refer to S3.
3.3 Lot Definition—A lot shall consist of finished tube from the same base tube heat, enhanced in the same manner and nominal
dimensions, and subsequently heat treated using the same resistance heating parameters, in the same furnace charge, or if in a
continuous furnace with continuous temperature monitoring and control within a 24 h time period.
4. Ordering Information
4.1 Purchase orders for tubes described in this specification should include the following to describe the tubes adequately.
4.1.1 ASTM Specification B891 designation and year of issue.
4.1.2 ASTM Specification B338 grade number.
4.1.3 If either welded or seamless is required for base tube.
4.1.4 Quantity (number of pieces) and the total tube length to be suppled under the purchase order.
4.1.5 Base tube dimensions; diameter, wall thickness (average or minimum wall thickness must be specified), tube length(s).
4.1.6 Enhancement: configuration of finned surfaces (fins per unit length, fin height, wall thickness under fin, etc. – refer to Fig.
1), configuration of ribbed surfaces (pitch, height, thickness of rib – refer to Fig. 2), length of plain ends, location and length of
lands (refer to Figs. 3 and 4).
4.1.7 Dimensions: length of straight tubes (refer to Fig. 3), bend radii and leg lengths to tangent of U-bends (refer to Fig. 4).
4.1.8 Condition: heat treatment, (annealing, stress relieving, or thermal oxidation) requirements other than the standard
as-enhanced condition (refer to 3.2, Section 7, and S2 and S3).
4.1.9 Nondestructive test requirements other than standard eddy current test (refer to Section 10).
4.1.10 Pressure test requirements other than standard pneumatic air under water or pressure differential tests (refer to Section
10).
4.1.11 Packaging, if other than manufacturer’s standard (refer to Section 16).
4.1.12 Supplementary Requirements made a part of the purchase order.
TABLE 1 ENHANCED TUBE NOMENCLATURE
D Outside Diameter of Base Tube
Di Inside Diameter of Base Tube
dr Root Diameter of Finned Section – Outside of Tube
do Outside Diameter of Enhanced Section – Outside of Tube
di Inside Diameter of Enhanced Section – Inside of Tube
W Wall Thickness of Base Tube
Wf Wall Thickness in Enhanced Section
Fh Height of Fin – Outside of Tube
Fm Mean Fin Thickness – Finned Section Outside of Tube
P Mean Rib Pitch – Enhanced Section Inside of Tube
Rh Height of Rib – Enhanced Section Inside of Tube
Ha Rib Helix Angle – Enhanced Section Inside of Tube
Tt Transition Taper
B891/B891M − 19
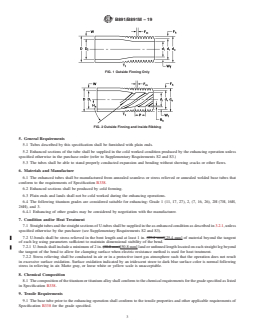
FIG. 1 Outside Finning Only
FIG. 2 Outside Finning and Inside Ribbing
5. General Requirements
5.1 Tubes described by this specification shall be furnished with plain ends.
5.2 Enhanced sections of the tube shall be supplied in the cold worked condition produced by the enhancing operation unless
specified otherwise in the purchase order (refer to Supplementary Requirements S2 and S3.)
5.3 The tubes shall be able to stand properly conducted expansion and bending without showing cracks or other flaws.
6. Materials and Manufacture
6.1 The enhanced tubes shall be manufactured from annealed seamless or stress relieved or annealed welded base tubes that
conform to the requirements of Specification B338.
6.2 Enhanced sections shall be produced by cold forming.
6.3 Plain ends and lands shall not be cold worked during the enhancing operations.
6.4 The following titanium grades are considered suitable for enhancing: Grade 1 (11, 17, 27), 2, (7, 16, 26), 2H (7H, 16H,
26H), and 3.
6.4.1 Enhancing of other grades may be considered by negotiation with the manufacturer.
7. Condition and/or Heat Treatment
7.1 Straight tubes and the straight sections of U-tubes shall be supplied in the as-enhanced condition as described in 3.2.1, unless
specified otherwise by the purchaser (see Supplementary Requirements S2 and S3).
7.2 U-bends shall be stress relieved in the bent length and at least 1 in. (25.4 mm)[25.4 mm] of material beyond the tangent
of each leg using parameters sufficient to maintain dimensional stability of the bend.
7.2.1 U-bends shall include a minimum of 2 in. (50.8 mm)[50.8 mm] land or unfinned length located on each straight leg beyond
the tangent of the bend to allow for clamping surface when electric resistance method is used for heat treatment.
7.2.2 Stress relieving shall be conducted in air or in a protective inert gas atmosphere such that the operation does not result
in excessive surface oxidation. Surface oxidation indicated by an iridescent straw to dark blue surface color is normal following
stress in relieving in air. Matte gray, or loose white or yellow scale is unacceptable.
8. Chemical Composition
8.1 The composition of the titanium or titanium alloy shall conform to the chemical requirements for the grade specified as listed
in Specification B338.
9. Tensile Requirements
9.1 The base tube prior to the enhancing operation shall conform to the tensile properties and other applicable requirements of
Specification B338 for the grade specified.
B891/B891M − 19
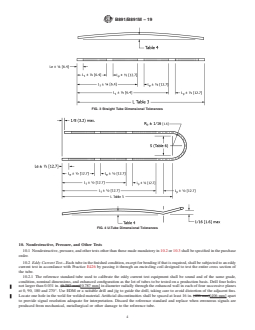
FIG. 3 Straight Tube Dimensional Tolerances
FIG. 4 U-Tube Dimensional Tolerances
10. Nondestructive, Pressure, and Other Tests
10.1 Nondestructive, pressure, and other tests other than those made mandatory in 10.2 or 10.3 shall be specified in the purchase
order.
10.2 Eddy Current Test—Each tube in the finished condition, except for bending if that is required, shall be subjected to an eddy
current test in accordance with Practice E426 by passing it through an encircling coil designed to test the entire cross section of
the tube.
10.2.1 The reference standard tube used to calibrate the eddy current test equipment shall be sound and of the same grade,
condition, nominal dimensions, and enhanced configuration as the lot of tubes to be tested on a production basis. Drill four holes
not larger than 0.031 in. (0.787 mm)[0.787 mm] in diameter radially through the enhanced wall in each of four successive planes
at 0, 90, 180 and 270°. Use EDM or a suitable drill and jig to guide the drill, taking care to avoid distortion of the adjacent fins.
Locate one hole in the weld for welded material. Artificial discontinuities shall be spaced at least 16 in. (406 mm)[406 mm] apart
to provide signal resolution adequate for interpretation. Discard the reference standard and replace when erroneous signals are
produced from mechanical, metallurgical or other damage to the reference tube.
B891/B891M − 19
10.2.2 Adjust the eddy current test unit to obtain an optimum signal-to-noise ratio with the minimum sensitivity required to
detect all four artificial defects in the reference standard on a repeatable basis. Equipment adjustments and tube speed maintained
during calibration shall be the same for production tubes.
10.2.3 Set aside tubes showing an eddy current indication in excess of any signal obtained from artificial defects in the reference
standard and subject them to retest or rejection.
10.2.4 Tubes causing irrelevant signals because of moisture, debris and like effects shall be considered to conform, should they
not cause output signals beyond acceptable limits when retested. Tubes causing irrelevant signals because of visible and identifiable
handling marks shall be considered to conform, provided the wall thickness in the enhanced and unenhanced areas is not less than
the minimum specified.
10.2.5 Tubes causing relevant signals because of injurious defects that reduce the wall thickness below the minimum specified
shall be rejected. If, after retest and examination, no source for the reject signal can be discerned, the tube shall be rejected.
10.3 Pneumatic Pressure Test—Each tube in the finished condition, except for bending if that is required, shall be subjected to
a pneumatic pressure test. Each tube shall withstand a minimum internal pressure of 250 psi (1.72 MPa)[1.72 MPa] for a minimum
of 5 s without showing evidence of leakage. The test method used shall permit easy detection of any leakage by placing the tube
underwater or by using the pressure differential method as defined in Test Method A1047/A1047M. Any evidence of leakage shall
be cause for rejection of that tube.
10.4 Hydrostatic Pressure Test:
10.4.1 Hydrostatic test of straight tube is not required unless Supplementary Requirement S1 is made part of the purchase order.
10.4.2 Hydrostatic test of U-bend tube is required. Testing shall be completed for each U-tube. Testing shall be conducted in
accordance with Supplementary Requirement S1.
10.4.3 Hydrostatic testing shall be conducted after all required enhancing, bending, and heat treatment is completed.
11. Permissible Variations in Dimensions
11.1 Diameter:
11.1.1 The outside diameter of plain ends and lands shall not vary by more than the amount in Table 2, as measured by “go”
and “no go” ring gauges. The dimensions of the ring gauges shall be as described in 11.1.3 and 11.1.4.
11.1.2 The diameter over the enhanced sections shall not exceed the diameter of the plain sections involved, as determined by
a “go” ring gauge unless otherwise specified.
11.1.3 The inside diameter dimension of the “go” ring gauge shall be equal to the nominal tube diameter, plus the plus tolerance
from Table 2, plus 0.002 in. (0.051 mm).[0.051 mm]. The length of the “go” ring gauge shall be 1 in. (25.4 mm)[25.4 mm]
minimum.
11.1.4 The inside diameter dimension of the “no go” ring or snap-on gauge shall be equal to the nominal tube diameter minus
the minus tolerance from Table 2. The length of the “no go” ring gauge shall be 1 in. (25.4 mm)[25.4 mm] minimum.
11.1.5 Permissible variations from the specified outside diameter in the bent portion of the U-tube for bend radius R = 2 × D
or greater, neither the major nor minor diameter of the tube shall deviate from the nominal diameter prior to bending by more than
10 %.
11.1.6 Permissible variations from the specified outside diameter in the bent portion of the U-tube for bend radius less than R
= 2 × D shall be negotiated between the manufacturer and the purchaser.
11.2 Wall Thickness:
11.2.1 Wall thickness in plain end and lands (except in bends) shall conform to the requirements of Specification B338 for
average or minimum wall as specified.
11.2.2 Permissible variations from the specified average wall thickness in enhanced sections (W in Fig. 2 and Fig. 1) are 610 %
f
(Table 2).
TABLE 2 Permissible Variations in Outside Dimensions and Wall Thickness Based on Individual Measurements
A
Permissible Variations in
A
Diameter Tolerance
Permissible Variations in
Outside Diameter, in. (mm) Minimimum Wall Thickness,
A
in. (mm) Wall Thickness, t, %
t, %
Under 1 (25.4), excl ±0.004 (±0.102) ±10 ±20, –0
1 (25.4) ±0.005 (±0.127) ±10 ±20, –0
TABLE 2 Permissible Variations in Outside Dimensions and Wall Thickness Based on Individual Measurements
A
Permissible Variations in
A
Diameter Tolerance
Permissible Variations in
Outside Diameter, in. [mm] Minimimum Wall Thickness,
A
Wall Thickness, t, %
in. [mm]
t, %
Under 1 [25.4], excl ±0.004 [±0.102] ±10 ±20, –0
1 [25.4] ±0.005 [±0.127] ±10 ±20, –0
A
These permissible variations in outside diameter apply only to tubes as finished at the mill before subsequent swaging, expanding, bending, polishing or other fabricating
operations.
B891/B891M − 19
11.2.3 Permissible variations from the specified minimum wall thickness in enhanced sections (W in Fig. 2 and Fig. 1) are
f
620 %, –0 % (Table 2).
11.2.4 Permissible variations from the specified wall thickness in U-bends shall not be less than value determined by the
equation:
3 3 3
t 5 4 R T / 4 R1D (1)
~ ! ~ !
f
4RT
t 5 (1)
f
4R1D
where:
where:
t = wall thickness after bending, in. (mm),
f
T = minimum wall thickness of 10.2.1, 10.2.2, 10.2.3, in. (mm),
R = centerline bend radius, in. (mm), and
D = nominal outside tube diameter, in. (mm).
t = wall thickness after bending, in. [mm],
f
T = mi
...
Questions, Comments and Discussion
Ask us and Technical Secretary will try to provide an answer. You can facilitate discussion about the standard in here.
Loading comments...