ASTM A451-93(1997)
(Specification)Standard Specification for Centrifugally Cast Austenitic Steel Pipe for High-Temperature Service
Standard Specification for Centrifugally Cast Austenitic Steel Pipe for High-Temperature Service
SCOPE
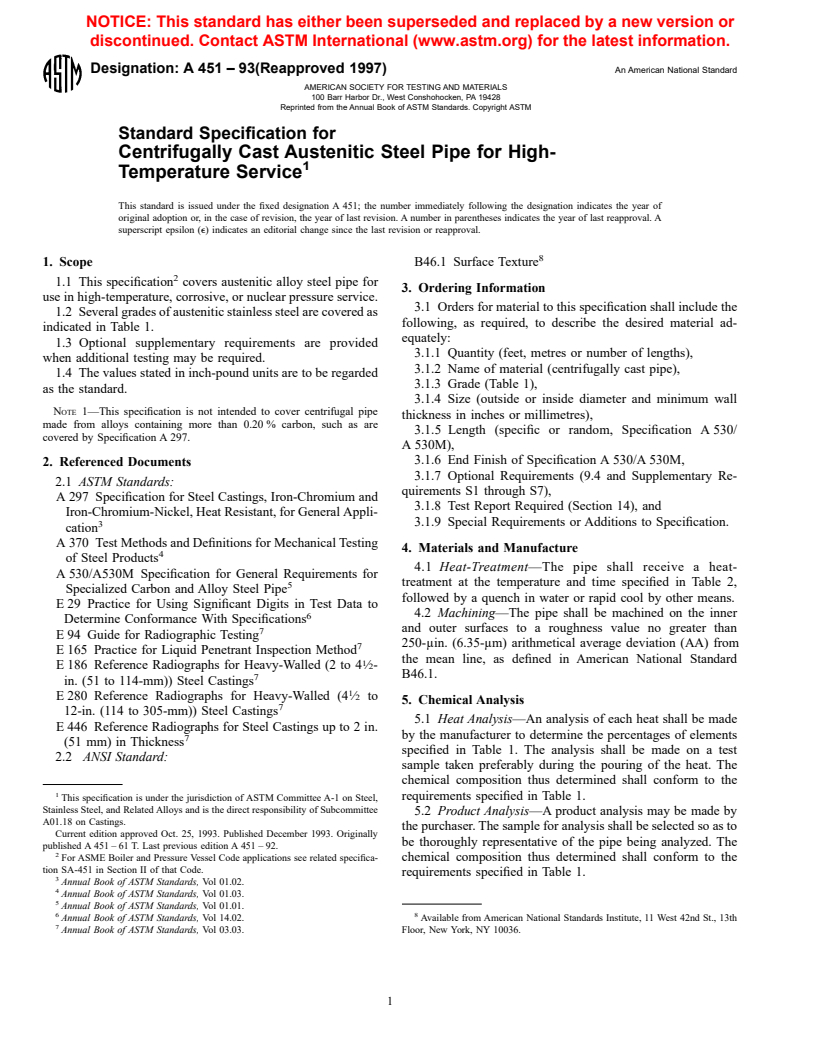
1.1 This specification covers austenitic alloy steel pipe for use in high-temperature, corrosive, or nuclear pressure service.
1.2 Several grades of austenitic stainless steel are covered as indicated in Table 1.
1.3 Optional supplementary requirements are provided when additional testing may be required.
1.4 The values stated in inch-pound units are to be regarded as the standard.
Note 1—This specification is not intended to cover centrifugal pipe made from alloys containing more than 0.20 % carbon, such as are covered by Specification A 297.
General Information
Standards Content (Sample)
NOTICE: This standard has either been superseded and replaced by a new version or
discontinued. Contact ASTM International (www.astm.org) for the latest information.
Designation: A 451 – 93(Reapproved 1997) An American National Standard
AMERICAN SOCIETY FOR TESTING AND MATERIALS
100 Barr Harbor Dr., West Conshohocken, PA 19428
Reprinted from the Annual Book of ASTM Standards. Copyright ASTM
Standard Specification for
Centrifugally Cast Austenitic Steel Pipe for High-
Temperature Service
This standard is issued under the fixed designation A 451; the number immediately following the designation indicates the year of
original adoption or, in the case of revision, the year of last revision. A number in parentheses indicates the year of last reapproval. A
superscript epsilon (e) indicates an editorial change since the last revision or reapproval.
1. Scope B46.1 Surface Texture
1.1 This specification covers austenitic alloy steel pipe for
3. Ordering Information
use in high-temperature, corrosive, or nuclear pressure service.
3.1 Orders for material to this specification shall include the
1.2 Several grades of austenitic stainless steel are covered as
following, as required, to describe the desired material ad-
indicated in Table 1.
equately:
1.3 Optional supplementary requirements are provided
3.1.1 Quantity (feet, metres or number of lengths),
when additional testing may be required.
3.1.2 Name of material (centrifugally cast pipe),
1.4 The values stated in inch-pound units are to be regarded
3.1.3 Grade (Table 1),
as the standard.
3.1.4 Size (outside or inside diameter and minimum wall
NOTE 1—This specification is not intended to cover centrifugal pipe
thickness in inches or millimetres),
made from alloys containing more than 0.20 % carbon, such as are
3.1.5 Length (specific or random, Specification A 530/
covered by Specification A 297.
A 530M),
3.1.6 End Finish of Specification A 530/A 530M,
2. Referenced Documents
3.1.7 Optional Requirements (9.4 and Supplementary Re-
2.1 ASTM Standards:
quirements S1 through S7),
A 297 Specification for Steel Castings, Iron-Chromium and
3.1.8 Test Report Required (Section 14), and
Iron-Chromium-Nickel, Heat Resistant, for General Appli-
3.1.9 Special Requirements or Additions to Specification.
cation
A 370 Test Methods and Definitions for Mechanical Testing
4. Materials and Manufacture
of Steel Products
4.1 Heat-Treatment—The pipe shall receive a heat-
A 530/A530M Specification for General Requirements for
treatment at the temperature and time specified in Table 2,
Specialized Carbon and Alloy Steel Pipe
followed by a quench in water or rapid cool by other means.
E 29 Practice for Using Significant Digits in Test Data to
4.2 Machining—The pipe shall be machined on the inner
Determine Conformance With Specifications
and outer surfaces to a roughness value no greater than
E 94 Guide for Radiographic Testing
250-μin. (6.35-μm) arithmetical average deviation (AA) from
E 165 Practice for Liquid Penetrant Inspection Method
the mean line, as defined in American National Standard
E 186 Reference Radiographs for Heavy-Walled (2 to 4 ⁄2-
B46.1.
in. (51 to 114-mm)) Steel Castings
E 280 Reference Radiographs for Heavy-Walled (4 ⁄2 to
5. Chemical Analysis
12-in. (114 to 305-mm)) Steel Castings
5.1 Heat Analysis—An analysis of each heat shall be made
E 446 Reference Radiographs for Steel Castings up to 2 in.
by the manufacturer to determine the percentages of elements
(51 mm) in Thickness
specified in Table 1. The analysis shall be made on a test
2.2 ANSI Standard:
sample taken preferably during the pouring of the heat. The
chemical composition thus determined shall conform to the
requirements specified in Table 1.
This specification is under the jurisdiction of ASTM Committee A-1 on Steel,
Stainless Steel, and Related Alloys and is the direct responsibility of Subcommittee
5.2 Product Analysis—A product analysis may be made by
A01.18 on Castings.
the purchaser. The sample for analysis shall be selected so as to
Current edition approved Oct. 25, 1993. Published December 1993. Originally
be thoroughly representative of the pipe being analyzed. The
published A 451 – 61 T. Last previous edition A 451 – 92.
chemical composition thus determined shall conform to the
For ASME Boiler and Pressure Vessel Code applications see related specifica-
tion SA-451 in Section II of that Code.
requirements specified in Table 1.
Annual Book of ASTM Standards, Vol 01.02.
Annual Book of ASTM Standards, Vol 01.03.
Annual Book of ASTM Standards, Vol 01.01.
6 8
Annual Book of ASTM Standards, Vol 14.02. Available from American National Standards Institute, 11 West 42nd St., 13th
Annual Book of ASTM Standards, Vol 03.03. Floor, New York, NY 10036.
A 451
TABLE 1 Chemical Requirements
Composition, %
Car- Man- Phos- Sul- Sili- Tan-
bon, ga- pho- fur, con, Molybde- ta-
Grade Nickel Chromium Columbium Nitrogen
max nese, rus, max max num lum,
max max max
CPF3 0.03 1.50 0.040 0.040 2.00 8.0–12.0 17.0–21.0 . . . .
CPF3A 0.03 1.50 0.040 0.040 2.00 8.0–12.0 17.0–21.0 . . . .
CPF8 0.08 1.50 0.040 0.040 2.00 8.0–11.0 18.0–21.0 . . . .
CPF8A 0.08 1.50 0.040 0.040 2.00 8.0–11.0 18.0–21.0 . . . .
CPF3M 0.03 1.50 0.040 0.040 1.50 9.0–13.0 17.0–21.0 2.0–3.0 . . .
CPF8M 0.08 1.50 0.040 0.040 1.50 9.0–12.0 18.0–21.0 2.0–3.0 . . .
A
CPF10MC 0.10 1.50 0.040 0.040 1.50 13.0–16.0 15.0–18.0 1.75–2.25 1.2 max, 10 3 C min . .
A
CPF8C 0.08 1.50 0.040 0.040 2.00 9.0–12.0 18.0–21.0 . 1 max, 8 3 C min . .
B
CPF8C(Ta max) 0.08 1.50 0.040 0.040 2.00 9.0–12.0 18.0–21.0 . 1 max, 8 3 C min 0.10 .
CPH8 0.08 1.50 0.040 0.040 1.50 12.0–15.0 22.0–26.0 . . . .
C
CPH20 or CPH10 0.20 1.50 0.040 0.040 2.00 12.0–15.0 22.0–26.0 . . . .
CPK20 0.20 1.50 0.040 0.040 1.75 19.0–22.0 23.0–27.0 . . . .
CPE20N 0.20 1.50 0.040 0.040 1.50 8.0–11.0 23.0–26.0 . . . 0.08–0.20
A
Grades CPF10MC and CPF8C may have a columbium plus tantalum content maximum of 1.35 %.
B
No designation as yet assigned by ASTM or Steel Founders’ Society of America.
C
By agreement between the manufacturer and the purchaser, the carbon content of Grade CPH20 may be restricted to 0.10 % max. When so agreed, the grade
designation shall be CPH10.
TABLE 2 Heat-Treatment Requirements TABLE 3 Tensile Requirements
Temperature, min Hold Time, Tensile Yield Elongation
Grade h/in. of Strength, Strength, in 2 in.
Grade
°F °C
Thickness min, ksi (MPa) min, ksi or 50 mm,
(MPa) min
CPF3, CPF3A, CPF8, CPF8A, CPF3M, 1900 1040 1
CPF8M CPF3 70 (485) 30 (205) 35
A
CPF10MC, CPF8C, CPF8C (Ta max) 1950 1065 2 CPF3A 77 (535) 35 (240) 35
CPH8, CPH10, CPH20, CPK20 2100 1150 1 CPF3M 70 (485) 30 (205) 30
CPE20N 2225 1218 1 CPF8 70 (485) 30 (205) 35
A
CPF8A 77 (535) 35 (240) 35
CPF8M 70 (485) 30 (205) 30.0
CPF10MC 70 (485) 30 (205) 20.0
5.3 To determine conformance with the chemical analysis
CPH10 70 (485) 30 (205) 30.0
requirements, an observed value or calculated value shall be
CPF8C (Ta max), CPF8C 70 (485) 30 (205) 30.0
rounded in accordance with Practice E 29 to the nearest unit in CPH8 65 (448) 28 (195) 30.0
CPK20 65 (448) 28 (195) 30.0
the last right-hand place of values listed in Table 1.
CPH20 70 (485) 30 (205) 30.0
CPE20N 80 (550) 40 (275) 30.0
6. Tensile Requirements
A
The properties shown are obtained by adjusting the composition within the
6.1 Test Specimens:
limits shown in Table 1 to obtain a ferrite-austenite ratio that will result in the higher
ultimate and yield strengths indicated. A lowering of impact values may develop in
6.1.1 Test specimens shall be prepared in accordance with
these materials when exposed to service temperature above 800°F.
Test Methods and Definitions A 370. Test bars shall be poured
in special blocks from the same heat as the castings repre-
7. Hydrostatic Test
sented. Test bars shall be supplied in sufficient number to
7.1 Each length of pipe shall be hydrostatically tested in
furnish all specimens required in 6.2 and 6.3 (see Table 3).
accordance with Specification A 530/A 530M.
6.1.2 Test specimens may be cut from heat-treated castings
7.2 It is realized that the foundry may be unable to perform
instead of from test bars when agreed upon between the
the hy
...


Questions, Comments and Discussion
Ask us and Technical Secretary will try to provide an answer. You can facilitate discussion about the standard in here.