ASTM A2-02(2008)
(Specification)Standard Specification for Carbon Steel Girder Rails of Plain, Grooved, and Guard Types
Standard Specification for Carbon Steel Girder Rails of Plain, Grooved, and Guard Types
ABSTRACT
This specification deals with carbon steel girder rails of plain, grooved, and guard types. Materials considered in this specification are grouped into three classes (Class A, B, and C) based on type, weight, and chemistry (carbon, manganese, phosphorus, and silicon compositions). Steel samples shall be melt processed by either open-hearth, basic-oxygen, or electric furnace, and may be cast by a continuous process or in ingots. Material specimens shall undergo product analysis and tests, and shall conform to required chemical and physical attributes such as chemical composition, Brinell hardness, weight, length, sectioning, end finishing, drilling and punching specifications. Rails shall be finished by cold straightening in a press or roller machine to remove twists, waves and kinks. Final products shall be marked either by brand and stamp, paint, or bar code.
SCOPE
1.1 This specification covers carbon steel girder rails of three classes based on type or type and weight, and chemistry defined as follows and in Table 1.
1.1.1 Unless otherwise specified by the purchaser, girder-guard rails shall be Class A.
1.1.2 Plain and grooved-girder rails under 135 lb/yd (67.1 kg/m) in weight shall be specified by the purchaser as either Class A or Class B.
1.1.3 Plain and grooved-girder rails of 135 lb/yd in weight and heavier shall be Class C, unless otherwise specified.
1.2 The values states in inch-pound units are to be regarded as the standard. The values given in parentheses are for information only. <
General Information
Relations
Buy Standard
Standards Content (Sample)
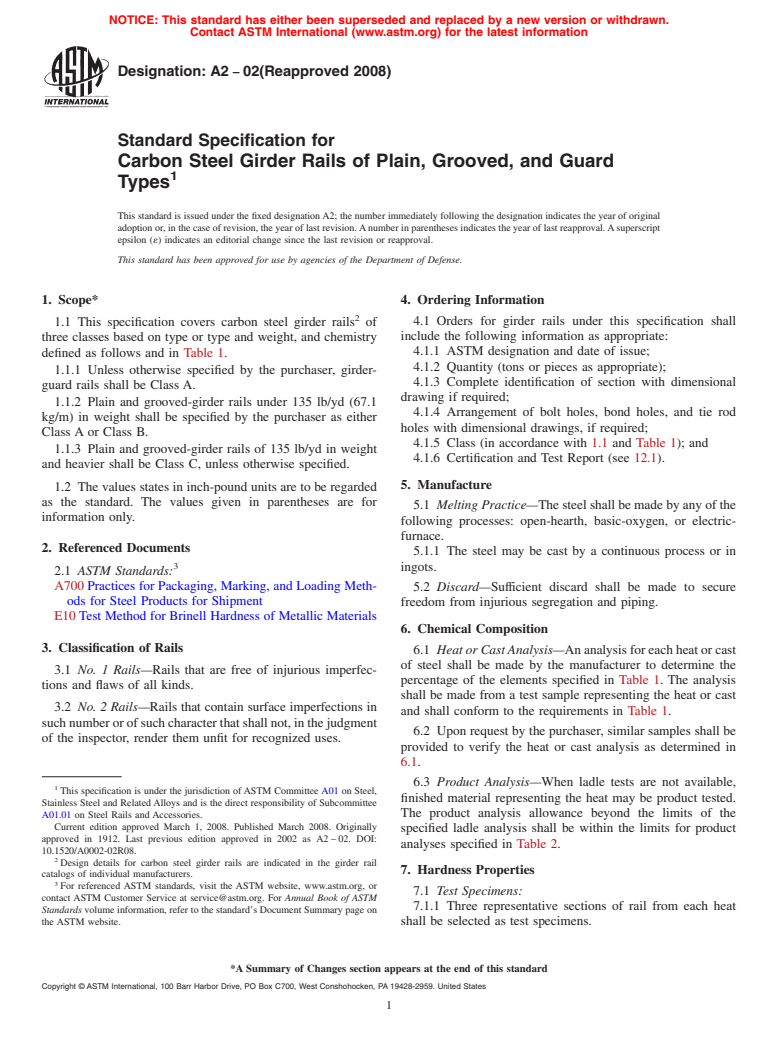
NOTICE: This standard has either been superseded and replaced by a new version or withdrawn.
Contact ASTM International (www.astm.org) for the latest information
Designation:A2 −02(Reapproved 2008)
Standard Specification for
Carbon Steel Girder Rails of Plain, Grooved, and Guard
Types
This standard is issued under the fixed designationA2; the number immediately following the designation indicates the year of original
adoption or, in the case of revision, the year of last revision.Anumber in parentheses indicates the year of last reapproval.Asuperscript
epsilon (´) indicates an editorial change since the last revision or reapproval.
This standard has been approved for use by agencies of the Department of Defense.
1. Scope* 4. Ordering Information
4.1 Orders for girder rails under this specification shall
1.1 This specification covers carbon steel girder rails of
include the following information as appropriate:
three classes based on type or type and weight, and chemistry
4.1.1 ASTM designation and date of issue;
defined as follows and in Table 1.
4.1.2 Quantity (tons or pieces as appropriate);
1.1.1 Unless otherwise specified by the purchaser, girder-
4.1.3 Complete identification of section with dimensional
guard rails shall be Class A.
drawing if required;
1.1.2 Plain and grooved-girder rails under 135 lb/yd (67.1
4.1.4 Arrangement of bolt holes, bond holes, and tie rod
kg/m) in weight shall be specified by the purchaser as either
holes with dimensional drawings, if required;
Class A or Class B.
4.1.5 Class (in accordance with 1.1 and Table 1); and
1.1.3 Plain and grooved-girder rails of 135 lb/yd in weight
4.1.6 Certification and Test Report (see 12.1).
and heavier shall be Class C, unless otherwise specified.
5. Manufacture
1.2 The values states in inch-pound units are to be regarded
as the standard. The values given in parentheses are for
5.1 MeltingPractice—The steel shall be made by any of the
information only.
following processes: open-hearth, basic-oxygen, or electric-
furnace.
2. Referenced Documents
5.1.1 The steel may be cast by a continuous process or in
ingots.
2.1 ASTM Standards:
A700 Practices for Packaging, Marking, and Loading Meth-
5.2 Discard—Sufficient discard shall be made to secure
ods for Steel Products for Shipment
freedom from injurious segregation and piping.
E10 Test Method for Brinell Hardness of Metallic Materials
6. Chemical Composition
3. Classification of Rails
6.1 HeatorCastAnalysis—Ananalysisforeachheatorcast
of steel shall be made by the manufacturer to determine the
3.1 No. 1 Rails—Rails that are free of injurious imperfec-
percentage of the elements specified in Table 1. The analysis
tions and flaws of all kinds.
shall be made from a test sample representing the heat or cast
3.2 No. 2 Rails—Rails that contain surface imperfections in
and shall conform to the requirements in Table 1.
suchnumberorofsuchcharacterthatshallnot,inthejudgment
6.2 Upon request by the purchaser, similar samples shall be
of the inspector, render them unfit for recognized uses.
provided to verify the heat or cast analysis as determined in
6.1.
6.3 Product Analysis—When ladle tests are not available,
This specification is under the jurisdiction of ASTM Committee A01 on Steel,
finished material representing the heat may be product tested.
Stainless Steel and Related Alloys and is the direct responsibility of Subcommittee
A01.01 on Steel Rails and Accessories. The product analysis allowance beyond the limits of the
Current edition approved March 1, 2008. Published March 2008. Originally
specified ladle analysis shall be within the limits for product
approved in 1912. Last previous edition approved in 2002 as A2 – 02. DOI:
analyses specified in Table 2.
10.1520/A0002-02R08.
Design details for carbon steel girder rails are indicated in the girder rail
7. Hardness Properties
catalogs of individual manufacturers.
For referenced ASTM standards, visit the ASTM website, www.astm.org, or
7.1 Test Specimens:
contact ASTM Customer Service at service@astm.org. For Annual Book of ASTM
7.1.1 Three representative sections of rail from each heat
Standards volume information, refer to the standard’s Document Summary page on
the ASTM website. shall be selected as test specimens.
*A Summary of Changes section appears at the end of this standard
Copyright © ASTM International, 100 Barr Harbor Drive, PO Box C700, West Conshohocken, PA 19428-2959. United States
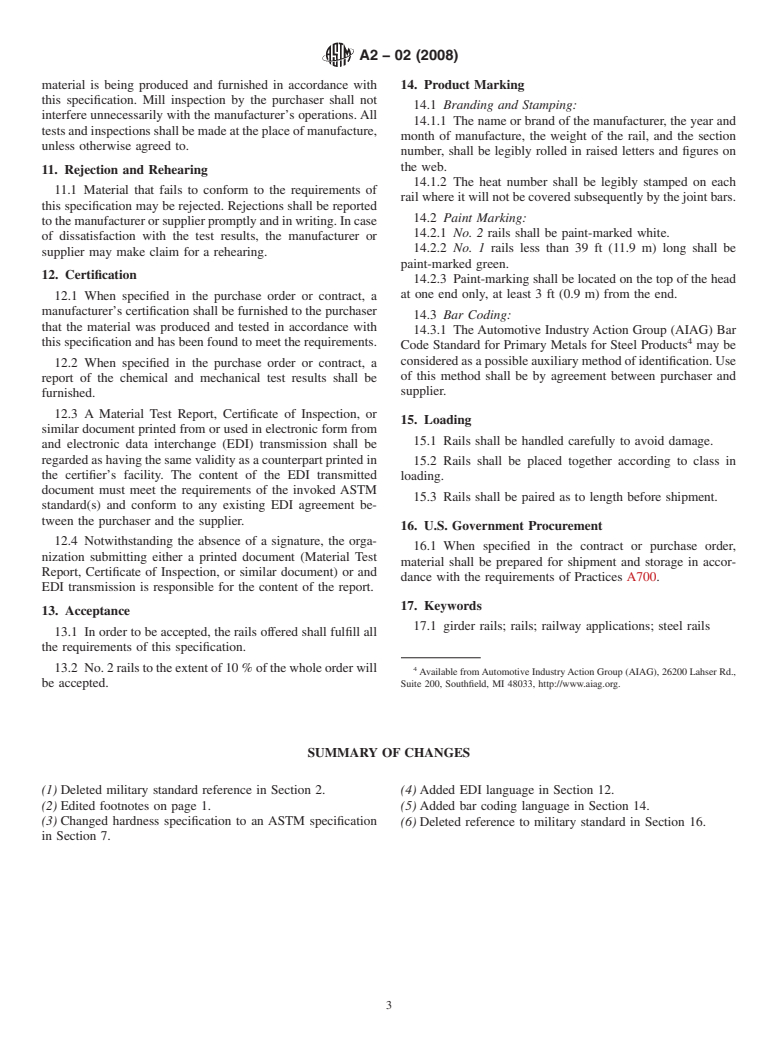
A2−02 (2008)
TABLE 1 Chemical Requirements, %
8.2 Weight—The weight of the rails per yard as calculated,
Class A Class B Class C shall be maintained as nearly as possible after conforming to
Carbon 0.60–0.75 0.70–0.85 0.75–0.90 the requirements specified in 8.1.
Manganese 0.60–0.90 0.60–0.90 0.60–0.90
8.3 Length:
Phosphorus, max 0.04 0.04 0.04
Silicon 0.10–0.40 0.10–0.40 0.10–0.40
8.3.1 Unless otherwise specified, the standard length of rail
shall be 39 ft (11.9 m) where measured at a temperature of
60°F (15°C).
TABLE 2 Product Analysis—Allowance Beyond Limits of
8.3.2 All standard 39-ft lengths may be specified; or
Specified Chemical Analysis
8.3.3 Standard 39-ft lengths with up to 11 % of the entire
Allowance Under Minumum Allowance Over Maximum
order in lengths shorter than standard, varying by 1 ft (0.3 m)
Limit, % Limit, %
from 38 to 24 ft (11.6 to 7.3 m) may be specified; or
Carbon 0.04 0.04
8.3.4 Length variations other than those described in 8.3.3
Manganese 0.06 0.06
Phosphorus . . . 0.008
may be established by agreement between the purchaser and
A
Silicon 0.02 0.02
manufacturer.
A
Continuously cast allowances shall be 0.05 % over maximum for silicon. 7
8.3.5 A variation of ⁄16 in. (11 mm) from the specified
length of individual rails will be permitted.
8.4 End Finish:
7.1.2 Excess scale and decarburization shall be removed 8.4.1 Rails shall be milled, abrasive wheel cut, or ground to
from the test area of the head or web of the selected specimens.
length, with a variation in end squareness of not more than ⁄32
in. (0.8 mm) allowed.
7.2 Procedure:
8.4.2 Harmful burrs on the ends shall be removed.
7.2.1 The test shall be conducted in accordance with Test
Method E10. 8.5 Drilling:
8.5.1 Circular holes for joint bar bolts, bonds, and tie rods
7.3 Requirements:
shall be drilled to conform to the drawings and dimensions
7.3.1 Class A rail shall have a Brinell hardness of 248 to
furnished by the purchaser and within the following permis-
293, and Classes B and C shall have hardnesses of 269 to 321.
sible variations:
7.4 Retests—If the average depth of the impressions ob-
8.5.2 Thediameterofboltholesshallnotvarymorethan ⁄16
tained on the head of the three specimens from any heat fails
in. (1.6 mm) over and 0 in. under that specified. The diameter
to conform to the requirements specified in 7.3, the manufac-
of bond holes shall not be over the size specified, but may be
turer may at his option retest the specimens, or each rail from
⁄32 in. (0.8 mm) under. The diameter of the tie rod holes shall
that heat. Rails represented by retests which conform to the
not be less than that specified but may be ⁄16 in. (1.6 mm) over.
requirements of 7.3 shall be accepted.
8.5.3 The location of bolt and bond holes shall not vary
more than ⁄16 in. (1.6 mm), either longitudinally or vertically
8. Permissible Variations of Dimension, Weight, and
from that specified. The location of the tie rod holes shall not
Other Physical Attributes
vary more than ⁄4 in. (6.35 mm) vert
...
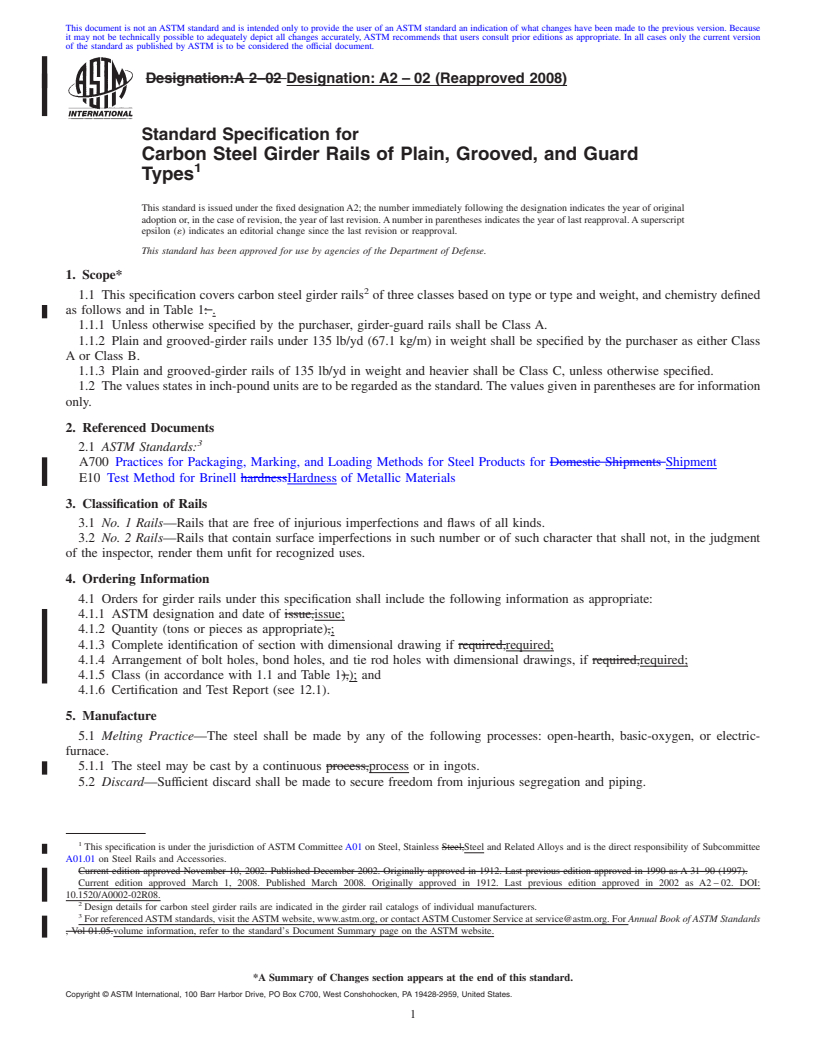
This document is not an ASTM standard and is intended only to provide the user of an ASTM standard an indication of what changes have been made to the previous version. Because
it may not be technically possible to adequately depict all changes accurately, ASTM recommends that users consult prior editions as appropriate. In all cases only the current version
of the standard as published by ASTM is to be considered the official document.
Designation:A 2–02 Designation: A2 – 02 (Reapproved 2008)
Standard Specification for
Carbon Steel Girder Rails of Plain, Grooved, and Guard
Types
This standard is issued under the fixed designationA2; the number immediately following the designation indicates the year of original
adoption or, in the case of revision, the year of last revision.Anumber in parentheses indicates the year of last reapproval.Asuperscript
epsilon (´) indicates an editorial change since the last revision or reapproval.
This standard has been approved for use by agencies of the Department of Defense.
1. Scope*
1.1 This specification covers carbon steel girder rails of three classes based on type or type and weight, and chemistry defined
as follows and in Table 1: .
1.1.1 Unless otherwise specified by the purchaser, girder-guard rails shall be Class A.
1.1.2 Plain and grooved-girder rails under 135 lb/yd (67.1 kg/m) in weight shall be specified by the purchaser as either Class
A or Class B.
1.1.3 Plain and grooved-girder rails of 135 lb/yd in weight and heavier shall be Class C, unless otherwise specified.
1.2 The values states in inch-pound units are to be regarded as the standard.The values given in parentheses are for information
only.
2. Referenced Documents
2.1 ASTM Standards:
A700 Practices for Packaging, Marking, and Loading Methods for Steel Products for Domestic Shipments Shipment
E10 Test Method for Brinell hardnessHardness of Metallic Materials
3. Classification of Rails
3.1 No. 1 Rails—Rails that are free of injurious imperfections and flaws of all kinds.
3.2 No. 2 Rails—Rails that contain surface imperfections in such number or of such character that shall not, in the judgment
of the inspector, render them unfit for recognized uses.
4. Ordering Information
4.1 Orders for girder rails under this specification shall include the following information as appropriate:
4.1.1 ASTM designation and date of issue,issue;
4.1.2 Quantity (tons or pieces as appropriate),;
4.1.3 Complete identification of section with dimensional drawing if required,required;
4.1.4 Arrangement of bolt holes, bond holes, and tie rod holes with dimensional drawings, if required,required;
4.1.5 Class (in accordance with 1.1 and Table 1),); and
4.1.6 Certification and Test Report (see 12.1).
5. Manufacture
5.1 Melting Practice—The steel shall be made by any of the following processes: open-hearth, basic-oxygen, or electric-
furnace.
5.1.1 The steel may be cast by a continuous process,process or in ingots.
5.2 Discard—Sufficient discard shall be made to secure freedom from injurious segregation and piping.
This specification is under the jurisdiction ofASTM CommitteeA01 on Steel, Stainless Steel,Steel and RelatedAlloys and is the direct responsibility of Subcommittee
A01.01 on Steel Rails and Accessories.
Current edition approved November 10, 2002. Published December 2002. Originally approved in 1912. Last previous edition approved in 1990 as A 31–90 (1997).
Current edition approved March 1, 2008. Published March 2008. Originally approved in 1912. Last previous edition approved in 2002 as A2 – 02. DOI:
10.1520/A0002-02R08.
Design details for carbon steel girder rails are indicated in the girder rail catalogs of individual manufacturers.
For referencedASTM standards, visit theASTM website, www.astm.org, or contactASTM Customer Service at service@astm.org. ForAnnualBookofASTMStandards
, Vol 01.05.volume information, refer to the standard’s Document Summary page on the ASTM website.
*A Summary of Changes section appears at the end of this standard.
Copyright © ASTM International, 100 Barr Harbor Drive, PO Box C700, West Conshohocken, PA 19428-2959, United States.
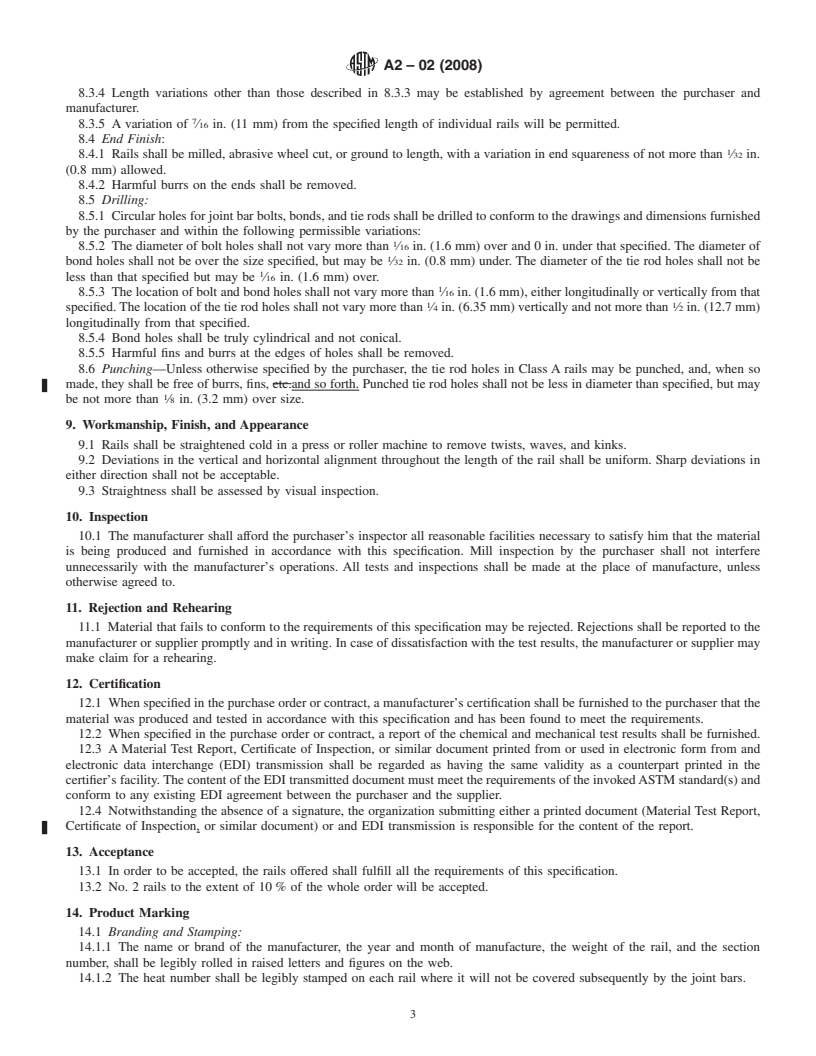
A2 – 02 (2008)
TABLE 1 Chemical Requirements, %
Class A Class B Class C
Carbon 0.60–0.75 0.70–0.85 0.75–0.90
Manganese 0.60–0.90 0.60–0.90 0.60–0.90
Phosphorus, max 0.04 0.04 0.04
Silicon 0.10–0.40 0.10–0.40 0.10–0.40
6. Chemical Composition
6.1 Heat or Cast Analysis—An analysis for each heat or cast of steel shall be made by the manufacturer to determine the
percentage of the elements specified in Table 1. The analysis shall be made from a test sample representing the heat or cast and
shall conform to the requirements in Table 1.
6.2 Upon request by the purchaser, similar samples shall be provided to verify the heat or cast analysis as determined in 6.1.
6.3 Product Analysis—When ladle tests are not available, finished material representing the heat may be product tested. The
product analysis allowance beyond the limits of the specified ladle analysis shall be within the limits for product analyses specified
in Table 2.
7. Hardness Properties
7.1 Test Specimens:
7.1.1 Three representative sections of rail from each heat shall be selected as test specimens.
7.1.2 Excess scale and decarburization shall be removed from the test area of the head or web of the selected specimens.
7.2 Procedure:
7.2.1 1 The test shall be conducted in accordance with Test Method E10E10.
7.3 Requirements:
7.3.1 Class A rail shall have a Brinell hardness of 248 to 293, and Classes B and C shall have hardnesses of 269 to 321.
7.4 Retests—If the average depth of the impressions obtained on the head of the three specimens from any heat fails to conform
to the requirements specified in 7.3, the manufacturer may at his option retest the specimens, or each rail from that heat. Rails
represented by retests which conform to the requirements of 7.3 shall be accepted.
8. Permissible Variations of Dimension, Weight, and Other Physical Attributes
8.1 Section:
8.1.1 The section of the rail shall conform to the design specified by the purchaser.
1 1
8.1.2 A variation of ⁄64 in. (0.4 mm) less or ⁄32 in. (0.8 mm) greater than the specified height will be permitted.
8.1.3 A variation of ⁄8 in. (3.2 mm) from the specified overall width of the head and tram will be permitted, but any variation
that would affect the gage line more than ⁄32 in. (0.8 mm) will not be permitted.
1 1
8.1.4 The overall width of the base shall not vary under that specified more than ⁄8 in. (3.2 mm) for widths less than 6 ⁄2 in.
3 1 1
(165 mm), ⁄16 in. (4.8 mm) for a width of 6 ⁄2 in., and ⁄4 in. (6.35 mm) for a width of 7 in. (178 mm).
8.1.5 No variation will be permitted in dimensions affecting the fit of the joint bars, except that the fishing template approved
by the purchaser may stand out laterally not more than ⁄32 in. (2.4 mm).
8.1.6 The base of the rail shall be at right angles to the web, and the convexity shall not exceed ⁄32 in. (0.8 mm).
8.1.7 When necessary, because of the type of track construction, and notice to that effect has been given to the manufacturer,
the position of the gage line with respect to the outer edge of the base shall not vary more than ⁄64 in. (1.2 mm).
8.2 Weight—The weight of the rails per yard as calculated, shall be maintained as nearly as possible after conforming to the
requirements specified in 8.1.
8.3 Length:
8.3.1 Unless otherwise specified, the standard length of rail shall be 39 ft (11.9 m) where measured at a temperature of 60°F
(15°C).
8.3.2 All standard 39-ft lengths may be specified; or
8.3.3 Standard 39-ft lengths with up to 11 % of the entire order in lengths shorter than standard, varying by 1 ft (0.3 m) from
38 to 24 ft (11.6 to 7.3 m) may be specified; or
TABLE 2 Product Analy
...


Questions, Comments and Discussion
Ask us and Technical Secretary will try to provide an answer. You can facilitate discussion about the standard in here.