ASTM E2283-08
(Practice)Standard Practice for Extreme Value Analysis of Nonmetallic Inclusions in Steel and Other Microstructural Features
Standard Practice for Extreme Value Analysis of Nonmetallic Inclusions in Steel and Other Microstructural Features
ABSTRACT
This practice describes a methodology to statistically characterize the distribution of the largest indigenous non-metallic inclusions in steel specimens based upon quantitative metallographic measurements. This practice enables the experimenter to estimate the extreme value distribution of inclusions in steels. The procedures in determining non-metallic inclusions in steel are presented and discussed in details.
SIGNIFICANCE AND USE
This practice is used to assess the indigenous inclusions or second-phase constituents in metals using extreme value statistics.
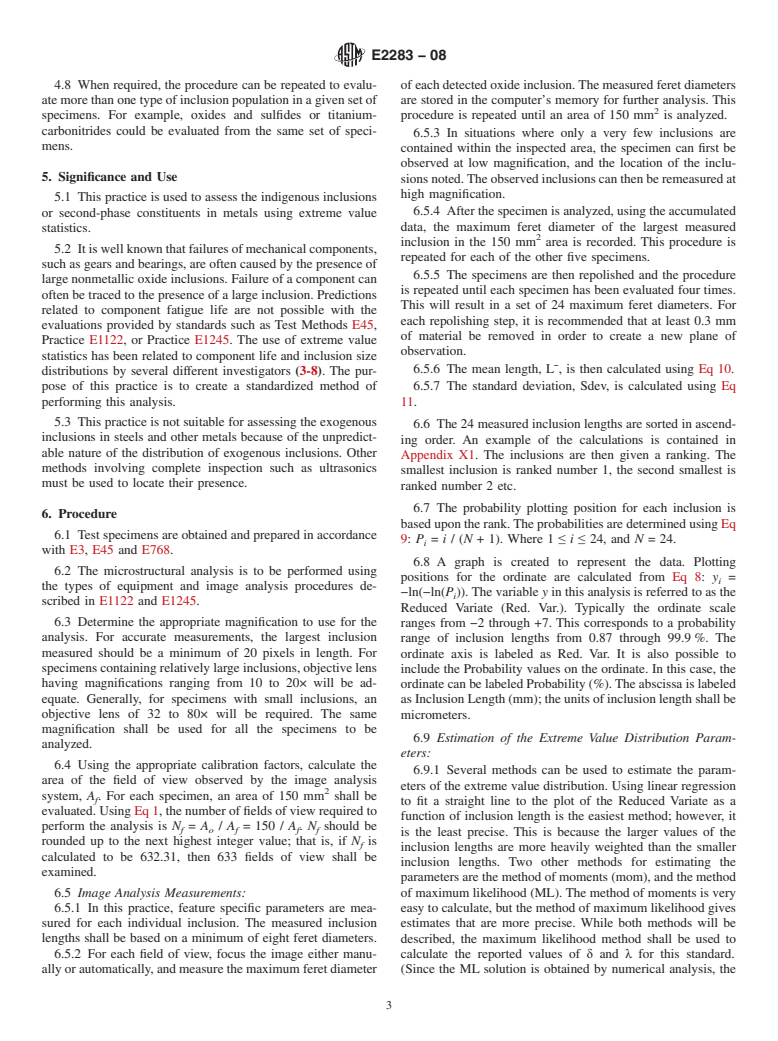
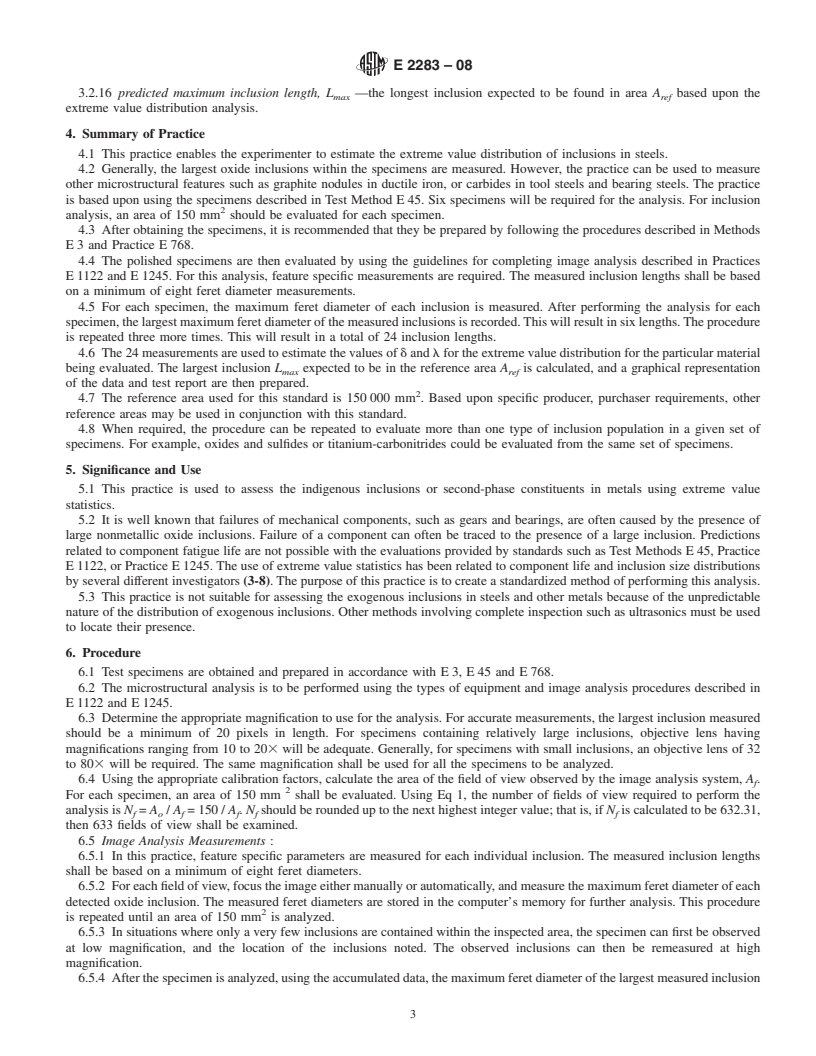
It is well known that failures of mechanical components, such as gears and bearings, are often caused by the presence of large nonmetallic oxide inclusions. Failure of a component can often be traced to the presence of a large inclusion. Predictions related to component fatigue life are not possible with the evaluations provided by standards such as Test Methods E 45, Practice E 1122, or Practice E 1245. The use of extreme value statistics has been related to component life and inclusion size distributions by several different investigators (3-8). The purpose of this practice is to create a standardized method of performing this analysis.
This practice is not suitable for assessing the exogenous inclusions in steels and other metals because of the unpredictable nature of the distribution of exogenous inclusions. Other methods involving complete inspection such as ultrasonics must be used to locate their presence.
SCOPE
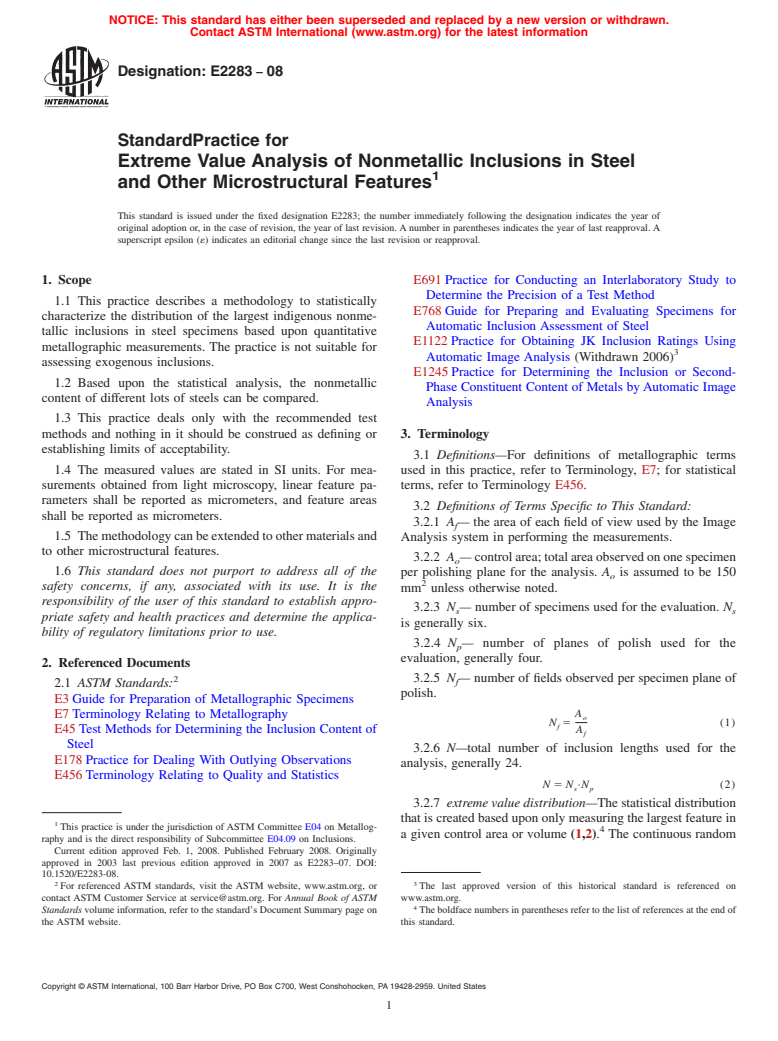
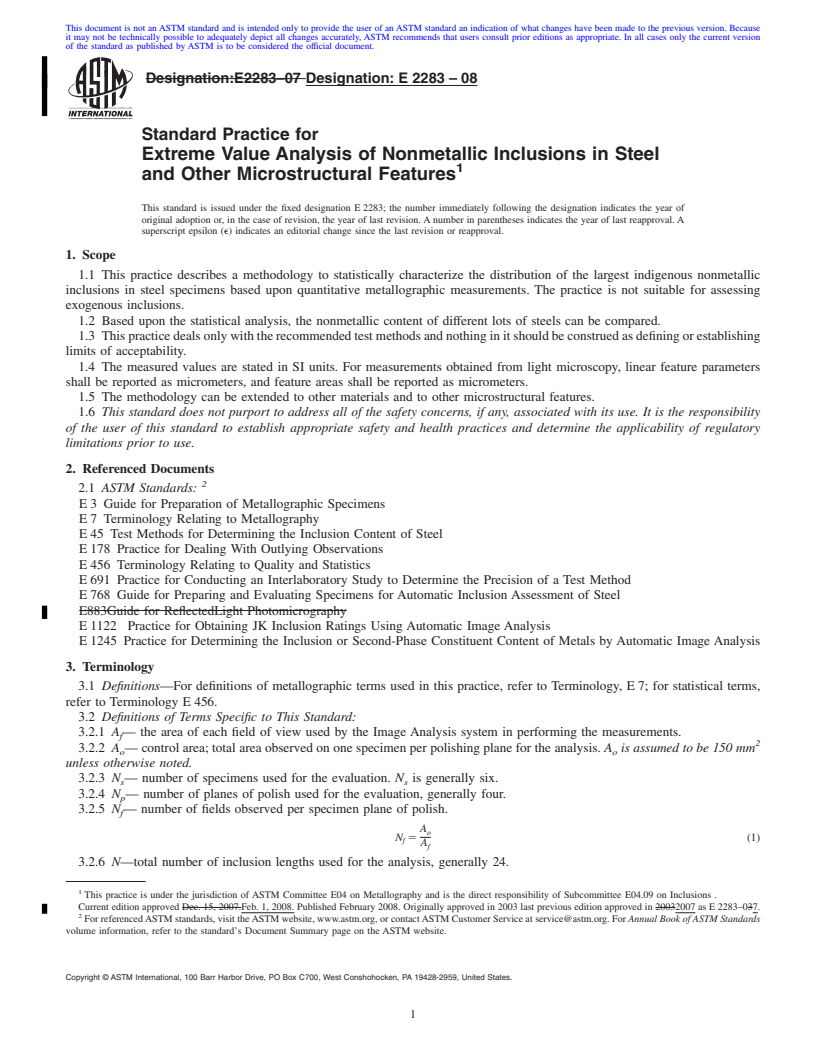
1.1 This practice describes a methodology to statistically characterize the distribution of the largest indigenous nonmetallic inclusions in steel specimens based upon quantitative metallographic measurements. The practice is not suitable for assessing exogenous inclusions.
1.2 Based upon the statistical analysis, the nonmetallic content of different lots of steels can be compared.
1.3 This practice deals only with the recommended test methods and nothing in it should be construed as defining or establishing limits of acceptability.
1.4 The measured values are stated in SI units. For measurements obtained from light microscopy, linear feature parameters shall be reported as micrometers, and feature areas shall be reported as micrometers.
1.5 The methodology can be extended to other materials and to other microstructural features.
1.6 This standard does not purport to address all of the safety concerns, if any, associated with its use. It is the responsibility of the user of this standard to establish appropriate safety and health practices and determine the applicability of regulatory limitations prior to use.
General Information
Relations
Buy Standard
Standards Content (Sample)
NOTICE: This standard has either been superseded and replaced by a new version or withdrawn.
Contact ASTM International (www.astm.org) for the latest information
Designation: E2283 − 08
StandardPractice for
Extreme Value Analysis of Nonmetallic Inclusions in Steel
1
and Other Microstructural Features
This standard is issued under the fixed designation E2283; the number immediately following the designation indicates the year of
original adoption or, in the case of revision, the year of last revision.Anumber in parentheses indicates the year of last reapproval.A
superscript epsilon (´) indicates an editorial change since the last revision or reapproval.
1. Scope E691Practice for Conducting an Interlaboratory Study to
Determine the Precision of a Test Method
1.1 This practice describes a methodology to statistically
E768Guide for Preparing and Evaluating Specimens for
characterize the distribution of the largest indigenous nonme-
Automatic Inclusion Assessment of Steel
tallic inclusions in steel specimens based upon quantitative
E1122Practice for Obtaining JK Inclusion Ratings Using
metallographic measurements. The practice is not suitable for
3
Automatic Image Analysis (Withdrawn 2006)
assessing exogenous inclusions.
E1245Practice for Determining the Inclusion or Second-
1.2 Based upon the statistical analysis, the nonmetallic
Phase Constituent Content of Metals byAutomatic Image
content of different lots of steels can be compared.
Analysis
1.3 This practice deals only with the recommended test
methods and nothing in it should be construed as defining or 3. Terminology
establishing limits of acceptability.
3.1 Definitions—For definitions of metallographic terms
1.4 The measured values are stated in SI units. For mea-
used in this practice, refer to Terminology, E7; for statistical
surements obtained from light microscopy, linear feature pa- terms, refer to Terminology E456.
rameters shall be reported as micrometers, and feature areas
3.2 Definitions of Terms Specific to This Standard:
shall be reported as micrometers.
3.2.1 A— the area of each field of view used by the Image
f
1.5 Themethodologycanbeextendedtoothermaterialsand
Analysis system in performing the measurements.
to other microstructural features.
3.2.2 A —controlarea;totalareaobservedononespecimen
o
1.6 This standard does not purport to address all of the
per polishing plane for the analysis. A is assumed to be 150
o
2
safety concerns, if any, associated with its use. It is the
mm unless otherwise noted.
responsibility of the user of this standard to establish appro-
3.2.3 N — number of specimens used for the evaluation. N
s s
priate safety and health practices and determine the applica-
is generally six.
bility of regulatory limitations prior to use.
3.2.4 N — number of planes of polish used for the
p
evaluation, generally four.
2. Referenced Documents
2 3.2.5 N— number of fields observed per specimen plane of
f
2.1 ASTM Standards:
polish.
E3Guide for Preparation of Metallographic Specimens
E7Terminology Relating to Metallography A
o
N 5 (1)
f
E45Test Methods for Determining the Inclusion Content of A
f
Steel
3.2.6 N—total number of inclusion lengths used for the
E178Practice for Dealing With Outlying Observations
analysis, generally 24.
E456Terminology Relating to Quality and Statistics
N 5 N ·N (2)
s p
3.2.7 extreme value distribution—Thestatisticaldistribution
thatiscreatedbasedupononlymeasuringthelargestfeaturein
1
This practice is under the jurisdiction of ASTM Committee E04 on Metallog-
4
a given control area or volume (1,2). The continuous random
raphy and is the direct responsibility of Subcommittee E04.09 on Inclusions.
Current edition approved Feb. 1, 2008. Published February 2008. Originally
approved in 2003 last previous edition approved in 2007 as E2283–07. DOI:
10.1520/E2283-08.
2 3
For referenced ASTM standards, visit the ASTM website, www.astm.org, or The last approved version of this historical standard is referenced on
contact ASTM Customer Service at service@astm.org. For Annual Book of ASTM www.astm.org.
4
Standards volume information, refer to the standard’s Document Summary page on Theboldfacenumbersinparenthesesrefertothelistofreferencesattheendof
the ASTM website. this standard.
Copyright © ASTM International, 100 Barr Harbor Drive, PO Box C700, West Conshohocken, PA 19428-2959. United States
1
---------------------- Page: 1 ----------------------
E2283 − 08
variable x has a two parameter (Gumbel) Extreme Value 1
T 5 (12)
Distribution if the probability density function is given by the 1 2 P
following equation:
3.2.15 reference area, A —the arbitrarily selected area of
ref
2
150000 mm . A in conjunction with the parameters of the
1 x 2 λ x 2 λ
ref
f x 5 exp 2 3exp 2exp 2 (3)
~ ! F S DG F S DG
extreme value distribution is used to calculate the size of the
δ δ δ
largest inclusion reported by this standard. As applied to this
and the cumulative distribution is given by the following
analysis, the largest inclusion in each cont
...
This document is not anASTM standard and is intended only to provide the user of anASTM standard an indication of what changes have been made to the previous version. Because
it may not be technically possible to adequately depict all changes accurately, ASTM recommends that users consult prior editions as appropriate. In all cases only the current version
of the standard as published by ASTM is to be considered the official document.
Designation:E2283–07 Designation:E2283–08
Standard Practice for
Extreme Value Analysis of Nonmetallic Inclusions in Steel
1
and Other Microstructural Features
This standard is issued under the fixed designation E2283; the number immediately following the designation indicates the year of
original adoption or, in the case of revision, the year of last revision.Anumber in parentheses indicates the year of last reapproval.A
superscript epsilon (e) indicates an editorial change since the last revision or reapproval.
1. Scope
1.1 This practice describes a methodology to statistically characterize the distribution of the largest indigenous nonmetallic
inclusions in steel specimens based upon quantitative metallographic measurements. The practice is not suitable for assessing
exogenous inclusions.
1.2 Based upon the statistical analysis, the nonmetallic content of different lots of steels can be compared.
1.3 Thispracticedealsonlywiththerecommendedtestmethodsandnothinginitshouldbeconstruedasdefiningorestablishing
limits of acceptability.
1.4 The measured values are stated in SI units. For measurements obtained from light microscopy, linear feature parameters
shall be reported as micrometers, and feature areas shall be reported as micrometers.
1.5 The methodology can be extended to other materials and to other microstructural features.
1.6 This standard does not purport to address all of the safety concerns, if any, associated with its use. It is the responsibility
of the user of this standard to establish appropriate safety and health practices and determine the applicability of regulatory
limitations prior to use.
2. Referenced Documents
2
2.1 ASTM Standards:
E3 Guide for Preparation of Metallographic Specimens
E7 Terminology Relating to Metallography
E45 Test Methods for Determining the Inclusion Content of Steel
E178 Practice for Dealing With Outlying Observations
E456 Terminology Relating to Quality and Statistics
E691 Practice for Conducting an Interlaboratory Study to Determine the Precision of a Test Method
E768 Guide for Preparing and Evaluating Specimens for Automatic Inclusion Assessment of Steel
E883Guide for ReflectedLight Photomicrography
E1122 Practice for Obtaining JK Inclusion Ratings Using Automatic Image Analysis
E1245 Practice for Determining the Inclusion or Second-Phase Constituent Content of Metals by Automatic Image Analysis
3. Terminology
3.1 Definitions—For definitions of metallographic terms used in this practice, refer to Terminology, E7; for statistical terms,
refer to Terminology E456.
3.2 Definitions of Terms Specific to This Standard:
3.2.1 A— the area of each field of view used by the Image Analysis system in performing the measurements.
f
2
3.2.2 A — control area; total area observed on one specimen per polishing plane for the analysis. A is assumed to be 150 mm
o o
unless otherwise noted.
3.2.3 N — number of specimens used for the evaluation. N is generally six.
s s
3.2.4 N — number of planes of polish used for the evaluation, generally four.
p
3.2.5 N— number of fields observed per specimen plane of polish.
f
A
o
N 5 (1)
f
A
f
3.2.6 N—total number of inclusion lengths used for the analysis, generally 24.
1
This practice is under the jurisdiction of ASTM Committee E04 on Metallography and is the direct responsibility of Subcommittee E04.09 on Inclusions .
Current edition approved Dec. 15, 2007.Feb. 1, 2008. Published February 2008. Originally approved in 2003 last previous edition approved in 20032007 as E2283–037.
2
ForreferencedASTMstandards,visittheASTMwebsite,www.astm.org,orcontactASTMCustomerServiceatservice@astm.org.For Annual Book of ASTM Standards
volume information, refer to the standard’s Document Summary page on the ASTM website.
Copyright © ASTM International, 100 Barr Harbor Drive, PO Box C700, West Conshohocken, PA 19428-2959, United States.
1
---------------------- Page: 1 ----------------------
E2283–08
N 5 N · N (2)
s p
3.2.7 extreme value distribution—The statistical distribution that is created based upon only measuring the largest feature in a
3
given control area or volume (1,2). The continuous random variable x has a two parameter (Gumbel) ExtremeValue Distribution
if the probability density function is given by the following equation:
1 x2l x2l
f~x! 5 exp 2 3exp 2exp 2 (3)
F S DG F S DG
d d d
and the cumulative distribution is given by the following equation:
F~x! 5exp~2exp~2~x2l!/ d !! (4)
As applied to this practice, x, represents the maximum feret diameter, Length, of the largest inclusion in each control area, A ,
o
letting:
x2
...


Questions, Comments and Discussion
Ask us and Technical Secretary will try to provide an answer. You can facilitate discussion about the standard in here.