ASTM E740/E740M-23
(Practice)Standard Practice for Fracture Testing with Surface-Crack Tension Specimens
Standard Practice for Fracture Testing with Surface-Crack Tension Specimens
SIGNIFICANCE AND USE
4.1 The surface-crack tension (SCT) test is used to estimate the load-carrying capacity of simple sheet- or plate-like structural components having a type of flaw likely to occur in service. The test is also used for research purposes to investigate failure mechanisms of cracks under service conditions.
4.2 The residual strength of an SCT specimen is a function of the crack depth and length and the specimen thickness as well as the characteristics of the material. This relationship is extremely complex and cannot be completely described or characterized at present.
4.2.1 The results of the SCT test are suitable for direct application to design only when the service conditions exactly parallel the test conditions. Some methods for further analysis are suggested in Appendix X1.
4.3 In order that SCT test data can be comparable and reproducible and can be correlated among laboratories, it is essential that uniform SCT testing practices be established.
4.4 The specimen configuration, preparation, and instrumentation described in this practice are generally suitable for cyclic- or sustained-force testing as well. However, certain constraints are peculiar to each of these tests. These are beyond the scope of this practice but are discussed in Ref. (1).
SCOPE
1.1 This practice covers the design, preparation, and testing of surface-crack tension (SCT) specimens. It relates specifically to testing under continuously increasing force and excludes cyclic and sustained loadings. The quantity determined is the residual strength of a specimen having a semielliptical or circular-segment fatigue crack in one surface. This value depends on the crack dimensions and the specimen thickness as well as the characteristics of the material.
1.2 Metallic materials that can be tested are not limited by strength, thickness, or toughness. However, tests of thick specimens of tough materials may require a tension test machine of extremely high capacity. The applicability of this practice to nonmetallic materials has not been determined.
1.3 This practice is limited to specimens having a uniform rectangular cross section in the test section. The test section width and length must be large with respect to the crack length. Crack depth and length should be chosen to suit the ultimate purpose of the test.
1.4 Residual strength may depend strongly upon temperature within a certain range depending upon the characteristics of the material. This practice is suitable for tests at any appropriate temperature.
1.5 Residual strength is believed to be relatively insensitive to loading rate within the range normally used in conventional tension tests. When very low or very high rates of loading are expected in service, the effect of loading rate should be investigated using special procedures that are beyond the scope of this practice.
Note 1: Further information on background and need for this type of test is given in the report of ASTM Task Group E24.01.05 on Part-Through-Crack Testing (1).2
1.6 The values stated in either SI units or inch-pound units are to be regarded separately as standard. The values stated in each system may not be exact equivalents; therefore, each system shall be used independently of the other. Combining values from the two systems may result in non-conformance with the standard.
1.7 This standard does not purport to address all of the safety concerns, if any, associated with its use. It is the responsibility of the user of this standard to establish appropriate safety, health, and environmental practices and determine the applicability of regulatory limitations prior to use.
1.8 This international standard was developed in accordance with internationally recognized principles on standardization established in the Decision on Principles for the Development of International Standards, Guides and Recommendations issued by the World Trade Organization Technical Barriers to T...
General Information
- Status
- Published
- Publication Date
- 14-Nov-2023
- Technical Committee
- E08 - Fatigue and Fracture
- Drafting Committee
- E08.07 - Fracture Mechanics
Relations
- Effective Date
- 15-Nov-2023
- Effective Date
- 15-Feb-2024
- Effective Date
- 01-Feb-2024
- Effective Date
- 01-Jan-2024
- Effective Date
- 01-Feb-2023
- Effective Date
- 01-May-2022
- Effective Date
- 15-Nov-2023
Overview
ASTM E740/E740M-23: Standard Practice for Fracture Testing with Surface-Crack Tension Specimens establishes uniform procedures for the design, preparation, and testing of surface-crack tension (SCT) specimens. This practice is widely recognized as a reliable method for determining the residual strength of metallic sheet or plate-like structural elements containing surface cracks, especially semielliptical or circular-segment cracks created by fatigue. The standard aims to estimate the load-carrying capacity of structural components with flaws that are likely to occur in real-world service, and it ensures reproducibility and comparability of test results across different laboratories.
Key Topics
- Scope of Testing: Applies specifically to testing under a continuously increasing force, excluding cyclic and sustained loadings.
- Materials: Designed primarily for metallic materials of varying strength, thickness, and toughness. The standard's applicability to nonmetallic materials is not specified.
- Specimen Configuration: Limits testing to rectangular cross-sections where width and length greatly exceed crack dimensions.
- Residual Strength: The main measured value, defined as the maximum nominal stress a cracked specimen can sustain.
- Crack Geometry: The relationship between residual strength, crack depth, crack length, and specimen thickness is complex and not fully characterized, requiring careful selection of crack and specimen dimensions.
- Temperature and Loading Rate: Tests can be performed at any appropriate temperature, and residual strength is relatively insensitive to conventional loading rates.
- Uniform Procedure: Ensures data comparability through standardized specimen preparation, testing protocols, and reporting guidelines.
Applications
Fracture testing using surface-crack tension specimens is essential in multiple areas of materials engineering and structural analysis:
- Structural Integrity Assessment: Used by engineers to estimate the remaining strength of critical metallic components in aerospace, transportation, civil infrastructure, and power generation that may contain surface flaws.
- Material Performance Evaluation: Helps manufacturers and designers select materials with adequate crack resistance for demanding environments.
- Research and Development: Supports investigations into failure mechanisms, crack propagation, and residual strength in complex structural geometries under realistic service conditions.
- Quality Assurance and Safety: Assists in determining acceptance criteria for inspection, maintenance, and repair by simulating service-relevant flaw scenarios.
The SCT method provides valuable data for direct application in design only when test conditions closely match service conditions. For broader applicability, additional analytical methods, such as linear elastic fracture mechanics (LEFM) and semiempirical or empirical models, may be used as described in the standard’s appendices.
Related Standards
For comprehensive fracture toughness characterization and tension testing, ASTM E740/E740M-23 references several related ASTM standards:
- ASTM E4: Practices for Force Calibration and Verification of Testing Machines
- ASTM E8/E8M: Test Methods for Tension Testing of Metallic Materials
- ASTM E399: Test Method for Linear-Elastic Plane-Strain Fracture Toughness of Metallic Materials
- ASTM E466: Practice for Conducting Force Controlled Constant Amplitude Axial Fatigue Tests of Metallic Materials
- ASTM E561: Test Method for K Curve Determination
- ASTM E1823: Terminology Relating to Fatigue and Fracture Testing
These standards support consistent methodology and definitions in materials testing and fracture mechanics, facilitating better safety assessments and design decisions.
Keywords: ASTM E740, fracture testing, surface-crack tension specimen, residual strength, metallic materials, crack geometry, structural integrity, fracture mechanics, materials testing, SCT test.
Buy Documents
ASTM E740/E740M-23 - Standard Practice for Fracture Testing with Surface-Crack Tension Specimens
REDLINE ASTM E740/E740M-23 - Standard Practice for Fracture Testing with Surface-Crack Tension Specimens
Get Certified
Connect with accredited certification bodies for this standard

Element Materials Technology
Materials testing and product certification.

Inštitut za kovinske materiale in tehnologije
Institute of Metals and Technology. Materials testing, metallurgical analysis, NDT.
Sponsored listings
Frequently Asked Questions
ASTM E740/E740M-23 is a standard published by ASTM International. Its full title is "Standard Practice for Fracture Testing with Surface-Crack Tension Specimens". This standard covers: SIGNIFICANCE AND USE 4.1 The surface-crack tension (SCT) test is used to estimate the load-carrying capacity of simple sheet- or plate-like structural components having a type of flaw likely to occur in service. The test is also used for research purposes to investigate failure mechanisms of cracks under service conditions. 4.2 The residual strength of an SCT specimen is a function of the crack depth and length and the specimen thickness as well as the characteristics of the material. This relationship is extremely complex and cannot be completely described or characterized at present. 4.2.1 The results of the SCT test are suitable for direct application to design only when the service conditions exactly parallel the test conditions. Some methods for further analysis are suggested in Appendix X1. 4.3 In order that SCT test data can be comparable and reproducible and can be correlated among laboratories, it is essential that uniform SCT testing practices be established. 4.4 The specimen configuration, preparation, and instrumentation described in this practice are generally suitable for cyclic- or sustained-force testing as well. However, certain constraints are peculiar to each of these tests. These are beyond the scope of this practice but are discussed in Ref. (1). SCOPE 1.1 This practice covers the design, preparation, and testing of surface-crack tension (SCT) specimens. It relates specifically to testing under continuously increasing force and excludes cyclic and sustained loadings. The quantity determined is the residual strength of a specimen having a semielliptical or circular-segment fatigue crack in one surface. This value depends on the crack dimensions and the specimen thickness as well as the characteristics of the material. 1.2 Metallic materials that can be tested are not limited by strength, thickness, or toughness. However, tests of thick specimens of tough materials may require a tension test machine of extremely high capacity. The applicability of this practice to nonmetallic materials has not been determined. 1.3 This practice is limited to specimens having a uniform rectangular cross section in the test section. The test section width and length must be large with respect to the crack length. Crack depth and length should be chosen to suit the ultimate purpose of the test. 1.4 Residual strength may depend strongly upon temperature within a certain range depending upon the characteristics of the material. This practice is suitable for tests at any appropriate temperature. 1.5 Residual strength is believed to be relatively insensitive to loading rate within the range normally used in conventional tension tests. When very low or very high rates of loading are expected in service, the effect of loading rate should be investigated using special procedures that are beyond the scope of this practice. Note 1: Further information on background and need for this type of test is given in the report of ASTM Task Group E24.01.05 on Part-Through-Crack Testing (1).2 1.6 The values stated in either SI units or inch-pound units are to be regarded separately as standard. The values stated in each system may not be exact equivalents; therefore, each system shall be used independently of the other. Combining values from the two systems may result in non-conformance with the standard. 1.7 This standard does not purport to address all of the safety concerns, if any, associated with its use. It is the responsibility of the user of this standard to establish appropriate safety, health, and environmental practices and determine the applicability of regulatory limitations prior to use. 1.8 This international standard was developed in accordance with internationally recognized principles on standardization established in the Decision on Principles for the Development of International Standards, Guides and Recommendations issued by the World Trade Organization Technical Barriers to T...
SIGNIFICANCE AND USE 4.1 The surface-crack tension (SCT) test is used to estimate the load-carrying capacity of simple sheet- or plate-like structural components having a type of flaw likely to occur in service. The test is also used for research purposes to investigate failure mechanisms of cracks under service conditions. 4.2 The residual strength of an SCT specimen is a function of the crack depth and length and the specimen thickness as well as the characteristics of the material. This relationship is extremely complex and cannot be completely described or characterized at present. 4.2.1 The results of the SCT test are suitable for direct application to design only when the service conditions exactly parallel the test conditions. Some methods for further analysis are suggested in Appendix X1. 4.3 In order that SCT test data can be comparable and reproducible and can be correlated among laboratories, it is essential that uniform SCT testing practices be established. 4.4 The specimen configuration, preparation, and instrumentation described in this practice are generally suitable for cyclic- or sustained-force testing as well. However, certain constraints are peculiar to each of these tests. These are beyond the scope of this practice but are discussed in Ref. (1). SCOPE 1.1 This practice covers the design, preparation, and testing of surface-crack tension (SCT) specimens. It relates specifically to testing under continuously increasing force and excludes cyclic and sustained loadings. The quantity determined is the residual strength of a specimen having a semielliptical or circular-segment fatigue crack in one surface. This value depends on the crack dimensions and the specimen thickness as well as the characteristics of the material. 1.2 Metallic materials that can be tested are not limited by strength, thickness, or toughness. However, tests of thick specimens of tough materials may require a tension test machine of extremely high capacity. The applicability of this practice to nonmetallic materials has not been determined. 1.3 This practice is limited to specimens having a uniform rectangular cross section in the test section. The test section width and length must be large with respect to the crack length. Crack depth and length should be chosen to suit the ultimate purpose of the test. 1.4 Residual strength may depend strongly upon temperature within a certain range depending upon the characteristics of the material. This practice is suitable for tests at any appropriate temperature. 1.5 Residual strength is believed to be relatively insensitive to loading rate within the range normally used in conventional tension tests. When very low or very high rates of loading are expected in service, the effect of loading rate should be investigated using special procedures that are beyond the scope of this practice. Note 1: Further information on background and need for this type of test is given in the report of ASTM Task Group E24.01.05 on Part-Through-Crack Testing (1).2 1.6 The values stated in either SI units or inch-pound units are to be regarded separately as standard. The values stated in each system may not be exact equivalents; therefore, each system shall be used independently of the other. Combining values from the two systems may result in non-conformance with the standard. 1.7 This standard does not purport to address all of the safety concerns, if any, associated with its use. It is the responsibility of the user of this standard to establish appropriate safety, health, and environmental practices and determine the applicability of regulatory limitations prior to use. 1.8 This international standard was developed in accordance with internationally recognized principles on standardization established in the Decision on Principles for the Development of International Standards, Guides and Recommendations issued by the World Trade Organization Technical Barriers to T...
ASTM E740/E740M-23 is classified under the following ICS (International Classification for Standards) categories: 77.040.10 - Mechanical testing of metals. The ICS classification helps identify the subject area and facilitates finding related standards.
ASTM E740/E740M-23 has the following relationships with other standards: It is inter standard links to ASTM E740/E740M-03(2016), ASTM E1823-24a, ASTM E1823-24, ASTM E8/E8M-24, ASTM E1823-23, ASTM E8/E8M-22, ASTM C1421-18. Understanding these relationships helps ensure you are using the most current and applicable version of the standard.
ASTM E740/E740M-23 is available in PDF format for immediate download after purchase. The document can be added to your cart and obtained through the secure checkout process. Digital delivery ensures instant access to the complete standard document.
Standards Content (Sample)
This international standard was developed in accordance with internationally recognized principles on standardization established in the Decision on Principles for the
Development of International Standards, Guides and Recommendations issued by the World Trade Organization Technical Barriers to Trade (TBT) Committee.
Designation: E740/E740M − 23
Standard Practice for
Fracture Testing with Surface-Crack Tension Specimens
This standard is issued under the fixed designation E740/E740M; the number immediately following the designation indicates the year
of original adoption or, in the case of revision, the year of last revision. A number in parentheses indicates the year of last reapproval.
A superscript epsilon (´) indicates an editorial change since the last revision or reapproval.
1. Scope each system may not be exact equivalents; therefore, each
system shall be used independently of the other. Combining
1.1 This practice covers the design, preparation, and testing
values from the two systems may result in non-conformance
of surface-crack tension (SCT) specimens. It relates specifi-
with the standard.
cally to testing under continuously increasing force and ex-
1.7 This standard does not purport to address all of the
cludes cyclic and sustained loadings. The quantity determined
safety concerns, if any, associated with its use. It is the
is the residual strength of a specimen having a semielliptical or
responsibility of the user of this standard to establish appro-
circular-segment fatigue crack in one surface. This value
priate safety, health, and environmental practices and deter-
depends on the crack dimensions and the specimen thickness as
mine the applicability of regulatory limitations prior to use.
well as the characteristics of the material.
1.8 This international standard was developed in accor-
1.2 Metallic materials that can be tested are not limited by
dance with internationally recognized principles on standard-
strength, thickness, or toughness. However, tests of thick
ization established in the Decision on Principles for the
specimens of tough materials may require a tension test
Development of International Standards, Guides and Recom-
machine of extremely high capacity. The applicability of this
mendations issued by the World Trade Organization Technical
practice to nonmetallic materials has not been determined.
Barriers to Trade (TBT) Committee.
1.3 This practice is limited to specimens having a uniform
rectangular cross section in the test section. The test section
2. Referenced Documents
width and length must be large with respect to the crack length. 3
2.1 ASTM Standards:
Crack depth and length should be chosen to suit the ultimate
E4 Practices for Force Calibration and Verification of Test-
purpose of the test.
ing Machines
1.4 Residual strength may depend strongly upon tempera-
E8/E8M Test Methods for Tension Testing of Metallic Ma-
ture within a certain range depending upon the characteristics terials
of the material. This practice is suitable for tests at any
E338 Test Method of Sharp-Notch Tension Testing of High-
appropriate temperature.
Strength Sheet Materials (Withdrawn 2010)
E399 Test Method for Linear-Elastic Plane-Strain Fracture
1.5 Residual strength is believed to be relatively insensitive
Toughness of Metallic Materials
to loading rate within the range normally used in conventional
E466 Practice for Conducting Force Controlled Constant
tension tests. When very low or very high rates of loading are
Amplitude Axial Fatigue Tests of Metallic Materials
expected in service, the effect of loading rate should be
E561 Test Method for K Curve Determination
R
investigated using special procedures that are beyond the scope
E1823 Terminology Relating to Fatigue and Fracture Testing
of this practice.
NOTE 1—Further information on background and need for this type of
3. Terminology
test is given in the report of ASTM Task Group E24.01.05 on Part-
3.1 Definitions:
Through-Crack Testing (1).
3.1.1 Definitions given in Terminology E1823 are appli-
1.6 The values stated in either SI units or inch-pound units
cable to this practice.
are to be regarded separately as standard. The values stated in
3.1.2 crack mouth opening displacement (CMOD), 2v
m
(L)—crack—opening displacement resulting from the total
This practice is under the jurisdiction of ASTM Committee E08 on Fatigue and
Fracture and is the direct responsibility of Subcommittee E08.07 on Fracture
Mechanics. For referenced ASTM standards, visit the ASTM website, www.astm.org, or
Current edition approved Nov. 15, 2023. Published December 2023. Originally contact ASTM Customer Service at service@astm.org. For Annual Book of ASTM
approved in 1988. Last previous edition approved in 2016 as E740/ Standards volume information, refer to the standard’s Document Summary page on
E740M – 03(2016). DOI: 10.1520/E0740_E0740M-23. the ASTM website.
2 4
The boldface numbers in parentheses refer to the list of references at the end of The last approved version of this historical standard is referenced on
this standard. www.astm.org.
Copyright © ASTM International, 100 Barr Harbor Drive, PO Box C700, West Conshohocken, PA 19428-2959. United States
E740/E740M − 23
deformation (elastic plus plastic) measured under force at the 5. Apparatus
location on the crack surface that has the largest displacement
5.1 The procedure involves testing of specimens that have
per unit force.
been precracked in fatigue. force versus CMOD, if CMOD is
measured, is recorded autographically or digitally.
NOTE 2—In surface-crack tension (SCT) specimens, CMOD is mea-
sured on the specimen surface along the normal bisector of the crack
5.2 Fatigue Precracking Apparatus—Axial tension or three-
length.
point, four-point, or cantilever bending are all acceptable
3.1.3 fracture toughness—a generic term for measures of
modes for fatigue precracking. Fixture design is not critical as
resistance to extension of a crack.
long as the crack growth is symmetrical and the plane of the
crack remains perpendicular to the specimen face and the
3.1.4 original crack size, a [L]—the physical crack size at
o
tensile force vector. The effect of cyclic frequency is thought to
the start of testing.
be negligible below 100 Hz in a nonaggressive environment.
3.2 Definitions of Terms Specific to This Standard:
NOTE 4—Certain crack shapes are more readily produced in axial
3.2.1 crack depth, a [L]—in surface-crack tension (SCT)
tension, others in bending (see Annex A1).
specimens, the normal distance from the cracked plate surface
5.2.1 Devices and fixtures for cantilever bending of sheet
to the point of maximum penetration of the crack front into the
and plate specimens are described in Refs. (2) and (3),
material. Crack depth is a fraction of the specimen thickness.
respectively. Others may be equally suitable. The axial fatigue
3.2.1.1 Discussion—In this practice, crack depth is the
machines described in Practice E466 are suitable for precrack-
original depth a and the subscript o is everywhere implied.
o
ing in tension; however, since the precracking operation is
3.2.2 crack length, 2c [L]—in surface-crack tension
terminated prior to specimen failure, one should ensure that
specimens, a distance measured on the specimen surface
load variations during slowdown or shutdown do not exceed
between the two points at which the crack front intersects the
those desired.
specimen surface. Crack length is a fraction of specimen width.
5.2.2 A magnifier of about 20 power should be used to
3.2.2.1 Discussion—In this practice, crack length is the
monitor the fatigue precracking process. Ease of observation
original length 2c and the subscript o is everywhere implied.
will be enhanced if the cyclic rate can be reduced to about 1 Hz
o
−2
when desired. Alternatively, a stroboscopic light synchronized
3.2.3 residual strength, σ (FL )—the maximum value of
r
with the maximum application of tensile force may serve as
the nominal stress, neglecting the area of the crack, that a
well.
cracked specimen is capable of sustaining.
5.3 Testing Machine—The test should be conducted with a
NOTE 3—In surface-crack tension (SCT) specimens, residual strength is
tension testing machine that conforms to the requirements of
the ratio of the maximum load (P ) to the product of test section width
max
Practices E4.
(W) times thickness (B), P /(BW). It represents the stress at fracture
max
normal to and remote from the plane of the crack. 5.3.1 The devices for transmitting force to the specimen
shall be such that the major axis of the specimen coincides with
4. Significance and Use the load axis. The pin-and-clevis arrangement described in Test
Method E338 should be suitable for specimens whose width is
4.1 The surface-crack tension (SCT) test is used to estimate
less than about 4 in. [100 mm]. An arrangement such as that
the load-carrying capacity of simple sheet- or plate-like struc-
shown in Fig. 2 of Practice E561 should be suitable for wider
tural components having a type of flaw likely to occur in
specimens.
service. The test is also used for research purposes to investi-
5.3.2 For tests at other than room temperature, the tempera-
gate failure mechanisms of cracks under service conditions.
ture control and temperature measurement requirements of Test
4.2 The residual strength of an SCT specimen is a function Method E338 are appropriate.
of the crack depth and length and the specimen thickness as
5.4 Displacement Gage (Optional)—If used to measure
well as the characteristics of the material. This relationship is
CMOD, the displacement gage output should accurately indi-
extremely complex and cannot be completely described or
cate the relative displacement of two gage points on the
characterized at present.
cracked surface, spanning the crack at the midpoint of its
4.2.1 The results of the SCT test are suitable for direct
length. Further information on displacement gages appears in
application to design only when the service conditions exactly
Appendix X2.
parallel the test conditions. Some methods for further analysis
5.5 For some combinations of material and crack geometry,
are suggested in Appendix X1.
the crack may propagate entirely through the thickness prior to
4.3 In order that SCT test data can be comparable and
total failure. Methods of detecting this occurrence, should it be
reproducible and can be correlated among laboratories, it is
of interest, are discussed briefly in Ref. (1).
essential that uniform SCT testing practices be established.
6. Test Specimen
4.4 The specimen configuration, preparation, and instru-
mentation described in this practice are generally suitable for 6.1 Configuration and Notation—The SCT test specimen
cyclic- or sustained-force testing as well. However, certain and the notation used herein are shown in Fig. 1. Grip details
constraints are peculiar to each of these tests. These are beyond have been omitted, since grip design may depend on specimen
the scope of this practice but are discussed in Ref. (1). size (5.3.1) and material toughness. In general, the only
E740/E740M − 23
vice dimensions should be used but one should not then
attempt to generalize data from such tests.
6.3 Fatigue Precracking—The object is to produce at a
prescribed location a fatigue crack whose configuration is
regular (that is, a half-ellipse or a segment of a circle), whose
depth and length are close to predetermined target values, and
whose subsequent fracture behavior will not be influenced by
any detail of the preparation process. A small slit or crack
starter is machined into the specimen surface at the center of
the test section (Fig. 2) to locate and help initiate the fatigue
crack. Regularity of crack configuration is influenced primarily
by fatigue force uniformity, which can be maximized by
careful alignment of force train and fixtures. Material
inhomogeneity, residual stresses, and starter notch root radius
variation can produce irregularities which may be beyond
control. Fatigue crack size and shape control are discussed in
Annex A1.
6.3.1 Crack starters have been produced by a variety of
methods. The following procedures are known to produce
acceptable results.
6.3.1.1 The crack starter should be machined, either by
slitting with a thin jeweler’s circular saw or similar cutter or by
electrical discharge machining (EDM) with a thin, shaped
electrode.
FIG. 1 Typical Surface-Crack Specimen (Grip Details Omitted)
6.3.1.2 The crack starter plane should be perpendicular to
and Nomenclature
the specimen face and the tensile force vector within 10°.
6.3.1.3 The starter notch root radius should be less than
gripping requirements are that the arrangement be strong
0.010 in. [0.25 mm].
enough to carry the maximum expected force and that it allow
6.3.1.4 The crack starter length and depth should be chosen
uniform distribution of force over the specimen cross section.
with the desired crack dimensions and the requirements of
6.3.2.2 in mind.
6.2 Dimensions—The crack depth and length and specimen
thickness should be chosen according to the ultimate purpose 6.3.2 The following procedures should ensure the produc-
tion of an effective sharp fatigue crack.
of the test. Further discussion of this subject may be found in
Appendix X3. The specimen width W should be at least 5 times 6.3.2.1 Fatigue crack with the specimen in the heat treat-
ment condition in which it is to be tested, if at all possible.
the crack length 2c and the specimen test section length L
should be at least twice the width W. Should these width and 6.3.2.2 Whenever it is physically possible, the crack should
length dimensions exceed actual service dimensions, the ser- be extended at least 0.05 in. [1.3 mm]; in any event the fatigue
NOTE 1—Section A-A refers to the plane normal to any tangent to the crack periphery and containing the point of tangency.
FIG. 2 Fatigue Crack and Starter Details
E740/E740M − 23
crack extension must not be less than 5 % of the final crack mm] or 0.1 %, whichever is larger. A low-power [20 to 50 × ]
depth, and the crack and its starter must lie entirely within an traveling microscope is usually satisfactory. Observe the crack
imaginary 30° wedge whose apex is at the crack tip. These shape; it should closely approximate a semiellipse or a segment
two-dimensional descriptions shall apply around the entire of a circle. If the crack shape is irregular or unsymmetric the
crack front, that is, in all planes normal to tangents to all points test should be discarded. Using the actual crack dimensions,
on the crack periphery (Fig. 2). verify that the requirement 6.3.2.4 was indeed met.
6.3.2.3 The ratio of minimum to maximum cyclic stress, R,
7.6 Residual Strength—Calculate the residual strength as σ
r
should not be greater than 0.1.
= P /(BW).
max
6.3.2.4 For at least the final 2.5 % of the total crack depth,
1/2 1/2
the ratio K /E should not exceed 0.002 in. [0.00032 m ],
max
8. Report
where K is the maximum stress intensity factor during
max
8.1 The report should include the following for each speci-
fatigue cracking and E is the material’s elastic modulus. An
men tested:
estimate of K can be computed based on the cyclic stress
max
8.1.1 Test section width, W, and thickness, B.
and the target crack dimensions using the appropriate equation
8.1.2 Maximum stress intensity factor during fatigue
from Annex A2. Compute K at the surface or at the deepest
max
precracking, K , based on actual crack dimensions.
point, whichever is greater.
max
8.1.3 Fatigue crack depth, a, and length, 2c.
7. Procedure
8.1.4 Maximum force observed during the test, P , and
max
the corresponding residual strength, σ .
7.1 Number of Tests—If only one crack geometry (that is,
r
fixed crack depth and length) is to be studied, at least three
8.2 The following should also be reported. If an item is a
specimens should be tested. If geometry is to be varied, at least
controlled variable, it should be reported for each specimen; if
two specimens should be tested for each combination of
common to an identifiable block of specimens, it need be
depth-to-length (a/2c) and depth-to-thickness (a/B) ratios.
reported only once.
8.2.1 Crack starter dimensions.
7.2 Specimen Measurements—Measure
...
This document is not an ASTM standard and is intended only to provide the user of an ASTM standard an indication of what changes have been made to the previous version. Because
it may not be technically possible to adequately depict all changes accurately, ASTM recommends that users consult prior editions as appropriate. In all cases only the current version
of the standard as published by ASTM is to be considered the official document.
Designation: E740/E740M − 03 (Reapproved 2016) E740/E740M − 23
Standard Practice for
Fracture Testing with Surface-Crack Tension Specimens
This standard is issued under the fixed designation E740/E740M; the number immediately following the designation indicates the year
of original adoption or, in the case of revision, the year of last revision. A number in parentheses indicates the year of last reapproval.
A superscript epsilon (´) indicates an editorial change since the last revision or reapproval.
1. Scope
1.1 This practice covers the design, preparation, and testing of surface-crack tension (SCT) specimens. It relates specifically to
testing under continuously increasing force and excludes cyclic and sustained loadings. The quantity determined is the residual
strength of a specimen having a semielliptical or circular-segment fatigue crack in one surface. This value depends on the crack
dimensions and the specimen thickness as well as the characteristics of the material.
1.2 Metallic materials that can be tested are not limited by strength, thickness, or toughness. However, tests of thick specimens
of tough materials may require a tension test machine of extremely high capacity. The applicability of this practice to nonmetallic
materials has not been determined.
1.3 This practice is limited to specimens having a uniform rectangular cross section in the test section. The test section width and
length must be large with respect to the crack length. Crack depth and length should be chosen to suit the ultimate purpose of the
test.
1.4 Residual strength may depend strongly upon temperature within a certain range depending upon the characteristics of the
material. This practice is suitable for tests at any appropriate temperature.
1.5 Residual strength is believed to be relatively insensitive to loading rate within the range normally used in conventional tension
tests. When very low or very high rates of loading are expected in service, the effect of loading rate should be investigated using
special procedures that are beyond the scope of this practice.
NOTE 1—Further information on background and need for this type of test is given in the report of ASTM Task Group E24.01.05 on Part-Through-Crack
Testing (1).
1.6 The values stated in either SI units or inch-pound units are to be regarded separately as standard. The values stated in each
system may not be exact equivalents; therefore, each system shall be used independently of the other. Combining values from the
two systems may result in non-conformance with the standard.
1.7 This standard does not purport to address all of the safety concerns, if any, associated with its use. It is the responsibility
of the user of this standard to establish appropriate safety and healthsafety, health, and environmental practices and determine
the applicability of regulatory limitations prior to use.
1.8 This international standard was developed in accordance with internationally recognized principles on standardization
established in the Decision on Principles for the Development of International Standards, Guides and Recommendations issued
by the World Trade Organization Technical Barriers to Trade (TBT) Committee.
This practice is under the jurisdiction of ASTM Committee E08 on Fatigue and Fracture and is the direct responsibility of Subcommittee E08.07 on Fracture Mechanics.
Current edition approved Oct. 1, 2016Nov. 15, 2023. Published October 2016December 2023. Originally approved in 1988. Last previous edition approved in 20102016
ɛ2
as E740/E740M – 03(2010)(2016). . DOI: 10.1520/E0740_E0740M-03R16.10.1520/E0740_E0740M-23.
The boldface numbers in parentheses refer to the list of references at the end of this standard.
Copyright © ASTM International, 100 Barr Harbor Drive, PO Box C700, West Conshohocken, PA 19428-2959. United States
E740/E740M − 23
2. Referenced Documents
2.1 ASTM Standards:
E4 Practices for Force Calibration and Verification of Testing Machines
E8/E8M Test Methods for Tension Testing of Metallic Materials
E338 Test Method of Sharp-Notch Tension Testing of High-Strength Sheet Materials (Withdrawn 2010)
E399 Test Method for Linear-Elastic Plane-Strain Fracture Toughness of Metallic Materials
E466 Practice for Conducting Force Controlled Constant Amplitude Axial Fatigue Tests of Metallic Materials
E561 Test Method for K Curve Determination
R
E1823 Terminology Relating to Fatigue and Fracture Testing
3. Terminology
3.1 Definitions:
3.1.1 Definitions given in Terminology E1823 are applicable to this practice.
3.1.2 crack mouth opening displacement (CMOD), 2v (L)—crack—opening displacement resulting from the total deformation
m
(elastic plus plastic) measured under force at the location on the crack surface that has the largest displacement per unit force.
NOTE 2—In surface-crack tension (SCT) specimens, CMOD is measured on the specimen surface along the normal bisector of the crack length.
3.1.3 fracture toughness—a generic term for measures of resistance to extension of a crack. E616
3.1.4 original crack size, a [L]—the physical crack size at the start of testing. (E616)
o
3.2 Definitions of Terms Specific to This Standard:
3.2.1 crack depth, a [L]—in surface-crack tension (SCT) specimens, the normal distance from the cracked plate surface to the
point of maximum penetration of the crack front into the material. Crack depth is a fraction of the specimen thickness.
3.2.1.1 Discussion—
In this practice, crack depth is the original depth a and the subscript o is everywhere implied.
o
3.2.2 crack length, 2c [L]—in surface-crack tension specimens, a distance measured on the specimen surface between the two
points at which the crack front intersects the specimen surface. Crack length is a fraction of specimen width.
3.2.2.1 Discussion—
In this practice, crack length is the original length 2c and the subscript o is everywhere implied.
o
−2
3.2.3 residual strength, σ (FL )—the maximum value of the nominal stress, neglecting the area of the crack, that a cracked
r
specimen is capable of sustaining.
NOTE 3—In surface-crack tension (SCT) specimens, residual strength is the ratio of the maximum load (P ) to the product of test section width (W)
max
times thickness (B), P /(BW). It represents the stress at fracture normal to and remote from the plane of the crack.
max
4. Significance and Use
4.1 The surface-crack tension (SCT) test is used to estimate the load-carrying capacity of simple sheet- or plate-like structural
components having a type of flaw likely to occur in service. The test is also used for research purposes to investigate failure
mechanisms of cracks under service conditions.
4.2 The residual strength of an SCT specimen is a function of the crack depth and length and the specimen thickness as well as
the characteristics of the material. This relationship is extremely complex and cannot be completely described or characterized at
present.
For referenced ASTM standards, visit the ASTM website, www.astm.org, or contact ASTM Customer Service at service@astm.org. For Annual Book of ASTM Standards
volume information, refer to the standard’s Document Summary page on the ASTM website.
The last approved version of this historical standard is referenced on www.astm.org.
E740/E740M − 23
4.2.1 The results of the SCT test are suitable for direct application to design only when the service conditions exactly parallel the
test conditions. Some methods for further analysis are suggested in Appendix X1.
4.3 In order that SCT test data can be comparable and reproducible and can be correlated among laboratories, it is essential that
uniform SCT testing practices be established.
4.4 The specimen configuration, preparation, and instrumentation described in this practice are generally suitable for cyclic- or
sustained-force testing as well. However, certain constraints are peculiar to each of these tests. These are beyond the scope of this
practice but are discussed in Ref. (1).
5. Apparatus
5.1 The procedure involves testing of specimens that have been precracked in fatigue. force versus CMOD, if CMOD is measured,
is recorded autographically or digitally.
5.2 Fatigue Precracking Apparatus—Axial tension or three-point, four-point, or cantilever bending are all acceptable modes for
fatigue precracking. Fixture design is not critical as long as the crack growth is symmetrical and the plane of the crack remains
perpendicular to the specimen face and the tensile force vector. The effect of cyclic frequency is thought to be negligible below
100 Hz in a nonaggressive environment.
NOTE 4—Certain crack shapes are more readily produced in axial tension, others in bending (see Annex A1).
5.2.1 Devices and fixtures for cantilever bending of sheet and plate specimens are described in Refs. (2) and (3), respectively.
Others may be equally suitable. The axial fatigue machines described in Practice E466 are suitable for precracking in tension;
however, since the precracking operation is terminated prior to specimen failure, one should ensure that load variations during
slowdown or shutdown do not exceed those desired.
5.2.2 A magnifier of about 20 power should be used to monitor the fatigue precracking process. Ease of observation will be
enhanced if the cyclic rate can be reduced to about 1 Hz when desired. Alternatively, a stroboscopic light synchronized with the
maximum application of tensile force may serve as well.
5.3 Testing Machine—The test should be conducted with a tension testing machine that conforms to the requirements of Practices
E4.
5.3.1 The devices for transmitting force to the specimen shall be such that the major axis of the specimen coincides with the load
axis. The pin-and-clevis arrangement described in Test Method E338 should be suitable for specimens whose width is less than
about 4 in. [100 mm]. An arrangement such as that shown in Fig. 2 of Practice E561 should be suitable for wider specimens.
5.3.2 For tests at other than room temperature, the temperature control and temperature measurement requirements of Test Method
E338 are appropriate.
5.4 Displacement Gage (Optional)—If used to measure CMOD, the displacement gage output should accurately indicate the
relative displacement of two gage points on the cracked surface, spanning the crack at the midpoint of its length. Further
information on displacement gages appears in Appendix X2.
5.5 For some combinations of material and crack geometry, the crack may propagate entirely through the thickness prior to total
failure. Methods of detecting this occurrence, should it be of interest, are discussed briefly in Ref. (1).
6. Test Specimen
6.1 Configuration and Notation—The SCT test specimen and the notation used herein are shown in Fig. 1. Grip details have been
omitted, since grip design may depend on specimen size (5.3.1) and material toughness. In general, the only gripping requirements
are that the arrangement be strong enough to carry the maximum expected force and that it allow uniform distribution of force over
the specimen cross section.
E740/E740M − 23
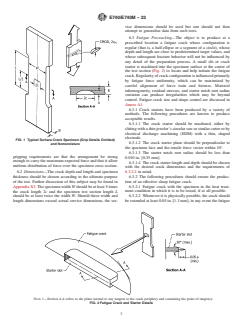
FIG. 1 Typical Surface-Crack Specimen (Grip Details Omitted) and Nomenclature
6.2 Dimensions—The crack depth and length and specimen thickness should be chosen according to the ultimate purpose of the
test. Further discussion of this subject may be found in Appendix X3. The specimen width W should be at least 5 times the crack
length 2c and the specimen test section length L should be at least twice the width W. Should these width and length dimensions
exceed actual service dimensions, the service dimensions should be used but one should not then attempt to generalize data from
such tests.
6.3 Fatigue Precracking—The object is to produce at a prescribed location a fatigue crack whose configuration is regular (that is,
a half-ellipse or a segment of a circle), whose depth and length are close to predetermined target values, and whose subsequent
fracture behavior will not be influenced by any detail of the preparation process. A small slit or crack starter is machined into the
specimen surface at the center of the test section (Fig. 2) to locate and help initiate the fatigue crack. Regularity of crack
NOTE 1—Section A-A refers to the plane normal to any tangent to the crack periphery and containing the point of tangency.
FIG. 2 Fatigue Crack and Starter Details
E740/E740M − 23
configuration is influenced primarily by fatigue force uniformity, which can be maximized by careful alignment of force train and
fixtures. Material inhomogeneity, residual stresses, and starter notch root radius variation can produce irregularities which may be
beyond control. Fatigue crack size and shape control are discussed in Annex A1.
6.3.1 Crack starters have been produced by a variety of methods. The following procedures are known to produce acceptable
results.
6.3.1.1 The crack starter should be machined, either by slitting with a thin jeweler’s circular saw or similar cutter or by electrical
discharge machining (EDM) with a thin, shaped electrode.
6.3.1.2 The crack starter plane should be perpendicular to the specimen face and the tensile force vector within 10°.
6.3.1.3 The starter notch root radius should be less than 0.010 in. [0.25 mm].
6.3.1.4 The crack starter length and depth should be chosen with the desired crack dimensions and the requirements of 6.3.2.2 in
mind.
6.3.2 The following procedures should ensure the production of an effective sharp fatigue crack.
6.3.2.1 Fatigue crack with the specimen in the heat treatment condition in which it is to be tested, if at all possible.
6.3.2.2 Whenever it is physically possible, the crack should be extended at least 0.05 in. [1.3 mm]; in any event the fatigue crack
extension must not be less than 5 % of the final crack depth, and the crack and its starter must lie entirely within an imaginary
30° wedge whose apex is at the crack tip. These two-dimensional descriptions shall apply around the entire crack front, that is,
in all planes normal to tangents to all points on the crack periphery (Fig. 2).
6.3.2.3 The ratio of minimum to maximum cyclic stress, R, should not be greater than 0.1.
1/2 1/2
6.3.2.4 For at least the final 2.5 % of the total crack depth, the ratio K /E should not exceed 0.002 in. [0.00032 m ], where
max
K is the maximum stress intensity factor during fatigue cracking and E is the material’s elastic modulus. An estimate of K
max max
can be computed based on the cyclic stress and the target crack dimensions using the appropriate equation from Annex A2.
Compute K at the surface or at the deepest point, whichever is greater.
max
7. Procedure
7.1 Number of Tests—If only one crack geometry (that is, fixed crack depth and length) is to be studied, at least three specimens
should be tested. If geometry is to be varied, at least two specimens should be tested for each combination of depth-to-length (a/2c)
and depth-to-thickness (a/B) ratios.
7.2 Specimen Measurements—Measure the specimen thickness B at the points midway between each crack tip and the nearest
specimen edge, to the nearest 0.001 in. [0.025 mm] or 0.1 %, whichever is larger. If these measurements are not within 3 % of their
average, the specimen should be discarded or remachined as appropriate. Measure the specimen width W at the crack plane to
within 1 % of W.
7.3 Testing—Conduct the test in a manner similar to that for an ordinary tension specimen. The test loading rate shall be such that
the rate of increase of the nominal stress P/BW is less than 100 000100 000 psi [690 MPa]/min. Record the maximum force, P ,
max
reached during the test.
7.4 Test Record—If CMOD is measured, a test record should be made consisting of an autographic plot or digital record of the
output of a force-sensing transducer versus the displacement gage output.
7.5 Crack Measurements—After fracture, measure the crack depth a and the crack length 2c to the nearest 0.001 in. [0.025 mm]
or 0.1 %, whichever is larger. A low-power [20 to 50 × ] traveling microscope is usually satisfactory. Observe the crack shape; it
should closely approximate a semiellipse or a segment of a circle. If th
...
Questions, Comments and Discussion
Ask us and Technical Secretary will try to provide an answer. You can facilitate discussion about the standard in here.
Loading comments...