ASTM D1474-98(2002)
(Test Method)Standard Test Methods for Indentation Hardness of Organic Coatings
Standard Test Methods for Indentation Hardness of Organic Coatings
SIGNIFICANCE AND USE
Indentation hardness measurements have proven to be useful in rating coatings on rigid substrates for their resistance to mechanical abuse, such as that produced by blows, gouging, and scratching. These measurements do not necessarily characterize the resistance to mechanical abuse of coatings that are required to remain intact when deformed.
SCOPE
1.1 These test methods cover the determination of the indentation hardness of organic materials such as dried paint, varnish, and lacquer coatings, when applied to an acceptable plane rigid surface, for example, metal or glass.
1.2 Two methods are covered as follows: SectionsMethod A-Knoop Indentation Hardness6-12Method B-Pfund Indentation Hardness13-19
1.3 Method A, which has the greater precision, provides hardness values in terms of Knoop Hardness Number (KHN). Method B provides hardness in terms of Pfund Hardness Number (PHN). Although the hardness value scales of these methods differ, the methods agree in the ranking of coating hardness.
1.4 Test Method A of these test methods is similar in content (but not technically equivalent) to ISO 6441-1 and ISO 6441-2.
1.5 The values stated in inch-pound units are to be regarded as the standard. The values given in parentheses are for information only.
1.6 This standard does not purport to address the safety concerns, if any, associated with its use. It is the responsibility of the user of this standard to establish appropriate safety and health practices and determine the applicability of regulatory limitations prior to use.
General Information
Relations
Standards Content (Sample)
NOTICE: This standard has either been superseded and replaced by a new version or withdrawn.
Contact ASTM International (www.astm.org) for the latest information
Designation:D1474–98(Reapproved2002)
Standard Test Methods for
1
Indentation Hardness of Organic Coatings
This standard is issued under the fixed designation D1474; the number immediately following the designation indicates the year of
original adoption or, in the case of revision, the year of last revision.Anumber in parentheses indicates the year of last reapproval.A
superscript epsilon (e) indicates an editorial change since the last revision or reapproval.
This standard has been approved for use by agencies of the Department of Defense.
1. Scope * Dry-Film Thickness of Nonconductive Coatings Applied
2
to a Nonferrous Metal Base
1.1 These test methods cover the determination of the
E384 Test Method for Microindentation Hardness of Ma-
indentation hardness of organic materials such as dried paint,
3
terials
varnish, and lacquer coatings, when applied to an acceptable
2.2 Other Standards:
plane rigid surface, for example, metal or glass.
ISO 6441-1 Hardness testing—Part 1: Determination of
1.2 Two methods are covered as follows:
Knoophardnessbymeasurementoftheindentationlength
Sections
4
using a microscope
Method A—Knoop Indentation Hardness 6-12
Method B—Pfund Indentation Hardness 13-19
ISO 6441-2 Hardness testing—Part 2: Determination of
4
Knoophardnessbymeasurementoftheindentationdepth
1.3 Method A, which has the greater precision, provides
hardness values in terms of Knoop Hardness Number (KHN).
3. Terminology
Method B provides hardness in terms of Pfund Hardness
3.1 Definitions:
Number (PHN). Although the hardness value scales of these
3.1.1 indentation hardness—theresistancetopenetrationby
methods differ, the methods agree in the ranking of coating
an indenter.
hardness.
3.1.2 Knoop indenter—a pyramidal diamond of prescribed
1.4 TestMethodAofthesetestmethodsissimilarincontent
dimensions.
(butnottechnicallyequivalent)toISO6441-1andISO6441-2.
3.1.3 Pfund indenter—hemispherical quartz or sapphire in-
1.5 Thevaluesstatedininch-poundunitsaretoberegarded
denter of prescribed dimensions.
as the standard. The values given in parentheses are for
3.1.4 Knoop hardness number, KHN—the indentation hard-
information only.
ness determined with a Knoop indenter, and calculated as
1.6 This standard does not purport to address the safety
follows:
concerns, if any, associated with its use. It is the responsibility
2
of the user of this standard to establish appropriate safety and
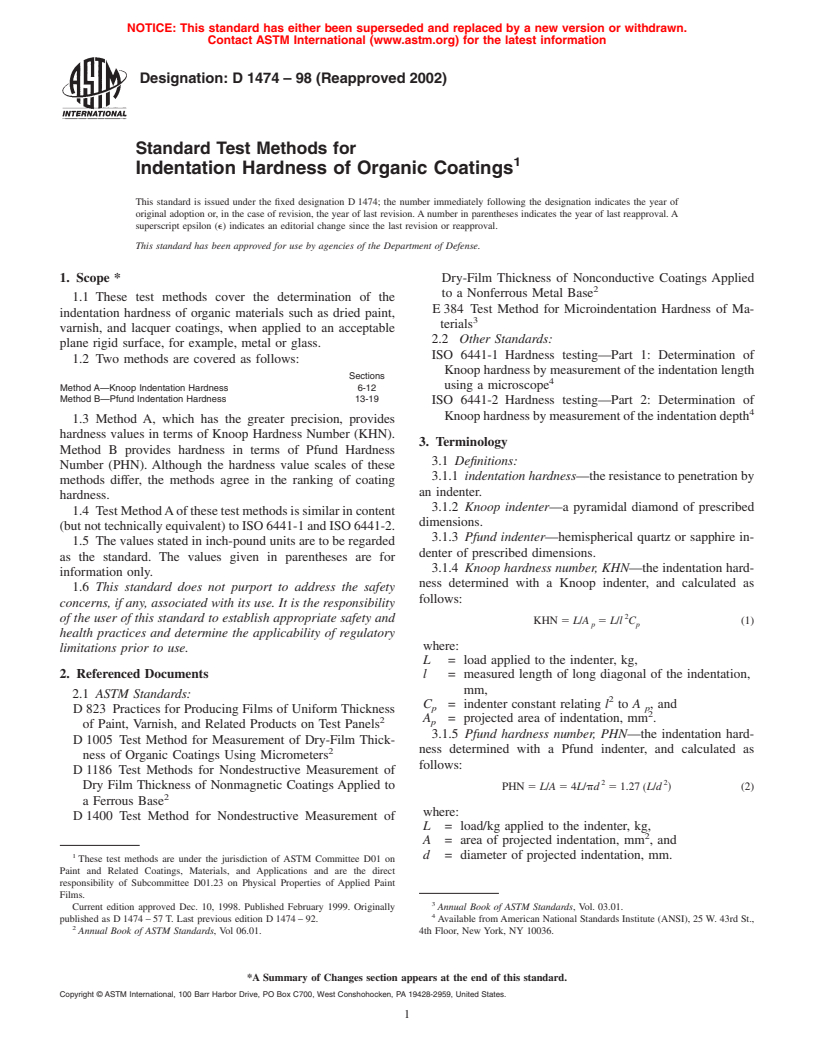
KHN 5 L/A 5 L/l C (1)
p p
health practices and determine the applicability of regulatory
where:
limitations prior to use.
L = load applied to the indenter, kg,
2. Referenced Documents l = measured length of long diagonal of the indentation,
mm,
2.1 ASTM Standards:
2
C = indenter constant relating l to A , and
p p
D823 Practices for Producing Films of Uniform Thickness
2
A = projected area of indentation, mm .
2
p
of Paint, Varnish, and Related Products on Test Panels
3.1.5 Pfund hardness number, PHN—the indentation hard-
D1005 Test Method for Measurement of Dry-Film Thick-
ness determined with a Pfund indenter, and calculated as
2
ness of Organic Coatings Using Micrometers
follows:
D1186 Test Methods for Nondestructive Measurement of
2 2
Dry Film Thickness of Nonmagnetic Coatings Applied to PHN 5 L/A 54L/pd 51.27 ~L/d ! (2)
2
a Ferrous Base
where:
D1400 Test Method for Nondestructive Measurement of
L = load/kg applied to the indenter, kg,
2
A = area of projected indentation, mm , and
1 d = diameter of projected indentation, mm.
These test methods are under the jurisdiction of ASTM Committee D01 on
Paint and Related Coatings, Materials, and Applications and are the direct
responsibility of Subcommittee D01.23 on Physical Properties of Applied Paint
Films.
3
Current edition approved Dec. 10, 1998. Published February 1999. Originally Annual Book of ASTM Standards, Vol. 03.01.
4
published as D1474–57T. Last previous edition D1474–92. Available fromAmerican National Standards Institute (ANSI), 25 W. 43rd St.,
2
Annual Book of ASTM Standards, Vol 06.01. 4th Floor, New York, NY 10036.
*A Summary of Changes section appears at the end of this standard.
Copyright © ASTM International, 100 Barr Harbor Drive, PO Box C700, West Conshohocken, PA 19428-2959, United States.
1
---------------------- Page: 1 ----------------------
D1474
4. Significance and Use 8. Calibration
4.1 Indentation hardness measurements have proven to be 8.1 Adjust the illumination in the microscope to give
useful in rating coatings on rigid substrates for their resistance maximum contrast when viewing an indentation.
tomechanicalabuse,suchasthatproducedbyblows,gouging, 8.2 By means of a calibrated scale, determine the factor for
and scratching. These measurements do not necessarily char- each microscope objective that converts the filar scale units of
acterize the resistance to mechanical abuse of coatings that are the eyepi
...


Questions, Comments and Discussion
Ask us and Technical Secretary will try to provide an answer. You can facilitate discussion about the standard in here.