ASTM E1312-18
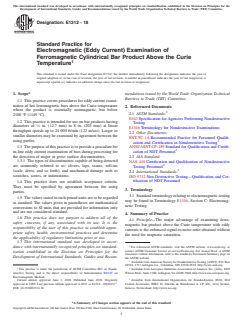
(Practice)Standard Practice for Electromagnetic (Eddy Current) Examination of Ferromagnetic Cylindrical Bar Product Above the Curie Temperature
Standard Practice for Electromagnetic (Eddy Current) Examination of Ferromagnetic Cylindrical Bar Product Above the Curie Temperature
SIGNIFICANCE AND USE
5.1 The purpose of this practice is to describe a procedure for in-line-eddy-current examination of hot cylindrical bars in the range of diameters listed in 1.2 for large and repetitive discontinuities that may form during processing.
5.2 The discontinuities in bar product capable of being detected by the electromagnetic method are listed in 1.3.1. The method is capable of detecting surface and some subsurface discontinuities that are typically in the order of 0.030 in. (0.75 mm) and deeper, but some shallower discontinuities might also be found.
5.3 Discontinuities that are narrow and deep, but short in length, are readily detectable by both probe and encircling coils because they cause abrupt flux changes. Surface and subsurface discontinuities (if the electromagnetic frequency provides sufficient effective depth of penetration) can be detected by this method.
5.3.1 Discontinuities such as scratches or seams that are continuous and uniform for the full length of cut length bars or extend for extensive linear distances in coiled product may not always be detected when encircling coils are used. These are more detectable with probe coils by intercepting the discontinuity in their rotation around the circumference.
5.3.2 The orientation and type of coil are important parameters in coil design because they influence the detectability of discontinuities.
5.4 The eddy current method is sensitive to metallurgical variations that occur as a result of processing, thus all received signals above the alarm level are not necessarily indicative of defective product.
SCOPE
1.1 This practice covers procedures for eddy current examination of hot ferromagnetic bars above the Curie temperature where the product is essentially nonmagnetic, but below 2100 °F (1149 °C).
1.2 This practice is intended for use on bar products having diameters of 1/2 in. (12.7 mm) to 8 in. (203 mm) at linear throughput speeds up to 24 000 ft/min (122 m/sec). Larger or smaller diameters may be examined by agreement between the using parties.
1.3 The purpose of this practice is to provide a procedure for in-line eddy current examination of bars during processing for the detection of major or gross surface discontinuities.
1.3.1 The types of discontinuities capable of being detected are commonly referred to as: slivers, laps, seams, roll-ins (scale, dross, and so forth), and mechanical damage such as scratches, scores, or indentations.
1.4 This practice does not establish acceptance criteria. They must be specified by agreement between the using parties.
1.5 The values stated in inch-pound units are to be regarded as standard. The values given in parentheses are mathematical conversions to SI units that are provided for information only and are not considered standard.
1.6 This practice does not purport to address all of the safety concerns, if any, associated with its use. It is the responsibility of the user of this practice to establish appropriate safety, health, environmental practices and determine the applicability of regulatory limitations prior to use.
1.7 This international standard was developed in accordance with internationally recognized principles on standardization established in the Decision on Principles for the Development of International Standards, Guides and Recommendations issued by the World Trade Organization Technical Barriers to Trade (TBT) Committee.
General Information
- Status
- Published
- Publication Date
- 31-May-2018
- Technical Committee
- E07 - Nondestructive Testing
- Drafting Committee
- E07.07 - Electromagnetic Method
Relations
- Effective Date
- 01-Jun-2018
- Effective Date
- 01-Feb-2024
- Effective Date
- 01-Dec-2019
- Effective Date
- 01-Mar-2019
- Effective Date
- 01-Jan-2018
- Effective Date
- 15-Jun-2017
- Effective Date
- 01-Feb-2017
- Effective Date
- 01-Aug-2016
- Effective Date
- 01-Feb-2016
- Effective Date
- 01-Dec-2015
- Effective Date
- 01-Sep-2015
- Effective Date
- 01-Jun-2014
- Effective Date
- 01-Jun-2014
- Effective Date
- 01-Dec-2013
- Effective Date
- 15-Jun-2013
Overview
ASTM E1312-18 sets forth the standard practice for the electromagnetic (eddy current) examination of ferromagnetic cylindrical bar products when processed at temperatures above their Curie point but below 2100 °F (1149 °C). Above the Curie temperature, these products are essentially nonmagnetic, allowing for reliable eddy current inspection. This method is designed for in-line examination during bar processing, enabling the detection of significant surface and some subsurface discontinuities that may emerge during manufacturing.
Eddy current examination, as described in this standard, is non-contact and suited for high-throughput environments, covering cylindrical bars with diameters from 1/2 inch (12.7 mm) to 8 inches (203 mm), and capable of supporting speeds up to 24,000 feet per minute (122 m/sec). The practice does not establish acceptance criteria, which must be determined contractually by users.
Key Topics
- Principle of Operation: Eddy current testing above the Curie temperature enhances signal-to-noise ratio by leveraging the nonmagnetic state of the material, improving the ability to detect relevant defects.
- Detectable Discontinuities: The standard targets major or gross discontinuities such as:
- Slivers
- Laps
- Seams
- Roll-ins (scale, dross)
- Mechanical damage (scratches, scores, indentations)
- Detection Capabilities: The method is sensitive to both surface and some subsurface flaws, typically down to depths around 0.030 in. (0.75 mm), with potential for finding shallower defects.
- Equipment: Systems utilize encircling coils or rotating probes. Proper coil orientation and type are crucial to optimize defect detection across the bar’s circumference.
- Sensitivity and Limitations:
- Easily detects abrupt, narrow, and deep flaws.
- Uniform linear imperfections may require probe coils for reliable detection.
- Eddy current signals can also respond to metallurgical changes, so all indications above the alarm threshold are not strictly defect-related.
Applications
ASTM E1312-18 is widely applied in metallurgical and steelmaking industries where production of ferromagnetic bars requires reliable, inline defect detection at elevated temperatures, such as:
- Steel mills and rolling plants: Continuous monitoring of hot bar product to identify significant surface or near-surface defects before further processing or shipping.
- Quality assurance in process lines: Ensures that only bars meeting agreed-upon specifications progress to subsequent production stages, reducing rework and waste.
- Safety and engineering compliance: Supports delivery of bars that meet industry and customer defect tolerance agreements.
This standard is especially valuable for high-speed production lines, offering rapid inspection without physical contact, minimizing downtime, and supporting real-time quality assurance practices.
Related Standards
The effective use of ASTM E1312-18 may require familiarity with related standards, including:
- ASTM E543: Specification for Agencies Performing Nondestructive Testing
- ASTM E1316: Terminology for Nondestructive Examinations
- ANSI/ASNT-CP-189: Standard for Qualification and Certification of NDT Personnel
- SNT-TC-1A: Recommended Practice for Personnel Qualification and Certification in Nondestructive Testing
- AIA NAS 410: Certification and Qualification of Nondestructive Testing Personnel
- ISO 9712: Non-Destructive Testing - Qualification and Certification of NDT Personnel
These documents establish terminology, personnel qualifications, and agency requirements essential for implementing ASTM E1312-18 in a manner consistent with global best practices in nondestructive testing.
Keywords: ASTM E1312-18, eddy current testing, ferromagnetic bar inspection, in-line nondestructive testing, surface discontinuities, steel bar quality, hot bar examination, electromagnetic inspection, industrial standards for bar products
Buy Documents
ASTM E1312-18 - Standard Practice for Electromagnetic (Eddy Current) Examination of Ferromagnetic Cylindrical Bar Product Above the Curie Temperature
REDLINE ASTM E1312-18 - Standard Practice for Electromagnetic (Eddy Current) Examination of Ferromagnetic Cylindrical Bar Product Above the Curie Temperature
Get Certified
Connect with accredited certification bodies for this standard

Element Materials Technology
Materials testing and product certification.

Inštitut za kovinske materiale in tehnologije
Institute of Metals and Technology. Materials testing, metallurgical analysis, NDT.
Sponsored listings
Frequently Asked Questions
ASTM E1312-18 is a standard published by ASTM International. Its full title is "Standard Practice for Electromagnetic (Eddy Current) Examination of Ferromagnetic Cylindrical Bar Product Above the Curie Temperature". This standard covers: SIGNIFICANCE AND USE 5.1 The purpose of this practice is to describe a procedure for in-line-eddy-current examination of hot cylindrical bars in the range of diameters listed in 1.2 for large and repetitive discontinuities that may form during processing. 5.2 The discontinuities in bar product capable of being detected by the electromagnetic method are listed in 1.3.1. The method is capable of detecting surface and some subsurface discontinuities that are typically in the order of 0.030 in. (0.75 mm) and deeper, but some shallower discontinuities might also be found. 5.3 Discontinuities that are narrow and deep, but short in length, are readily detectable by both probe and encircling coils because they cause abrupt flux changes. Surface and subsurface discontinuities (if the electromagnetic frequency provides sufficient effective depth of penetration) can be detected by this method. 5.3.1 Discontinuities such as scratches or seams that are continuous and uniform for the full length of cut length bars or extend for extensive linear distances in coiled product may not always be detected when encircling coils are used. These are more detectable with probe coils by intercepting the discontinuity in their rotation around the circumference. 5.3.2 The orientation and type of coil are important parameters in coil design because they influence the detectability of discontinuities. 5.4 The eddy current method is sensitive to metallurgical variations that occur as a result of processing, thus all received signals above the alarm level are not necessarily indicative of defective product. SCOPE 1.1 This practice covers procedures for eddy current examination of hot ferromagnetic bars above the Curie temperature where the product is essentially nonmagnetic, but below 2100 °F (1149 °C). 1.2 This practice is intended for use on bar products having diameters of 1/2 in. (12.7 mm) to 8 in. (203 mm) at linear throughput speeds up to 24 000 ft/min (122 m/sec). Larger or smaller diameters may be examined by agreement between the using parties. 1.3 The purpose of this practice is to provide a procedure for in-line eddy current examination of bars during processing for the detection of major or gross surface discontinuities. 1.3.1 The types of discontinuities capable of being detected are commonly referred to as: slivers, laps, seams, roll-ins (scale, dross, and so forth), and mechanical damage such as scratches, scores, or indentations. 1.4 This practice does not establish acceptance criteria. They must be specified by agreement between the using parties. 1.5 The values stated in inch-pound units are to be regarded as standard. The values given in parentheses are mathematical conversions to SI units that are provided for information only and are not considered standard. 1.6 This practice does not purport to address all of the safety concerns, if any, associated with its use. It is the responsibility of the user of this practice to establish appropriate safety, health, environmental practices and determine the applicability of regulatory limitations prior to use. 1.7 This international standard was developed in accordance with internationally recognized principles on standardization established in the Decision on Principles for the Development of International Standards, Guides and Recommendations issued by the World Trade Organization Technical Barriers to Trade (TBT) Committee.
SIGNIFICANCE AND USE 5.1 The purpose of this practice is to describe a procedure for in-line-eddy-current examination of hot cylindrical bars in the range of diameters listed in 1.2 for large and repetitive discontinuities that may form during processing. 5.2 The discontinuities in bar product capable of being detected by the electromagnetic method are listed in 1.3.1. The method is capable of detecting surface and some subsurface discontinuities that are typically in the order of 0.030 in. (0.75 mm) and deeper, but some shallower discontinuities might also be found. 5.3 Discontinuities that are narrow and deep, but short in length, are readily detectable by both probe and encircling coils because they cause abrupt flux changes. Surface and subsurface discontinuities (if the electromagnetic frequency provides sufficient effective depth of penetration) can be detected by this method. 5.3.1 Discontinuities such as scratches or seams that are continuous and uniform for the full length of cut length bars or extend for extensive linear distances in coiled product may not always be detected when encircling coils are used. These are more detectable with probe coils by intercepting the discontinuity in their rotation around the circumference. 5.3.2 The orientation and type of coil are important parameters in coil design because they influence the detectability of discontinuities. 5.4 The eddy current method is sensitive to metallurgical variations that occur as a result of processing, thus all received signals above the alarm level are not necessarily indicative of defective product. SCOPE 1.1 This practice covers procedures for eddy current examination of hot ferromagnetic bars above the Curie temperature where the product is essentially nonmagnetic, but below 2100 °F (1149 °C). 1.2 This practice is intended for use on bar products having diameters of 1/2 in. (12.7 mm) to 8 in. (203 mm) at linear throughput speeds up to 24 000 ft/min (122 m/sec). Larger or smaller diameters may be examined by agreement between the using parties. 1.3 The purpose of this practice is to provide a procedure for in-line eddy current examination of bars during processing for the detection of major or gross surface discontinuities. 1.3.1 The types of discontinuities capable of being detected are commonly referred to as: slivers, laps, seams, roll-ins (scale, dross, and so forth), and mechanical damage such as scratches, scores, or indentations. 1.4 This practice does not establish acceptance criteria. They must be specified by agreement between the using parties. 1.5 The values stated in inch-pound units are to be regarded as standard. The values given in parentheses are mathematical conversions to SI units that are provided for information only and are not considered standard. 1.6 This practice does not purport to address all of the safety concerns, if any, associated with its use. It is the responsibility of the user of this practice to establish appropriate safety, health, environmental practices and determine the applicability of regulatory limitations prior to use. 1.7 This international standard was developed in accordance with internationally recognized principles on standardization established in the Decision on Principles for the Development of International Standards, Guides and Recommendations issued by the World Trade Organization Technical Barriers to Trade (TBT) Committee.
ASTM E1312-18 is classified under the following ICS (International Classification for Standards) categories: 77.140.40 - Steels with special magnetic properties. The ICS classification helps identify the subject area and facilitates finding related standards.
ASTM E1312-18 has the following relationships with other standards: It is inter standard links to ASTM E1312-09(2013)e1, ASTM E1316-24, ASTM E1316-19b, ASTM E1316-19, ASTM E1316-18, ASTM E1316-17a, ASTM E1316-17, ASTM E1316-16a, ASTM E1316-16, ASTM E1316-15a, ASTM E1316-15, ASTM E1316-14, ASTM E1316-14e1, ASTM E1316-13d, ASTM E1316-13c. Understanding these relationships helps ensure you are using the most current and applicable version of the standard.
ASTM E1312-18 is available in PDF format for immediate download after purchase. The document can be added to your cart and obtained through the secure checkout process. Digital delivery ensures instant access to the complete standard document.
Standards Content (Sample)
This international standard was developed in accordance with internationally recognized principles on standardization established in the Decision on Principles for the
Development of International Standards, Guides and Recommendations issued by the World Trade Organization Technical Barriers to Trade (TBT) Committee.
Designation: E1312 − 18
Standard Practice for
Electromagnetic (Eddy Current) Examination of
Ferromagnetic Cylindrical Bar Product Above the Curie
Temperature
This standard is issued under the fixed designation E1312; the number immediately following the designation indicates the year of
original adoption or, in the case of revision, the year of last revision. A number in parentheses indicates the year of last reapproval. A
superscript epsilon (´) indicates an editorial change since the last revision or reapproval.
1. Scope* mendations issued by the World Trade Organization Technical
Barriers to Trade (TBT) Committee.
1.1 This practice covers procedures for eddy current exami-
nation of hot ferromagnetic bars above the Curie temperature
2. Referenced Documents
where the product is essentially nonmagnetic, but below
2.1 ASTM Standards:
2100 °F (1149 °C).
E543 Specification for Agencies Performing Nondestructive
1.2 This practice is intended for use on bar products having
Testing
diameters of ⁄2 in. (12.7 mm) to 8 in. (203 mm) at linear
E1316 Terminology for Nondestructive Examinations
throughput speeds up to 24 000 ft/min (122 m/sec). Larger or
2.2 Other Documents:
smaller diameters may be examined by agreement between the
SNT-TC-1A Recommended Practice for Personnel Qualifi-
using parties.
cation and Certification in Nondestructive Testing
1.3 Thepurposeofthispracticeistoprovideaprocedurefor
ANSI/ASNT-CP-189 Standard for Qualification and Certifi-
in-line eddy current examination of bars during processing for
cation of NDT Personnel
the detection of major or gross surface discontinuities.
2.3 AIA Standard:
1.3.1 The types of discontinuities capable of being detected
NAS 410 Certification and Qualification of Nondestructive
are commonly referred to as: slivers, laps, seams, roll-ins
Testing Personnel
(scale, dross, and so forth), and mechanical damage such as
2.4 International Standards:
scratches, scores, or indentations.
ISO 9712 Non-Destructive Testing—Qualification and Cer-
tification of NDT Personnel
1.4 This practice does not establish acceptance criteria.
They must be specified by agreement between the using
3. Terminology
parties.
3.1 Standardterminologyrelatingtoelectromagnetictesting
1.5 The values stated in inch-pound units are to be regarded
may be found in Terminology E1316, Section C: Electromag-
as standard. The values given in parentheses are mathematical
netic Testing.
conversions to SI units that are provided for information only
and are not considered standard.
4. Summary of Practice
1.6 This practice does not purport to address all of the
4.1 Principle—The major advantage of examining ferro-
safety concerns, if any, associated with its use. It is the
magnetic bar product above the Curie temperature with eddy
responsibility of the user of this practice to establish appro-
currents is the enhanced signal-to-noise ratio obtained without
priate safety, health, environmental practices and determine
the need for magnetic saturation.
the applicability of regulatory limitations prior to use.
1.7 This international standard was developed in accor-
For referenced ASTM standards, visit the ASTM website, www.astm.org, or
dance with internationally recognized principles on standard-
contact ASTM Customer Service at service@astm.org. For Annual Book of ASTM
ization established in the Decision on Principles for the
Standards volume information, refer to the standard’s Document Summary page on
Development of International Standards, Guides and Recom-
the ASTM website.
AvailablefromAmericanSocietyforNondestructiveTesting(ASNT),P.O.Box
28518, 1711 Arlingate Ln., Columbus, OH 43228-0518, http://www.asnt.org.
1 4
This practice is under the jurisdiction of ASTM Committee E07 on Nonde- Available fromAerospace IndustriesAssociation ofAmerica, Inc. (AIA), 1000
structive Testing and is the direct responsibility of Subcommittee E07.07 on WilsonBlvd.,Suite1700,Arlington,VA22209-3928,http://www.aia-aerospace.org.
Electromagnetic Method.
Current edition approved June 1, 2018. Published June 2018. Originally Available from International Organization for Standardization (ISO), ISO
ɛ1
approved in 1989. Last previous edition approved in 2013 as E1312 – 09(2013) . Central Secretariat, BIBC II, Chemin de Blandonnet 8, CP 401, 1214 Vernier,
DOI: 10.1520/E1312-18. Geneva, Switzerland, http://www.iso.org.
*A Summary of Changes section appears at the end of this standard
Copyright © ASTM International, 100 Barr Harbor Drive, PO Box C700, West Conshohocken, PA 19428-2959. United States
E1312 − 18
4.2 Sensors—This examination may be performed with 5.4 The eddy current method is sensitive to metallurgical
various types or designs of encircling coils or with probe coils variations that occur as a result of processing, thus all received
that are fixed or rotating. signals above the alarm level are not necessarily indicative of
4.2.1 One or more exciter or sensor coils is used to encircle defective product.
the bar through which the product to be examined is passed.
6. Basis of Application
When the hot bar is in close proximity to the sensing and
exciting coils, eddy currents are induced in the hot product by
6.1 Personnel Qualification—If specified in the contractual
an alternating current. The sensing coil detects the electromag-
agreement, personnel performing examinations to this practice
netic flux related to these currents. Changes or disruptions in
shall be qualified in accordance with a nationally recognized
the normal flux pattern indicate the presence of discontinuities.
nondestructive testing (NDT) personnel qualification practice
This technique is capable of examining the entire circumfer-
or standard such as ANSI/ASNT-CP-189, SNT-TC-1A, NAS-
ence without contacting the product.
410, ISO-9712, or a similar document and certified by the
4.2.2 The surface can also be examined with probe coils
employer or certifying agency, as applicable. The practice or
having one or more exciters and sensors which are spaced in
standard used and its applicable revision shall be identified in
close proximity to the product surface. The probe is usually
the contractual agreement between the using parties.
small and does not encircle the product, making it necessary to
6.2 Qualification of Nondestructive Testing Agencies—If
rotateeithertheprobesortheproducttoobtain100%coverage
specified in the contractual agreement, NDT agencies shall be
of the circumference. This is essentially a contact technique
qualified and evaluated as described in Practice E543. The
because the coil is fixtured in a device that rides on the
applicable edition of Practice E543 shall be specified in the
circumferencetomaintainafixeddistancebetweenthecoiland
contractual agreement.
product surface.
6.3 Acceptance Criteria—Since acceptance criteria are not
4.2.3 Discontinuities cause either a change in phase or
specified in this practice, they shall be specified in the
signal amplitude when detected by the sensing coil. These
contractual agreement.
signals are amplified and processed to activate marking or
recording devices, or both. Relative severity of the imperfec-
7. Apparatus
tion can be indicated by the signal amplitude generated by the
flux change or the degree of change in phase.
7.1 Electronic Apparatus, should be capable of energizing
4.2.4 Caution must be exercised in establishing reference
the test coils or probes with alternating current at selectable
standards because flux changes caused by natural discontinui-
frequencies from 400 Hz to 100 kHz. Either manual or
ties might differ significantly from those generated by artificial
remotely operated switches can be used for frequency selec-
discontinuities.
tion. The equipment should include a detector display (CRT,
meters), phase discriminator, filters, modulators, recorders, and
5. Significance and Use
alarming/marking devices required for particular applications.
5.1 The purpose of this practice is to describe a procedure
7.2 Sensors, whether probe or encircling coils, should op-
for in-line-eddy-current examination of hot cylindrical bars in
erate through a frequency range from 400 Hz to 100 kHz.
the range of diameters listed in 1.2 for large and repetitive
7.2.1 The sensor windings must be cooled (such as water
discontinuities that may form during processing.
jackets) to control the sensor operating temperature and pre-
5.2 The discontinuities in bar product capable of being vent thermal damage to the sensors.
detected by the electromagnetic method are listed in 1.3.1. The 7.2.2 Magneticorelectrostaticshieldsmightbenecessaryto
method is capable of detecting surface and some subsurface suppress extraneous electrical transient noise. Electrostatic
discontinuities that are typically in the order of 0.030 in. shields usually float above ground at the sensor and are
(0.75 mm) and deeper, but some shallower discontinuities connected to a cable and then to the preamplifier shield.
might also be found. 7.2.3 Constant spacing, ranging from ⁄16 in. (1.6 mm) to
...
This document is not an ASTM standard and is intended only to provide the user of an ASTM standard an indication of what changes have been made to the previous version. Because
it may not be technically possible to adequately depict all changes accurately, ASTM recommends that users consult prior editions as appropriate. In all cases only the current version
of the standard as published by ASTM is to be considered the official document.
´1
Designation: E1312 − 09 (Reapproved 2013) E1312 − 18
Standard Practice for
Electromagnetic (Eddy Current) Examination of
Ferromagnetic Cylindrical Bar Product Above the Curie
Temperature
This standard is issued under the fixed designation E1312; the number immediately following the designation indicates the year of
original adoption or, in the case of revision, the year of last revision. A number in parentheses indicates the year of last reapproval. A
superscript epsilon (´) indicates an editorial change since the last revision or reapproval.
ε NOTE—Changes were made editorially in July 2013.
1. Scope*
1.1 This practice covers procedures for eddy current examination of hot ferromagnetic bars above the Curie temperature where
the product is essentially nonmagnetic, but below 2100 °F (1149 °C).
1.2 This practice is intended for use on bar products having diameters of ⁄2 in. (12.7 mm) to 8 in. (203 mm) at linear throughput
speeds up to 1200 ft/min (366 m/min).24 000 ft/min (122 m/sec). Larger or smaller diameters may be examined by agreement
between the using parties.
1.3 The purpose of this practice is to provide a procedure for in-line eddy current examination of bars during processing for the
detection of major or gross surface discontinuities.
1.3.1 The types of discontinuities capable of being detected are commonly referred to as: slivers, laps, seams, roll-ins (scale,
dross, and so forth), and mechanical damage such as scratches, scores, or indentations.
1.4 This practice does not establish acceptance criteria. They must be specified by agreement between the using parties.
1.5 The values stated in inch-pound units are to be regarded as standard. The values given in parentheses are mathematical
conversions to SI units that are provided for information only and are not considered standard.
1.6 This practice does not purport to address all of the safety concerns, if any, associated with its use. It is the responsibility
of the user of this practice to establish appropriate safety and healthsafety, health, environmental practices and determine the
applicability of regulatory limitations prior to use.
1.7 This international standard was developed in accordance with internationally recognized principles on standardization
established in the Decision on Principles for the Development of International Standards, Guides and Recommendations issued
by the World Trade Organization Technical Barriers to Trade (TBT) Committee.
2. Referenced Documents
2.1 ASTM Standards:
E543 Specification for Agencies Performing Nondestructive Testing
E1316 Terminology for Nondestructive Examinations
2.2 Other Documents:
SNT-TC-1A Recommended Practice for Personnel Qualification and Certification in Nondestructive Testing
ANSI/ASNT-CP-189 Standard for Qualification and Certification of NDT Personnel
2.3 AIA Standard:
NAS 410 Certification and Qualification of Nondestructive Testing Personnel
This practice is under the jurisdiction of ASTM Committee E07 on Nondestructive Testing and is the direct responsibility of Subcommittee E07.07 on Electromagnetic
Method.
Current edition approved July 15, 2013June 1, 2018. Published August 2013June 2018. Originally approved in 1989. Last previous edition approved in 20092013 as
ɛ1
E1312 – 09.E1312 – 09(2013) . DOI: 10.1520/E1312-09R13E01.10.1520/E1312-18.
For referenced ASTM standards, visit the ASTM website, www.astm.org, or contact ASTM Customer Service at service@astm.org. For Annual Book of ASTM Standards
volume information, refer to the standard’s Document Summary page on the ASTM website.
Available from American Society for Nondestructive Testing (ASNT), P.O. Box 28518, 1711 Arlingate Ln., Columbus, OH 43228-0518, http://www.asnt.org.
Available from Aerospace Industries Association of America, Inc. (AIA), 1000 Wilson Blvd., Suite 1700, Arlington, VA 22209-3928, http://www.aia-aerospace.org.
*A Summary of Changes section appears at the end of this standard
Copyright © ASTM International, 100 Barr Harbor Drive, PO Box C700, West Conshohocken, PA 19428-2959. United States
E1312 − 18
2.4 International Standards:
ISO 9712 Non-Destructive Testing—Qualification and Certification of NDT Personnel
3. Terminology
3.1 Standard terminology relating to electromagnetic testing may be found in Terminology E1316, Section C: Electromagnetic
Testing.
4. Summary of Practice
4.1 Principle—The major advantage of examining ferromagnetic bar product above the Curie temperature with eddy currents
is the enhanced signal-to-noise ratio obtained without the need for magnetic saturation.
4.2 Sensors—This examination may be performed with various types or designs of encircling coils or with probe coils that are
fixed or rotating.
4.2.1 One or more exciter or sensor coils is used to encircle the bar through which the product to be examined is passed. When
the hot bar is in close proximity to the sensing and exciting coils, eddy currents are induced in the hot product by an alternating
current. The sensing coil detects the electromagnetic flux related to these currents. Changes or disruptions in the normal flux pattern
indicate the presence of discontinuities. This technique is capable of examining the entire circumference without contacting the
product.
4.2.2 The surface can also be examined with probe coils having one or more exciters and sensors which are spaced in close
proximity to the product surface. The probe is usually small and does not encircle the product, making it necessary to rotate either
the probes or the product to obtain 100 % coverage of the circumference. This is essentially a contact technique because the coil
is fixtured in a device that rides on the circumference to maintain a fixed distance between the coil and product surface.
4.2.3 Discontinuities cause either a change in phase or signal amplitude when detected by the sensing coil. These signals are
amplified and processed to activate marking or recording devices, or both. Relative severity of the imperfection can be indicated
by the signal amplitude generated by the flux change or the degree of change in phase.
4.2.4 Caution must be exercised in establishing reference standards because flux changes caused by natural discontinuities
might differ significantly from those generated by artificial discontinuities.
5. Significance and Use
5.1 The purpose of this practice is to describe a procedure for in-line-eddy-current examination of hot cylindrical bars in the
range of diameters listed in 1.2 for large and repetitive discontinuities that may form during processing.
5.2 The discontinuities in bar product capable of being detected by the electromagnetic method are listed in 1.3.1. The method
is capable of detecting surface and some subsurface discontinuities that are typically in the order of 0.030 in. (0.75 mm) (0.75 mm)
and deeper, but some shallower discontinuities might also be found.
5.3 Discontinuities that are narrow and deep, but short in length, are readily detectable by both probe and encircling coils
because they cause abrupt flux changes. Surface and subsurface discontinuities (if the electromagnetic frequency provides
sufficient effective depth of penetration) can be detected by this method.
5.3.1 Discontinuities such as scratches or seams that are continuous and uniform for the full length of cut length bars or extend
for extensive linear distances in coiled product may not always be detected when encircling coils are used. These are more
detectable with probe coils by intercepting the discontinuity in their rotation around the circumference.
5.3.2 The orientation and type of coil are important parameters in coil design because they influence the detectability of
discontinuities.
5.4 The eddy current method is sensitive to metallurgical variations that occur as a result of processing, thus all received signals
above the alarm level are not necessarily indicative of defective product.
6. Basis of Application
6.1 Personnel Qualification—If specified in the contractual agreement, personnel performing examinations to this practice shall
be qualified in accordance with a nationally recognized nondestructive testing (NDT) personnel qualification practice or standard
such as ANSI/ASNT-CP-189, SNT-TC-1A, NAS-410, ISO-9712, or a similar document and certified by the employer or certifying
agency, as applicable. The practice or standard used and its applicable revision shall be identified in the contractual agreement
between the using parties.
6.2 Qualification of Nondestructive Testing Agencies—If specified in the contractual agreement, NDT agencies shall be qualified
and evaluated as described in Practice E543. The applicable edition of Practice E543 shall be specified in the contractual
agreement.
Available from International Organization for Standardization (ISO), ISO Central Secretariat, BIBC II, Chemin de Blandonnet 8, CP 401, 1214 Vernier, Geneva,
Switzerland, http://www.iso.org.
E1312 − 18
6.3 Acceptance Criteria—Since acceptance criteria are not specified in this practice, they shall be specified in the contractual
agreement.
7. Apparatus
7.1 Electronic Apparatus, should be cap
...


Questions, Comments and Discussion
Ask us and Technical Secretary will try to provide an answer. You can facilitate discussion about the standard in here.
Loading comments...