ASTM D3954-15
(Test Method)Standard Test Method for Dropping Point of Waxes
Standard Test Method for Dropping Point of Waxes
SIGNIFICANCE AND USE
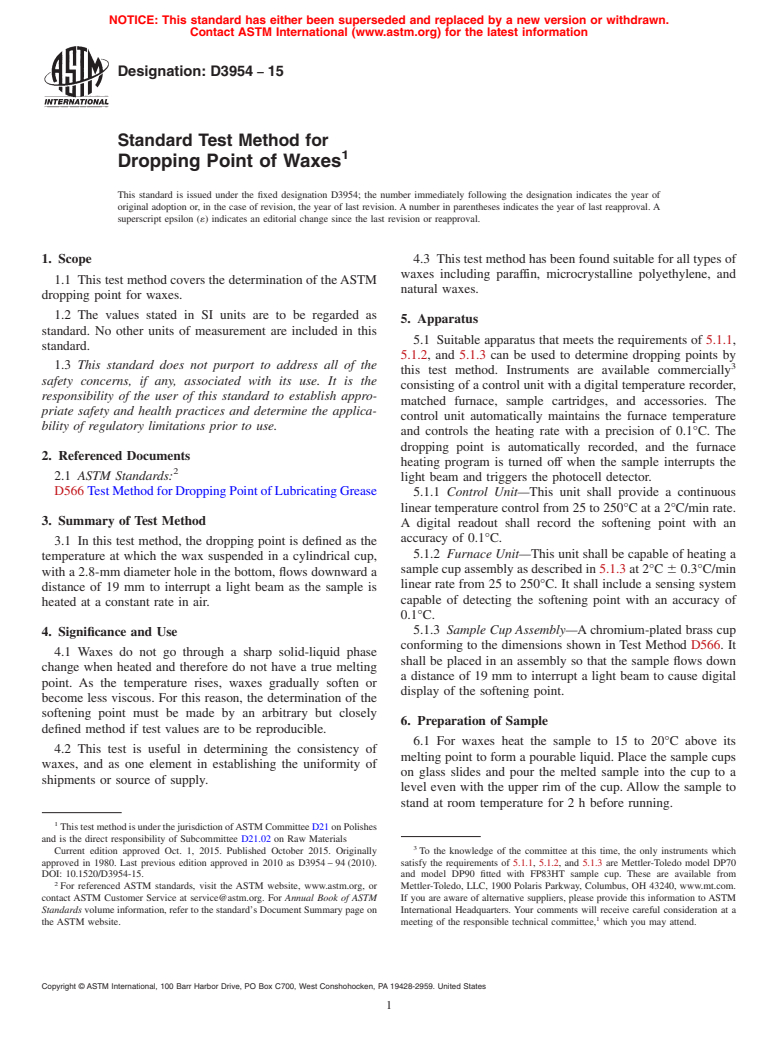
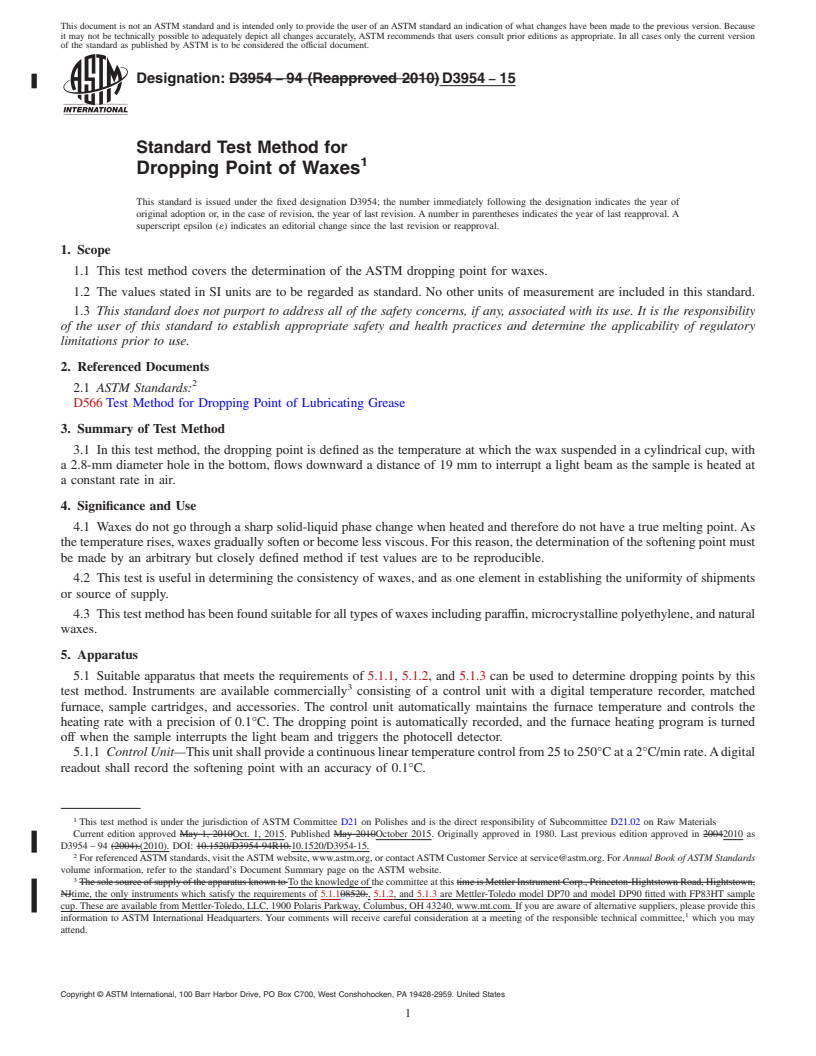
4.1 Waxes do not go through a sharp solid-liquid phase change when heated and therefore do not have a true melting point. As the temperature rises, waxes gradually soften or become less viscous. For this reason, the determination of the softening point must be made by an arbitrary but closely defined method if test values are to be reproducible.
4.2 This test is useful in determining the consistency of waxes, and as one element in establishing the uniformity of shipments or source of supply.
4.3 This test method has been found suitable for all types of waxes including paraffin, microcrystalline polyethylene, and natural waxes.
SCOPE
1.1 This test method covers the determination of the ASTM dropping point for waxes.
1.2 The values stated in SI units are to be regarded as standard. No other units of measurement are included in this standard.
1.3 This standard does not purport to address all of the safety concerns, if any, associated with its use. It is the responsibility of the user of this standard to establish appropriate safety and health practices and determine the applicability of regulatory limitations prior to use.
General Information
Standards Content (Sample)
NOTICE: This standard has either been superseded and replaced by a new version or withdrawn.
Contact ASTM International (www.astm.org) for the latest information
Designation: D3954 − 15
Standard Test Method for
1
Dropping Point of Waxes
This standard is issued under the fixed designation D3954; the number immediately following the designation indicates the year of
original adoption or, in the case of revision, the year of last revision. A number in parentheses indicates the year of last reapproval. A
superscript epsilon (´) indicates an editorial change since the last revision or reapproval.
1. Scope 4.3 This test method has been found suitable for all types of
waxes including paraffin, microcrystalline polyethylene, and
1.1 This test method covers the determination of theASTM
natural waxes.
dropping point for waxes.
1.2 The values stated in SI units are to be regarded as
5. Apparatus
standard. No other units of measurement are included in this
5.1 Suitable apparatus that meets the requirements of 5.1.1,
standard.
5.1.2, and 5.1.3 can be used to determine dropping points by
3
1.3 This standard does not purport to address all of the
this test method. Instruments are available commercially
safety concerns, if any, associated with its use. It is the
consisting of a control unit with a digital temperature recorder,
responsibility of the user of this standard to establish appro-
matched furnace, sample cartridges, and accessories. The
priate safety and health practices and determine the applica-
control unit automatically maintains the furnace temperature
bility of regulatory limitations prior to use.
and controls the heating rate with a precision of 0.1°C. The
dropping point is automatically recorded, and the furnace
2. Referenced Documents
heating program is turned off when the sample interrupts the
2
2.1 ASTM Standards:
light beam and triggers the photocell detector.
D566 TestMethodforDroppingPointofLubricatingGrease 5.1.1 Control Unit—This unit shall provide a continuous
linear temperature control from 25 to 250°C at a 2°C/min rate.
3. Summary of Test Method
A digital readout shall record the softening point with an
accuracy of 0.1°C.
3.1 In this test method, the dropping point is defined as the
5.1.2 Furnace Unit—This unit shall be capable of heating a
temperature at which the wax suspended in a cylindrical cup,
sample cup assembly as described in 5.1.3 at 2°C 6 0.3°C/min
with a 2.8-mm diameter hole in the bottom, flows downward a
linear rate from 25 to 250°C. It shall include a sensing system
distance of 19 mm to interrupt a light beam as the sample is
capable of detecting the softening point with an accuracy of
heated at a constant rate in air.
0.1°C.
5.1.3 Sample Cup Assembly—Achromium-plated brass cup
4. Significance and Use
conforming to the dimensions shown in Test Method D566.It
4.1 Waxes do not go through a sharp solid-liquid phase
shall be placed in an assembly so that the sample flows down
change when heated and therefore do not have a true melting
a distance of 19 mm to interrupt a light beam to cause digital
point. As the temperature rises, waxes gradually soften or
display of the softening point.
become less viscous. For this reason, the determination of the
softening point must be made by an arbitrary but closely
6. Preparation of Sample
defined method if test values are to be reproducible.
6.1 For waxes heat the sample to 15 to 20°C above its
4.2 This test is useful in determining the consistency of
melting point to form a pourable liquid. Place the sample cups
waxes, and as one element in establishing the uniformity of
on glass slides and pour the melted sample into the cup to a
shipments or source of supply.
level even with the upper rim of the cup. Allow the sample to
stand at room temperature for 2 h before running.
1
ThistestmethodisunderthejurisdictionofASTMCommitteeD21onPolishes
and is the direct responsibility of Subcommittee D21.02 on Raw Materials
3
Current edition approved Oct. 1, 2015. Published October 2015. Originally To the knowledge of the committee at this time, the only instruments which
approved in 1980. Last previous edition approved in 2010 as D3954 – 94 (2010). satisfy the requirements of 5.1.1, 5.1.2, and 5.1.3 are Mettler-Toledo model DP70
DOI: 10.1520/D3954-15. and model DP90 fitted with FP83HT sample cup. These are available from
2
For referenced ASTM standards, visit the ASTM website, www.astm.org, or Mettler-Toledo, LLC, 1900 Polaris Parkway, Columbus, OH 43240, www.mt.com.
contact ASTM Customer Service at service@astm.org. For Annual Book of ASTM If you are aware of alternative suppliers, please provide this information to ASTM
Standards volume information, refer to the standard’s Document Summary page on International Headquarters. Your comments will receive careful consideration at a
1
the ASTM website. meeting of the responsible technical committee, which you may attend.
Copyright © ASTM International, 100 Barr Harbor Drive, PO Box C700, West Conshohocken, PA 19428-2
...
This document is not an ASTM standard and is intended only to provide the user of an ASTM standard an indication of what changes have been made to the previous version. Because
it may not be technically possible to adequately depict all changes accurately, ASTM recommends that users consult prior editions as appropriate. In all cases only the current version
of the standard as published by ASTM is to be considered the official document.
Designation: D3954 − 94 (Reapproved 2010) D3954 − 15
Standard Test Method for
1
Dropping Point of Waxes
This standard is issued under the fixed designation D3954; the number immediately following the designation indicates the year of
original adoption or, in the case of revision, the year of last revision. A number in parentheses indicates the year of last reapproval. A
superscript epsilon (´) indicates an editorial change since the last revision or reapproval.
1. Scope
1.1 This test method covers the determination of the ASTM dropping point for waxes.
1.2 The values stated in SI units are to be regarded as standard. No other units of measurement are included in this standard.
1.3 This standard does not purport to address all of the safety concerns, if any, associated with its use. It is the responsibility
of the user of this standard to establish appropriate safety and health practices and determine the applicability of regulatory
limitations prior to use.
2. Referenced Documents
2
2.1 ASTM Standards:
D566 Test Method for Dropping Point of Lubricating Grease
3. Summary of Test Method
3.1 In this test method, the dropping point is defined as the temperature at which the wax suspended in a cylindrical cup, with
a 2.8-mm diameter hole in the bottom, flows downward a distance of 19 mm to interrupt a light beam as the sample is heated at
a constant rate in air.
4. Significance and Use
4.1 Waxes do not go through a sharp solid-liquid phase change when heated and therefore do not have a true melting point. As
the temperature rises, waxes gradually soften or become less viscous. For this reason, the determination of the softening point must
be made by an arbitrary but closely defined method if test values are to be reproducible.
4.2 This test is useful in determining the consistency of waxes, and as one element in establishing the uniformity of shipments
or source of supply.
4.3 This test method has been found suitable for all types of waxes including paraffin, microcrystalline polyethylene, and natural
waxes.
5. Apparatus
5.1 Suitable apparatus that meets the requirements of 5.1.1, 5.1.2, and 5.1.3 can be used to determine dropping points by this
3
test method. Instruments are available commercially consisting of a control unit with a digital temperature recorder, matched
furnace, sample cartridges, and accessories. The control unit automatically maintains the furnace temperature and controls the
heating rate with a precision of 0.1°C. The dropping point is automatically recorded, and the furnace heating program is turned
off when the sample interrupts the light beam and triggers the photocell detector.
5.1.1 Control Unit—This unit shall provide a continuous linear temperature control from 25 to 250°C at a 2°C/min rate. A digital
readout shall record the softening point with an accuracy of 0.1°C.
1
This test method is under the jurisdiction of ASTM Committee D21 on Polishes and is the direct responsibility of Subcommittee D21.02 on Raw Materials
Current edition approved May 1, 2010Oct. 1, 2015. Published May 2010October 2015. Originally approved in 1980. Last previous edition approved in 20042010 as
D3954 – 94 (2004).(2010). DOI: 10.1520/D3954-94R10.10.1520/D3954-15.
2
For referenced ASTM standards, visit the ASTM website, www.astm.org, or contact ASTM Customer Service at service@astm.org. For Annual Book of ASTM Standards
volume information, refer to the standard’s Document Summary page on the ASTM website.
3
The sole source of supply of the apparatus known to To the knowledge of the committee at this time is Mettler Instrument Corp., Princeton-Hightstown Road, Hightstown,
NJtime, the only instruments which satisfy the requirements of 5.1.108520., 5.1.2, and 5.1.3 are Mettler-Toledo model DP70 and model DP90 fitted with FP83HT sample
cup. These are available from Mettler-Toledo, LLC, 1900 Polaris Parkway, Columbus, OH 43240, www.mt.com. If you are aware of alternative suppliers, please provide this
1
information to ASTM International Headquarters. Your comments will receive careful consideration at a meeting of the responsible technical committee, which you may
attend.
Copyright © ASTM International, 100 Barr Harbor Drive, PO Box C700, West Conshohocken, PA 19428-2959. United States
1
---------------------- Page: 1 ----------------------
D3954 − 15
5.1.2 Furnace Unit—This unit shall be capable of heating a sample cup assembly as described in 5.1.3 at 2°C 6 0.3°C/min
linear rate from 25 to 250°C. It shall include a sensing system capable of detecting the softening point with an acc
...


Questions, Comments and Discussion
Ask us and Technical Secretary will try to provide an answer. You can facilitate discussion about the standard in here.