ASTM F144-80(2015)
(Practice)Standard Practice for Making Reference Glass-Metal Sandwich Seal and Testing for Expansion Characteristics by Polarimetric Methods
Standard Practice for Making Reference Glass-Metal Sandwich Seal and Testing for Expansion Characteristics by Polarimetric Methods
SIGNIFICANCE AND USE
4.1 The term “reference” as employed in this practice implies that either the glass or the metal of the reference glass-metal seal will be a “standard reference material” such as those supplied for other physical tests by the National Institute of Standards and Technology, or a secondary reference material whose sealing characteristics have been determined by seals to a standard reference material (see NBS Special Publication 260). Until standard reference materials for seals are established by the NIST, secondary reference materials may be agreed upon between manufacturer and purchaser.
SCOPE
1.1 This practice covers the preparation and testing of a reference glass-metal sandwich seal for determining stress in the glass or for determining the degree of thermal expansion (or contraction) mismatch between the glass and metal. Tests are in accordance with Test Method F218 (Section 2).
1.2 This practice applies to all glass and metal (or alloy) combinations normally sealed together in the production of electronic components.
1.3 The practical limit of the test in deriving mismatch is approximately 300 ppm, above which the glass is likely to fracture.
1.4 This standard does not purport to address all of the safety problems, if any, associated with its use. It is the responsibility of the user of this standard to establish appropriate safety and health practices and determine the applicability of regulatory limitations prior to use.
General Information
Relations
Buy Standard
Standards Content (Sample)
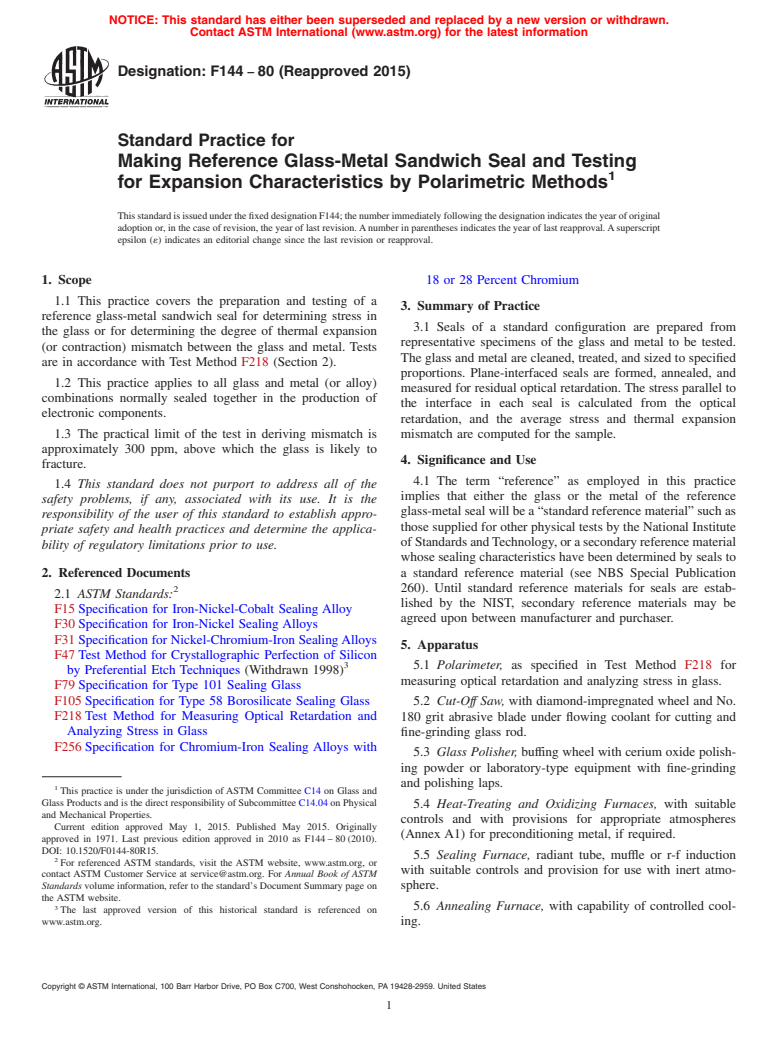
NOTICE: This standard has either been superseded and replaced by a new version or withdrawn.
Contact ASTM International (www.astm.org) for the latest information
Designation:F144 −80 (Reapproved 2015)
Standard Practice for
Making Reference Glass-Metal Sandwich Seal and Testing
for Expansion Characteristics by Polarimetric Methods
ThisstandardisissuedunderthefixeddesignationF144;thenumberimmediatelyfollowingthedesignationindicatestheyearoforiginal
adoption or, in the case of revision, the year of last revision.Anumber in parentheses indicates the year of last reapproval.Asuperscript
epsilon (´) indicates an editorial change since the last revision or reapproval.
1. Scope 18 or 28 Percent Chromium
1.1 This practice covers the preparation and testing of a
3. Summary of Practice
reference glass-metal sandwich seal for determining stress in
3.1 Seals of a standard configuration are prepared from
the glass or for determining the degree of thermal expansion
representative specimens of the glass and metal to be tested.
(or contraction) mismatch between the glass and metal. Tests
The glass and metal are cleaned, treated, and sized to specified
are in accordance with Test Method F218 (Section 2).
proportions. Plane-interfaced seals are formed, annealed, and
1.2 This practice applies to all glass and metal (or alloy)
measured for residual optical retardation. The stress parallel to
combinations normally sealed together in the production of
the interface in each seal is calculated from the optical
electronic components.
retardation, and the average stress and thermal expansion
1.3 The practical limit of the test in deriving mismatch is mismatch are computed for the sample.
approximately 300 ppm, above which the glass is likely to
4. Significance and Use
fracture.
4.1 The term “reference” as employed in this practice
1.4 This standard does not purport to address all of the
implies that either the glass or the metal of the reference
safety problems, if any, associated with its use. It is the
glass-metal seal will be a “standard reference material” such as
responsibility of the user of this standard to establish appro-
those supplied for other physical tests by the National Institute
priate safety and health practices and determine the applica-
ofStandardsandTechnology,orasecondaryreferencematerial
bility of regulatory limitations prior to use.
whose sealing characteristics have been determined by seals to
a standard reference material (see NBS Special Publication
2. Referenced Documents
2 260). Until standard reference materials for seals are estab-
2.1 ASTM Standards:
lished by the NIST, secondary reference materials may be
F15 Specification for Iron-Nickel-Cobalt Sealing Alloy
agreed upon between manufacturer and purchaser.
F30 Specification for Iron-Nickel Sealing Alloys
F31 Specification for Nickel-Chromium-Iron SealingAlloys
5. Apparatus
F47 Test Method for Crystallographic Perfection of Silicon
5.1 Polarimeter, as specified in Test Method F218 for
by Preferential Etch Techniques (Withdrawn 1998)
measuring optical retardation and analyzing stress in glass.
F79 Specification for Type 101 Sealing Glass
F105 Specification for Type 58 Borosilicate Sealing Glass 5.2 Cut-Off Saw, with diamond-impregnated wheel and No.
F218 Test Method for Measuring Optical Retardation and 180 grit abrasive blade under flowing coolant for cutting and
Analyzing Stress in Glass fine-grinding glass rod.
F256 Specification for Chromium-Iron Sealing Alloys with
5.3 Glass Polisher, buffing wheel with cerium oxide polish-
ing powder or laboratory-type equipment with fine-grinding
and polishing laps.
This practice is under the jurisdiction of ASTM Committee C14 on Glass and
Glass Products and is the direct responsibility of Subcommittee C14.04 on Physical
5.4 Heat-Treating and Oxidizing Furnaces, with suitable
and Mechanical Properties.
controls and with provisions for appropriate atmospheres
Current edition approved May 1, 2015. Published May 2015. Originally
(Annex A1) for preconditioning metal, if required.
approved in 1971. Last previous edition approved in 2010 as F144 – 80 (2010).
DOI: 10.1520/F0144-80R15.
5.5 Sealing Furnace, radiant tube, muffle or r-f induction
For referenced ASTM standards, visit the ASTM website, www.astm.org, or
with suitable controls and provision for use with inert atmo-
contact ASTM Customer Service at service@astm.org. For Annual Book of ASTM
Standards volume information, refer to the standard’s Document Summary page on sphere.
the ASTM website.
5.6 Annealing Furnace, with capability of controlled cool-
The last approved version of this historical standard is referenced on
www.astm.org. ing.
Copyright © ASTM International, 100 Barr Harbor Drive, PO Box C700, West Conshohocken, PA 19428-2959. United States
F144−80 (2015)
5.7 Ultrasonic Cleaner, optional.
5.8 Fixture for Furnace Sealing, design as suggested in
Annex A2.
FIG. 2 General Seal Configuration.
5.9 Micrometer Caliper, with index permitting direct read-
ing of 0.02 cm.
8. Preparation of Specimens
5.10 Immersion Mercury Thermometer.
8.1 Metal—Chemically clean the specimens to remove sur-
face contaminants, especially lubricants and fingerprints from
6. Materials
fabrication and handling. Usually it is advisable to preoxidize
6.1 Metal—Five representative specimen pairs of the metal
parts as described in AnnexA1. Preoxidation promotes a better
from either rod or plate stock with dimensions satisfying the glass-to-metal bond and relieves cold working stresses.
requirements of 7.1. The surfaces to be sealed should be
8.2 Glass—Using optical glass techniques grind and polish
relatively free of scratches, machine marks, pits, or inclusions
the sealing surfaces of the glass specimens with either wet
that would induce localized stresses. The sealing surfaces
abrasive wheels or water slurries of abrasive on a lap. The
should terminate in sharp edges at the peripheral corners to act
polished surfaces should satisfy the dimensional criteria of 6.2
as a glass stop. Edges that are rounded, such as appear on
and 7.2, and be without chips, nicks, or scratches. Remove any
tumbled parts, will have the tendency to permit glass overflow.
surface contaminants which could produce bubbly seals. An
The opposite faces of each plate should be parallel within 0.5°.
ultrasonic wash may be used. See Annex A1.
6.2 Glass—Five representative specimens of rod or plate
9. Procedure for Making the Sandwich Seal
glass, cut with either diamond-impregnated or other abrasive
cutting wheels under flowing water. Dimensions (volume)
9.1 Record dimensions of metal plates and glass parts.
must satisfy the requirements of 7.2, and the faces should be
9.2 Make the seal in a furnace or by induction heating of the
flat and parallel within 0.5° for uniform flow during sealing.
metal utilizing suitable specimen holders or supports under
controlled conditions of temperature and time. See Annex A2.
7. Test Specimens
10. Annealing
7.1 The metal specimens may take the form of circular,
square,orrectangularplates.Ineachcasethedimensiond,Fig.
10.1 Once a symmetrical, bubble-free seal has been made,
1, designates the path along which the optical retardation in the
proper annealing of the seal becomes the most critical part of
finished seal is measured. Two identical metal plates of any of
the procedure. It is by this operation that all stresses are
the indicated shapes are required for a seal. The thickness, t ,
m
relieved except those due to the difference in thermal contrac-
of each plate should be at least 0.7 mm and d/t should be at
m
tion of the two materials from annealing temperature levels.
least 6.
This process involves heating the seal to a temperature
somewhat higher than the annealing point of the glass and
7.2 Glass with suitable optical transmission of any shape
maintaining this temperature for a time sufficient to relieve the
maybeused,provideditflowsessentiallybubble-freetofillthe
existing strain. The test specimen is then cooled slowly at a
entire volume between the metal plates as in Fig. 2. Experience
constant rate.As an alternative, annealing can proceed directly
indicates, however, that best results are obtained with flat glass
on cooling during the making of a seal.
conforming closely to the outline of the metal plates. The
thickness of the glass before sealing shall be such that it equals
10.2 Seal stress and associated expansion mismatch can be
t after sealing within 15 %. Thus, the volume of glass
m
varied markedly by annealing schedule modification. For this
necessary to fill the void between the metal plates to a
reason, when the test is used as an acceptance specification, it
thickness equal to that of a single plate becomes the determin-
is strongly recommended that producer and user mutually
ing dimensional criterion for the glass.
definetheannealingscheduleandestablishrigidcontrolsforits
maintenance.
7.3 When used as an acceptance test by producer and user,
thenumberoftestsealsrepresentingonedeterminationshallbe
11. Procedure for Measuring Optical Retardation
established by mutual agreement. However two seals are a
minimum requirement for one determination.
11.1 For each specimen measure the retardation in the
annealed seal due to the stress parallel to the interface
according to Test Method F218.
11.1.1 Positiontheplaneoftheseal(inanimmersionliquid,
if needed) in a direction 45° from the direction of vibration of
the polarizer and analyzer, so that the line of sight, or light
path, is through the maximum glass dimension in the direction
d shown in Fig. 1. In a circular seal, for example, this would be
the diameter.
11.1.2 Determine the retardation along the light path
through the glass in terms of degrees of rotation of analyzer.
FIG. 1 Permissible Metal Shapes. Rotate in a direction that causes the curved black fringes seen
F144−80 (2015)
within the glass to appear to merge in the center of cross
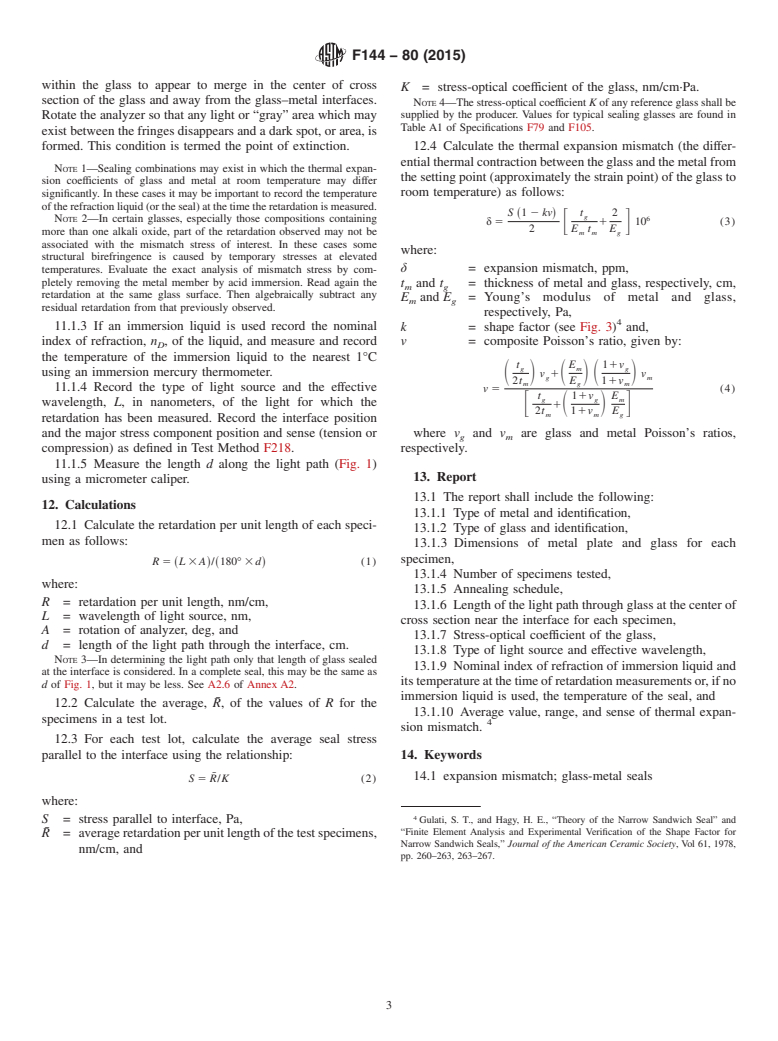
K = stress-optical coefficient of the glass, nm/cm·Pa.
section of the glass and away from the glass–metal interfaces.
NOTE 4—The stress-optical coefficient K of any reference glass shall be
Rotate the analyzer so that any light or “gray” area which may supplied by the producer. Values for typical sealing glasses are found in
Table A1 of Specifications F79 and F105.
exist between the fringes disappea
...
This document is not an ASTM standard and is intended only to provide the user of an ASTM standard an indication of what changes have been made to the previous version. Because
it may not be technically possible to adequately depict all changes accurately, ASTM recommends that users consult prior editions as appropriate. In all cases only the current version
of the standard as published by ASTM is to be considered the official document.
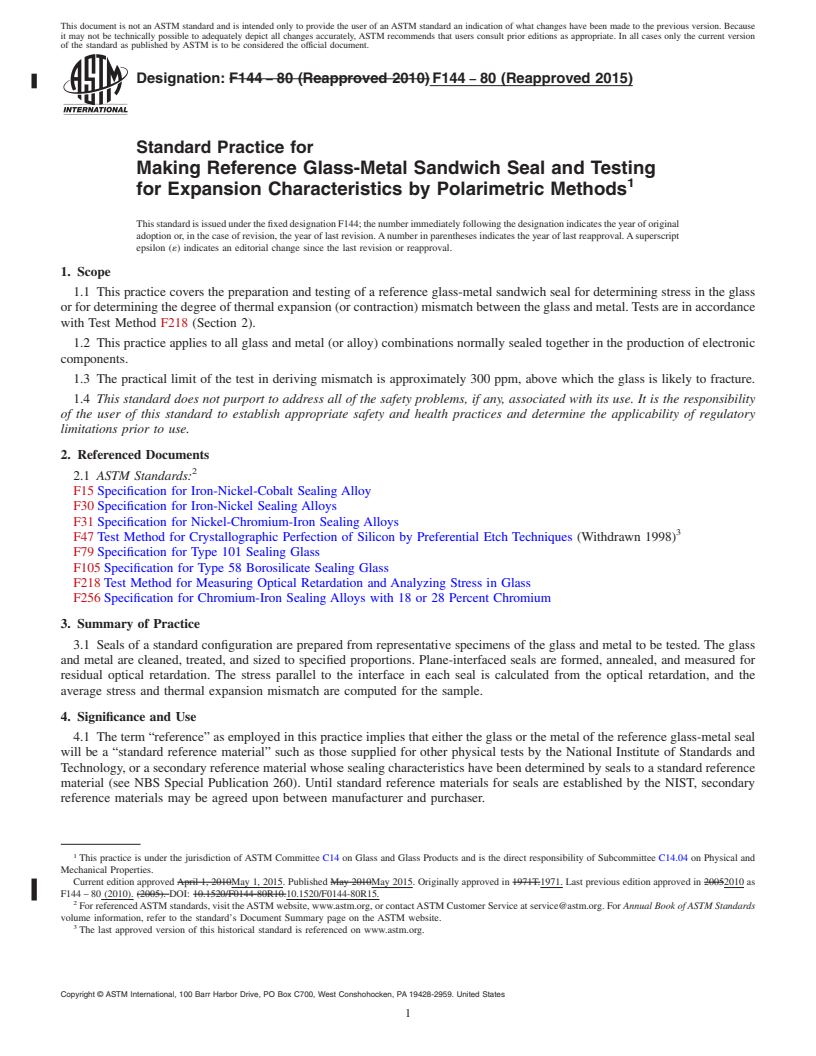
Designation: F144 − 80 (Reapproved 2010) F144 − 80 (Reapproved 2015)
Standard Practice for
Making Reference Glass-Metal Sandwich Seal and Testing
for Expansion Characteristics by Polarimetric Methods
This standard is issued under the fixed designation F144; the number immediately following the designation indicates the year of original
adoption or, in the case of revision, the year of last revision. A number in parentheses indicates the year of last reapproval. A superscript
epsilon (´) indicates an editorial change since the last revision or reapproval.
1. Scope
1.1 This practice covers the preparation and testing of a reference glass-metal sandwich seal for determining stress in the glass
or for determining the degree of thermal expansion (or contraction) mismatch between the glass and metal. Tests are in accordance
with Test Method F218 (Section 2).
1.2 This practice applies to all glass and metal (or alloy) combinations normally sealed together in the production of electronic
components.
1.3 The practical limit of the test in deriving mismatch is approximately 300 ppm, above which the glass is likely to fracture.
1.4 This standard does not purport to address all of the safety problems, if any, associated with its use. It is the responsibility
of the user of this standard to establish appropriate safety and health practices and determine the applicability of regulatory
limitations prior to use.
2. Referenced Documents
2.1 ASTM Standards:
F15 Specification for Iron-Nickel-Cobalt Sealing Alloy
F30 Specification for Iron-Nickel Sealing Alloys
F31 Specification for Nickel-Chromium-Iron Sealing Alloys
F47 Test Method for Crystallographic Perfection of Silicon by Preferential Etch Techniques (Withdrawn 1998)
F79 Specification for Type 101 Sealing Glass
F105 Specification for Type 58 Borosilicate Sealing Glass
F218 Test Method for Measuring Optical Retardation and Analyzing Stress in Glass
F256 Specification for Chromium-Iron Sealing Alloys with 18 or 28 Percent Chromium
3. Summary of Practice
3.1 Seals of a standard configuration are prepared from representative specimens of the glass and metal to be tested. The glass
and metal are cleaned, treated, and sized to specified proportions. Plane-interfaced seals are formed, annealed, and measured for
residual optical retardation. The stress parallel to the interface in each seal is calculated from the optical retardation, and the
average stress and thermal expansion mismatch are computed for the sample.
4. Significance and Use
4.1 The term “reference” as employed in this practice implies that either the glass or the metal of the reference glass-metal seal
will be a “standard reference material” such as those supplied for other physical tests by the National Institute of Standards and
Technology, or a secondary reference material whose sealing characteristics have been determined by seals to a standard reference
material (see NBS Special Publication 260). Until standard reference materials for seals are established by the NIST, secondary
reference materials may be agreed upon between manufacturer and purchaser.
This practice is under the jurisdiction of ASTM Committee C14 on Glass and Glass Products and is the direct responsibility of Subcommittee C14.04 on Physical and
Mechanical Properties.
Current edition approved April 1, 2010May 1, 2015. Published May 2010May 2015. Originally approved in 1971T.1971. Last previous edition approved in 20052010 as
F144 – 80 (2010). (2005). DOI: 10.1520/F0144-80R10.10.1520/F0144-80R15.
For referenced ASTM standards, visit the ASTM website, www.astm.org, or contact ASTM Customer Service at service@astm.org. For Annual Book of ASTM Standards
volume information, refer to the standard’s Document Summary page on the ASTM website.
The last approved version of this historical standard is referenced on www.astm.org.
Copyright © ASTM International, 100 Barr Harbor Drive, PO Box C700, West Conshohocken, PA 19428-2959. United States
F144 − 80 (2015)
5. Apparatus
5.1 Polarimeter, as specified in Test Method F218 for measuring optical retardation and analyzing stress in glass.
5.2 Cut-Off Saw, with diamond-impregnated wheel and No. 180 grit abrasive blade under flowing coolant for cutting and
fine-grinding glass rod.
5.3 Glass Polisher, buffing wheel with cerium oxide polishing powder or laboratory-type equipment with fine-grinding and
polishing laps.
5.4 Heat-Treating and Oxidizing Furnaces, with suitable controls and with provisions for appropriate atmospheres (Annex A1)
for preconditioning metal, if required.
5.5 Sealing Furnace, radiant tube, muffle or r-f induction with suitable controls and provision for use with inert atmosphere.
5.6 Annealing Furnace, with capability of controlled cooling.
5.7 Ultrasonic Cleaner, optional.
5.8 Fixture for Furnace Sealing, design as suggested in Annex A2.
5.9 Micrometer Caliper, with index permitting direct reading of 0.02 cm.
5.10 Immersion Mercury Thermometer.
6. Materials
6.1 Metal—Five representative specimen pairs of the metal from either rod or plate stock with dimensions satisfying the
requirements of 7.1. The surfaces to be sealed should be relatively free of scratches, machine marks, pits, or inclusions that would
induce localized stresses. The sealing surfaces should terminate in sharp edges at the peripheral corners to act as a glass stop. Edges
that are rounded, such as appear on tumbled parts, will have the tendency to permit glass overflow. The opposite faces of each plate
should be parallel within 0.5°.
6.2 Glass—Five representative specimens of rod or plate glass, cut with either diamond-impregnated or other abrasive cutting
wheels under flowing water. Dimensions (volume) must satisfy the requirements of 7.2, and the faces should be flat and parallel
within 0.5° for uniform flow during sealing.
7. Test Specimens
7.1 The metal specimens may take the form of circular, square, or rectangular plates. In each case the dimension d,Fig. 1,
designates the path along which the optical retardation in the finished seal is measured. Two identical metal plates of any of the
indicated shapes are required for a seal. The thickness, t , of each plate should be at least 0.7 mm and d/t should be at least 6.
m m
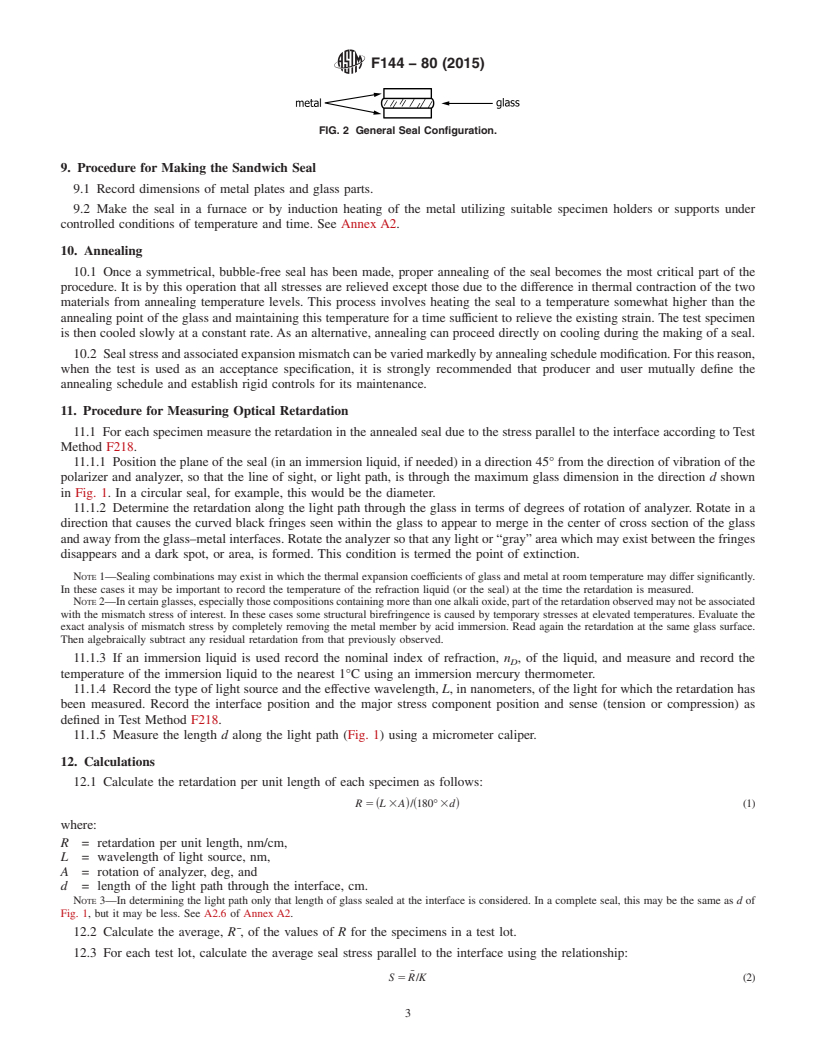
7.2 Glass with suitable optical transmission of any shape may be used, provided it flows essentially bubble-free to fill the entire
volume between the metal plates as in Fig. 2. Experience indicates, however, that best results are obtained with flat glass
conforming closely to the outline of the metal plates. The thickness of the glass before sealing shall be such that it equals t after
m
sealing within 15 %. Thus, the volume of glass necessary to fill the void between the metal plates to a thickness equal to that of
a single plate becomes the determining dimensional criterion for the glass.
7.3 When used as an acceptance test by producer and user, the number of test seals representing one determination shall be
established by mutual agreement. However two seals are a minimum requirement for one determination.
8. Preparation of Specimens
8.1 Metal—Chemically clean the specimens to remove surface contaminants, especially lubricants and fingerprints from
fabrication and handling. Usually it is advisable to preoxidize parts as described in Annex A1. Preoxidation promotes a better
glass-to-metal bond and relieves cold working stresses.
8.2 Glass—Using optical glass techniques grind and polish the sealing surfaces of the glass specimens with either wet abrasive
wheels or water slurries of abrasive on a lap. The polished surfaces should satisfy the dimensional criteria of 6.26.2 and 7.2 and
7.2, and be without chips, nicks, or scratches. Remove any surface contaminants which could produce bubbly seals. An ultrasonic
wash may be used. See Annex A1.
FIG. 1 Permissible Metal Shapes.
F144 − 80 (2015)
FIG. 2 General Seal Configuration.
9. Procedure for Making the Sandwich Seal
9.1 Record dimensions of metal plates and glass parts.
9.2 Make the seal in a furnace or by induction heating of the metal utilizing suitable specimen holders or supports under
controlled conditions of temperature and time. See Annex A2.
10. Annealing
10.1 Once a symmetrical, bubble-free seal has been made, proper annealing of the seal becomes the most critical part of the
procedure. It is by this operation that all stresses are relieved except those due to the difference in thermal contraction of the two
materials from annealing temperature levels. This process involves heating the seal to a temperature somewhat higher than the
annealing point of the glass and maintaining this temperature for a time sufficient to relieve the existing strain. The test specimen
is then cooled slowly at a constant rate. As an alternative, annealing can proceed directly on cooling during the making of a seal.
10.2 Seal stress and associated expansion mismatch can be varied markedly by annealing schedule modification. For this reason,
when the test is used as an acceptance specification, it is strongly recommended that producer and user mutually define the
annealing schedule and establish rigid controls for its maintenance.
11. Procedure for Measuring Optical Retardation
11.1 For each specimen measure the retardation in the annealed seal due to the stress parallel to the interface according to Test
Method F218.
11.1.1 Position the plane of the seal (in an immersion liquid, if needed) in a direction 45° from the direction of vibration of the
polarizer and analyzer, so that the line of sight, or light path, is through the maximum glass dimension in the direction d shown
in Fig. 1. In a circular seal, for example, this would be the diameter.
11.1.2 Determine the retardation along the light path through the glass in terms of degrees of rotation of analyzer. Rotate in a
direction that causes the curved black fringes seen within the glass to appear to merge in the center of cross section of the glass
and away from the glass–metal interfaces. Rotate the analyzer so that any light or “gray” area which may exist between the fringes
disappears and a dark spot, or area, is formed. This condition is termed the point of extinction.
NOTE 1—Se
...


Questions, Comments and Discussion
Ask us and Technical Secretary will try to provide an answer. You can facilitate discussion about the standard in here.