ASTM C748-20
(Test Method)Standard Test Method for Rockwell Hardness of Graphite Materials
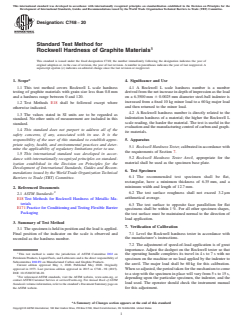
Standard Test Method for Rockwell Hardness of Graphite Materials
SIGNIFICANCE AND USE
4.1 A Rockwell L scale hardness number is a number derived from the net increase in depth of impression as the load on a 6.3500 mm ± 0.0025 mm diameter steel-ball indenter is increased from a fixed 10 kg minor load to a 60 kg major load and then returned to the minor load.
4.2 A Rockwell hardness number is directly related to the indentation hardness of a material; the higher the Rockwell L scale reading, the harder the material. The test is useful in the evaluation and the manufacturing control of carbon and graphite materials.
SCOPE
1.1 This test method covers Rockwell L scale hardness testing of graphite materials with grain size less than 0.8 mm and a hardness range between 0 and 120.
1.2 Test Methods E18 shall be followed except where otherwise indicated.
1.3 The values stated in SI units are to be regarded as standard. No other units of measurement are included in this standard.
1.4 This standard does not purport to address all of the safety concerns, if any, associated with its use. It is the responsibility of the user of this standard to establish appropriate safety, health, and environmental practices and determine the applicability of regulatory limitations prior to use.
1.5 This international standard was developed in accordance with internationally recognized principles on standardization established in the Decision on Principles for the Development of International Standards, Guides and Recommendations issued by the World Trade Organization Technical Barriers to Trade (TBT) Committee.
General Information
- Status
- Published
- Publication Date
- 30-Apr-2020
- Technical Committee
- D02 - Petroleum Products, Liquid Fuels, and Lubricants
- Drafting Committee
- D02.F0 - Manufactured Carbon and Graphite Products
Relations
- Effective Date
- 01-May-2020
- Effective Date
- 01-Jul-2018
- Effective Date
- 01-Jul-2017
- Effective Date
- 01-Dec-2012
- Effective Date
- 01-Nov-2011
- Effective Date
- 15-May-2008
- Effective Date
- 15-Jan-2008
- Effective Date
- 01-Apr-2007
- Effective Date
- 01-Apr-2007
- Effective Date
- 01-Apr-2005
- Effective Date
- 01-Feb-2005
- Effective Date
- 10-Jun-2003
- Effective Date
- 10-Jun-2003
- Effective Date
- 10-Jan-2002
- Effective Date
- 10-Jan-2002
Overview
ASTM C748-20 is the standardized test method for determining the Rockwell hardness of graphite materials, specifically using the Rockwell L scale. This method provides a quantitative measurement of the indentation hardness of graphite and carbon specimens with a grain size less than 0.8 mm and a hardness range between 0 and 120. The procedure involves applying a minor and a major load to a specimen using a steel-ball indenter, then measuring the depth of the resulting impression. This hardness test plays a vital role in quality assurance, research, and manufacturing control processes where graphite materials are used.
Key Topics
- Rockwell L Scale Method: Utilizes a 6.35 mm diameter steel-ball indenter and specific load sequences (10 kg minor load, 60 kg major load).
- Indenter and Test Specimen: Requires precise preparation - specimens must be flat, rectangular, and meet minimum thickness (6.35 mm) and surface parallelism standards.
- Procedural Controls: Includes rigorous calibration and verification of test equipment, surface conditioning, and environmental controls to ensure precision.
- Test Reproducibility: Recommends at least five hardness tests at different locations per specimen, with special attention to anisotropic material orientation.
- Data Reporting: Specifies detailed reporting requirements including specimen dimensions, hardness readings, test conditions, and statistical measures.
Applications
The ASTM C748-20 Rockwell hardness test is widely used in the evaluation and manufacturing control of carbon and graphite materials. Typical applications include:
- Manufacturing Quality Control: Ensures consistent material properties for graphite components used in high-temperature, chemical, and mechanical environments.
- Material Research and Development: Facilitates comparison of different graphite grades and processing parameters.
- Product Certification and Specification: Provides a standardized benchmark for suppliers and end-users to verify compliance with technical requirements.
- Equipment and Component Selection: Hardness values help select suitable graphite materials for applications in aerospace, nuclear reactors, electronic manufacturing, and industrial processing.
By delivering objective hardness readings, the standard supports process optimization, cost control, and risk management across industries reliant on graphite products.
Related Standards
Users of ASTM C748-20 may also reference the following related standards:
- ASTM E18: Standard Test Methods for Rockwell Hardness of Metallic Materials - provides foundational procedures adapted in C748-20.
- ASTM E171: Practice for Conditioning and Testing Flexible Barrier Packaging - referenced for ambient conditioning practices.
- ISO Hardness Standards: For those working in international contexts, ISO equivalents for hardness testing may provide additional harmonization.
Practical Value
Implementing ASTM C748-20 ensures reliable, repeatable Rockwell L scale hardness test results for graphite materials, fostering trust in graphite-based products and facilitating market acceptance. Adoption of this standard minimizes variability, supports regulatory compliance, and underpins technical and commercial decision-making for suppliers, manufacturers, laboratories, and end-users.
Keywords: ASTM C748-20, Rockwell hardness, graphite materials, carbon, L scale, indentation hardness, quality control, standard test method, manufacturing, material testing
Buy Documents
ASTM C748-20 - Standard Test Method for Rockwell Hardness of Graphite Materials
REDLINE ASTM C748-20 - Standard Test Method for Rockwell Hardness of Graphite Materials
Get Certified
Connect with accredited certification bodies for this standard

ECOCERT
Organic and sustainability certification.

Eurofins Food Testing Global
Global leader in food, environment, and pharmaceutical product testing.

Intertek Bangladesh
Intertek certification and testing services in Bangladesh.
Sponsored listings
Frequently Asked Questions
ASTM C748-20 is a standard published by ASTM International. Its full title is "Standard Test Method for Rockwell Hardness of Graphite Materials". This standard covers: SIGNIFICANCE AND USE 4.1 A Rockwell L scale hardness number is a number derived from the net increase in depth of impression as the load on a 6.3500 mm ± 0.0025 mm diameter steel-ball indenter is increased from a fixed 10 kg minor load to a 60 kg major load and then returned to the minor load. 4.2 A Rockwell hardness number is directly related to the indentation hardness of a material; the higher the Rockwell L scale reading, the harder the material. The test is useful in the evaluation and the manufacturing control of carbon and graphite materials. SCOPE 1.1 This test method covers Rockwell L scale hardness testing of graphite materials with grain size less than 0.8 mm and a hardness range between 0 and 120. 1.2 Test Methods E18 shall be followed except where otherwise indicated. 1.3 The values stated in SI units are to be regarded as standard. No other units of measurement are included in this standard. 1.4 This standard does not purport to address all of the safety concerns, if any, associated with its use. It is the responsibility of the user of this standard to establish appropriate safety, health, and environmental practices and determine the applicability of regulatory limitations prior to use. 1.5 This international standard was developed in accordance with internationally recognized principles on standardization established in the Decision on Principles for the Development of International Standards, Guides and Recommendations issued by the World Trade Organization Technical Barriers to Trade (TBT) Committee.
SIGNIFICANCE AND USE 4.1 A Rockwell L scale hardness number is a number derived from the net increase in depth of impression as the load on a 6.3500 mm ± 0.0025 mm diameter steel-ball indenter is increased from a fixed 10 kg minor load to a 60 kg major load and then returned to the minor load. 4.2 A Rockwell hardness number is directly related to the indentation hardness of a material; the higher the Rockwell L scale reading, the harder the material. The test is useful in the evaluation and the manufacturing control of carbon and graphite materials. SCOPE 1.1 This test method covers Rockwell L scale hardness testing of graphite materials with grain size less than 0.8 mm and a hardness range between 0 and 120. 1.2 Test Methods E18 shall be followed except where otherwise indicated. 1.3 The values stated in SI units are to be regarded as standard. No other units of measurement are included in this standard. 1.4 This standard does not purport to address all of the safety concerns, if any, associated with its use. It is the responsibility of the user of this standard to establish appropriate safety, health, and environmental practices and determine the applicability of regulatory limitations prior to use. 1.5 This international standard was developed in accordance with internationally recognized principles on standardization established in the Decision on Principles for the Development of International Standards, Guides and Recommendations issued by the World Trade Organization Technical Barriers to Trade (TBT) Committee.
ASTM C748-20 is classified under the following ICS (International Classification for Standards) categories: 71.060.10 - Chemical elements. The ICS classification helps identify the subject area and facilitates finding related standards.
ASTM C748-20 has the following relationships with other standards: It is inter standard links to ASTM C748-98(2015), ASTM E18-18, ASTM E18-17, ASTM E18-12, ASTM E18-11, ASTM E18-08a, ASTM E18-08, ASTM E171-94(2007), ASTM E18-07, ASTM E18-05e1, ASTM E18-05, ASTM E18-03, ASTM E18-03e1, ASTM E18-02, ASTM E18-00. Understanding these relationships helps ensure you are using the most current and applicable version of the standard.
ASTM C748-20 is available in PDF format for immediate download after purchase. The document can be added to your cart and obtained through the secure checkout process. Digital delivery ensures instant access to the complete standard document.
Standards Content (Sample)
This international standard was developed in accordance with internationally recognized principles on standardization established in the Decision on Principles for the
Development of International Standards, Guides and Recommendations issued by the World Trade Organization Technical Barriers to Trade (TBT) Committee.
Designation: C748 − 20
Standard Test Method for
Rockwell Hardness of Graphite Materials
This standard is issued under the fixed designation C748; the number immediately following the designation indicates the year of
original adoption or, in the case of revision, the year of last revision. A number in parentheses indicates the year of last reapproval. A
superscript epsilon (´) indicates an editorial change since the last revision or reapproval.
1. Scope* 4. Significance and Use
1.1 This test method covers Rockwell L scale hardness 4.1 A Rockwell L scale hardness number is a number
testing of graphite materials with grain size less than 0.8 mm derivedfromthenetincreaseindepthofimpressionastheload
and a hardness range between 0 and 120. on a 6.3500 mm 6 0.0025 mm diameter steel-ball indenter is
increased from a fixed 10 kg minor load to a 60 kg major load
1.2 Test Methods E18 shall be followed except where
and then returned to the minor load.
otherwise indicated.
4.2 A Rockwell hardness number is directly related to the
1.3 The values stated in SI units are to be regarded as
indentation hardness of a material; the higher the Rockwell L
standard. No other units of measurement are included in this
scale reading, the harder the material. The test is useful in the
standard.
evaluation and the manufacturing control of carbon and graph-
1.4 This standard does not purport to address all of the
ite materials.
safety concerns, if any, associated with its use. It is the
responsibility of the user of this standard to establish appro-
5. Apparatus
priate safety, health, and environmental practices and deter-
5.1 Rockwell Hardness Tester, calibrated in accordance with
mine the applicability of regulatory limitations prior to use.
the requirements of Section 7.
1.5 This international standard was developed in accor-
5.2 Rockwell Hardness Tester Anvil, appropriate for the
dance with internationally recognized principles on standard-
material shall be used as the specimen base plate.
ization established in the Decision on Principles for the
Development of International Standards, Guides and Recom-
6. Test Specimen
mendations issued by the World Trade Organization Technical
6.1 The recommended test specimen shall be flat,
Barriers to Trade (TBT) Committee.
rectangular, have a minimum thickness of 6.35 mm, and a
minimum width and length of 12.7 mm.
2. Referenced Documents
6.2 The test surface roughness shall not exceed 3.2 µm
2.1 ASTM Standards:
arithmetical average.
E18 Test Methods for Rockwell Hardness of Metallic Ma-
terials
6.3 The test surface to opposite face parallelism for flat
E171 Practice for Conditioning and Testing Flexible Barrier
specimens shall be within 1 %. For all other specimen shapes,
Packaging
the test surface must be maintained normal to the direction of
load application.
3. Summary of Test Method
7. Verification of Calibration
3.1 The specimen is held in position and the load is applied.
Final position of the indicator on the scale is observed and 7.1 Level the Rockwell hardness tester in accordance with
the manufacturer’s instructions.
recorded as the hardness number.
7.2 The adjustment of speed-of-load application is of great
importance. Adjust the dashpot on the Rockwell tester so that
This test method is under the jurisdiction of ASTM Committee D02 on
the operating handle completes its travel in 4 s to 7 s with no
Petroleum Products, Liquid Fuels, and Lubricants and is the direct responsibility of
specimen on the machine or no load applied by the indenter to
Subcommittee D02.F0 on Manufactured Carbon and Graphite Products.
the anvil. The major load shall be 60 kg for this calibration.
Current edition approved May 1, 2020. Published May 2020. Originally
When so adjusted, the period taken for the mechanism to come
approved in 1973. Last previous edition approved in 2015 as C748 – 98 (2015).
DOI: 10.1520/C0748-20.
to a stop with the specimen in place will vary from 5 s to 15 s,
For referenced ASTM standards, visit the ASTM website, www.astm.org, or
depending upon the particular specimen, the indenter, and the
contact ASTM Customer Service at service@astm.org. For Annual Book of ASTM
load used. The operator should check the instrument manual
Standards volume information, refer to the standard’s Document Summary page on
the ASTM website. for this adjustment.
*A Summary of Changes section appears at the end of this standard
Copyright © ASTM International, 100 Barr Harbor Drive, PO Box C700, West Conshohocken, PA 19428-2959. United States
C748 − 20
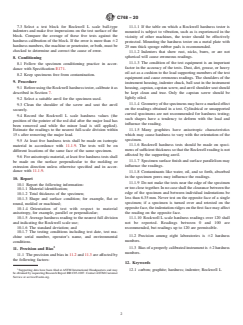
7.3 Select a test block for Rockwell L scale ball-type 11.1.1 If the table on which a Rockwell hardness tester is
indenters and make five impressions on the test surface of the mounted is subject to vibration, such as is experienced in the
block. Compare the average of these five tests against the
vicinity of other machines, the tester should be effectively
hardness calibration of the block. If the error is more than 62
protected. Mounting the hardness tester on a metal plate with
hardness numbers, the machine or penetrator, or both, must be
25 mm thick sponge rubber pads is recommended.
checked to determine and correct the cause of error.
11.1.2 Indenters that show rust, nicks, burrs, or are not
spherical will cause erroneous readings.
8. Conditioning
...
This document is not an ASTM standard and is intended only to provide the user of an ASTM standard an indication of what changes have been made to the previous version. Because
it may not be technically possible to adequately depict all changes accurately, ASTM recommends that users consult prior editions as appropriate. In all cases only the current version
of the standard as published by ASTM is to be considered the official document.
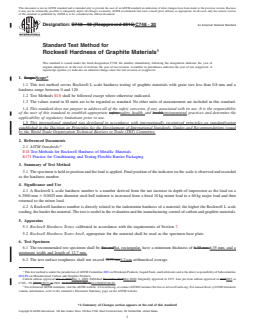
Designation: C748 − 98 (Reapproved 2015) C748 − 20 An American National Standard
Standard Test Method for
Rockwell Hardness of Graphite Materials
This standard is issued under the fixed designation C748; the number immediately following the designation indicates the year of
original adoption or, in the case of revision, the year of last revision. A number in parentheses indicates the year of last reapproval. A
superscript epsilon (´) indicates an editorial change since the last revision or reapproval.
1. Scope Scope*
1.1 This test method covers Rockwell L scale hardness testing of graphite materials with grain size less than 0.8 mm and a
hardness range between 0 and 120.
1.2 Test Methods E18 shall be followed except where otherwise indicated.
1.3 The values stated in SI units are to be regarded as standard. No other units of measurement are included in this standard.
1.4 This standard does not purport to address all of the safety concerns, if any, associated with its use. It is the responsibility
of the user of this standard to establish appropriate safety safety, health, and healthenvironmental practices and determine the
applicability of regulatory limitations prior to use.
1.5 This international standard was developed in accordance with internationally recognized principles on standardization
established in the Decision on Principles for the Development of International Standards, Guides and Recommendations issued
by the World Trade Organization Technical Barriers to Trade (TBT) Committee.
2. Referenced Documents
2.1 ASTM Standards:
E18 Test Methods for Rockwell Hardness of Metallic Materials
E171 Practice for Conditioning and Testing Flexible Barrier Packaging
3. Summary of Test Method
3.1 The specimen is held in position and the load is applied. Final position of the indicator on the scale is observed and recorded
as the hardness number.
4. Significance and Use
4.1 A Rockwell L scale hardness number is a number derived from the net increase in depth of impression as the load on a
6.3500 mm 6 0.0025 mm diameter steel-ball indenter is increased from a fixed 10 kg minor load to a 60 kg major load and then
returned to the minor load.
4.2 A Rockwell hardness number is directly related to the indentation hardness of a material; the higher the Rockwell L scale
reading, the harder the material. The test is useful in the evaluation and the manufacturing control of carbon and graphite materials.
5. Apparatus
5.1 Rockwell Hardness Tester, calibrated in accordance with the requirements of Section 7.
5.2 Rockwell Hardness Tester Anvil, appropriate for the material shall be used as the specimen base plate.
6. Test Specimen
6.1 The recommended test specimen shall be flat andflat, rectangular, have a minimum thickness of 6.35 mm.6.35 mm, and a
minimum width and length of 12.7 mm.
6.2 The test surface roughness shall not exceed 3175 nm3.2 μm arithmetical average.
This test method is under the jurisdiction of ASTM Committee D02 on Petroleum Products, Liquid Fuels, and Lubricants and is the direct responsibility of Subcommittee
D02.F0 on Manufactured Carbon and Graphite Products.
Current edition approved Oct. 1, 2015May 1, 2020. Published December 2015May 2020. Originally approved in 1973. Last previous edition approved in 20102015 as
ɛ1
C748 – 98 (2010)(2015). . DOI: 10.1520/C0748-98R15.10.1520/C0748-20.
For referenced ASTM standards, visit the ASTM website, www.astm.org, or contact ASTM Customer Service at service@astm.org. For Annual Book of ASTM Standards
volume information, refer to the standard’s Document Summary page on the ASTM website.
*A Summary of Changes section appears at the end of this standard
Copyright © ASTM International, 100 Barr Harbor Drive, PO Box C700, West Conshohocken, PA 19428-2959. United States
C748 − 20
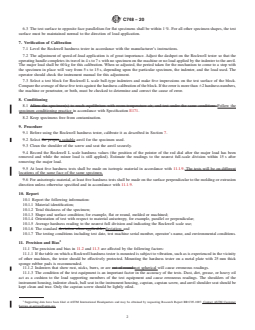
6.3 The test surface to opposite face parallelism for flat specimens shall be within 1 %. For all other specimen shapes, the test
surface must be maintained normal to the direction of load application.
7. Verification of Calibration
7.1 Level the Rockwell hardness tester in accordance with the manufacturer’s instructions.
7.2 The adjustment of speed-of-load application is of great importance. Adjust the dashpot on the Rockwell tester so that the
operating handle completes its travel in 4 s to 7 s with no specimen on the machine or no load applied by the indenter to the anvil.
The major load shall be 60 kg for this calibration. When so adjusted, the period taken for the mechanism to come to a stop with
the specimen in place will vary from 5 s to 15 s, depending upon the particular specimen, the indenter, and the load used. The
operator should check the instrument manual for this adjustment.
7.3 Select a test block for Rockwell L scale ball-type indenters and make five impressions on the test surface of the block.
Compare the average of these five tests against the hardness calibration of the block. If the error is more than 62 hardness numbers,
the machine or penetrator, or both, must be checked to determine and correct the cause of error.
8. Conditioning
8.1 Allow the specimen(s) to reach equilibrium with room-temperature air, and test under the same conditions Follow the
specimen conditioning practice in accordance with Specification E171.
8.2 Keep specimens free from contamination.
9. Procedure
9.1 Before using the Rockwell hardness tester, calibrate it as described in Section 7.
9.2 Select the propera s
...


Questions, Comments and Discussion
Ask us and Technical Secretary will try to provide an answer. You can facilitate discussion about the standard in here.
Loading comments...