ASTM E190-92(2008)
(Test Method)Standard Test Method for Guided Bend Test for Ductility of Welds
Standard Test Method for Guided Bend Test for Ductility of Welds
SIGNIFICANCE AND USE
The guided bend test as described in this test method is used to evaluate the quality of welds as a function of ductility as evidenced by their ability to resist cracking during bending.
SCOPE
1.1 This test method covers a guided bend test for the determination of soundness and ductility of welds in ferrous and nonferrous products. Defects, not shown by X rays, may appear in the surface of a specimen when it is subjected to progressive localized overstressing. This guided bend test has been developed primarily for plates and is not intended to be substituted for other methods of bend testing.
1.2 The values stated in inch-pound units are to be regarded as standard. The values given in parentheses are mathematical conversions to SI units that are provided for information only and are not considered standard.
Note 1—For additional information see Terminology E 6, and American Welding Society Standard D 1.1.
1.3 This standard does not purport to address all of the safety concerns, if any, associated with its use. It is the responsibility of the user of this standard to establish appropriate safety and health practices and determine the applicability of regulatory limitations prior to use.
General Information
Relations
Buy Standard
Standards Content (Sample)
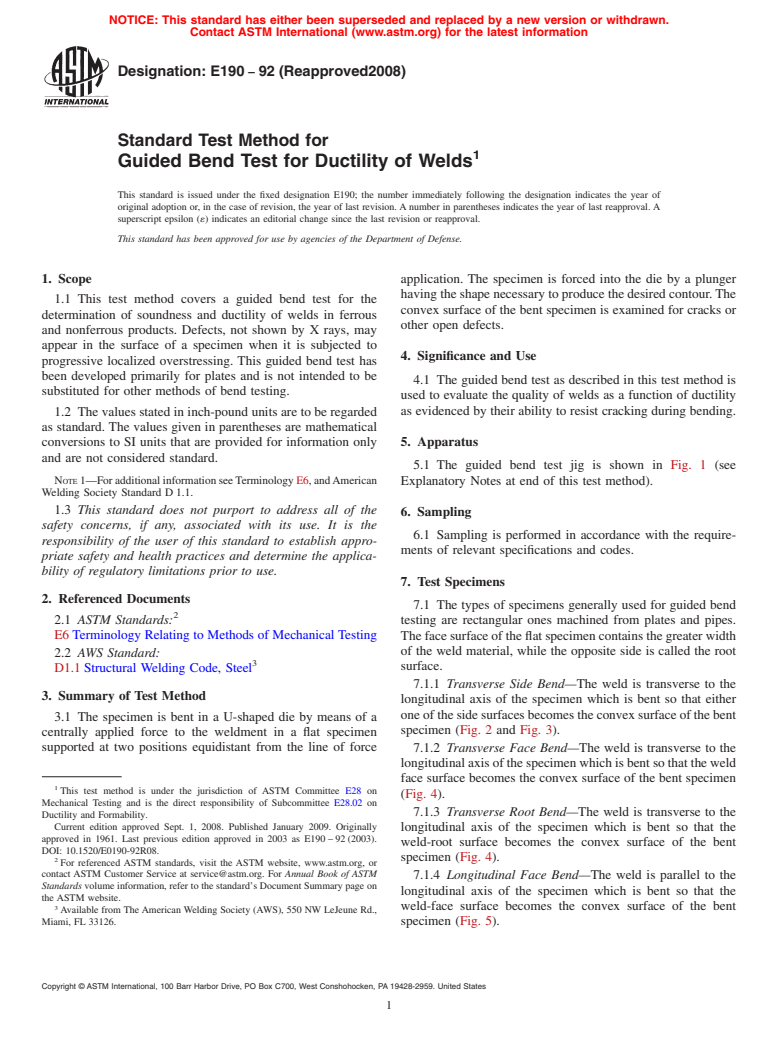
NOTICE: This standard has either been superseded and replaced by a new version or withdrawn.
Contact ASTM International (www.astm.org) for the latest information
Designation: E190 − 92 (Reapproved2008)
Standard Test Method for
Guided Bend Test for Ductility of Welds
This standard is issued under the fixed designation E190; the number immediately following the designation indicates the year of
original adoption or, in the case of revision, the year of last revision. A number in parentheses indicates the year of last reapproval. A
superscript epsilon (´) indicates an editorial change since the last revision or reapproval.
This standard has been approved for use by agencies of the Department of Defense.
1. Scope application. The specimen is forced into the die by a plunger
having the shape necessary to produce the desired contour.The
1.1 This test method covers a guided bend test for the
convex surface of the bent specimen is examined for cracks or
determination of soundness and ductility of welds in ferrous
other open defects.
and nonferrous products. Defects, not shown by X rays, may
appear in the surface of a specimen when it is subjected to
4. Significance and Use
progressive localized overstressing. This guided bend test has
been developed primarily for plates and is not intended to be
4.1 The guided bend test as described in this test method is
substituted for other methods of bend testing.
used to evaluate the quality of welds as a function of ductility
as evidenced by their ability to resist cracking during bending.
1.2 The values stated in inch-pound units are to be regarded
as standard. The values given in parentheses are mathematical
5. Apparatus
conversions to SI units that are provided for information only
and are not considered standard.
5.1 The guided bend test jig is shown in Fig. 1 (see
NOTE1—ForadditionalinformationseeTerminologyE6,andAmerican
Explanatory Notes at end of this test method).
Welding Society Standard D 1.1.
1.3 This standard does not purport to address all of the
6. Sampling
safety concerns, if any, associated with its use. It is the
6.1 Sampling is performed in accordance with the require-
responsibility of the user of this standard to establish appro-
ments of relevant specifications and codes.
priate safety and health practices and determine the applica-
bility of regulatory limitations prior to use.
7. Test Specimens
2. Referenced Documents
7.1 The types of specimens generally used for guided bend
2.1 ASTM Standards: testing are rectangular ones machined from plates and pipes.
E6 Terminology Relating to Methods of Mechanical Testing The face surface of the flat specimen contains the greater width
of the weld material, while the opposite side is called the root
2.2 AWS Standard:
surface.
D1.1 Structural Welding Code, Steel
7.1.1 Transverse Side Bend—The weld is transverse to the
3. Summary of Test Method
longitudinal axis of the specimen which is bent so that either
oneofthesidesurfacesbecomestheconvexsurfaceofthebent
3.1 The specimen is bent in a U-shaped die by means of a
specimen (Fig. 2 and Fig. 3).
centrally applied force to the weldment in a flat specimen
supported at two positions equidistant from the line of force 7.1.2 Transverse Face Bend—The weld is transverse to the
longitudinalaxisofthespecimenwhichisbentsothattheweld
face surface becomes the convex surface of the bent specimen
This test method is under the jurisdiction of ASTM Committee E28 on
(Fig. 4).
Mechanical Testing and is the direct responsibility of Subcommittee E28.02 on
7.1.3 Transverse Root Bend—The weld is transverse to the
Ductility and Formability.
Current edition approved Sept. 1, 2008. Published January 2009. Originally
longitudinal axis of the specimen which is bent so that the
approved in 1961. Last previous edition approved in 2003 as E190 – 92 (2003).
weld-root surface becomes the convex surface of the bent
DOI: 10.1520/E0190-92R08.
specimen (Fig. 4).
For referenced ASTM standards, visit the ASTM website, www.astm.org, or
contact ASTM Customer Service at service@astm.org. For Annual Book of ASTM
7.1.4 Longitudinal Face Bend—The weld is parallel to the
Standards volume information, refer to the standard’s Document Summary page on
longitudinal axis of the specimen which is bent so that the
the ASTM website.
weld-face surface becomes the convex surface of the bent
Available from The American Welding Society (AWS), 550 NW LeJeune Rd.,
Miami, FL 33126. specimen (Fig. 5).
Copyright © ASTM International, 100 Barr Harbor Drive, PO Box C700, West Conshohocken, PA 19428-2959. United States
E190 − 92 (2008)
Thickness of Specimen
A, in. (mm) B, in. (mm) C, in. (mm) D, in. (mm)
in. (mm)
3 1 3 3 3
⁄8 (9.5) 1 ⁄2 (38) ⁄4 (19) 2 ⁄8 (60) 1 ⁄16 (30)
1 1 1 3 3
⁄8 (3.2) 2 ⁄8 (54) 1 ⁄16 (27) 2 ⁄8 (60) 1 ⁄16 (30)
1 1
t 4t 2t 6t + ⁄8 ( + 3.2) 3t + ⁄16(+1.6)
FIG. 1 Guided Bend Test Jig
t, in. (mm) T,in.
3 1
⁄8 to 1 ⁄2 (9.5 to 38) t
>1 ⁄2 See Note
t, in. (mm) T,in.
3 1 NOTE 1—For plates over 1 ⁄2 in. (38 mm) thick, cut specimen into
⁄8 to 1 ⁄2 (9.5 to 38) t
3 1
approximately equal strips between ⁄4 and 1 ⁄2 in. (19 to 38 mm) wide and
>1 ⁄2 (38) See Note
test each strip.
FIG. 3 Side-Bend Specimen for Nonferrous Materials
NOTE 1—For plates over 1 ⁄2 in. (38 mm) thick, cut specimen into
3 1
approximately equal strips between ⁄4 and 1 ⁄2 in. (19 and 38 mm) wide
and test each strip.
FIG. 2 Side-Bend Specimen for Ferrous Materials
8.2 Any convenient means may be used for moving the
plunger with relation to the die; but it must be steady and
without any signi
...
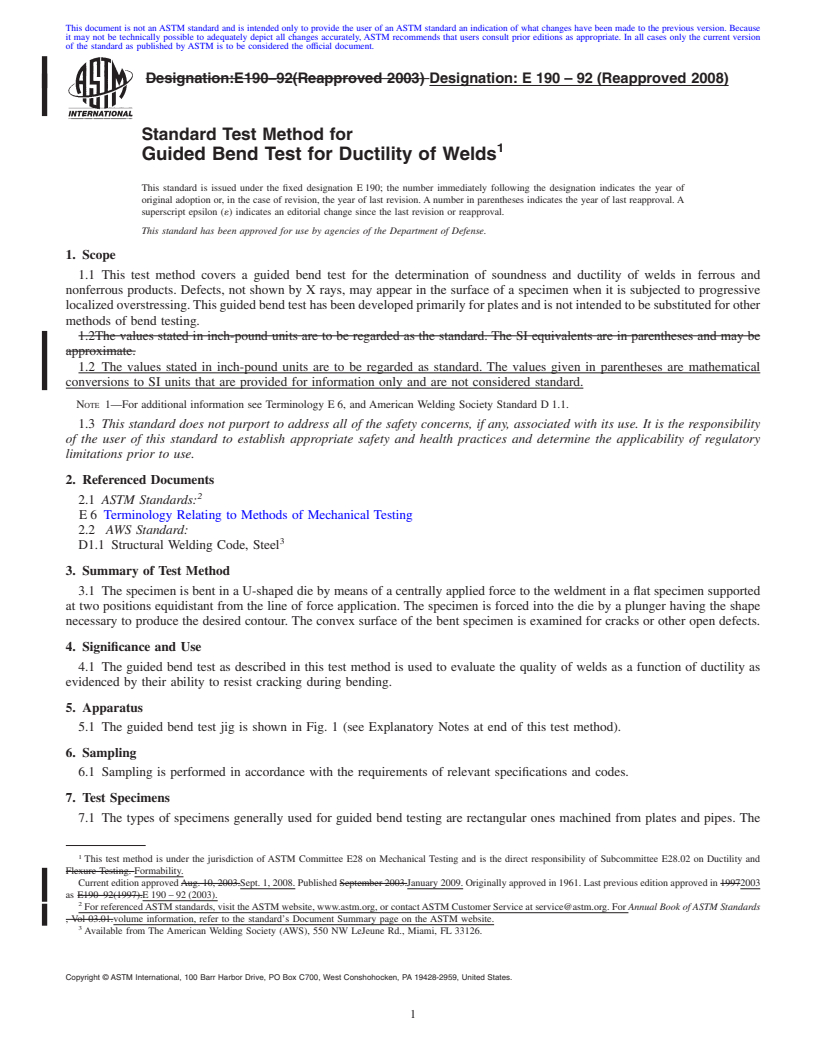
This document is not anASTM standard and is intended only to provide the user of anASTM standard an indication of what changes have been made to the previous version. Because
it may not be technically possible to adequately depict all changes accurately, ASTM recommends that users consult prior editions as appropriate. In all cases only the current version
of the standard as published by ASTM is to be considered the official document.
Designation:E190–92(Reapproved 2003) Designation: E 190 – 92 (Reapproved 2008)
Standard Test Method for
Guided Bend Test for Ductility of Welds
This standard is issued under the fixed designation E 190; the number immediately following the designation indicates the year of
original adoption or, in the case of revision, the year of last revision. A number in parentheses indicates the year of last reapproval. A
superscript epsilon (´) indicates an editorial change since the last revision or reapproval.
This standard has been approved for use by agencies of the Department of Defense.
1. Scope
1.1 This test method covers a guided bend test for the determination of soundness and ductility of welds in ferrous and
nonferrous products. Defects, not shown by X rays, may appear in the surface of a specimen when it is subjected to progressive
localizedoverstressing.Thisguidedbendtesthasbeendevelopedprimarilyforplatesandisnotintendedtobesubstitutedforother
methods of bend testing.
1.2The values stated in inch-pound units are to be regarded as the standard. The SI equivalents are in parentheses and may be
approximate.
1.2 The values stated in inch-pound units are to be regarded as standard. The values given in parentheses are mathematical
conversions to SI units that are provided for information only and are not considered standard.
NOTE 1—For additional information see Terminology E 6, and American Welding Society Standard D 1.1.
1.3 This standard does not purport to address all of the safety concerns, if any, associated with its use. It is the responsibility
of the user of this standard to establish appropriate safety and health practices and determine the applicability of regulatory
limitations prior to use.
2. Referenced Documents
2.1 ASTM Standards:
E6 Terminology Relating to Methods of Mechanical Testing
2.2 AWS Standard:
D1.1 Structural Welding Code, Steel
3. Summary of Test Method
3.1 The specimen is bent in a U-shaped die by means of a centrally applied force to the weldment in a flat specimen supported
at two positions equidistant from the line of force application. The specimen is forced into the die by a plunger having the shape
necessary to produce the desired contour. The convex surface of the bent specimen is examined for cracks or other open defects.
4. Significance and Use
4.1 The guided bend test as described in this test method is used to evaluate the quality of welds as a function of ductility as
evidenced by their ability to resist cracking during bending.
5. Apparatus
5.1 The guided bend test jig is shown in Fig. 1 (see Explanatory Notes at end of this test method).
6. Sampling
6.1 Sampling is performed in accordance with the requirements of relevant specifications and codes.
7. Test Specimens
7.1 The types of specimens generally used for guided bend testing are rectangular ones machined from plates and pipes. The
This test method is under the jurisdiction of ASTM Committee E28 on Mechanical Testing and is the direct responsibility of Subcommittee E28.02 on Ductility and
Flexure Testing. Formability.
Current edition approvedAug. 10, 2003.Sept. 1, 2008. Published September 2003.January 2009. Originally approved in 1961. Last previous edition approved in 19972003
as E190–92(1997).E 190 – 92 (2003).
For referencedASTM standards, visit theASTM website, www.astm.org, or contactASTM Customer Service at service@astm.org. For Annual Book ofASTM Standards
, Vol 03.01.volume information, refer to the standard’s Document Summary page on the ASTM website.
Available from The American Welding Society (AWS), 550 NW LeJeune Rd., Miami, FL 33126.
Copyright © ASTM International, 100 Barr Harbor Drive, PO Box C700, West Conshohocken, PA 19428-2959, United States.
E 190 – 92 (2008)
Thickness of Specimen
A, in. (mm) B, in. (mm) C, in. (mm) D, in. (mm)
in. (mm)
3 1 3 3 3
⁄8 (9.5) 1 ⁄2 (38) ⁄4 (19) 2 ⁄8 (60) 1 ⁄16 (30)
1 1 1 3 3
⁄8 (3.2) 2 ⁄8 (54) 1 ⁄16 (27) 2 ⁄8 (60) 1 ⁄16 (30)
1 1
t 4t 2t 6t + ⁄8 ( + 3.2) 3t + ⁄16 ( + 1.6)
FIG. 1 Guided Bend Test Jig
face surface of the flat specimen contains the greater width of the weld material, while the opposite side is called the root surface.
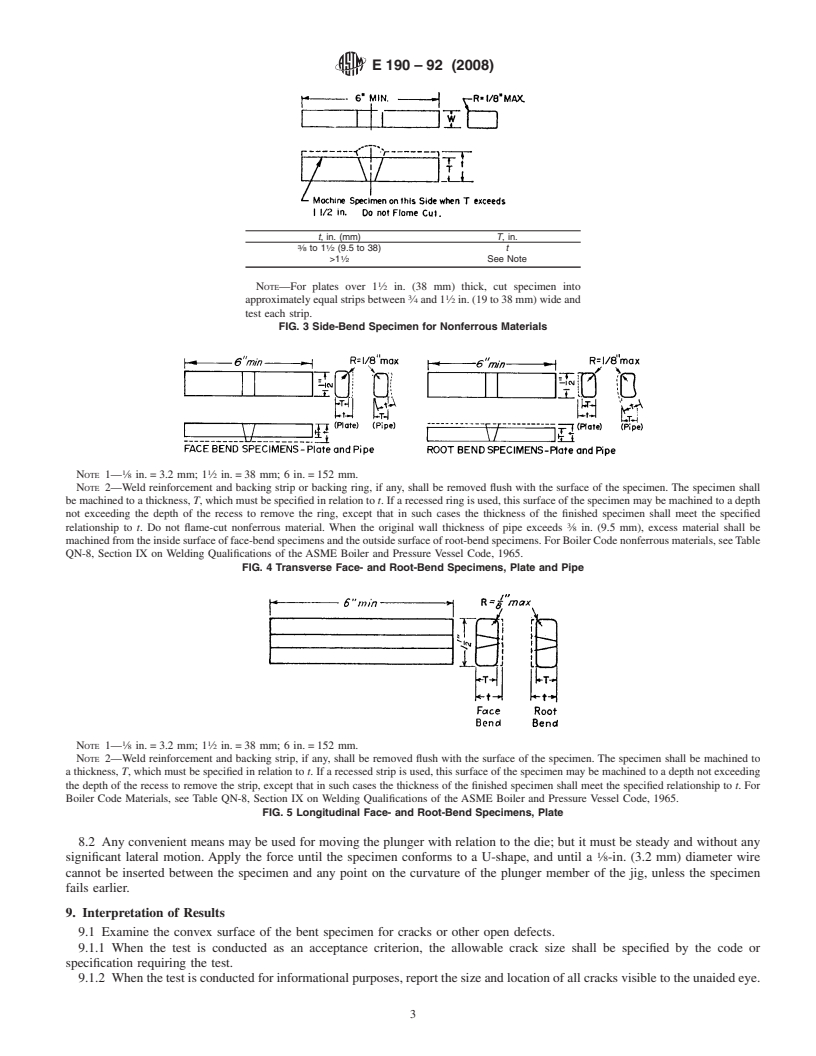
7.1.1 Transverse Side Bend—The weld is transverse to the longitudinal axis of the specimen which is bent so that either one
of the side surfaces becomes the convex surface of the bent specimen (Fig. 2 and Fig. 3).
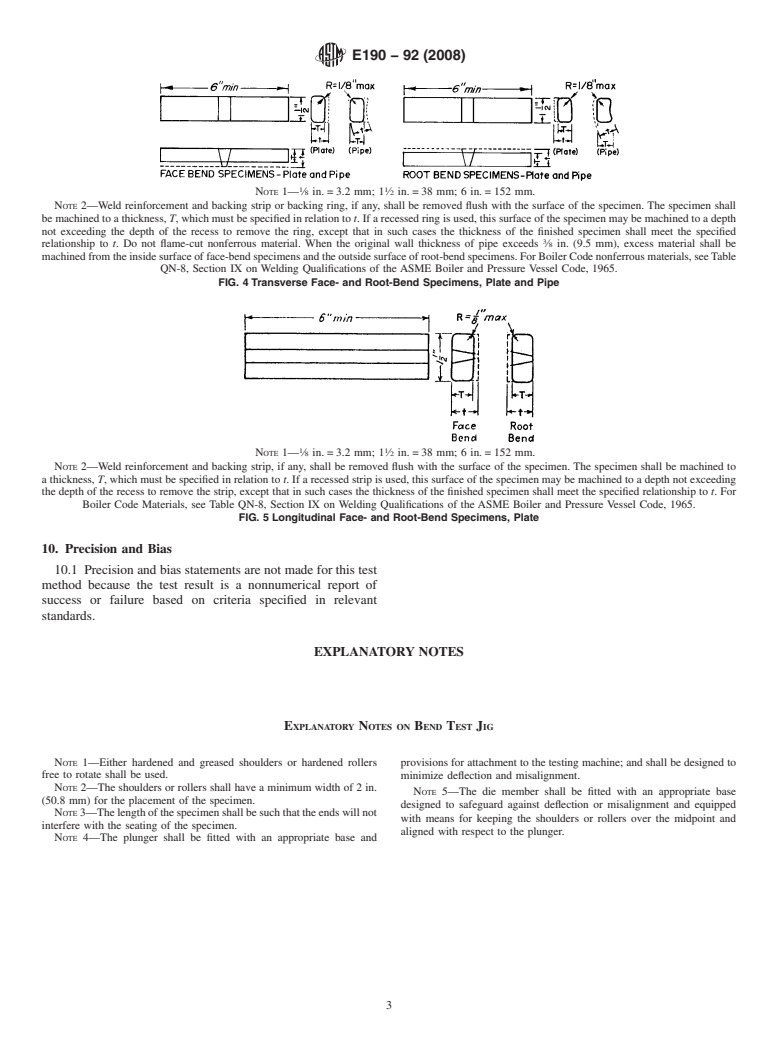
7.1.2 TransverseFaceBend—Theweldistransversetothelongitudinalaxisofthespecimenwhichisbentsothattheweldface
surface becomes the convex surface of the bent specimen (Fig. 4).
7.1.3 TransverseRootBend—The weld is transverse to the longitudinal axis of the specimen which is bent so that the weld-root
surface becomes the convex surface of the bent specimen (Fig. 4).
7.1.4 Longitudinal Face Bend—The weld is parallel to the longitudinal axis of the specimen which is bent so that the weld-face
surface becomes the convex surface of the bent specimen (Fig. 5).
7.1.5 Longitudinal Root Bend—The weld is parallel to the longitudinal axis of the specimen which is bent so that the weld root
surface becomes the convex surface of the bent specimen (Fig. 5).
8. Procedure
8.1 Bend the guided-bend specimens in a test jig that is substantially in accordance with Fig. 1. Place transverse specimens on
the die member of the jig with the weld at midspan. Place face-bend specimens with the face of the
...


Questions, Comments and Discussion
Ask us and Technical Secretary will try to provide an answer. You can facilitate discussion about the standard in here.