ASTM E1085-22
(Test Method)Standard Test Method for Analysis of Low-Alloy Steels by Wavelength Dispersive X-Ray Fluorescence Spectrometry
Standard Test Method for Analysis of Low-Alloy Steels by Wavelength Dispersive X-Ray Fluorescence Spectrometry
SIGNIFICANCE AND USE
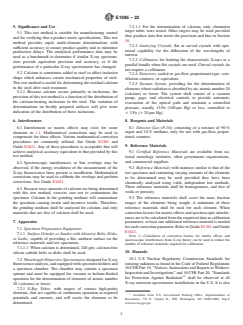
5.1 This test method is suitable for manufacturing control and for verifying that a product meets specifications. This test method provides rapid, multi-element determinations with sufficient accuracy to ensure product quality and to minimize production delays. The analytical performance data may be used as a benchmark to determine if similar X-ray spectrometers provide equivalent precision and accuracy, or if the performance of a particular X-ray spectrometer has changed.
5.2 Calcium is sometimes added to steel to affect inclusion shape which enhances certain mechanical properties of steel. This test method is useful for determining the residual calcium in the steel after such treatment.
5.2.1 Because calcium occurs primarily in inclusions, the precision of this test method is a function of the distribution of the calcium-bearing inclusions in the steel. The variation of determinations on freshly prepared surfaces will give some indication of the distribution of these inclusions.
SCOPE
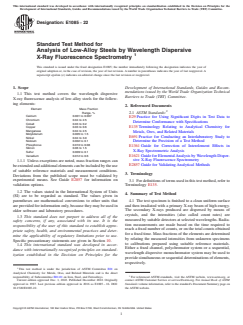
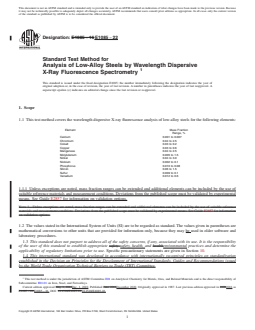
1.1 This test method covers the wavelength dispersive X-ray fluorescence analysis of low-alloy steels for the following elements:
Element
Mass Fraction
Range, %
Calcium
0.001 to 0.007
Chromium
0.04 to 2.5
Cobalt
0.03 to 0.2
Copper
0.03 to 0.6
Manganese
0.04 to 2.5
Molybdenum
0.005 to 1.5
Nickel
0.04 to 3.0
Niobium
0.002 to 0.1
Phosphorus
0.010 to 0.08
Silicon
0.06 to 1.5
Sulfur
0.009 to 0.1
Vanadium
0.012 to 0.6
1.1.1 Unless exceptions are noted, mass fraction ranges can be extended and additional elements can be included by the use of suitable reference materials and measurement conditions. Deviations from the published scope must be validated by experimental means. See Guide E2857 for information on validation options.
1.2 The values stated in the International System of Units (SI) are to be regarded as standard. The values given in parentheses are mathematical conversions to other units that are provided for information only, because they may be used in older software and laboratory procedures.
1.3 This standard does not purport to address all of the safety concerns, if any, associated with its use. It is the responsibility of the user of this standard to establish appropriate safety, health, and environmental practices and determine the applicability of regulatory limitations prior to use. Specific precautionary statements are given in Section 10.
1.4 This international standard was developed in accordance with internationally recognized principles on standardization established in the Decision on Principles for the Development of International Standards, Guides and Recommendations issued by the World Trade Organization Technical Barriers to Trade (TBT) Committee.
General Information
- Status
- Published
- Publication Date
- 30-Nov-2022
- Technical Committee
- E01 - Analytical Chemistry for Metals, Ores, and Related Materials
- Drafting Committee
- E01.01 - Iron, Steel, and Ferroalloys
Relations
- Effective Date
- 01-Jan-2020
- Effective Date
- 15-May-2019
- Effective Date
- 15-May-2016
- Effective Date
- 01-Jul-2015
- Effective Date
- 15-May-2015
- Effective Date
- 15-Aug-2014
- Effective Date
- 01-Apr-2014
- Effective Date
- 15-Feb-2014
- Effective Date
- 01-Dec-2013
- Effective Date
- 01-May-2013
- Effective Date
- 01-Nov-2011
- Effective Date
- 01-Nov-2011
- Effective Date
- 15-Sep-2011
- Effective Date
- 15-Jun-2011
- Effective Date
- 15-Jan-2011
Overview
ASTM E1085-22: Standard Test Method for Analysis of Low-Alloy Steels by Wavelength Dispersive X-Ray Fluorescence Spectrometry is an internationally recognized procedure for the precise and rapid determination of multiple elements in low-alloy steels. Developed by ASTM Committee E01, this standard enhances manufacturing control, ensures product compliance with specifications, and serves as a benchmark for X-ray spectrometer performance. The method enables multi-element analysis essential for quality assurance in steel production, minimizing delays and optimizing product reliability.
Key Topics
Element Analysis Coverage:
The test method applies to low-alloy steels and determines the mass fraction ranges for the following elements (in %):- Calcium: 0.001 - 0.007
- Chromium: 0.04 - 2.5
- Cobalt: 0.03 - 0.2
- Copper: 0.03 - 0.6
- Manganese: 0.04 - 2.5
- Molybdenum: 0.005 - 1.5
- Nickel: 0.04 - 3.0
- Niobium: 0.002 - 0.1
- Phosphorus: 0.010 - 0.08
- Silicon: 0.06 - 1.5
- Sulfur: 0.009 - 0.1
- Vanadium: 0.012 - 0.6
Wavelength Dispersive X-Ray Fluorescence (WDXRF):
The method uses WDXRF spectrometry to irradiate steel samples and measure the intensity of secondary X-rays dispersed by crystals. This process allows accurate, simultaneous, or sequential multi-element determinations.Calibration & Reference Materials:
Certified reference materials are critical for establishing calibration curves and ensuring analytical accuracy. The method supports the extension of mass fraction ranges and inclusion of additional elements provided appropriate reference materials and validation are used.Precision & Interferences:
The technique provides sufficient analytical precision for manufacturing control. However, care must be taken to avoid contamination-especially when measuring trace elements such as calcium.Safety & Regulatory Compliance:
Operation of X-ray equipment must adhere to safety protocols for ionizing radiation, including the use of proper shielding and maintenance of safety interlocks.
Applications
ASTM E1085-22 is widely used in steel manufacturing and laboratory environments for:
Quality Assurance:
Verifying elemental composition in low-alloy steel products to confirm they meet industry and customer specifications.Manufacturing Control:
Rapid, on-site analysis minimizes production delays by allowing for quick decision-making during steel processing and alloying.Residual Calcium Analysis:
Determining residual calcium in steel, which is important for understanding its impact on inclusion shape and mechanical properties post-treatment.Instrument Benchmarking:
Evaluating and qualifying new or existing X-ray fluorescence spectrometers against standardized performance criteria.
Practical value: The method’s speed and accuracy support consistent steel quality, reduce risk of non-conformance, and optimize production workflows.
Related Standards
Refer to these supporting ASTM standards and guides for enhanced implementation and validation of analytical methods:
- E29: Practice for Using Significant Digits in Test Data
- E135: Terminology Relating to Analytical Chemistry for Metals, Ores, and Related Materials
- E691: Practice for Determining the Precision of a Test Method Through Interlaboratory Studies
- E1361: Guide for Correction of Interelement Effects in X-Ray Spectrometric Analysis
- E1621: Guide for Elemental Analysis by Wavelength Dispersive X-Ray Fluorescence Spectrometry
- E2857: Guide for Validating Analytical Methods
These documents provide additional guidance on method validation, calibration, precision assessment, and terminology required for comprehensive elemental analysis in metals and alloys.
Keywords: ASTM E1085-22, low-alloy steel analysis, wavelength dispersive X-ray fluorescence spectrometry, WDXRF, multi-element steel analysis, calibration, manufacturing control, quality assurance in steel production.
Buy Documents
ASTM E1085-22 - Standard Test Method for Analysis of Low-Alloy Steels by Wavelength Dispersive X-Ray Fluorescence Spectrometry
REDLINE ASTM E1085-22 - Standard Test Method for Analysis of Low-Alloy Steels by Wavelength Dispersive X-Ray Fluorescence Spectrometry
Get Certified
Connect with accredited certification bodies for this standard

Element Materials Technology
Materials testing and product certification.

Inštitut za kovinske materiale in tehnologije
Institute of Metals and Technology. Materials testing, metallurgical analysis, NDT.
Sponsored listings
Frequently Asked Questions
ASTM E1085-22 is a standard published by ASTM International. Its full title is "Standard Test Method for Analysis of Low-Alloy Steels by Wavelength Dispersive X-Ray Fluorescence Spectrometry". This standard covers: SIGNIFICANCE AND USE 5.1 This test method is suitable for manufacturing control and for verifying that a product meets specifications. This test method provides rapid, multi-element determinations with sufficient accuracy to ensure product quality and to minimize production delays. The analytical performance data may be used as a benchmark to determine if similar X-ray spectrometers provide equivalent precision and accuracy, or if the performance of a particular X-ray spectrometer has changed. 5.2 Calcium is sometimes added to steel to affect inclusion shape which enhances certain mechanical properties of steel. This test method is useful for determining the residual calcium in the steel after such treatment. 5.2.1 Because calcium occurs primarily in inclusions, the precision of this test method is a function of the distribution of the calcium-bearing inclusions in the steel. The variation of determinations on freshly prepared surfaces will give some indication of the distribution of these inclusions. SCOPE 1.1 This test method covers the wavelength dispersive X-ray fluorescence analysis of low-alloy steels for the following elements: Element Mass Fraction Range, % Calcium 0.001 to 0.007 Chromium 0.04 to 2.5 Cobalt 0.03 to 0.2 Copper 0.03 to 0.6 Manganese 0.04 to 2.5 Molybdenum 0.005 to 1.5 Nickel 0.04 to 3.0 Niobium 0.002 to 0.1 Phosphorus 0.010 to 0.08 Silicon 0.06 to 1.5 Sulfur 0.009 to 0.1 Vanadium 0.012 to 0.6 1.1.1 Unless exceptions are noted, mass fraction ranges can be extended and additional elements can be included by the use of suitable reference materials and measurement conditions. Deviations from the published scope must be validated by experimental means. See Guide E2857 for information on validation options. 1.2 The values stated in the International System of Units (SI) are to be regarded as standard. The values given in parentheses are mathematical conversions to other units that are provided for information only, because they may be used in older software and laboratory procedures. 1.3 This standard does not purport to address all of the safety concerns, if any, associated with its use. It is the responsibility of the user of this standard to establish appropriate safety, health, and environmental practices and determine the applicability of regulatory limitations prior to use. Specific precautionary statements are given in Section 10. 1.4 This international standard was developed in accordance with internationally recognized principles on standardization established in the Decision on Principles for the Development of International Standards, Guides and Recommendations issued by the World Trade Organization Technical Barriers to Trade (TBT) Committee.
SIGNIFICANCE AND USE 5.1 This test method is suitable for manufacturing control and for verifying that a product meets specifications. This test method provides rapid, multi-element determinations with sufficient accuracy to ensure product quality and to minimize production delays. The analytical performance data may be used as a benchmark to determine if similar X-ray spectrometers provide equivalent precision and accuracy, or if the performance of a particular X-ray spectrometer has changed. 5.2 Calcium is sometimes added to steel to affect inclusion shape which enhances certain mechanical properties of steel. This test method is useful for determining the residual calcium in the steel after such treatment. 5.2.1 Because calcium occurs primarily in inclusions, the precision of this test method is a function of the distribution of the calcium-bearing inclusions in the steel. The variation of determinations on freshly prepared surfaces will give some indication of the distribution of these inclusions. SCOPE 1.1 This test method covers the wavelength dispersive X-ray fluorescence analysis of low-alloy steels for the following elements: Element Mass Fraction Range, % Calcium 0.001 to 0.007 Chromium 0.04 to 2.5 Cobalt 0.03 to 0.2 Copper 0.03 to 0.6 Manganese 0.04 to 2.5 Molybdenum 0.005 to 1.5 Nickel 0.04 to 3.0 Niobium 0.002 to 0.1 Phosphorus 0.010 to 0.08 Silicon 0.06 to 1.5 Sulfur 0.009 to 0.1 Vanadium 0.012 to 0.6 1.1.1 Unless exceptions are noted, mass fraction ranges can be extended and additional elements can be included by the use of suitable reference materials and measurement conditions. Deviations from the published scope must be validated by experimental means. See Guide E2857 for information on validation options. 1.2 The values stated in the International System of Units (SI) are to be regarded as standard. The values given in parentheses are mathematical conversions to other units that are provided for information only, because they may be used in older software and laboratory procedures. 1.3 This standard does not purport to address all of the safety concerns, if any, associated with its use. It is the responsibility of the user of this standard to establish appropriate safety, health, and environmental practices and determine the applicability of regulatory limitations prior to use. Specific precautionary statements are given in Section 10. 1.4 This international standard was developed in accordance with internationally recognized principles on standardization established in the Decision on Principles for the Development of International Standards, Guides and Recommendations issued by the World Trade Organization Technical Barriers to Trade (TBT) Committee.
ASTM E1085-22 is classified under the following ICS (International Classification for Standards) categories: 77.040.30 - Chemical analysis of metals. The ICS classification helps identify the subject area and facilitates finding related standards.
ASTM E1085-22 has the following relationships with other standards: It is inter standard links to ASTM E135-20, ASTM E135-19, ASTM E135-16, ASTM E135-15a, ASTM E135-15, ASTM E135-14b, ASTM E135-14a, ASTM E135-14, ASTM E135-13a, ASTM E691-13, ASTM E691-11, ASTM E2857-11, ASTM E135-11b, ASTM E135-11a, ASTM E135-11. Understanding these relationships helps ensure you are using the most current and applicable version of the standard.
ASTM E1085-22 is available in PDF format for immediate download after purchase. The document can be added to your cart and obtained through the secure checkout process. Digital delivery ensures instant access to the complete standard document.
Standards Content (Sample)
This international standard was developed in accordance with internationally recognized principles on standardization established in the Decision on Principles for the
Development of International Standards, Guides and Recommendations issued by the World Trade Organization Technical Barriers to Trade (TBT) Committee.
Designation: E1085 − 22
Standard Test Method for
Analysis of Low-Alloy Steels by Wavelength Dispersive
X-Ray Fluorescence Spectrometry
This standard is issued under the fixed designation E1085; the number immediately following the designation indicates the year of
original adoption or, in the case of revision, the year of last revision. A number in parentheses indicates the year of last reapproval. A
superscript epsilon (´) indicates an editorial change since the last revision or reapproval.
1. Scope Development of International Standards, Guides and Recom-
mendations issued by the World Trade Organization Technical
1.1 This test method covers the wavelength dispersive
Barriers to Trade (TBT) Committee.
X-ray fluorescence analysis of low-alloy steels for the follow-
ing elements:
2. Referenced Documents
Element Mass Fraction
Range, % 2.1 ASTM Standards:
Calcium 0.001 to 0.007
E29 Practice for Using Significant Digits in Test Data to
Chromium 0.04 to 2.5
Determine Conformance with Specifications
Cobalt 0.03 to 0.2
E135 Terminology Relating to Analytical Chemistry for
Copper 0.03 to 0.6
Manganese 0.04 to 2.5
Metals, Ores, and Related Materials
Molybdenum 0.005 to 1.5
E691 Practice for Conducting an Interlaboratory Study to
Nickel 0.04 to 3.0
Niobium 0.002 to 0.1 Determine the Precision of a Test Method
Phosphorus 0.010 to 0.08
E1361 Guide for Correction of Interelement Effects in
Silicon 0.06 to 1.5
X-Ray Spectrometric Analysis
Sulfur 0.009 to 0.1
Vanadium 0.012 to 0.6 E1621 Guide for ElementalAnalysis by Wavelength Disper-
sive X-Ray Fluorescence Spectrometry
1.1.1 Unless exceptions are noted, mass fraction ranges can
E2857 Guide for Validating Analytical Methods
beextendedandadditionalelementscanbeincludedbytheuse
of suitable reference materials and measurement conditions.
3. Terminology
Deviations from the published scope must be validated by
experimental means. See Guide E2857 for information on 3.1 For definitions of terms used in this test method, refer to
validation options.
Terminology E135.
1.2 The values stated in the International System of Units
4. Summary of Test Method
(SI) are to be regarded as standard. The values given in
4.1 The test specimen is finished to a clean uniform surface
parentheses are mathematical conversions to other units that
and then irradiated with a primary X-ray beam of high energy.
are provided for information only, because they may be used in
The secondary X-rays produced are dispersed by means of
older software and laboratory procedures.
crystals, and the intensities (also called count rates) are
1.3 This standard does not purport to address all of the
measured by suitable detectors at selected wavelengths. Radia-
safety concerns, if any, associated with its use. It is the
tion measurements are made based on the time required to
responsibility of the user of this standard to establish appro-
reach a fixed number of counts, or on the total counts obtained
priate safety, health, and environmental practices and deter-
for a fixed time. Mass fractions of the elements are determined
mine the applicability of regulatory limitations prior to use.
by relating the measured intensities from unknown specimens
Specific precautionary statements are given in Section 10.
to calibrations prepared using suitable reference materials.
1.4 This international standard was developed in accor-
Either a fixed channel, polychromator system or a sequential,
dance with internationally recognized principles on standard-
wavelength dispersive monochromator system may be used to
ization established in the Decision on Principles for the
providesimultaneousorsequentialdeterminationsofelements,
respectively.
This test method is under the jurisdiction of ASTM Committee E01 on
Analytical Chemistry for Metals, Ores, and Related Materials and is the direct
responsibility of Subcommittee E01.01 on Iron, Steel, and Ferroalloys. For referenced ASTM standards, visit the ASTM website, www.astm.org, or
Current edition approved Dec. 1, 2022. Published December 2022. Originally contact ASTM Customer Service at service@astm.org. For Annual Book of ASTM
approved in 1987. Last previous edition approved in 2016 as E1085 – 16. DOI: Standards volume information, refer to the standard’s Document Summary page on
10.1520/E1085-22. the ASTM website.
Copyright © ASTM International, 100 Barr Harbor Drive, PO Box C700, West Conshohocken, PA 19428-2959. United States
E1085 − 22
5. Significance and Use 7.2.1.1 For the determination of calcium, only chromium
target tubes were tested. Other targets may be used provided
5.1 This test method is suitable for manufacturing control
they produce data that meets the precision and bias in Section
and for verifying that a product meets specifications. This test
16.
method provides rapid, multi-element determinations with
7.2.2 Analyzing Crystals, flat or curved crystals with opti-
sufficient accuracy to ensure product quality and to minimize
mized capability for the diffraction of the wavelengths of
production delays. The analytical performance data may be
interest.
used as a benchmark to determine if similar X-ray spectrom-
7.2.3 Collimator, for limiting the characteristic X-rays to a
eters provide equivalent precision and accuracy, or if the
parallel bundle when flat crystals are used. Curved crystals do
performance of a particular X-ray spectrometer has changed.
not require a collimator.
5.2 Calcium is sometimes added to steel to affect inclusion
7.2.4 Detectors, sealed or gas-flow proportional-type, scin-
shape which enhances certain mechanical properties of steel.
tillation counters, or equivalent.
This test method is useful for determining the residual calcium
7.2.5 Vacuum System, providing for the determination of
in the steel after such treatment.
elements whose radiation is absorbed by air, atomic number 20
5.2.1 Because calcium occurs primarily in inclusions, the
(calcium) or lower. The system shall consist of a vacuum
precision of this test method is a function of the distribution of
pump, gage, and electrical controls to provide automatic
the calcium-bearing inclusions in the steel. The variation of
evacuation of the optical path and maintain a controlled
determinations on freshly prepared surfaces will give some
pressure, usually 13 Pa (100 µm Hg) or less, controlled to
indication of the distribution of these inclusions.
63Pa(6 20 µm Hg).
6. Interferences 8. Reagents and Materials
6.1 Interelement or matrix effects may exist for some 8.1 Detector Gas (P-10), consisting of a mixture of 90 %
argon and 10 % methane, only for use with gas-flow propor-
elements in 1.1. Mathematical corrections may be used to
compensate for these effects. Various mathematical correction tional counters.
procedures are commonly utilized. See Guide E1361 and
9. Reference Materials
Guide E1621. Any of these procedures is acceptable that will
achieve analytical accuracy equivalent to that provided by this
9.1 Certified Reference Materials are available from na-
test method.
tional metrology institutes, other government organizations,
and commercial suppliers.
6.2 Spectroscopic interferences or line overlaps may be
observed, if the energy resolution of the measurement of the 9.2 Reference Materials with matrices similar to that of the
X-ray fluorescence lines present is insufficient. Mathematical
test specimen and containing varying amounts of the elements
corrections may be used to calibrate the overlaps and perform to be determined may be used provided they have been
corrections. See Guide E1621.
chemically analyzed using valid, independent test methods.
These reference materials shall be homogeneous, and free of
6.3 Because trace amounts of calcium are being determined
voids or porosity.
with this test method, exercise care not to contaminate the
specimen. Calcium in the grinding medium will contaminate 9.3 The reference materials shall cover the mass fraction
the specimen causing erratic and incorrect results. Therefore,
ranges of the elements being sought. A minimum of three
the grinding medium shall be analyzed for calcium, and only reference materials shall be used for each element. When
materials that are free of calcium shall be used.
correction factors for matrix effects and spectroscopic interfer-
encesaretobecalculatedfromtheempiricaldataascalibration
7. Apparatus parameters, at least one additional reference material is needed
foreachcorrectionparameter.RefertoGuideE1361andGuide
7.1 Specimen Preparation Equipment:
E1621.
7.1.1 Surface Grinder or Sander with Abrasive Belts, Disks,
NOTE 1—Calculation of correction factors for matrix effects and
or Lathe, capable of providing a flat, uniform surface on the
spectroscopic interferences from X-ray theory can be used to reduce the
reference materials and test specimens.
number of reference materials required for calibration.
7.1.1.1 When calcium is determined, 240-grit, calcium-free
10. Hazards
silicon carbide belts or disks shall be used.
10.1 U.S Nuclear Regulatory Commission Standards for
7.2 WavelengthDispersiveSpectrometer,designedforX-ray
ionizing radiation as found in the Code of Federal Regulations
fluorescenceanalysis,andequippedwithspecimenholdersand
10CFRPart19,“Notices,InstructionsandReportstoWorkers:
a specimen chamber. The chamber may contain a specimen
Inspection and Investigations” and 10 CFR Part 20, ”Standards
spinner and must be equipped for vacuum or helium-flushed
for Protection Against Radiation” shall be observed at all
operation for the determination of elements of atomic number
X-ray emission spectrometer installations in the U.S. It is also
20 (calcium) or lower.
7.2.1 X-Ray Tubes, with targets of various high-purity
elements, that are capable of continuous operation at required
Available from U.S. Government Printing Office, Superintendent of
potentials and currents, and will excite the elements to be
Documents, 732 N. Capitol St., NW, Washington, DC 20401-0001, http://
determined. www.access.gpo.gov
E1085 − 22
A
recommended that operating and maintenance personnel fol-
Element Crystal Detector
Nickel LiF(200), LiF(220) SP, FP, Sc
lowtheguidelinesofsafeoperatingproceduresgiveninsimilar
Chromium LiF(200), LiF(220) FP, SP, Sc
handbooks on radiation safety.
Manganese LiF(200), LiF(220) FP, SP, Sc
Silicon PET, InSb FP
10.2 Exposure to excessive quantities of high energy radia-
Molybdenum LiF(200), LiF(220) Sc, SP
tionsuchasthoseproducedbyX-rayspectrometersisinjurious
Copper LiF(200), LiF(220) SP, FP, Sc
Vanadium LiF(200), LiF(220) FP, SP, Sc
tohealth.Theoperatorshouldtakeappropriateactionstoavoid
Cobalt LiF(200), LiF(220) FP, SP, Sc
exposinganypartoftheirbody,notonlytoprimaryX-rays,but
Sulfur Ge FP
also to secondary or scattered radiation that might be present.
Niobium LiF(200), LiF(220) Sc, SP
The X-ray spectrometer should be operated in accordance with Phosphorus Ge FP
Calcium LiF(200) FP
regulations governing the use of ionizing radiation. During
manufacturing, manufacturers of X-ray fluorescence spectrom-
A
SP = Sealed Proportional, Sc = Scintillation, and FP = Flow Proportional.
eters generally build into X-ray equipment appropriate shield-
12.4.2 Counting Time—Collect a sufficient number of
ing and safety interlocks that minimize the risk of excessive
counts so that the repeatability of the analysis will not be
radiation exposure to operators. Operators should not attempt
affected by variance in X-ray counting. A minimum of 10 000
to bypass or defeat these safety devices. Only authorized
counts is required for 1 % relative standard uncertainty and 40
personnel should service X-ray spectrometers.
000 counts for 0.5 %.
11. Preparation of Reference Materials and Test
13. Calibration and Drift Correction (Standardization)
Specimens
11.1 Prepare the reference materials and test specimens to 13
...
This document is not an ASTM standard and is intended only to provide the user of an ASTM standard an indication of what changes have been made to the previous version. Because
it may not be technically possible to adequately depict all changes accurately, ASTM recommends that users consult prior editions as appropriate. In all cases only the current version
of the standard as published by ASTM is to be considered the official document.
Designation: E1085 − 16 E1085 − 22
Standard Test Method for
Analysis of Low-Alloy Steels by Wavelength Dispersive
X-Ray Fluorescence Spectrometry
This standard is issued under the fixed designation E1085; the number immediately following the designation indicates the year of
original adoption or, in the case of revision, the year of last revision. A number in parentheses indicates the year of last reapproval. A
superscript epsilon (´) indicates an editorial change since the last revision or reapproval.
1. Scope
1.1 This test method covers the wavelength dispersive X-ray fluorescence analysis of low-alloy steels for the following elements:
Element Mass Fraction
Range, %
Calcium 0.001 to 0.007
Chromium 0.04 to 2.5
Cobalt 0.03 to 0.2
Copper 0.03 to 0.6
Manganese 0.04 to 2.5
Molybdenum 0.005 to 1.5
Nickel 0.04 to 3.0
Niobium 0.002 to 0.1
Phosphorus 0.010 to 0.08
Silicon 0.06 to 1.5
Sulfur 0.009 to 0.1
Vanadium 0.012 to 0.6
1.1.1 Unless exceptions are noted, mass fraction ranges can be extended and additional elements can be included by the use of
suitable reference materials and measurement conditions. Deviations from the published scope must be validated by experimental
means. See Guide E2857 for information on validation options.
NOTE 1—Unless exceptions are noted, mass fraction ranges can be extended and additional elements can be included by the use of suitable reference
materials and measurement conditions. Deviations from the published scope must be validated by experimental means. See Guide E2857 for information
on validation options.
1.2 The values stated in the International System of Units (SI) are to be regarded as standard. The values given in parentheses are
mathematical conversions to other units that are provided for information only, because they may be used in older software and
laboratory procedures.
1.3 This standard does not purport to address all of the safety concerns, if any, associated with its use. It is the responsibility
of the user of this standard to establish appropriate safety safety, health, and healthenvironmental practices and determine the
applicability of regulatory limitations prior to use. Specific precautionary statements are given in Section 10.
1.4 This international standard was developed in accordance with internationally recognized principles on standardization
established in the Decision on Principles for the Development of International Standards, Guides and Recommendations issued
by the World Trade Organization Technical Barriers to Trade (TBT) Committee.
This test method is under the jurisdiction of ASTM Committee E01 on Analytical Chemistry for Metals, Ores, and Related Materials and is the direct responsibility of
Subcommittee E01.01 on Iron, Steel, and Ferroalloys.
Current edition approved May 1, 2016Dec. 1, 2022. Published June 2016December 2022. Originally approved in 1987. Last previous edition approved in 20092016 as
E1085 – 09.E1085 – 16. DOI: 10.1520/E1085-16.10.1520/E1085-22.
Copyright © ASTM International, 100 Barr Harbor Drive, PO Box C700, West Conshohocken, PA 19428-2959. United States
E1085 − 22
2. Referenced Documents
2.1 ASTM Standards:
E29 Practice for Using Significant Digits in Test Data to Determine Conformance with Specifications
E135 Terminology Relating to Analytical Chemistry for Metals, Ores, and Related Materials
E691 Practice for Conducting an Interlaboratory Study to Determine the Precision of a Test Method
E1361 Guide for Correction of Interelement Effects in X-Ray Spectrometric Analysis
E1621 Guide for Elemental Analysis by Wavelength Dispersive X-Ray Fluorescence Spectrometry
E2857 Guide for Validating Analytical Methods
3. Terminology
3.1 For definitions of terms used in this test method, refer to Terminology E135.
4. Summary of Test Method
4.1 The test specimen is finished to a clean uniform surface and then irradiated with a primary X-ray beam of high energy. The
secondary X-rays produced are dispersed by means of crystals, and the intensities (also called count rates) are measured by suitable
detectors at selected wavelengths. Radiation measurements are made based on the time required to reach a fixed number of counts,
or on the total counts obtained for a fixed time. Mass fractions of the elements are determined by relating the measured intensities
from unknown specimens to analytical curves calibrations prepared withusing suitable reference materials. Either a fixed-channel,
fixed channel, polychromator system or a sequential, wavelength dispersive monochromator system may be used to provide
simultaneous or sequential determinations of elements, respectively.
5. Significance and Use
5.1 This test method is suitable for manufacturing control and for verifying that a product meets specifications. This test method
provides rapid, multi-element determinations with sufficient accuracy to ensure product quality and to minimize production delays.
The analytical performance data may be used as a benchmark to determine if similar X-ray spectrometers provide equivalent
precision and accuracy, or if the performance of a particular X-ray spectrometer has changed.
5.2 Calcium is sometimes added to steel to affect inclusion shape to enhancewhich enhances certain mechanical properties of steel.
This test method is useful for determining the residual calcium in the steel after such treatment.
5.2.1 Because calcium occurs primarily in inclusions, the precision of this test method is a function of the distribution of the
calcium-bearing inclusions in the steel. The variation of determinations on freshly prepared surfaces will give some indication of
the distribution of these inclusions.
6. Interferences
6.1 Interelement or matrix effects may exist for some elements in 1.1. Mathematical corrections may be used to compensate for
these effects. Various mathematical correction procedures are commonly utilized. See Guide E1361 and Guide E1621. Any of these
procedures is acceptable that will achieve analytical accuracy equivalent to that provided by this test method.
6.2 Spectroscopic interferences or line overlaps may be observed, if the energy resolution of the measurement conditions of the
X-ray fluorescence lines present is insufficient. Mathematical corrections may be used to calibrate the overlaps and perform
corrections. See Guide E1621.
6.3 Because trace amounts of calcium are being determined with this test method, exercise care not to contaminate the specimen.
Calcium in the grinding medium will contaminate the specimen to the extent that causing erratic and incorrect results will be
obtained. results. Therefore, the grinding medium shall be analyzed for calcium, and only materials that are free of calcium shall
be used.
For referenced ASTM standards, visit the ASTM website, www.astm.org, or contact ASTM Customer Service at service@astm.org. For Annual Book of ASTM Standards
volume information, refer to the standard’s Document Summary page on the ASTM website.
E1085 − 22
7. Apparatus
7.1 Specimen Preparation Equipment:
7.1.1 Surface Grinder or Sander with Abrasive Belts, Disks, or Lathe, capable of providing a flat, uniform surface on the reference
materials and test specimens.
7.1.1.1 When calcium is to be determined, 240-grit, calcium-free silicon carbide belts or disks shall be used.
7.2 Wavelength Dispersive Spectrometer, designed for X-ray fluorescence analysis, and equipped with specimen holders and a
specimen chamber. The chamber may contain a specimen spinner,spinner and must be equipped for vacuum or helium-flushed
operation for the determination of elements of atomic number 20 (calcium) or lower.
7.2.1 X-Ray Tubes, with targets of various high-purity elements, that are capable of continuous operation at required potentials and
currents, and will excite the elements to be determined.
7.2.1.1 For the determination of calcium, only chromium target tubes were tested. Other targets may be used provided they
produce data that meets the precision and bias in Section 16.
7.2.2 Analyzing Crystals, flat or curved crystals with optimized capability for the diffraction of the wavelengths of interest.
7.2.3 Collimator, for limiting the characteristic X-rays to a parallel bundle when flat crystals are used. Curved crystals do not
require a collimator.
7.2.4 Detectors, sealed or gas-flow proportional-type, scintillation counters, or equivalent.
7.2.5 Vacuum System, providing for the determination of elements whose radiation is absorbed by air, atomic number 20 (calcium)
or lower. The system shall consist of a vacuum pump, gage, and electrical controls to provide automatic pumpdownevacuation of
the optical path and maintain a controlled pressure, usually 13 Pa (100 μm Hg) or less, controlled to 6 3 Pa (6 20 μm Hg).
8. Reagents and Materials
8.1 Detector Gas (P-10), consisting of a mixture of 90 % argon and 10 % methane, only for use with gas-flow proportional
counters only. counters.
9. Reference Materials
9.1 Certified Reference Materials are available from national metrology institutes, other government organizations, and
commercial suppliers.
9.2 Reference Materials with matrices similar to that of the test specimen and containing varying amounts of the elements to be
determined may be used provided they have been chemically analyzed in using valid, independent test methods. These reference
materials shall be homogeneous, and free of voids or porosity.
9.3 The reference materials shall cover the mass fraction ranges of the elements being sought. A minimum of three reference
materials shall be used for each element. When correction factors for matrix effects and spectroscopic interferences are to be
calculated from the empirical data as calibration parameters, at least one additional reference material is needed for each correction
parameter. Refer to Guide E1361 and Guide E1621.
NOTE 1—Calculation of correction factors for matrix effects and spectroscopic interferences from X-ray theory can be used to reduce the number of
reference materials required for calibration.
10. Hazards
10.1 U.S Nuclear Regulatory Commission Standards for ionizing radiation as found in the Code of Federal Regulations 10 CFR
Part 19, “Notices, Instructions and Reports to Workers: Inspection and Investigations” and 10 CFR Part 20, ”Standards for
E1085 − 22
Protection Against Radiation” shall be observed at all X-ray emission spectrometer installations in the U.S. It is also
recommended that operating and maintenance personnel follow the guidelines of safe operating procedures given in similar
handbooks on radiation safety.
10.2 Exposure to excessive quantities of high energy radiation such as those produced by X-ray spectrometers is injurious to
health. The operator should take appropriate actions to avoid exposing any part of their body, not only to primary X-rays, but also
to secondary or scattered radiation that might be present. The X-ray spectrometer should be operated in accordance with
regulations governing the use of ionizing radiation. During manufacturing, manufacturers of X-ray fluorescence spectrometers
generally build into X-ray equipment appropriate shielding and safety interlocks that minimize the risk of excessive radiation
exposure to operators. Operators should not attempt to bypass or defeat these safety devices. Only authorized personnel should
service X-ray spectrometers.
11. Preparation of Reference Materials and Test Specimens
11.1 Prepare the reference materials and test specimens to provide a clean, flat uniform surface to be exposed to the X-ray beam.
For abrasive sanding, select a grit size, and use that grit and size exclusively for all reference materials and test specimens.
Aluminum oxide and zirconium oxide belts and discs with a grit size of between 60 and 180 have been found suitable.
11.2 Refinish the surfaces of the reference materials and test specimens as needed to eliminate surface contamination.
12. Preparation of Apparatus
12.1 Prepare and operate the spectrometer in accordance with the manufacturer’s instructions.
NOTE 2—It is not within the scope of this test method to prescribe minute details relative to the preparation of the apparatus. For a des
...
Questions, Comments and Discussion
Ask us and Technical Secretary will try to provide an answer. You can facilitate discussion about the standard in here.
Loading comments...