ASTM C539-84(2016)
(Test Method)Standard Test Method for Linear Thermal Expansion of Porcelain Enamel and Glaze Frits and Ceramic Whiteware Materials by Interferometric Method
Standard Test Method for Linear Thermal Expansion of Porcelain Enamel and Glaze Frits and Ceramic Whiteware Materials by Interferometric Method
SIGNIFICANCE AND USE
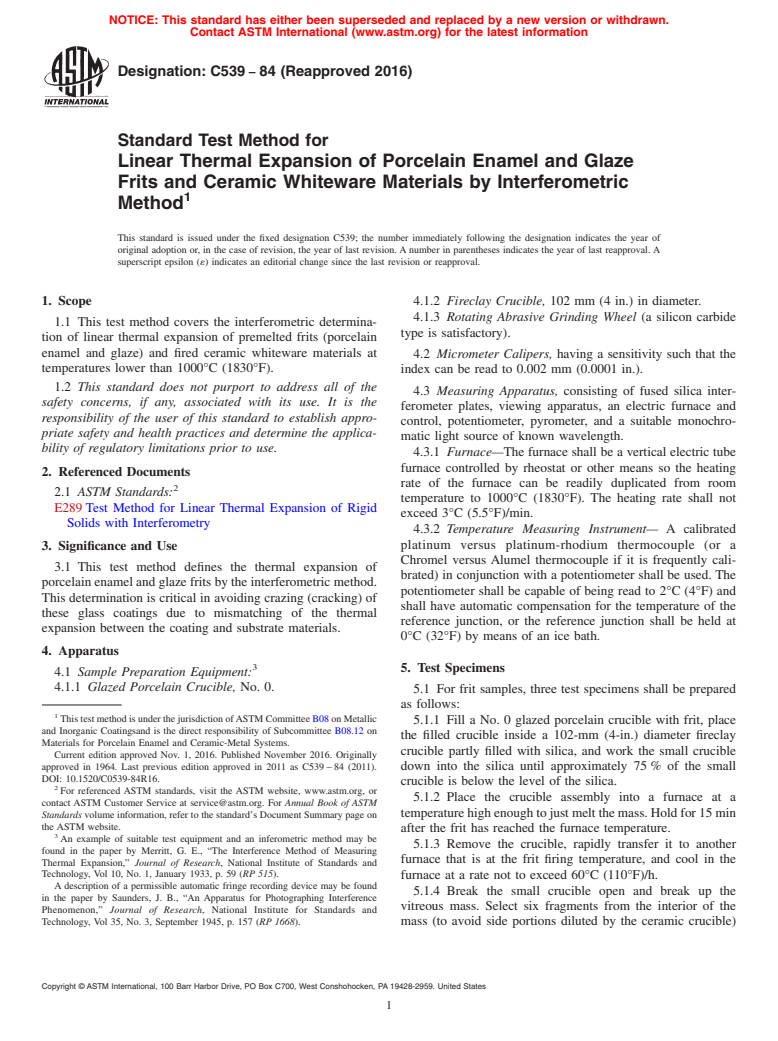
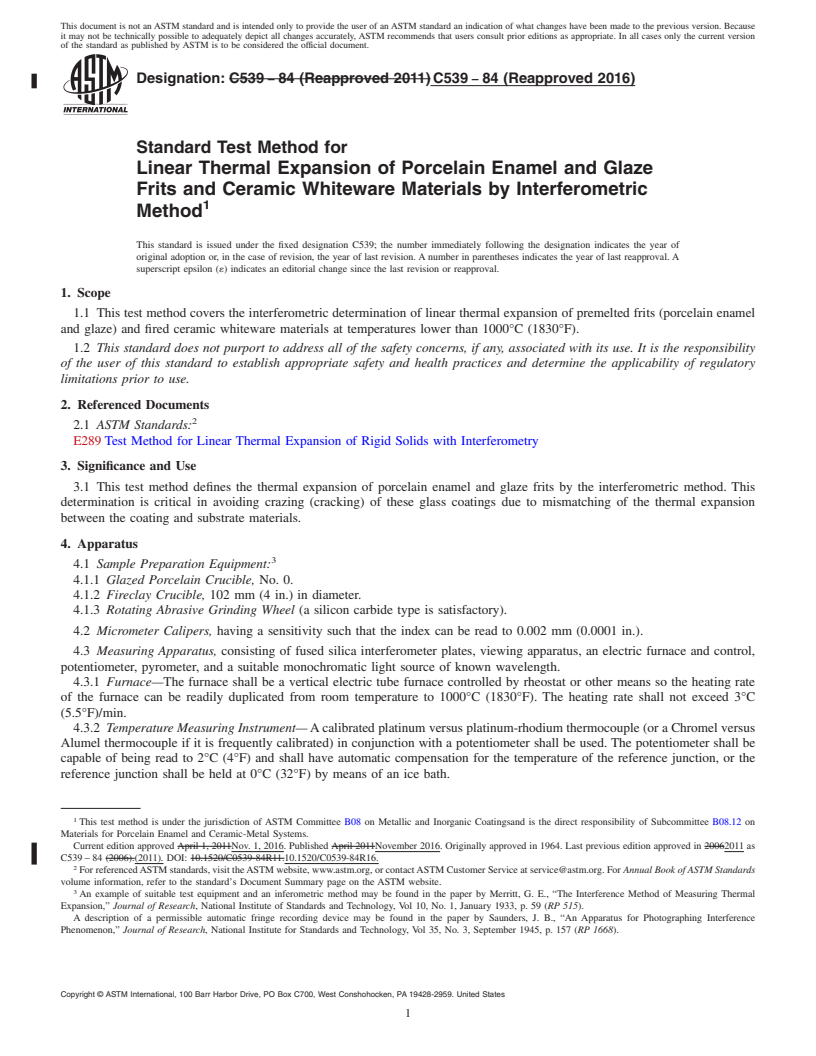
3.1 This test method defines the thermal expansion of porcelain enamel and glaze frits by the interferometric method. This determination is critical in avoiding crazing (cracking) of these glass coatings due to mismatching of the thermal expansion between the coating and substrate materials.
SCOPE
1.1 This test method covers the interferometric determination of linear thermal expansion of premelted frits (porcelain enamel and glaze) and fired ceramic whiteware materials at temperatures lower than 1000°C (1830°F).
1.2 This standard does not purport to address all of the safety concerns, if any, associated with its use. It is the responsibility of the user of this standard to establish appropriate safety and health practices and determine the applicability of regulatory limitations prior to use.
General Information
Buy Standard
Standards Content (Sample)
NOTICE: This standard has either been superseded and replaced by a new version or withdrawn.
Contact ASTM International (www.astm.org) for the latest information
Designation: C539 − 84 (Reapproved 2016)
Standard Test Method for
Linear Thermal Expansion of Porcelain Enamel and Glaze
Frits and Ceramic Whiteware Materials by Interferometric
1
Method
This standard is issued under the fixed designation C539; the number immediately following the designation indicates the year of
original adoption or, in the case of revision, the year of last revision. A number in parentheses indicates the year of last reapproval. A
superscript epsilon (´) indicates an editorial change since the last revision or reapproval.
1. Scope 4.1.2 Fireclay Crucible, 102 mm (4 in.) in diameter.
4.1.3 Rotating Abrasive Grinding Wheel (a silicon carbide
1.1 This test method covers the interferometric determina-
type is satisfactory).
tion of linear thermal expansion of premelted frits (porcelain
enamel and glaze) and fired ceramic whiteware materials at
4.2 Micrometer Calipers, having a sensitivity such that the
temperatures lower than 1000°C (1830°F).
index can be read to 0.002 mm (0.0001 in.).
1.2 This standard does not purport to address all of the
4.3 Measuring Apparatus, consisting of fused silica inter-
safety concerns, if any, associated with its use. It is the
ferometer plates, viewing apparatus, an electric furnace and
responsibility of the user of this standard to establish appro-
control, potentiometer, pyrometer, and a suitable monochro-
priate safety and health practices and determine the applica-
matic light source of known wavelength.
bility of regulatory limitations prior to use.
4.3.1 Furnace—The furnace shall be a vertical electric tube
furnace controlled by rheostat or other means so the heating
2. Referenced Documents
rate of the furnace can be readily duplicated from room
2
2.1 ASTM Standards:
temperature to 1000°C (1830°F). The heating rate shall not
E289 Test Method for Linear Thermal Expansion of Rigid
exceed 3°C (5.5°F)/min.
Solids with Interferometry
4.3.2 Temperature Measuring Instrument— A calibrated
platinum versus platinum-rhodium thermocouple (or a
3. Significance and Use
Chromel versus Alumel thermocouple if it is frequently cali-
3.1 This test method defines the thermal expansion of
brated) in conjunction with a potentiometer shall be used. The
porcelain enamel and glaze frits by the interferometric method.
potentiometer shall be capable of being read to 2°C (4°F) and
This determination is critical in avoiding crazing (cracking) of
shall have automatic compensation for the temperature of the
these glass coatings due to mismatching of the thermal
reference junction, or the reference junction shall be held at
expansion between the coating and substrate materials.
0°C (32°F) by means of an ice bath.
4. Apparatus
3
5. Test Specimens
4.1 Sample Preparation Equipment:
4.1.1 Glazed Porcelain Crucible, No. 0.
5.1 For frit samples, three test specimens shall be prepared
as follows:
1
This test method is under the jurisdiction ofASTM Committee B08 on Metallic
5.1.1 Fill a No. 0 glazed porcelain crucible with frit, place
and Inorganic Coatingsand is the direct responsibility of Subcommittee B08.12 on
the filled crucible inside a 102-mm (4-in.) diameter fireclay
Materials for Porcelain Enamel and Ceramic-Metal Systems.
crucible partly filled with silica, and work the small crucible
Current edition approved Nov. 1, 2016. Published November 2016. Originally
approved in 1964. Last previous edition approved in 2011 as C539 – 84 (2011).
down into the silica until approximately 75 % of the small
DOI: 10.1520/C0539-84R16.
crucible is below the level of the silica.
2
For referenced ASTM standards, visit the ASTM website, www.astm.org, or
5.1.2 Place the crucible assembly into a furnace at a
contact ASTM Customer Service at service@astm.org. For Annual Book of ASTM
Standards volume information, refer to the standard’s Document Summary page on temperaturehighenoughtojustmeltthemass.Holdfor15min
the ASTM website.
after the frit has reached the furnace temperature.
3
An example of suitable test equipment and an inferometric method may be
5.1.3 Remove the crucible, rapidly transfer it to another
found in the paper by Merritt, G. E., “The Interference Method of Measuring
furnace that is at the frit firing temperature, and cool in the
Thermal Expansion,” Journal of Research, National Institute of Standards and
Technology, Vol 10, No. 1, January 1933, p. 59 (RP 515).
furnace at a rate not to exceed 60°C (110°F)/h.
A description of a permissible automatic fringe recording device may be found
5.1.4 Break the small crucible open and break up the
in the paper by Saunders, J. B., “An Apparatus for Photographing Interference
vitreous mass. Select six fragments from the interior of the
Phenomenon,” Journal of Research, National Institute for Standards and
Technology, Vol 35, No. 3, September 1945, p. 157 (RP 1668). mass (to avoid side portions diluted
...
This document is not an ASTM standard and is intended only to provide the user of an ASTM standard an indication of what changes have been made to the previous version. Because
it may not be technically possible to adequately depict all changes accurately, ASTM recommends that users consult prior editions as appropriate. In all cases only the current version
of the standard as published by ASTM is to be considered the official document.
Designation: C539 − 84 (Reapproved 2011) C539 − 84 (Reapproved 2016)
Standard Test Method for
Linear Thermal Expansion of Porcelain Enamel and Glaze
Frits and Ceramic Whiteware Materials by Interferometric
1
Method
This standard is issued under the fixed designation C539; the number immediately following the designation indicates the year of
original adoption or, in the case of revision, the year of last revision. A number in parentheses indicates the year of last reapproval. A
superscript epsilon (´) indicates an editorial change since the last revision or reapproval.
1. Scope
1.1 This test method covers the interferometric determination of linear thermal expansion of premelted frits (porcelain enamel
and glaze) and fired ceramic whiteware materials at temperatures lower than 1000°C (1830°F).
1.2 This standard does not purport to address all of the safety concerns, if any, associated with its use. It is the responsibility
of the user of this standard to establish appropriate safety and health practices and determine the applicability of regulatory
limitations prior to use.
2. Referenced Documents
2
2.1 ASTM Standards:
E289 Test Method for Linear Thermal Expansion of Rigid Solids with Interferometry
3. Significance and Use
3.1 This test method defines the thermal expansion of porcelain enamel and glaze frits by the interferometric method. This
determination is critical in avoiding crazing (cracking) of these glass coatings due to mismatching of the thermal expansion
between the coating and substrate materials.
4. Apparatus
3
4.1 Sample Preparation Equipment:
4.1.1 Glazed Porcelain Crucible, No. 0.
4.1.2 Fireclay Crucible, 102 mm (4 in.) in diameter.
4.1.3 Rotating Abrasive Grinding Wheel (a silicon carbide type is satisfactory).
4.2 Micrometer Calipers, having a sensitivity such that the index can be read to 0.002 mm (0.0001 in.).
4.3 Measuring Apparatus, consisting of fused silica interferometer plates, viewing apparatus, an electric furnace and control,
potentiometer, pyrometer, and a suitable monochromatic light source of known wavelength.
4.3.1 Furnace—The furnace shall be a vertical electric tube furnace controlled by rheostat or other means so the heating rate
of the furnace can be readily duplicated from room temperature to 1000°C (1830°F). The heating rate shall not exceed 3°C
(5.5°F)/min.
4.3.2 Temperature Measuring Instrument— A calibrated platinum versus platinum-rhodium thermocouple (or a Chromel versus
Alumel thermocouple if it is frequently calibrated) in conjunction with a potentiometer shall be used. The potentiometer shall be
capable of being read to 2°C (4°F) and shall have automatic compensation for the temperature of the reference junction, or the
reference junction shall be held at 0°C (32°F) by means of an ice bath.
1
This test method is under the jurisdiction of ASTM Committee B08 on Metallic and Inorganic Coatingsand is the direct responsibility of Subcommittee B08.12 on
Materials for Porcelain Enamel and Ceramic-Metal Systems.
Current edition approved April 1, 2011Nov. 1, 2016. Published April 2011November 2016. Originally approved in 1964. Last previous edition approved in 20062011 as
C539 – 84 (2006).(2011). DOI: 10.1520/C0539-84R11.10.1520/C0539-84R16.
2
For referenced ASTM standards, visit the ASTM website, www.astm.org, or contact ASTM Customer Service at service@astm.org. For Annual Book of ASTM Standards
volume information, refer to the standard’s Document Summary page on the ASTM website.
3
An example of suitable test equipment and an inferometric method may be found in the paper by Merritt, G. E., “The Interference Method of Measuring Thermal
Expansion,” Journal of Research, National Institute of Standards and Technology, Vol 10, No. 1, January 1933, p. 59 (RP 515).
A description of a permissible automatic fringe recording device may be found in the paper by Saunders, J. B., “An Apparatus for Photographing Interference
Phenomenon,” Journal of Research, National Institute for Standards and Technology, Vol 35, No. 3, September 1945, p. 157 (RP 1668).
Copyright © ASTM International, 100 Barr Harbor Drive, PO Box C700, West Conshohocken, PA 19428-2959. United States
1
---------------------- Page: 1 ----------------------
C539 − 84 (2016)
5. Test Specimens
5.1 For frit samples, three test specimens shall be prepared as follows:
5.1.1 Fill a No. 0 glazed porcelain crucible with frit, place the filled crucible inside a 102-mm (4-in.) diameter fireclay crucible
partly filled with silica, and work the small crucible down into the silica until approxima
...


Questions, Comments and Discussion
Ask us and Technical Secretary will try to provide an answer. You can facilitate discussion about the standard in here.