ASTM E384-10e2
(Test Method)Standard Test Method for Knoop and Vickers Hardness of Materials
Standard Test Method for Knoop and Vickers Hardness of Materials
SIGNIFICANCE AND USE
4.1 Hardness tests have been found to be very useful for materials evaluation, quality control of manufacturing processes and research and development efforts. Hardness, although empirical in nature, can be correlated to tensile strength for many metals, and is an indicator of wear resistance and ductility.
4.2 Microindentation hardness tests extend testing to materials that are too thin or too small for macroindentation hardness tests. Microindentation hardness tests also allow specific phases or constituents and regions or gradients too small for macroindentation hardness testing to be evaluated.
4.3 Because the Knoop and Vickers hardness will reveal hardness variations that may exist within a material, a single test value may not be representative of the bulk hardness.
The Vickers indenter usually produces a geometrically similar indentation at all test forces. Except for tests at very low forces that produce indentations with diagonals smaller than about 25 μm, the hardness number will be essentially the same as produced by Vickers machines with test forces greater than 1 kgf, as long as the material being tested is reasonably homogeneous. For isotropic materials, the two diagonals of a Vickers indentation are equal in size. Recommendations for low force microindentation testing can be found in Appendix X5.
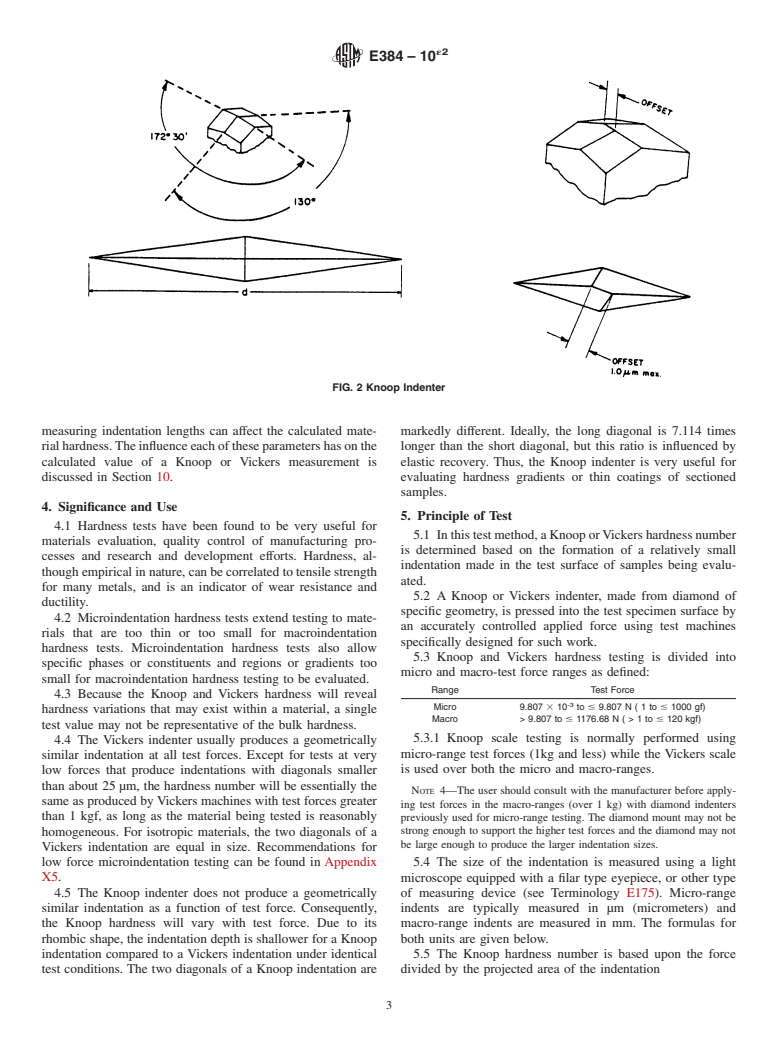
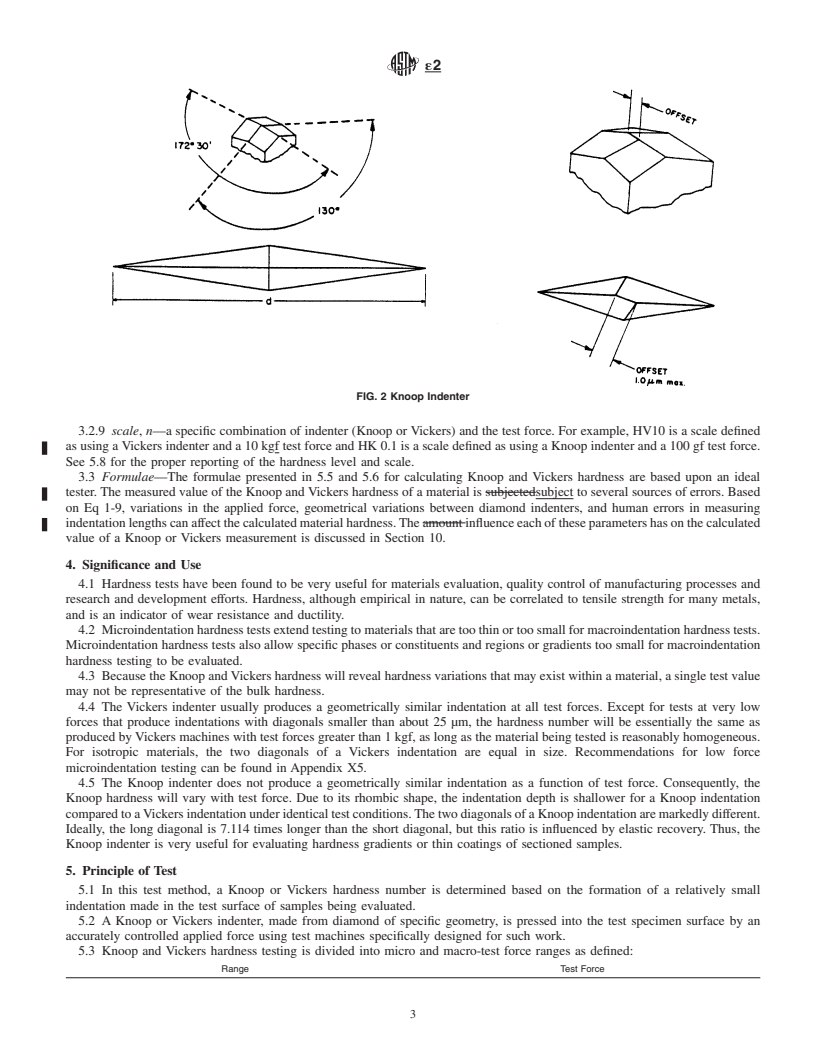
The Knoop indenter does not produce a geometrically similar indentation as a function of test force. Consequently, the Knoop hardness will vary with test force. Due to its rhombic shape, the indentation depth is shallower for a Knoop indentation compared to a Vickers indentation under identical test conditions. The two diagonals of a Knoop indentation are markedly different. Ideally, the long diagonal is 7.114 times longer than the short diagonal, but this ratio is influenced by elastic recovery. Thus, the Knoop indenter is very useful for evaluating hardness gradients or thin coatings of sectioned samples.
SCOPE
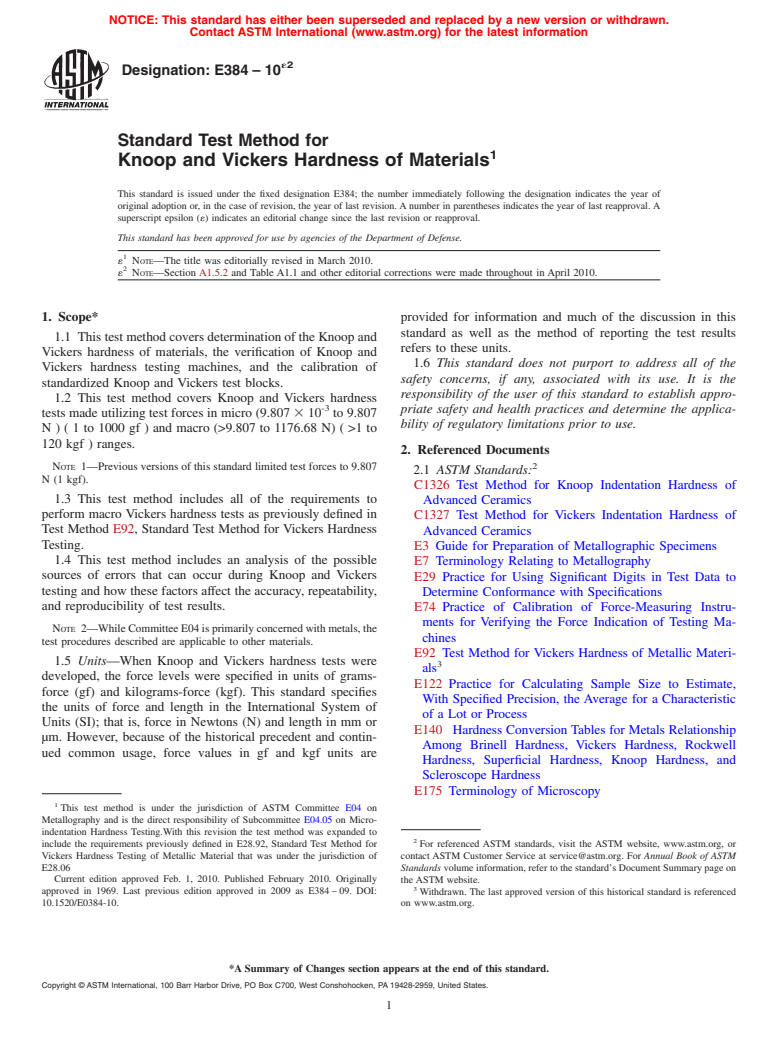
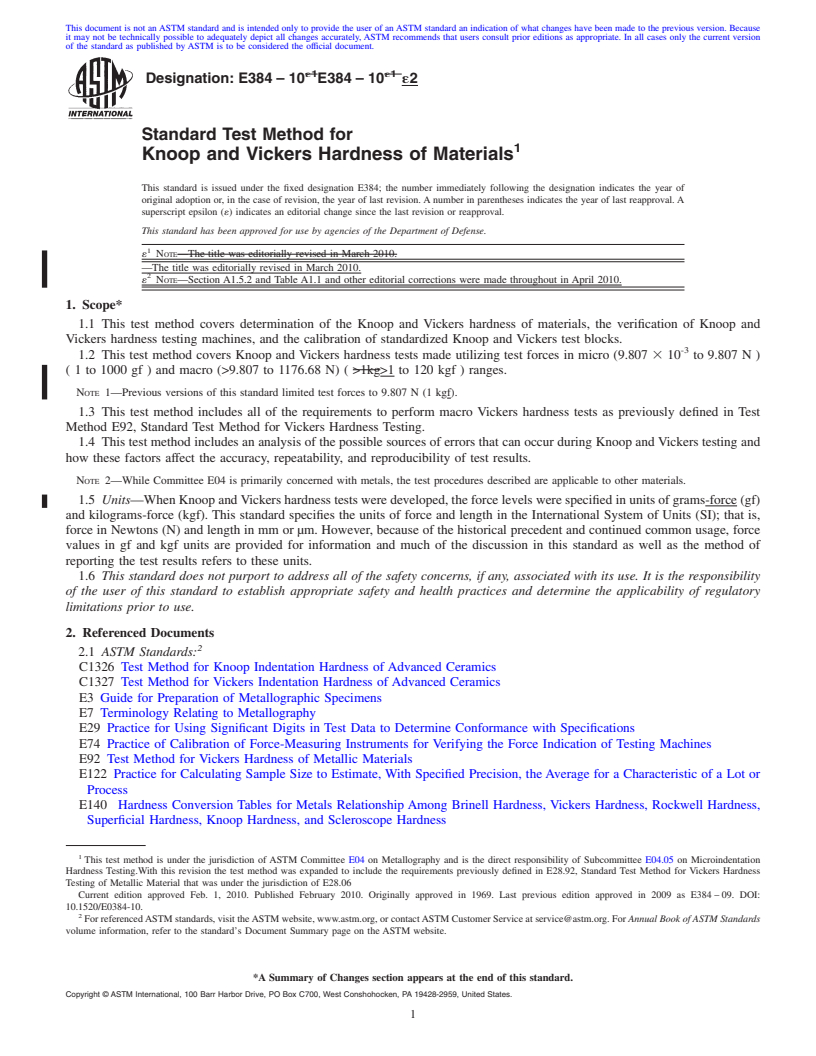
1.1 This test method covers determination of the Knoop and Vickers hardness of materials, the verification of Knoop and Vickers hardness testing machines, and the calibration of standardized Knoop and Vickers test blocks.
1.2 This test method covers Knoop and Vickers hardness tests made utilizing test forces in micro (9.807 × 10⁻³ to 9.807 N ) ( 1 to 1000 gf ) and macro (>9.807 to 1176.68 N) ( >1 to 120 kgf ) ranges.
Note 1—Previous versions of this standard limited test forces to 9.807 N (1 kgf).
1.3 This test method includes all of the requirements to perform macro Vickers hardness tests as previously defined in Test Method E92, Standard Test Method for Vickers Hardness Testing.
1.4 This test method includes an analysis of the possible sources of errors that can occur during Knoop and Vickers testing and how these factors affect the accuracy, repeatability, and reproducibility of test results.
Note 2—While Committee E04 is primarily concerned with metals, the test procedures described are applicable to other materials.
1.5 Units—When Knoop and Vickers hardness tests were developed, the force levels were specified in units of grams-force (gf) and kilograms-force (kgf). This standard specifies the units of force and length in the International System of Units (SI); that is, force in Newtons (N) and length in mm or μm. However, because of the historical precedent and continued common usage, force values in gf and kgf units are provided for information and much of the discussion in this standard as well as the method of reporting the test results refers to these units.
1.6 This standard does not purport to address all of the safety concerns, if any, associated with its use. It is the responsibility of the user of this standard to establish appropriate safety and health practices and determine the applicability of regulatory limitations prior to use.
General Information
Buy Standard
Standards Content (Sample)
NOTICE: This standard has either been superseded and replaced by a new version or withdrawn.
Contact ASTM International (www.astm.org) for the latest information
´2
Designation: E384 – 10
Standard Test Method for
1
Knoop and Vickers Hardness of Materials
This standard is issued under the fixed designation E384; the number immediately following the designation indicates the year of
original adoption or, in the case of revision, the year of last revision. A number in parentheses indicates the year of last reapproval. A
superscript epsilon (´) indicates an editorial change since the last revision or reapproval.
This standard has been approved for use by agencies of the Department of Defense.
1
´ NOTE—The title was editorially revised in March 2010.
2
´ NOTE—Section A1.5.2 and Table A1.1 and other editorial corrections were made throughout in April 2010.
1. Scope* provided for information and much of the discussion in this
standard as well as the method of reporting the test results
1.1 This test method covers determination of the Knoop and
refers to these units.
Vickers hardness of materials, the verification of Knoop and
1.6 This standard does not purport to address all of the
Vickers hardness testing machines, and the calibration of
safety concerns, if any, associated with its use. It is the
standardized Knoop and Vickers test blocks.
responsibility of the user of this standard to establish appro-
1.2 This test method covers Knoop and Vickers hardness
-3
priate safety and health practices and determine the applica-
tests made utilizing test forces in micro (9.807 3 10 to 9.807
bility of regulatory limitations prior to use.
N)(1to 1000 gf ) and macro (>9.807 to 1176.68 N) ( >1 to
120 kgf ) ranges.
2. Referenced Documents
2
NOTE 1—Previous versions of this standard limited test forces to 9.807
2.1 ASTM Standards:
N (1 kgf).
C1326 Test Method for Knoop Indentation Hardness of
1.3 This test method includes all of the requirements to
Advanced Ceramics
perform macro Vickers hardness tests as previously defined in
C1327 Test Method for Vickers Indentation Hardness of
Test Method E92, Standard Test Method for Vickers Hardness
Advanced Ceramics
Testing.
E3 Guide for Preparation of Metallographic Specimens
1.4 This test method includes an analysis of the possible
E7 Terminology Relating to Metallography
sources of errors that can occur during Knoop and Vickers
E29 Practice for Using Significant Digits in Test Data to
testing and how these factors affect the accuracy, repeatability,
Determine Conformance with Specifications
and reproducibility of test results.
E74 Practice of Calibration of Force-Measuring Instru-
ments for Verifying the Force Indication of Testing Ma-
NOTE 2—WhileCommitteeE04isprimarilyconcernedwithmetals,the
chines
test procedures described are applicable to other materials.
E92 Test Method for Vickers Hardness of Metallic Materi-
1.5 Units—When Knoop and Vickers hardness tests were
3
als
developed, the force levels were specified in units of grams-
E122 Practice for Calculating Sample Size to Estimate,
force (gf) and kilograms-force (kgf). This standard specifies
With Specified Precision, the Average for a Characteristic
the units of force and length in the International System of
of a Lot or Process
Units (SI); that is, force in Newtons (N) and length in mm or
E140 Hardness Conversion Tables for Metals Relationship
µm. However, because of the historical precedent and contin-
Among Brinell Hardness, Vickers Hardness, Rockwell
ued common usage, force values in gf and kgf units are
Hardness, Superficial Hardness, Knoop Hardness, and
Scleroscope Hardness
E175 Terminology of Microscopy
1
This test method is under the jurisdiction of ASTM Committee E04 on
Metallography and is the direct responsibility of Subcommittee E04.05 on Micro-
indentation Hardness Testing.With this revision the test method was expanded to
2
include the requirements previously defined in E28.92, Standard Test Method for For referenced ASTM standards, visit the ASTM website, www.astm.org, or
Vickers Hardness Testing of Metallic Material that was under the jurisdiction of contact ASTM Customer Service at service@astm.org. For Annual Book of ASTM
E28.06 Standards volume information, refer to the standard’s Document Summary page on
Current edition approved Feb. 1, 2010. Published February 2010. Originally the ASTM website.
3
approved in 1969. Last previous edition approved in 2009 as E384 – 09. DOI: Withdrawn. The last approved version of this historical standard is referenced
10.1520/E0384-10. on www.astm.org.
*A Summary of Changes section appears at the end of this standard.
Copyright © ASTM International, 100 Barr Harbor Drive, PO Box C700, West Conshohocken, PA 19428-2959, United States.
1
---------------------- Page: 1 ----------------------
´2
E384 – 10
-3
E177 Practice for Use of the Terms Precision and Bias in evaluated, in which the test forces are 9.807 3 10 to 9.807 N
ASTM Test Methods (1 to 1000 gf) and the indentation diagonal,
...
This document is not anASTM standard and is intended only to provide the user of anASTM standard an indication of what changes have been made to the previous version. Because
it may not be technically possible to adequately depict all changes accurately, ASTM recommends that users consult prior editions as appropriate. In all cases only the current version
of the standard as published by ASTM is to be considered the official document.
´1 ´1
Designation: E384 – 10 E384 – 10 ´2
Standard Test Method for
1
Knoop and Vickers Hardness of Materials
This standard is issued under the fixed designation E384; the number immediately following the designation indicates the year of
original adoption or, in the case of revision, the year of last revision. A number in parentheses indicates the year of last reapproval. A
superscript epsilon (´) indicates an editorial change since the last revision or reapproval.
This standard has been approved for use by agencies of the Department of Defense.
1
´ NOTE—The title was editorially revised in March 2010.
—The title was editorially revised in March 2010.
2
´ NOTE—Section A1.5.2 and Table A1.1 and other editorial corrections were made throughout in April 2010.
1. Scope*
1.1 This test method covers determination of the Knoop and Vickers hardness of materials, the verification of Knoop and
Vickers hardness testing machines, and the calibration of standardized Knoop and Vickers test blocks.
-3
1.2 This test method covers Knoop and Vickers hardness tests made utilizing test forces in micro (9.807 3 10 to 9.807 N )
( 1 to 1000 gf ) and macro (>9.807 to 1176.68 N) ( >1kg>1 to 120 kgf ) ranges.
NOTE 1—Previous versions of this standard limited test forces to 9.807 N (1 kgf).
1.3 This test method includes all of the requirements to perform macro Vickers hardness tests as previously defined in Test
Method E92, Standard Test Method for Vickers Hardness Testing.
1.4 This test method includes an analysis of the possible sources of errors that can occur during Knoop and Vickers testing and
how these factors affect the accuracy, repeatability, and reproducibility of test results.
NOTE 2—While Committee E04 is primarily concerned with metals, the test procedures described are applicable to other materials.
1.5 Units—When Knoop andVickers hardness tests were developed, the force levels were specified in units of grams-force (gf)
and kilograms-force (kgf). This standard specifies the units of force and length in the International System of Units (SI); that is,
force in Newtons (N) and length in mm or µm. However, because of the historical precedent and continued common usage, force
values in gf and kgf units are provided for information and much of the discussion in this standard as well as the method of
reporting the test results refers to these units.
1.6 This standard does not purport to address all of the safety concerns, if any, associated with its use. It is the responsibility
of the user of this standard to establish appropriate safety and health practices and determine the applicability of regulatory
limitations prior to use.
2. Referenced Documents
2
2.1 ASTM Standards:
C1326 Test Method for Knoop Indentation Hardness of Advanced Ceramics
C1327 Test Method for Vickers Indentation Hardness of Advanced Ceramics
E3 Guide for Preparation of Metallographic Specimens
E7 Terminology Relating to Metallography
E29 Practice for Using Significant Digits in Test Data to Determine Conformance with Specifications
E74 Practice of Calibration of Force-Measuring Instruments for Verifying the Force Indication of Testing Machines
E92 Test Method for Vickers Hardness of Metallic Materials
E122 Practice for Calculating Sample Size to Estimate, With Specified Precision, the Average for a Characteristic of a Lot or
Process
E140 Hardness Conversion Tables for Metals Relationship Among Brinell Hardness, Vickers Hardness, Rockwell Hardness,
Superficial Hardness, Knoop Hardness, and Scleroscope Hardness
1
This test method is under the jurisdiction of ASTM Committee E04 on Metallography and is the direct responsibility of Subcommittee E04.05 on Microindentation
Hardness Testing.With this revision the test method was expanded to include the requirements previously defined in E28.92, Standard Test Method for Vickers Hardness
Testing of Metallic Material that was under the jurisdiction of E28.06
Current edition approved Feb. 1, 2010. Published February 2010. Originally approved in 1969. Last previous edition approved in 2009 as E384 – 09. DOI:
10.1520/E0384-10.
2
For referencedASTM standards, visit theASTM website, www.astm.org, or contactASTM Customer Service at service@astm.org. For Annual Book of ASTM Standards
volume information, refer to the standard’s Document Summary page on the ASTM website.
*A Summary of Changes section appears at the end of this standard.
Copyright © ASTM International, 100 Barr Harbor Drive, PO Box C700, West Conshohocken, PA 19428-2959, United States.
1
---------------------- Page: 1 ------------
...


Questions, Comments and Discussion
Ask us and Technical Secretary will try to provide an answer. You can facilitate discussion about the standard in here.