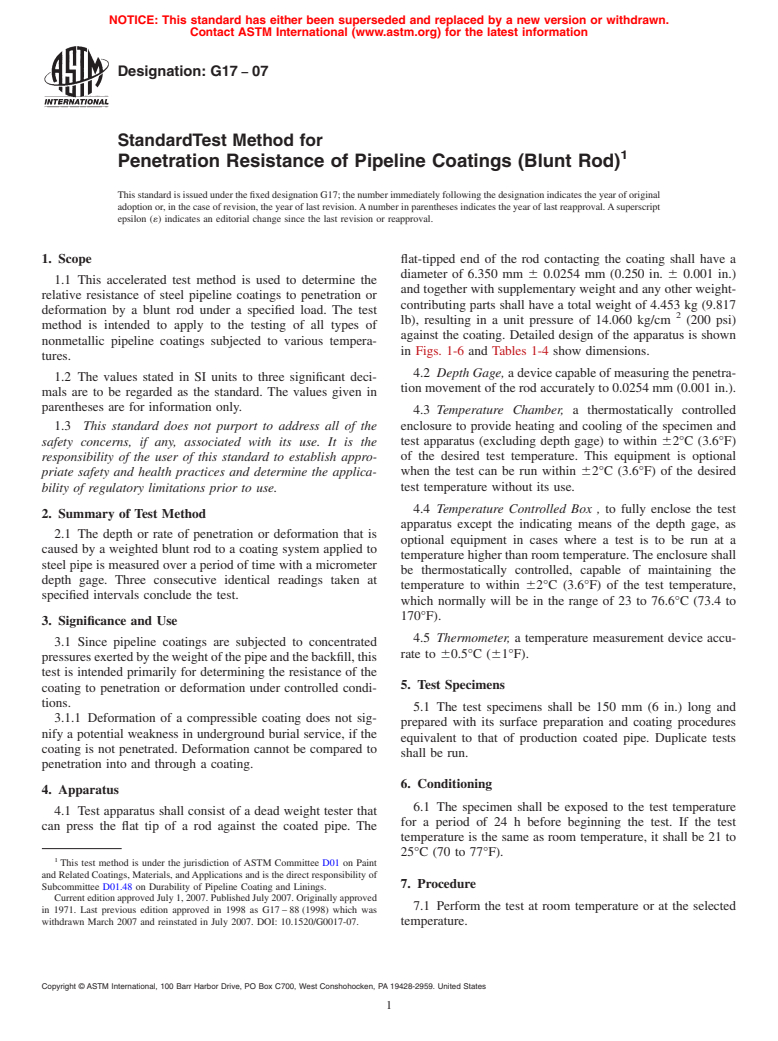
ASTM G17-07
(Test Method)Standard Test Method for Penetration Resistance of Pipeline Coatings (Blunt Rod)
Standard Test Method for Penetration Resistance of Pipeline Coatings (Blunt Rod)
SIGNIFICANCE AND USE
Since pipeline coatings are subjected to concentrated pressures exerted by the weight of the pipe and the backfill, this test is intended primarily for determining the resistance of the coating to penetration or deformation under controlled conditions.
3.1.1 Deformation of a compressible coating does not signify a potential weakness in underground burial service, if the coating is not penetrated. Deformation cannot be compared to penetration into and through a coating.
SCOPE
1.1 This accelerated test method is used to determine the relative resistance of steel pipeline coatings to penetration or deformation by a blunt rod under a specified load. The test method is intended to apply to the testing of all types of nonmetallic pipeline coatings subjected to various temperatures.
1.2 The values stated in SI units to three significant decimals are to be regarded as the standard. The values given in parentheses are for information only.
This standard does not purport to address all of the safety concerns, if any, associated with its use. It is the responsibility of the user of this standard to establish appropriate safety and health practices and determine the applicability of regulatory limitations prior to use.
General Information
Relations
Standards Content (Sample)
NOTICE: This standard has either been superseded and replaced by a new version or withdrawn.
Contact ASTM International (www.astm.org) for the latest information
Designation: G17 − 07
StandardTest Method for
1
Penetration Resistance of Pipeline Coatings (Blunt Rod)
This standard is issued under the fixed designation G17; the number immediately following the designation indicates the year of original
adoption or, in the case of revision, the year of last revision.Anumber in parentheses indicates the year of last reapproval.Asuperscript
epsilon (´) indicates an editorial change since the last revision or reapproval.
1. Scope flat-tipped end of the rod contacting the coating shall have a
diameter of 6.350 mm 6 0.0254 mm (0.250 in. 6 0.001 in.)
1.1 This accelerated test method is used to determine the
and together with supplementary weight and any other weight-
relative resistance of steel pipeline coatings to penetration or
contributing parts shall have a total weight of 4.453 kg (9.817
deformation by a blunt rod under a specified load. The test
2
lb), resulting in a unit pressure of 14.060 kg/cm (200 psi)
method is intended to apply to the testing of all types of
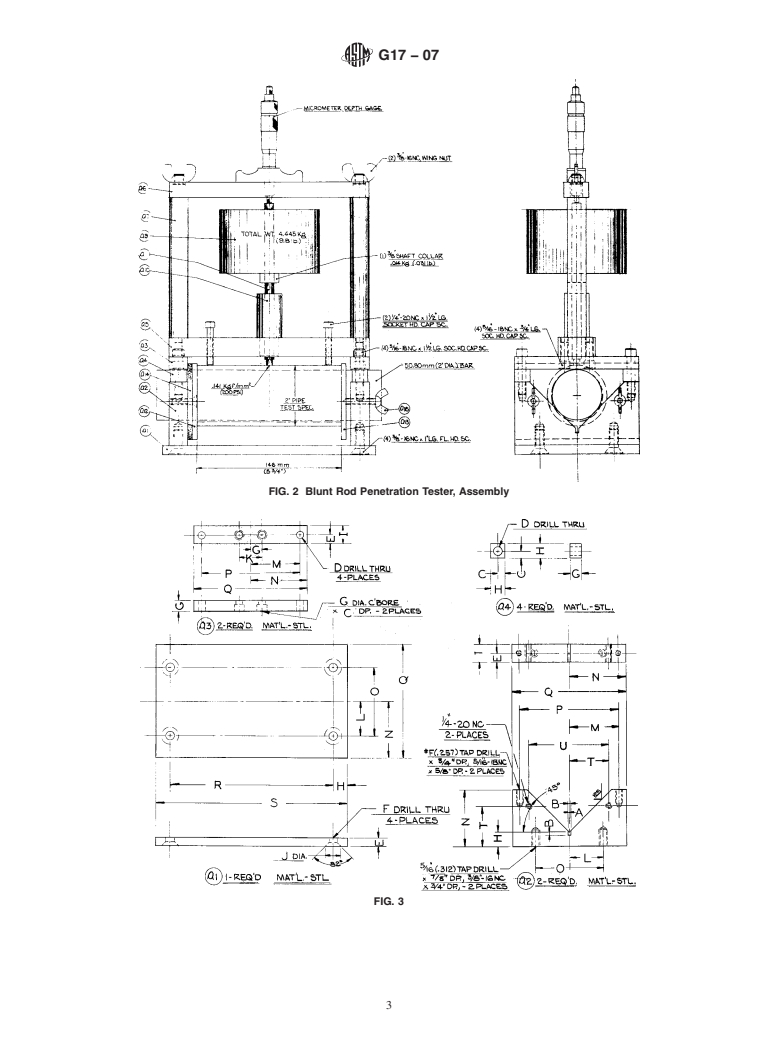
against the coating. Detailed design of the apparatus is shown
nonmetallic pipeline coatings subjected to various tempera-
in Figs. 1-6 and Tables 1-4 show dimensions.
tures.
4.2 Depth Gage, a device capable of measuring the penetra-
1.2 The values stated in SI units to three significant deci-
tion movement of the rod accurately to 0.0254 mm (0.001 in.).
mals are to be regarded as the standard. The values given in
parentheses are for information only.
4.3 Temperature Chamber, a thermostatically controlled
enclosure to provide heating and cooling of the specimen and
1.3 This standard does not purport to address all of the
safety concerns, if any, associated with its use. It is the test apparatus (excluding depth gage) to within 62°C (3.6°F)
of the desired test temperature. This equipment is optional
responsibility of the user of this standard to establish appro-
priate safety and health practices and determine the applica- when the test can be run within 62°C (3.6°F) of the desired
test temperature without its use.
bility of regulatory limitations prior to use.
4.4 Temperature Controlled Box , to fully enclose the test
2. Summary of Test Method
apparatus except the indicating means of the depth gage, as
2.1 The depth or rate of penetration or deformation that is
optional equipment in cases where a test is to be run at a
caused by a weighted blunt rod to a coating system applied to
temperature higher than room temperature. The enclosure shall
steel pipe is measured over a period of time with a micrometer
be thermostatically controlled, capable of maintaining the
depth gage. Three consecutive identical readings taken at
temperature to within 62°C (3.6°F) of the test temperature,
specified intervals conclude the test.
which normally will be in the range of 23 to 76.6°C (73.4 to
170°F).
3. Significance and Use
4.5 Thermometer, a temperature measurement device accu-
3.1 Since pipeline coatings are subjected to concentrated
rate to 60.5°C (61°F).
pressuresexertedbytheweightofthepipeandthebackfill,this
test is intended primarily for determining the resistance of the
5. Test Specimens
coating to penetration or deformation under controlled condi-
tions.
5.1 The test specimens shall be 150 mm (6 in.) long and
3.1.1 Deformation of a compressible coating does not sig-
prepared with its surface preparation and coating procedures
nify a potential weakness in underground burial service, if the
equivalent to that of production coated pipe. Duplicate tests
coating is not penetrated. Deformation cannot be compared to
shall be run.
penetration into and through a coating.
6. Conditioning
4. Apparatus
6.1 The specimen shall be exposed to the test temperature
4.1 Test apparatus shall consist of a dead weight tester that
for a period of 24 h before beginning the test. If the test
can press the flat tip of a rod against the coated pipe. The
temperature is the same as room temperature, it shall be 21 to
25°C (70 to 77°F).
1
This test method is under the jurisdiction of ASTM Committee D01 on Paint
and Related Coatings, Materials, andApplications and is the direct responsibility of
7. Procedure
Subcommittee D01.48 on Durability of Pipeline Coating and Linings.
Current edition approved July 1, 2007. Published July 2007. Originally approved
7.1 Perform the test at room temperature or at the selected
in 1971. Last previous edition approved in 1998 as G17 – 88 (1998) which was
withdrawn March 2007 and reinstated in July 2007. DOI: 10.1520/G0017-07. temperature.
Copyright © ASTM International, 100 Barr Harbor Drive, PO Box C700, West Conshohocken, PA 19428-2959. United States
1
---------------------- Page: 1 ----------------------
G17−07
where:
C = net change,
N
M = final measurement,
F
M = initial measurement,
I
C = percent change, and
P
T = film thickness.
9. Report
9.1 The report shal
...


Questions, Comments and Discussion
Ask us and Technical Secretary will try to provide an answer. You can facilitate discussion about the standard in here.