ASTM E1606-20
(Practice)Standard Practice for Electromagnetic (Eddy Current) Examination of Copper and Aluminum Redraw Rod for Electrical Purposes
Standard Practice for Electromagnetic (Eddy Current) Examination of Copper and Aluminum Redraw Rod for Electrical Purposes
SIGNIFICANCE AND USE
5.1 Eddy current instrumentation provides timely and useful information regarding the acceptability of copper and aluminum rod for quality control purposes, as well as providing for early warning that unacceptable rod is being produced. Eddy current testing is a nondestructive method of locating surface discontinuities in a product. Signals can be produced by discontinuities located on the surface of the rod. Since the density of eddy currents decreases nearly exponentially as the distance from the surface increases, deep-seated defects may be undetected.
5.1.1 An exception is the detection of subsurface ferromagnetic inclusions with an additional, or shared, winding enveloped in a DC magnetic field and the addition of appropriate instrumentation. The coil winding, acting as a transducer, generates a voltage as the magnetized inclusion passes through, providing an electrical signal separate from the eddy current response to surface imperfections. The rod is transparent to the DC effect allowing high sensitivity to ferromagnetic inclusions, in the absence of eddy current noise. The method is inherently speed sensitive but is enhanced by high throughput speeds enabling the detection of small subsurface ferromagnetic inclusions which are particularly detrimental to rod quality.
5.2 Some indications obtained by this practice may not be relevant to product quality. For example, a signal may be caused by minute flaws or irregularities, by anomalies in the material, or a combination thereof, that are not detrimental to the end use of the product. Nonrelevant indications, referred to as “noise,” can mask unacceptable discontinuities. On the other hand, relevant indications are those that may result from unacceptable discontinuities and should be determined by agreement between the user and the supplier. Any indication that is believed to be irrelevant shall be regarded as unacceptable until it is demonstrated by reexamination or other means to be nonrelevant.
SCOPE
1.1 This practice covers the procedures that shall be followed in electromagnetic (eddy current) examination of copper and aluminum redraw rods for detecting discontinuities or imperfections of a severity likely to cause failure or markedly impair surface quality of the rod. These procedures are applicable for continuous lengths of redraw rod in diameters from 1/4 to 13/8 in. (6.4 to 35 mm) suitable for further fabrication into electrical conductors.
1.2 This practice covers redraw rod made from tough-pitch or oxygen-free coppers. It can also be used for other types of copper, such as fire-refined high conductivity rod. It is also appropriate for aluminum and other nonferrous alloys used for electrical purposes.
1.3 The procedures described in this practice are based on methods for making use of differential or absolute stationary encircling annular test coil systems.
1.4 This practice does not establish acceptance criteria. Acceptance criteria must be established by the using parties.
1.5 Units—The values stated in inch-pound units are to be regarded as standard. The values given in parentheses are mathematical conversions to SI units that are provided for information only and are not considered standard.
1.6 This standard does not purport to address all of the safety concerns, if any, associated with its use. It is the responsibility of the user of this standard to establish appropriate safety, health, and environmental practices and determine the applicability of regulatory limitations prior to use.
1.7 This international standard was developed in accordance with internationally recognized principles on standardization established in the Decision on Principles for the Development of International Standards, Guides and Recommendations issued by the World Trade Organization Technical Barriers to Trade (TBT) Committee.
General Information
- Status
- Published
- Publication Date
- 31-May-2020
- Technical Committee
- E07 - Nondestructive Testing
- Drafting Committee
- E07.07 - Electromagnetic Method
Relations
- Effective Date
- 01-Jun-2020
- Effective Date
- 01-Feb-2024
- Effective Date
- 01-Dec-2019
- Effective Date
- 01-Mar-2019
- Effective Date
- 01-Jan-2018
- Effective Date
- 15-Jun-2017
- Effective Date
- 01-Feb-2017
- Effective Date
- 01-Aug-2016
- Effective Date
- 01-Feb-2016
- Effective Date
- 01-Dec-2015
- Effective Date
- 01-Sep-2015
- Effective Date
- 01-Jun-2014
- Effective Date
- 01-Jun-2014
- Effective Date
- 01-Dec-2013
- Effective Date
- 15-Jun-2013
Overview
ASTM E1606-20: Standard Practice for Electromagnetic (Eddy Current) Examination of Copper and Aluminum Redraw Rod for Electrical Purposes provides comprehensive procedures for the nondestructive testing (NDT) of redraw rod materials. This standard outlines best practices for using eddy current examination methods to detect surface discontinuities and certain subsurface imperfections in copper and aluminum rods destined for electrical applications. Its primary goal is to support quality control, ensuring that only rods meeting stringent surface and internal quality criteria progress for further fabrication into electrical conductors.
Key Topics
- Non-Destructive Eddy Current Testing: Eddy current testing is a valuable NDT technique that allows for rapid, real-time evaluation of rod quality without damaging the product. It is especially adept at identifying surface flaws, cracks, and certain types of inclusions.
- Scope and Applicability: The practice applies to continuous lengths of redraw rods (diameters 1/4 to 1 3/8 in.; 6.4 mm to 35 mm) fabricated from tough-pitch, oxygen-free, and fire-refined high conductivity copper, as well as aluminum and other nonferrous alloys used in electrical manufacturing.
- Detection Capabilities and Limitations: Eddy current testing is most sensitive to surface imperfections. Signals from deeper-seated defects decrease rapidly with distance from the surface and may not always be detectable, except for certain ferromagnetic inclusions under specialized conditions.
- System Standardization and Calibration: The standard emphasizes the use of reference rods with known artificial discontinuities to set and verify instrument sensitivity and alarm thresholds, ensuring repeatable and dependable test results.
- Signal Interpretation: Not all detected signals indicate detrimental defects. The practice outlines the importance of interpreting relevant versus nonrelevant signals (noise) and setting acceptance criteria through agreement between supplier and user.
Applications
ASTM E1606-20 is widely utilized in industries involved in the production and quality assessment of copper and aluminum redraw rods, particularly those intended for electrical conductors. Key applications include:
- Quality Assurance: Continuous monitoring during rod production helps ensure only high-quality material is used, minimizing downstream failures and enhancing the reliability of the final electrical conductor.
- Early Detection of Defects: Utilizing eddy current methods provides manufacturers with immediate feedback if unacceptable discontinuities or inclusions are present, allowing timely corrective action.
- Fabrication Readiness: Helps verify that rods meet the requirements for subsequent manufacturing processes such as wire drawing, extrusion, or rolling into conductors.
- Supplier-Manufacturer Agreements: The standard provides a basis for establishing quality expectations and acceptance criteria, supporting clear communication and contractual compliance between stakeholders.
Related Standards
- ASTM E543 - Specification for Agencies Performing Nondestructive Testing: Ensures that organizations conducting NDT are properly qualified.
- ASTM E1316 - Terminology for Nondestructive Examinations: Standard language for consistent communication in NDT processes.
- ASTM E2884 - Guide for Eddy Current Testing of Electrically Conducting Materials Using Conformable Sensor Arrays: Expands applications and techniques for eddy current testing across various materials.
- SNT-TC-1A (ASNT) - Recommended Practice for Personnel Qualification and Certification in NDT: Ensures personnel operating test equipment are fully qualified.
- ISO 9712 - Non-Destructive Testing-Qualification and Certification of NDT Personnel: International standard for personnel competence in NDT methods.
Conclusion
The ASTM E1606-20 standard is a critical document for ensuring the structural integrity and reliability of copper and aluminum redraw rods for electrical uses. By specifying robust eddy current examination protocols, it helps manufacturers identify and address surface and near-surface imperfections early in the production cycle, supporting quality assurance and safe, dependable electrical performance. Its application promotes improved defect detection, supports industry best practices, and provides a common framework for expectations in supplier and end-user agreements.
Buy Documents
ASTM E1606-20 - Standard Practice for Electromagnetic (Eddy Current) Examination of Copper and Aluminum Redraw Rod for Electrical Purposes
REDLINE ASTM E1606-20 - Standard Practice for Electromagnetic (Eddy Current) Examination of Copper and Aluminum Redraw Rod for Electrical Purposes
Get Certified
Connect with accredited certification bodies for this standard

Intertek Testing Services NA Inc.
Intertek certification services in North America.

UL Solutions
Global safety science company with testing, inspection and certification.

ANCE
Mexican certification and testing association.
Sponsored listings
Frequently Asked Questions
ASTM E1606-20 is a standard published by ASTM International. Its full title is "Standard Practice for Electromagnetic (Eddy Current) Examination of Copper and Aluminum Redraw Rod for Electrical Purposes". This standard covers: SIGNIFICANCE AND USE 5.1 Eddy current instrumentation provides timely and useful information regarding the acceptability of copper and aluminum rod for quality control purposes, as well as providing for early warning that unacceptable rod is being produced. Eddy current testing is a nondestructive method of locating surface discontinuities in a product. Signals can be produced by discontinuities located on the surface of the rod. Since the density of eddy currents decreases nearly exponentially as the distance from the surface increases, deep-seated defects may be undetected. 5.1.1 An exception is the detection of subsurface ferromagnetic inclusions with an additional, or shared, winding enveloped in a DC magnetic field and the addition of appropriate instrumentation. The coil winding, acting as a transducer, generates a voltage as the magnetized inclusion passes through, providing an electrical signal separate from the eddy current response to surface imperfections. The rod is transparent to the DC effect allowing high sensitivity to ferromagnetic inclusions, in the absence of eddy current noise. The method is inherently speed sensitive but is enhanced by high throughput speeds enabling the detection of small subsurface ferromagnetic inclusions which are particularly detrimental to rod quality. 5.2 Some indications obtained by this practice may not be relevant to product quality. For example, a signal may be caused by minute flaws or irregularities, by anomalies in the material, or a combination thereof, that are not detrimental to the end use of the product. Nonrelevant indications, referred to as “noise,” can mask unacceptable discontinuities. On the other hand, relevant indications are those that may result from unacceptable discontinuities and should be determined by agreement between the user and the supplier. Any indication that is believed to be irrelevant shall be regarded as unacceptable until it is demonstrated by reexamination or other means to be nonrelevant. SCOPE 1.1 This practice covers the procedures that shall be followed in electromagnetic (eddy current) examination of copper and aluminum redraw rods for detecting discontinuities or imperfections of a severity likely to cause failure or markedly impair surface quality of the rod. These procedures are applicable for continuous lengths of redraw rod in diameters from 1/4 to 13/8 in. (6.4 to 35 mm) suitable for further fabrication into electrical conductors. 1.2 This practice covers redraw rod made from tough-pitch or oxygen-free coppers. It can also be used for other types of copper, such as fire-refined high conductivity rod. It is also appropriate for aluminum and other nonferrous alloys used for electrical purposes. 1.3 The procedures described in this practice are based on methods for making use of differential or absolute stationary encircling annular test coil systems. 1.4 This practice does not establish acceptance criteria. Acceptance criteria must be established by the using parties. 1.5 Units—The values stated in inch-pound units are to be regarded as standard. The values given in parentheses are mathematical conversions to SI units that are provided for information only and are not considered standard. 1.6 This standard does not purport to address all of the safety concerns, if any, associated with its use. It is the responsibility of the user of this standard to establish appropriate safety, health, and environmental practices and determine the applicability of regulatory limitations prior to use. 1.7 This international standard was developed in accordance with internationally recognized principles on standardization established in the Decision on Principles for the Development of International Standards, Guides and Recommendations issued by the World Trade Organization Technical Barriers to Trade (TBT) Committee.
SIGNIFICANCE AND USE 5.1 Eddy current instrumentation provides timely and useful information regarding the acceptability of copper and aluminum rod for quality control purposes, as well as providing for early warning that unacceptable rod is being produced. Eddy current testing is a nondestructive method of locating surface discontinuities in a product. Signals can be produced by discontinuities located on the surface of the rod. Since the density of eddy currents decreases nearly exponentially as the distance from the surface increases, deep-seated defects may be undetected. 5.1.1 An exception is the detection of subsurface ferromagnetic inclusions with an additional, or shared, winding enveloped in a DC magnetic field and the addition of appropriate instrumentation. The coil winding, acting as a transducer, generates a voltage as the magnetized inclusion passes through, providing an electrical signal separate from the eddy current response to surface imperfections. The rod is transparent to the DC effect allowing high sensitivity to ferromagnetic inclusions, in the absence of eddy current noise. The method is inherently speed sensitive but is enhanced by high throughput speeds enabling the detection of small subsurface ferromagnetic inclusions which are particularly detrimental to rod quality. 5.2 Some indications obtained by this practice may not be relevant to product quality. For example, a signal may be caused by minute flaws or irregularities, by anomalies in the material, or a combination thereof, that are not detrimental to the end use of the product. Nonrelevant indications, referred to as “noise,” can mask unacceptable discontinuities. On the other hand, relevant indications are those that may result from unacceptable discontinuities and should be determined by agreement between the user and the supplier. Any indication that is believed to be irrelevant shall be regarded as unacceptable until it is demonstrated by reexamination or other means to be nonrelevant. SCOPE 1.1 This practice covers the procedures that shall be followed in electromagnetic (eddy current) examination of copper and aluminum redraw rods for detecting discontinuities or imperfections of a severity likely to cause failure or markedly impair surface quality of the rod. These procedures are applicable for continuous lengths of redraw rod in diameters from 1/4 to 13/8 in. (6.4 to 35 mm) suitable for further fabrication into electrical conductors. 1.2 This practice covers redraw rod made from tough-pitch or oxygen-free coppers. It can also be used for other types of copper, such as fire-refined high conductivity rod. It is also appropriate for aluminum and other nonferrous alloys used for electrical purposes. 1.3 The procedures described in this practice are based on methods for making use of differential or absolute stationary encircling annular test coil systems. 1.4 This practice does not establish acceptance criteria. Acceptance criteria must be established by the using parties. 1.5 Units—The values stated in inch-pound units are to be regarded as standard. The values given in parentheses are mathematical conversions to SI units that are provided for information only and are not considered standard. 1.6 This standard does not purport to address all of the safety concerns, if any, associated with its use. It is the responsibility of the user of this standard to establish appropriate safety, health, and environmental practices and determine the applicability of regulatory limitations prior to use. 1.7 This international standard was developed in accordance with internationally recognized principles on standardization established in the Decision on Principles for the Development of International Standards, Guides and Recommendations issued by the World Trade Organization Technical Barriers to Trade (TBT) Committee.
ASTM E1606-20 is classified under the following ICS (International Classification for Standards) categories: 29.050 - Superconductivity and conducting materials. The ICS classification helps identify the subject area and facilitates finding related standards.
ASTM E1606-20 has the following relationships with other standards: It is inter standard links to ASTM E1606-15, ASTM E1316-24, ASTM E1316-19b, ASTM E1316-19, ASTM E1316-18, ASTM E1316-17a, ASTM E1316-17, ASTM E1316-16a, ASTM E1316-16, ASTM E1316-15a, ASTM E1316-15, ASTM E1316-14, ASTM E1316-14e1, ASTM E1316-13d, ASTM E1316-13c. Understanding these relationships helps ensure you are using the most current and applicable version of the standard.
ASTM E1606-20 is available in PDF format for immediate download after purchase. The document can be added to your cart and obtained through the secure checkout process. Digital delivery ensures instant access to the complete standard document.
Standards Content (Sample)
This international standard was developed in accordance with internationally recognized principles on standardization established in the Decision on Principles for the
Development of International Standards, Guides and Recommendations issued by the World Trade Organization Technical Barriers to Trade (TBT) Committee.
Designation: E1606 − 20
Standard Practice for
Electromagnetic (Eddy Current) Examination of Copper and
Aluminum Redraw Rod for Electrical Purposes
This standard is issued under the fixed designation E1606; the number immediately following the designation indicates the year of
original adoption or, in the case of revision, the year of last revision. A number in parentheses indicates the year of last reapproval. A
superscript epsilon (´) indicates an editorial change since the last revision or reapproval.
1. Scope* 2. Referenced Documents
1.1 This practice covers the procedures that shall be fol- 2.1 ASTM Standards:
lowed in electromagnetic (eddy current) examination of copper E543 Specification for Agencies Performing Nondestructive
and aluminum redraw rods for detecting discontinuities or Testing
imperfections of a severity likely to cause failure or markedly E1316 Terminology for Nondestructive Examinations
impair surface quality of the rod. These procedures are E2884 Guide for Eddy Current Testing of Electrically Con-
applicable for continuous lengths of redraw rod in diameters ducting Materials Using Conformable Sensor Arrays
1 3
from ⁄4to1 ⁄8in.(6.4to35mm)suitableforfurtherfabrication
2.2 ASNT Documents:
into electrical conductors. SNT-TC-1A Recommended Practice for Personnel Qualifi-
cation and Certification in Nondestructive Testing
1.2 This practice covers redraw rod made from tough-pitch
ANSI/ASNT-CP-189 Standard for Qualification and Certifi-
or oxygen-free coppers. It can also be used for other types of
cation of Nondestructive Testing Personnel
copper, such as fire-refined high conductivity rod. It is also
2.3 AIA Standard:
appropriate for aluminum and other nonferrous alloys used for
NAS 410 Certification and Qualification of Nondestructive
electrical purposes.
Testing Personnel
1.3 The procedures described in this practice are based on
2.4 ISO Standard:
methods for making use of differential or absolute stationary
ISO 9712 Non-Destructive Testing—Qualification and Cer-
encircling annular test coil systems.
tification of NDT Personnel
1.4 This practice does not establish acceptance criteria.
3. Terminology
Acceptance criteria must be established by the using parties.
3.1 Standardterminologyrelatingtoelectromagnetictesting
1.5 Units—The values stated in inch-pound units are to be
may be found in Terminology E1316, Section C: Electromag-
regarded as standard. The values given in parentheses are
netic Testing.
mathematical conversions to SI units that are provided for
information only and are not considered standard.
4. Summary of Practice
1.6 This standard does not purport to address all of the
4.1 The examination is performed by passing the rod
safety concerns, if any, associated with its use. It is the
lengthwise through a differential or absolute coil, or both,
responsibility of the user of this standard to establish appro-
energized with alternating current at a fixed frequency. The
priate safety, health, and environmental practices and deter-
electrical impedance of the test coil is affected by rod
mine the applicability of regulatory limitations prior to use.
vibrations, rod dimensions, electrical conductivity of the rod
1.7 This international standard was developed in accor-
material, and metallurgical or mechanical discontinuities in the
dance with internationally recognized principles on standard-
ization established in the Decision on Principles for the
Development of International Standards, Guides and Recom-
For referenced ASTM standards, visit the ASTM website, www.astm.org, or
mendations issued by the World Trade Organization Technical
contact ASTM Customer Service at service@astm.org. For Annual Book of ASTM
Standards volume information, refer to the standard’s Document Summary page on
Barriers to Trade (TBT) Committee.
the ASTM website.
AvailablefromAmericanSocietyforNondestructiveTesting(ASNT),P.O.Box
28518, 1711 Arlingate Ln., Columbus, OH 43228-0518, http://www.asnt.org.
1 4
This practice is under the jurisdiction of ASTM Committee E07 on Nonde- Available fromAerospace IndustriesAssociation ofAmerica, Inc. (AIA), 1000
structive Testing and is the direct responsibility of Subcommittee E07.07 on WilsonBlvd.,Suite1700,Arlington,VA22209-3928,http://www.aia-aerospace.org.
Electromagnetic Method.
Current edition approved June 1, 2020. Published June 2020. Originally Available from International Organization for Standardization (ISO), ISO
approved in 1994. Last previous edition approved in 2015 as E1606 – 15. DOI: Central Secretariat, BIBC II, Chemin de Blandonnet 8, CP 401, 1214 Vernier,
10.1520/E1606-20. Geneva, Switzerland, http://www.iso.org.
*A Summary of Changes section appears at the end of this standard
Copyright © ASTM International, 100 Barr Harbor Drive, PO Box C700, West Conshohocken, PA 19428-2959. United States
E1606 − 20
rod surface. During passage of the rod, the changes in or standard, such as ANSI/ASNT-CP-189, SNT-TC-1A,
impedance caused by these variables in the rod produce NAS 410, ISO 9712, or a similar document and certified by the
electrical signals that are processed so as to actuate an audio, employer or certifying agency, as applicable. The practice or
visual, or electrical signaling device. These electrical signals standard used and its applicable revision shall be identified in
can also be displayed and stored digitally or used to actuate
the contractual agreement between the using parties.
mechanical markers to produce a record of indications.
6.2 Qualification of Nondestructive Testing Agencies—If
4.2 The relative severity and type of imperfections may be
specified in the contractual agreement, NDT agencies shall be
indicated by eddy current signal amplitude, phase, or both,
qualifiedandevaluatedasdescribedinSpecificationE543.The
with automatic display and recording. Alarm levels can be set
applicable edition of Specification E543 shall be specified in
to provide data for counting and recording of event totals in
the contractual agreement.
various categories, as well as for providing outputs for actuat-
ing other devices. Because the responses from natural discon-
7. Apparatus
tinuities may vary significantly from those of artificial
7.1 Electronic Apparatus, differential or absolute systems
discontinuities, care must be exercised in establishing sensitiv-
(or both) capable of energizing the test coil with alternating
ity and acceptance criteria for the examination.
currents of suitable frequencies (for example, inthe range from
5. Significance and Use
1 kHz to 1 MHz), and capable of sensing the changes in the
electrical impedance of the coils. Electrical signals that are
5.1 Eddycurrentinstrumentationprovidestimelyanduseful
processed so as to actuate an audio, visual, or electrical
information regarding the acceptability of copper and alumi-
signaling device. These electrical signals can also be displayed
num rod for quality control purposes, as well as providing for
and stored digitally or used to actuate mechanical markers to
early warning that unacceptable rod is being produced. Eddy
produce a record of indications.
current testing is a nondestructive method of locating surface
discontinuities in a product. Signals can be produced by 7.1.1 The electronic apparatus should also be able to pro-
discontinuities located on the surface of the rod. Since the vide an electrical signal, either internally or externally, that can
density of eddy currents decreases nearly exponentially as the be used to test the apparatus without having a test coil
distance from the surface increases, deep-seated defects may connected. This electrical signal is used to verify sensitivity
be undetected.
levels and alarm threshold for the apparatus.
5.1.1 An exception is the detection of subsurface ferromag-
7.1.2 The electronic apparatus should have an adjustable
netic inclusions with an additional, or shared, winding envel-
filter that includes in its bandwidth the anticipated flaw signal
oped in a DC magnetic field and the addition of appropriate
frequencies.
instrumentation. The coil winding, acting as a transducer,
7.1.3 The electronic apparatus may have a “filter out”
generatesavoltageasthemagnetizedinclusionpassesthrough,
configuration that allows the adjustable filter to be bypassed
providing an electrical signal separate from the eddy current
during system standardization.
response to surface imperfections. The rod is transparent to the
7.2 Test Coils, capable of inducing currents in the rod and
DC effect allowing high sensitivity to ferromagnetic
sensing changes in the electrical characteristics of the rod. The
inclusions, in the absence of eddy current noise. The method is
test coil diameter should be selected to yield the largest
inherently speed sensitive but is enhanced by high throughput
practical fill factor. The coil assembly, whether differential or
speeds enabling the detection of small subsurface ferromag-
absolute coils, consists of one or more electrical coils, cooling
netic inclusions which are particularly detrimental to rod
apparatus that is adequate to maintain the proper coil-operating
quality.
temperature and prevent thermal damage, if needed, and
5.2 Some indications obtained by this practice may not be
positioning mechanisms for adjusting and maintaining a con-
relevant to product quality. For example, a signal may be
stant spacing between the coil and the rod surface. Some
caused by minute flaws or irregularities, by anomalies in the
assemblies may include mechanical guides to prevent physical
material, or a combination thereof, that are not detrimental to
damage to the coils by contact with the product.
the end use of the product. Nonrelevant indications, referred to
as“noise,”canmaskunacceptablediscontinuities.Ontheother
7.3 Driving Mechanism—An optional mechanical means
hand, relevant indications are those that may result from
may be used for passing the reference standard through the test
unacceptable discontinuities and should be determined by
coil with minimum vibration of the test coil or rod. If used, the
agreement between the user and the supplier. Any indication
mechanical device shall maintain the rod substantially concen-
that is believed to be irrelevant shall be regarded as unaccept-
tric with the electrical center of the test coil. When using an
able until it is demonstrated by reexamination or other means
apparatus that is sensitive to speed variations, a constant speed
to be nonrelevant.
(up to 65.0 % of the actual rod speed) shall be maintained.
When using an apparatus that can be configured to be insen-
6. Basis of Application
sitive to speed variations for the purposes of calibration or
6.1 Personnel Qualification—If specified in the contractual standardization, the reference standard can be moved through
agreement, personnel performing examinations to this practice the test coil manually with the mechanical centering main-
shall be qualified in accordance with a nationally recognized tained by removable, closely fitted bushings. This technique
nondestructive testing (NDT) personnel qualification practice should be utilized by the apparatus supplier as well as the user.
E1606 − 20
8. Reference Standards in a substantially straight line perpendicular to its longitudinal
axis.Thenotchdepthshallbe0.010in.(0.25mm)andshallnot
8.1 Reference standards containing one or more artificial
vary from the prescribed depth by more than 60.001 in.
discontinuity may be used to establish sensitivity and alarm
(60.025 mm) when measured at the center of the notch.
threshold settings to be used during eddy current examination.
8.4.3 The straightness of the rod should not vary more than
Sensitivity and alarm thresholds can be established using a
60.015 in. (60.38 mm) over a 12 in. (305 mm) length.
reference standard with a single artificial discontinuity if the
8.4.4 Diameter variations between the reference standard
instrument is configured to respond only to signal amplitude,
and any other replacements should not vary more than
without regard to phase differences. If phase differences are
60.015 in. (60.38 mm) of the diameter of the rod being
detected and processed, additional artificial notches can be
replaced, that is, between 1.1 and 6 % variation.
included in the reference standard to create and display phase
8.4.5 Electrical discharge machinery (EDM) can be used as
responses.
an alternative to drilling holes or fili
...
This document is not an ASTM standard and is intended only to provide the user of an ASTM standard an indication of what changes have been made to the previous version. Because
it may not be technically possible to adequately depict all changes accurately, ASTM recommends that users consult prior editions as appropriate. In all cases only the current version
of the standard as published by ASTM is to be considered the official document.
Designation: E1606 − 15 E1606 − 20
Standard Practice for
Electromagnetic (Eddy Current) Examination of Copper and
Aluminum Redraw Rod for Electrical Purposes
This standard is issued under the fixed designation E1606; the number immediately following the designation indicates the year of
original adoption or, in the case of revision, the year of last revision. A number in parentheses indicates the year of last reapproval. A
superscript epsilon (´) indicates an editorial change since the last revision or reapproval.
1. Scope*
1.1 This practice covers the procedures that shall be followed in electromagnetic (eddy current) examination of copper and
aluminum redraw rods for detecting discontinuities or imperfections of a severity likely to cause failure or markedly impair surface
1 3
quality of the rod. These procedures are applicable for continuous lengths of redraw rod in diameters from ⁄4 to 1 ⁄8 in. (6.4 to
35 mm) suitable for further fabrication into electrical conductors.
1.2 This practice covers redraw rod made from tough-pitch or oxygen-free coppers. It can also be used for other types of copper,
such as fire-refined high conductivity rod. It is also appropriate for aluminum and other nonferrous alloys used for electrical
purposes.
1.3 The procedures described in this practice are based on methods for making use of differential or absolute stationary
encircling annular test coil systems.
1.4 This practice does not establish acceptance criteria. Acceptance criteria must be established by the using parties.
1.5 Units—The values stated in inch-pound units are to be regarded as the standard. The values given in parentheses are
mathematical conversions to SI units that are provided for information only and are not considered standard.
1.6 This standard does not purport to address all of the safety concerns, if any, associated with its use. It is the responsibility
of the user of this standard to establish appropriate safety safety, health, and healthenvironmental practices and determine the
applicability of regulatory limitations prior to use.
1.7 This international standard was developed in accordance with internationally recognized principles on standardization
established in the Decision on Principles for the Development of International Standards, Guides and Recommendations issued
by the World Trade Organization Technical Barriers to Trade (TBT) Committee.
2. Referenced Documents
2.1 ASTM Standards:
E543 Specification for Agencies Performing Nondestructive Testing
E1316 Terminology for Nondestructive Examinations
E1033 Practice for Electromagnetic (Eddy Current) Examination of Type F-Continuously Welded (CW) Ferromagnetic Pipe and
Tubing Above the Curie Temperature (Withdrawn 2019)
E2884 Guide for Eddy Current Testing of Electrically Conducting Materials Using Conformable Sensor Arrays
2.2 ASNT Documents:
SNT-TC-1A Recommended Practice for Personnel Qualification and Certification in Nondestructive Testing
ANSI/ASNT-CP-189 Standard for Qualification and Certification of Nondestructive Testing Personnel
2.3 AIA Standard:
NAS 410 Certification and Qualification of Nondestructive Testing Personnel
This practice is under the jurisdiction of ASTM Committee E07 on Nondestructive Testing and is the direct responsibility of Subcommittee E07.07 on Electromagnetic
Method.
Current edition approved Dec. 1, 2015June 1, 2020. Published January 2016June 2020. Originally approved in 1994. Last previous edition approved in 20092015 as
E1606 - 09.E1606 – 15. DOI: 10.1520/E1606-15.10.1520/E1606-20.
For referenced ASTM standards, visit the ASTM website, www.astm.org, or contact ASTM Customer Service at service@astm.org. For Annual Book of ASTM Standards
volume information, refer to the standard’s Document Summary page on the ASTM website.
Available from American Society for Nondestructive Testing (ASNT), P.O. Box 28518, 1711 Arlingate Ln., Columbus, OH 43228-0518, http://www.asnt.org.
Available from Aerospace Industries Association of America, Inc. (AIA), 1000 Wilson Blvd., Suite 1700, Arlington, VA 22209-3928, http://www.aia-aerospace.org.
*A Summary of Changes section appears at the end of this standard
Copyright © ASTM International, 100 Barr Harbor Drive, PO Box C700, West Conshohocken, PA 19428-2959. United States
E1606 − 20
2.4 ISO Standard:
ISO 9712 Non-Destructive Testing—Qualification and Certification of NDT Personnel
3. Terminology
3.1 Standard terminology relating to electromagnetic testing may be found in Terminology E1316, Section C: Electromagnetic
Testing.
4. Summary of Practice
4.1 The examination is performed by passing the rod lengthwise through a differential or absolute coil, or both, energized with
alternating current at a fixed frequency. The electrical impedance of the test coil is affected by rod vibrations, rod dimensions,
electrical conductivity of the rod material, and metallurgical or mechanical discontinuities in the rod surface. During passage of
the rod, the changes in impedance caused by these variables in the rod produce electrical signals that are processed so as to actuate
an audio, visual, or electrical signaling device. These electrical signals can also be displayed and stored digitally or used to actuate
mechanical markers to produce a record of indications.
4.2 The relative severity and type of imperfections may be indicated by eddy current signal amplitude, phase, or both, with
automatic display and recording. Alarm levels can be set to provide data for counting and recording of event totals in various
categories, as well as for providing outputs for actuating other devices. Because the responses from natural discontinuities may
vary significantly from those of artificial discontinuities, care must be exercised in establishing sensitivity and acceptance criteria
for the examination.
5. Significance and Use
5.1 Eddy current instrumentation provides timely and useful information regarding the acceptability of copper and aluminum
rod for quality control purposes, as well as providing for early warning that unacceptable rod is being produced. Eddy current
testing is a nondestructive method of locating surface discontinuities in a product. Signals can be produced by discontinuities
located on the surface of the rod. Since the density of eddy currents decreases nearly exponentially as the distance from the surface
increases, deep-seated defects may be undetected.
5.1.1 An exception is the detection of subsurface ferromagnetic inclusions with an additional, or shared, winding enveloped in
a DC magnetic field and the addition of appropriate instrumentation. The coil winding, acting as a transducer, generates a voltage
as the magnetized inclusion passes through, providing an electrical signal separate from the eddy current response to surface
imperfections. The rod is transparent to the DC effect allowing high sensitivity to ferromagnetic inclusions, in the absence of eddy
current noise. The method is inherently speed sensitive but is enhanced by high throughput speeds enabling the detection of small
subsurface ferromagnetic inclusions which are particularly detrimental to rod quality.
5.2 Some indications obtained by this practice may not be relevant to product quality. For example, a signal may be caused by
minute flaws or irregularities, by anomalies in the material, or a combination thereof, that are not detrimental to the end use of the
product. Nonrelevant indications, referred to as “noise,” can mask unacceptable discontinuities. On the other hand, relevant
indications are those that may result from unacceptable discontinuities and should be determined by agreement between the user
and the supplier. Any indication that is believed to be irrelevant shall be regarded as unacceptable until it is demonstrated by
reexamination or other means to be nonrelevant.
6. Basis of Application
6.1 Personnel Qualification—If specified in the contractual agreement, personnel performing examinations to this practice shall
be qualified in accordance with a nationally recognized nondestructive testing (NDT) personnel qualification practice or standard,
such as ANSI/ASNT-CP-189, SNT-TC-1A, NAS-410,NAS 410, ISO 9712, or a similar document and certified by the employer
or certifying agency, as applicable. The practice or standard used and its applicable revision shall be identified in the contractual
agreement between the using parties.
6.2 Qualification of Nondestructive Testing Agencies—If specified in the contractual agreement, NDT agencies shall be qualified
and evaluated as described in PracticeSpecification E543. The applicable edition of PracticeSpecification E543 shall be specified
in the contractual agreement.
7. Apparatus
7.1 Electronic Apparatus, differential or absolute systems (or both) capable of energizing the test coil with alternating currents
of suitable frequencies (for example, in the range from 1 kHz to 1 MHz), and capable of sensing the changes in the electrical
Available from International Organization for Standardization (ISO), ISO Central Secretariat, BIBC II, Chemin de Blandonnet 8, CP 401, 1214 Vernier, Geneva,
Switzerland, http://www.iso.org.
E1606 − 20
impedance of the coils. Electrical signals that are processed so as to actuate an audio, visual, or electrical signaling device. These
electrical signals can also be displayed and stored digitally or used to actuate mechanical markers to produce a record of
indications.
7.1.1 The electronic apparatus should also be able to provide an electrical signal, either internally or externally, that can be used
to test the apparatus without having a test coil connected. This electrical signal is used to verify sensitivity levels and alarm
threshold for the apparatus.
7.1.2 The electronic apparatus should have an adjustable filter that includes in its bandwidth the anticipated flaw signal
frequencies.
7.1.3 The electronic apparatus may have a “filter out” configuration that allows the adjustable filter to be bypassed during
system standardization.
7.2 Test Coils, capable of inducing currents in the rod and sensing changes in the electrical characteristics of the rod. The test
coil diameter should be selected to yield the largest practical fill factor. The coil assembly, whether differential or absolute coils,
consists of one or more electrical coils, cooling apparatus that is adequate to maintain the proper coil-operating temperature and
prevent thermal damage, if needed, and positioning mechanisms for adjusting and maintaining a constant spacing between the coil
and the rod surface. Some assemblies may include mechanical guides to prevent physical damage to the coils by contact with the
product.
7.3 Driving Mechanism—An optional mechanical means may be used for passing the reference standard through the test coil
with minimum vibration of the test coil or rod. If used, the mechanical device shall maintain the rod substantially concentric with
the electrical center of the test coil. When using an apparatus that is sensitive to speed variations, a constant speed (up to 65.0
% of the actual rod speed) shall be maintained. When using an apparatus that can be configured to be insensitive to speed variations
for the purposes of calibration or standardization, the reference standard can be moved through the test coil manually with the
mechanical centering maintained by removable, closely fitted bushings. This technique should be utilized by the apparatus supplier
as well as the user.
8. Reference Standards
8.1 Reference standards containing one or more artificial discontinuity may be used to establish sensitivity and alarm threshold
settings to be used during eddy current examination. Sensitivity and alarm thresholds can be established using a reference standard
with a single artificial discontinuity if the instrument is configured to respond only to signal amplitude, without regard to phase
differences. If phase differences are detected and processed, additional artificial notches can be included in the reference standard
to create and display phase responses.
8.2 Artificial discontinuities are not intended to be representative of natural discontinuities or produce a direct relationship
between instrument response and discontinuity severity; they are intended only for establishing consistent sensitivity levels as
outlined in Section 9. The relationship between instrument response and discontinuity size, shape, and location is important and
should be established separately, particularly as related to the excitation frequency.
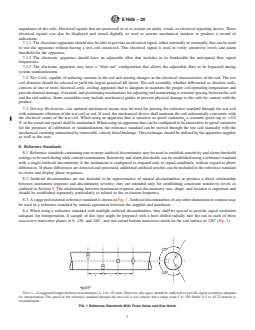
8.3 A suggested material reference standard is shown in Fig. 1. Artificial discontinuities of any other dimension or contour may
be used in a reference standard by mutual agreement between the supplier and purchaser.
8.4 When using a reference standard with multiple artificial discontinuities, they shall be spaced to provide signal resolution
adequate for interpretation. A sample of this type might be prepared with a hole drilled radially into the rod i
...
Questions, Comments and Discussion
Ask us and Technical Secretary will try to provide an answer. You can facilitate discussion about the standard in here.
Loading comments...