EN 12814-3:2014
(Main)Testing of welded joints in thermoplastics semi-finished products - Part 3: Tensile creep test
Testing of welded joints in thermoplastics semi-finished products - Part 3: Tensile creep test
This European Standard specifies the dimensions, the method of sampling and the preparation of the test specimens, and the conditions for performing the tensile creep test perpendicular to the weld in order to determine the long-term tensile welding factor.
A tensile creep test may be used in conjunction with other tests (e.g. bend test, tensile test, macrographic examination,...) to assess the performance of welded assemblies, made from thermoplastics materials.
The test is applicable to welded assemblies made from thermoplastics materials filled or unfilled such as tubes and fittings, sheets, plates and profiles, but not reinforced, irrespective of the welding process used.
Prüfen von Schweißverbindungen aus thermoplastischen Kunststoffen - Teil 3: Zeitstand-Zugversuch
Diese Europäische Norm legt Maße, Probenahmeverfahren, Probenvorbereitung sowie Durch¬führungs-bedingungen für einen Zeitstand-Zugversuch rechtwinklig zur Schweißnaht fest, bei dem der Zeitstandzug-Schweißfaktor bestimmt wird.
Ein Zeitstand-Zugversuch kann zusammen mit anderen Prüfungen (z. B. Biegeversuch, Zugversuch, makrographische Untersuchung) angewendet werden, um das Betriebsverhalten von Schweißverbindungen aus thermoplastischen Kunststoffen zu beurteilen.
Der Zeitstand-Zugversuch ist auf Schweißverbindungen aus gefüllten oder ungefüllten, jedoch nicht aus verstärkten thermoplastischen Kunststoffen unabhängig vom angewendeten Schweißverfahren anwendbar, z. B. auf Rohre, Fittings, Bahnen und Platten sowie Profile.
Essais des assemblages soudés sur produits semi-finis en thermoplastiques - Partie 3: Essai de fluage en traction
La présente Norme européenne spécifie les dimensions, la méthode d'échantillonnage et la préparation des éprouvettes, ainsi que les conditions d'exécution de l'essai de fluage en traction perpendiculairement à la soudure, afin de déterminer le coefficient de soudure en traction à long terme.
Un essai de fluage en traction peut être utilisé conjointement avec d'autres essais (par exemple : essai de pliage, essai de traction, examen macrographique, ...) pour évaluer les performances des assemblages soudés en thermoplastiques.
Cet essai est applicable aux assemblages soudés constitués de matières thermoplastiques chargées ou non chargées, telles que tubes et raccords, feuilles, plaques et profilés, mais non renforcées, indépendamment du procédé de soudage utilisé.
Preskus zvarjenih spojev plastomernih polizdelkov - 3. del: Preskus lezenja pri natezni obremenitvi
Standard EN 12814-3 določa dimenzije, metodo vzorčenja, pripravo preskusnih vzorcev in pogoje za izvedbo preskusa lezenja pri natezni obremenitvi, pravokotno na zvar, s katerim se določi dolgoročni natezni faktor zvara. Preskus lezenja pri natezni obremenitvi se lahko uporabi skupaj z drugimi preskusi (npr. preskus upogibanja, natezni preskus, makrografski pregled ...) za oceno zmogljivosti varjenih sestavov iz termoplastičnih materialov. Preskus se uporablja za varjene sestave iz polnjenih ali nepolnjenih termoplastičnih materialov, kot so cevi in spojniki, ponjave, plošče, in profili, ki niso ojačani – ne glede na uporabljeni postopek varjenja.
General Information
- Status
- Published
- Publication Date
- 25-Feb-2014
- Technical Committee
- CEN/TC 249 - Plastics
- Drafting Committee
- CEN/TC 249/WG 16 - Welding of thermoplastics
- Current Stage
- 9060 - Closure of 2 Year Review Enquiry - Review Enquiry
- Start Date
- 04-Mar-2025
- Completion Date
- 04-Mar-2025
Relations
- Effective Date
- 05-Mar-2014
- Effective Date
- 04-Apr-2012
- Effective Date
- 28-Jan-2026
- Effective Date
- 28-Jan-2026
- Effective Date
- 28-Jan-2026
- Effective Date
- 28-Jan-2026
- Effective Date
- 28-Jan-2026
- Effective Date
- 28-Jan-2026
Overview
EN 12814-3:2014 - Testing of welded joints in thermoplastics semi-finished products: Part 3: Tensile creep test - specifies how to sample, prepare and test specimens to determine the long-term tensile welding factor of welded thermoplastic assemblies. The method measures time-to-failure under a constant tensile load applied perpendicular to the weld (tensile creep) and is intended for tubes, fittings, sheets, plates and profiles made of filled or unfilled thermoplastics (not reinforced), regardless of welding process.
Key topics and technical requirements
- Test principle: constant-load tensile creep until fracture; measure time-to-failure and establish creep rupture curves for welded and unwelded (parent) material.
- Specimen preparation: welded and unwelded specimens must come from the same test piece; cut perpendicular to the weld at least 8 hours after welding; no heat treatment or straightening.
- Specimen types: two standard specimen geometries (Type 1 and Type 2) defined; an alternative whole pipe tensile creep rupture test is available (Annex B); special rules for socket joints (Annex D).
- Test conditions: specimens conditioned to test temperature; temperature variation ≤ ±1 °C; media that do not cause swelling or degradation (air, water, aqueous surfactant solutions); recommended minimum of six welded and six unwelded specimens per stress level and temperature.
- Data analysis: calculate geometric mean times, plot creep rupture curves on a bi-logarithmic scale (stress vs. time), and compute the long‑term tensile welding factor (fl) as the ratio of stresses for identical failure times (fl = σs / σt). Regression requires tests at a minimum of two stress levels.
- Quality indicators: fracture appearance (ductile vs brittle proportions) and resistance to slow crack growth are used to assess weld performance (Annex A); minimum parent-material creep rupture time (ttm) is required for applicability (Annex C).
- Dimensional tolerances: e.g., width b tolerance ±1 mm, calibrated length L0 tolerance ±2 mm; variation of b over L0 ≤ ±2%.
Applications
- Use EN 12814-3:2014 for qualification and quality assessment of welded thermoplastic assemblies subject to long-term static loads.
- Typical applications: pressure piping, drainage systems, tanks, structural profiles and fabricated fabrications where creep rupture performance of welds affects service life.
- Results feed design calculations together with parent-material creep rupture curves (e.g., EN 1778) to select weld procedures, evaluate joining methods, and set inspection/acceptance criteria.
Who should use this standard
- Materials engineers, welding procedure qualifiers, test laboratories, product designers, and quality managers working with thermoplastics joining and long-term structural performance.
Related standards
- EN 12814 series (Parts 1–8) - other welded-joint test methods (bend, tensile, peel, macroscopic exam, etc.)
- EN ISO 899-1 - tensile creep testing method
- EN 13100-1 - visual examination of welded joints
- EN 1778 - parent material creep rupture data (referenced in design)
Get Certified
Connect with accredited certification bodies for this standard

National Aerospace and Defense Contractors Accreditation Program (NADCAP)
Global cooperative program for special process quality in aerospace.

CARES (UK Certification Authority for Reinforcing Steels)
UK certification for reinforcing steels and construction.

DVS-ZERT GmbH
German welding certification society.
Sponsored listings
Frequently Asked Questions
EN 12814-3:2014 is a standard published by the European Committee for Standardization (CEN). Its full title is "Testing of welded joints in thermoplastics semi-finished products - Part 3: Tensile creep test". This standard covers: This European Standard specifies the dimensions, the method of sampling and the preparation of the test specimens, and the conditions for performing the tensile creep test perpendicular to the weld in order to determine the long-term tensile welding factor. A tensile creep test may be used in conjunction with other tests (e.g. bend test, tensile test, macrographic examination,...) to assess the performance of welded assemblies, made from thermoplastics materials. The test is applicable to welded assemblies made from thermoplastics materials filled or unfilled such as tubes and fittings, sheets, plates and profiles, but not reinforced, irrespective of the welding process used.
This European Standard specifies the dimensions, the method of sampling and the preparation of the test specimens, and the conditions for performing the tensile creep test perpendicular to the weld in order to determine the long-term tensile welding factor. A tensile creep test may be used in conjunction with other tests (e.g. bend test, tensile test, macrographic examination,...) to assess the performance of welded assemblies, made from thermoplastics materials. The test is applicable to welded assemblies made from thermoplastics materials filled or unfilled such as tubes and fittings, sheets, plates and profiles, but not reinforced, irrespective of the welding process used.
EN 12814-3:2014 is classified under the following ICS (International Classification for Standards) categories: 25.160.40 - Welded joints and welds. The ICS classification helps identify the subject area and facilitates finding related standards.
EN 12814-3:2014 has the following relationships with other standards: It is inter standard links to EN 12814-3:2000/A1:2005, EN 12814-3:2000, EN ISO 899-1:2017, EN 13100-1:2017, EN 12814-8:2024, EN 12814-8:2001, EN 12814-8:2021, EN 14879-4:2007. Understanding these relationships helps ensure you are using the most current and applicable version of the standard.
EN 12814-3:2014 is available in PDF format for immediate download after purchase. The document can be added to your cart and obtained through the secure checkout process. Digital delivery ensures instant access to the complete standard document.
Standards Content (Sample)
2003-01.Slovenski inštitut za standardizacijo. Razmnoževanje celote ali delov tega standarda ni dovoljeno.Preskus zvarjenih spojev plastomernih polizdelkov - 3. del: Preskus lezenja pri natezni obremenitviPrüfen von Schweißverbindungen aus thermoplastischen Kunststoffen - Teil 3: Zeitstand-ZugversuchEssais des assemblages soudés sur produits semi-finis en thermoplastiques - Partie 3: Essai de fluage en tractionTesting of welded joints in thermoplastics semi-finished products - Part 3: Tensile creep test25.160.40Varjeni spoji in variWelded jointsICS:Ta slovenski standard je istoveten z:EN 12814-3:2014SIST EN 12814-3:2014en,fr,de01-maj-2014SIST EN 12814-3:2014SLOVENSKI
STANDARDSIST EN 12814-3:2000/A1:2005SIST EN 12814-3:20001DGRPHãþD
EUROPEAN STANDARD NORME EUROPÉENNE EUROPÄISCHE NORM
EN 12814-3
February 2014 ICS 25.160.40 Supersedes EN 12814-3:2000English Version
Testing of welded joints in thermoplastics semi-finished products - Part 3: Tensile creep test
Essais des assemblages soudés sur produits semi-finis en thermoplastiques - Partie 3: Essai de fluage en traction
Prüfen von Schweißverbindungen aus thermoplastischen Kunststoffen - Teil 3: Zeitstand-Zugversuch This European Standard was approved by CEN on 30 November 2013.
CEN members are bound to comply with the CEN/CENELEC Internal Regulations which stipulate the conditions for giving this European Standard the status of a national standard without any alteration. Up-to-date lists and bibliographical references concerning such national standards may be obtained on application to the CEN-CENELEC Management Centre or to any CEN member.
This European Standard exists in three official versions (English, French, German). A version in any other language made by translation under the responsibility of a CEN member into its own language and notified to the CEN-CENELEC Management Centre has the same status as the official versions.
CEN members are the national standards bodies of Austria, Belgium, Bulgaria, Croatia, Cyprus, Czech Republic, Denmark, Estonia, Finland, Former Yugoslav Republic of Macedonia, France, Germany, Greece, Hungary, Iceland, Ireland, Italy, Latvia, Lithuania, Luxembourg, Malta, Netherlands, Norway, Poland, Portugal, Romania, Slovakia, Slovenia, Spain, Sweden, Switzerland, Turkey and United Kingdom.
EUROPEAN COMMITTEE FOR STANDARDIZATION
COMITÉ EUROPÉEN DE NORMALISATION EUROPÄISCHES KOMITEE FÜR NORMUNG
CEN-CENELEC Management Centre:
Avenue Marnix 17,
B-1000 Brussels © 2014 CEN All rights of exploitation in any form and by any means reserved worldwide for CEN national Members. Ref. No. EN 12814-3:2014 ESIST EN 12814-3:2014
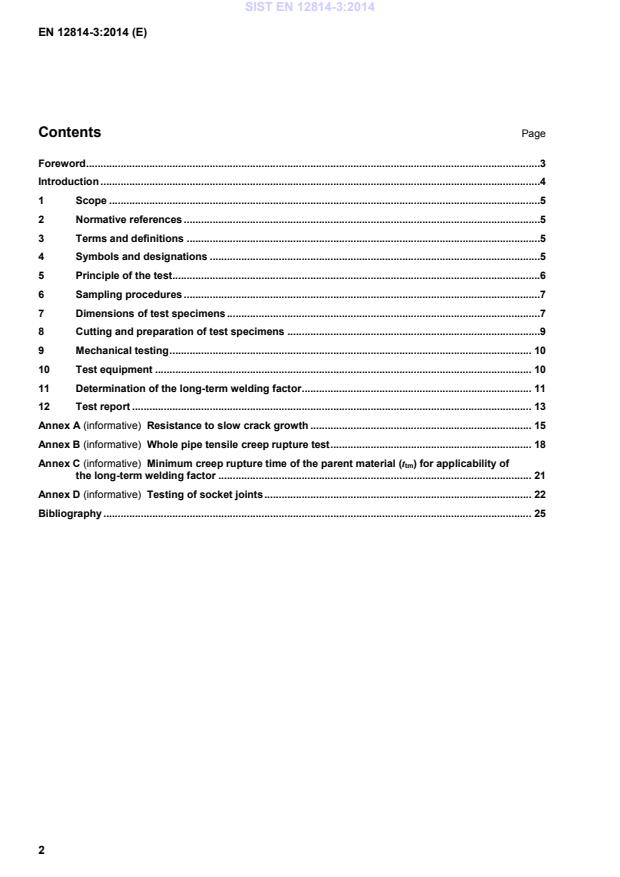
Page Foreword .3 Introduction .4 1 Scope .5 2 Normative references .5 3 Terms and definitions .5 4 Symbols and designations .5 5 Principle of the test.6 6 Sampling procedures .7 7 Dimensions of test specimens .7 8 Cutting and preparation of test specimens .9 9 Mechanical testing . 10 10 Test equipment . 10 11 Determination of the long-term welding factor . 11 12 Test report . 13 Annex A (informative)
Resistance to slow crack growth . 15 Annex B (informative)
Whole pipe tensile creep rupture test . 18 Annex C (informative)
Minimum creep rupture time of the parent material (ttm) for applicability of the long-term welding factor . 21 Annex D (informative)
Testing of socket joints . 22 Bibliography . 25
Fs Value of the force applied to the welded test specimen calculated from the chosen value of 1s N Ft Value of the force applied to the unwelded test specimen calculated from the chosen value of 1t N L Total length of the test specimen mm Lj Minimum distance between the clamping jaws mm L0 Calibrated and parallel length of the test specimen mm Lw a Maximum width of the weld bead of the test specimen mm r Radius of shoulder of the test specimen mm ttm Minimum failure time h 1s Value of stress of the welded test specimens used in the calculation of fl N/mm2 1t Reference stress. Value of stress of the unwelded test specimens, used in the calculation of fl N/mm2 a For extrusion and hot gas welds only.
5 Principle of the test The test involves subjecting a test specimen to a constant load until fracture occurs. The time to fracture is measured and recorded. NOTE An alternative test using a whole pipe welded sample rather that a test specimen cut form the weld is given in Annex B. SIST EN 12814-3:2014
Key Lj
= L0 + (2xb) Figure 1 — Type 1 test specimen for flat and tubular assemblies
Figure 2 — Type 2 test specimen for flat and tubular assemblies
an ≤ 10 15 120 ≥ 170 10 < an ≤ 20 30 120 ≥ 170 an > 20 1,5 x an 3 x an + Lw with 120 min ≥ L0 + 80
Table 3 — Dimensions of type 2 test specimens Dimensions in millimetres Dn or an b min. b1 L0 L r 20 ≤ Dn < 50 10nnDa+ b + 10 Lw + 60 ≥ 120 60 50 ≤ Dn < 100 10nnDa+ b + 10 Lw + 60 ≥ 170 60 Dn ≥ 100 or flat assemblies:
an ≤ 10 10 20 115 ≥ 170 60 10 < an ≤ 20 30 40 115 ≥ 170 60 an > 20 1,5 x an 2,5 x an 3 x an + Lw with 120 min ≥ L0 + 80 60
Where the beads are left intact in service, they shall be left intact for the test. Where the beads are removed in service, they shall be removed prior to testing. The minimum value for b shall be 6 mm. The tolerance for b shall be ± 1 mm. The tolerance for L0 shall be ± 2 mm. The variation of b over the length L0 shall not exceed ± 2 % of the average value of b. 8 Cutting and preparation of test specimens The tensile creep test specimens shall be cut with parallel sides as shown in Figures 1 and 2. During cutting, heating of the test specimen shall be minimized. The cutting operation shall not cause any damage to the test specimen. After cutting, a visual examination of the weld according to EN 13100-1 shall be carried out and recorded. SIST EN 12814-3:2014
...


Questions, Comments and Discussion
Ask us and Technical Secretary will try to provide an answer. You can facilitate discussion about the standard in here.
Loading comments...