ISO 10959:2016
(Main)Aerospace — MJ threads — Gauging
Aerospace — MJ threads — Gauging
ISO 10959:2016 contains information for the gauging of ISO MJ threads in accordance with ISO 5855‑1, ISO 5855‑2, and ISO 5855‑3. Other methods of ensuring that the product is within the specified limits may be used provided correlation with the specified gauges is established [see 8.2, e)].
Aéronautique et espace — Filetage MJ — Vérification par calibres
General Information
- Status
- Published
- Publication Date
- 07-Mar-2016
- Technical Committee
- ISO/TC 20/SC 4 - Aerospace fastener systems
- Drafting Committee
- ISO/TC 20/SC 4 - Aerospace fastener systems
- Current Stage
- 9093 - International Standard confirmed
- Start Date
- 19-Oct-2021
- Completion Date
- 14-Feb-2026
Relations
- Effective Date
- 29-Mar-2014
Overview
ISO 10959:2016 - "Aerospace - MJ threads - Gauging" provides standardized guidance for gauging ISO MJ threads, the thread form used in aerospace fasteners and fittings. The standard specifies gauging principles, gauge types, measurement methods and environmental controls (reference temperature) to ensure thread conformity with the dimensional and form limits given in ISO 5855-1, ISO 5855-2, and ISO 5855-3. Alternative inspection methods are permitted if they are correlated to the specified gauges (see clause 8.2 e)).
Key topics and technical requirements
- Scope and references: Gauging guidance applies to MJ thread products for aerospace applications and relies on normative references including ISO 1, ISO 1502, and ISO 5408.
- Types of gauges: Defines applicable gauges for external and internal threads:
- External: GO screw ring gauges, virtual pitch diameter indicating gauges, simple pitch diameter indicating gauges, major/minor diameter gauges, and optical comparator checks.
- Internal: GO screw plug gauges, NOT GO plug gauges, plain minor diameter plugs, GO full-form plug gauges, and indicating gauges.
- Virtual vs simple pitch diameter:
- Virtual pitch diameter indicating gauges measure the maximum-material virtual pitch diameter on segments or rolls and account for form variations (pitch, helix, flank, roundness, taper).
- Simple pitch diameter gauges (cone/vee or best-wire contacts) check that pitch diameter is above the minimum limit and are correlated with virtual-diameter measurements.
- GO / NOT GO principles: Use GO gauges to confirm ease of assembly and maximum-material limits; NOT GO gauges to verify minimum-limits are not exceeded.
- Controlled root radius: The standard requires a modified GO full-form plug gauge for internal threads with a controlled root radius matching the maximum external thread root radius specified in ISO 5855 series.
- Reference temperature: Gauging should be performed at 20 °C (ISO 1). Permitted tolerances: ±2 °C for sizes MJ24 and smaller; ±1 °C for larger sizes, unless product and gauge have identical thermal expansion.
- Use of optical comparator and setting plugs: Optical comparators verify root radius and minor diameter; setting plugs are required for adjustable GO gauges and indicating gauges.
Practical applications and users
This standard is essential for:
- Aerospace manufacturers and assembly shops producing MJ-thread bolts, nuts, and fittings
- Fastener and gauge manufacturers designing GO/NOT GO and indicating thread gauges
- Quality and inspection engineers, metrology labs, and suppliers needing traceable thread verification
- Design and procurement teams specifying thread acceptance criteria for aerospace components
ISO 10959:2016 ensures consistent, repeatable gauging practices for critical aerospace threads, reducing assembly failures and improving interchangeability.
Related standards
- ISO 5855-1 / -2 / -3 - MJ threads general requirements and limit dimensions
- ISO 1502 - General-purpose metric screw threads - Gauges and gauging
- ISO 5408 - Screw threads vocabulary
- ISO 1 - Standard reference temperature for geometrical product specification and verification
Keywords: ISO 10959:2016, MJ threads gauging, aerospace thread gauges, virtual pitch diameter, GO gauge, NOT GO gauge, ISO 5855, thread inspection, reference temperature.
Get Certified
Connect with accredited certification bodies for this standard

DEKRA North America
DEKRA certification services in North America.

Eagle Registrations Inc.
American certification body for aerospace and defense.

Element Materials Technology
Materials testing and product certification.
Sponsored listings
Frequently Asked Questions
ISO 10959:2016 is a standard published by the International Organization for Standardization (ISO). Its full title is "Aerospace — MJ threads — Gauging". This standard covers: ISO 10959:2016 contains information for the gauging of ISO MJ threads in accordance with ISO 5855‑1, ISO 5855‑2, and ISO 5855‑3. Other methods of ensuring that the product is within the specified limits may be used provided correlation with the specified gauges is established [see 8.2, e)].
ISO 10959:2016 contains information for the gauging of ISO MJ threads in accordance with ISO 5855‑1, ISO 5855‑2, and ISO 5855‑3. Other methods of ensuring that the product is within the specified limits may be used provided correlation with the specified gauges is established [see 8.2, e)].
ISO 10959:2016 is classified under the following ICS (International Classification for Standards) categories: 49.030.10 - Screw threads. The ICS classification helps identify the subject area and facilitates finding related standards.
ISO 10959:2016 has the following relationships with other standards: It is inter standard links to ISO 10959:2000. Understanding these relationships helps ensure you are using the most current and applicable version of the standard.
ISO 10959:2016 is available in PDF format for immediate download after purchase. The document can be added to your cart and obtained through the secure checkout process. Digital delivery ensures instant access to the complete standard document.
Standards Content (Sample)
INTERNATIONAL ISO
STANDARD 10959
Second edition
2016-03-01
Aerospace — MJ threads — Gauging
Aéronautique et espace — Filetage MJ — Vérification par calibres
Reference number
©
ISO 2016
© ISO 2016, Published in Switzerland
All rights reserved. Unless otherwise specified, no part of this publication may be reproduced or utilized otherwise in any form
or by any means, electronic or mechanical, including photocopying, or posting on the internet or an intranet, without prior
written permission. Permission can be requested from either ISO at the address below or ISO’s member body in the country of
the requester.
ISO copyright office
Ch. de Blandonnet 8 • CP 401
CH-1214 Vernier, Geneva, Switzerland
Tel. +41 22 749 01 11
Fax +41 22 749 09 47
copyright@iso.org
www.iso.org
ii © ISO 2016 – All rights reserved
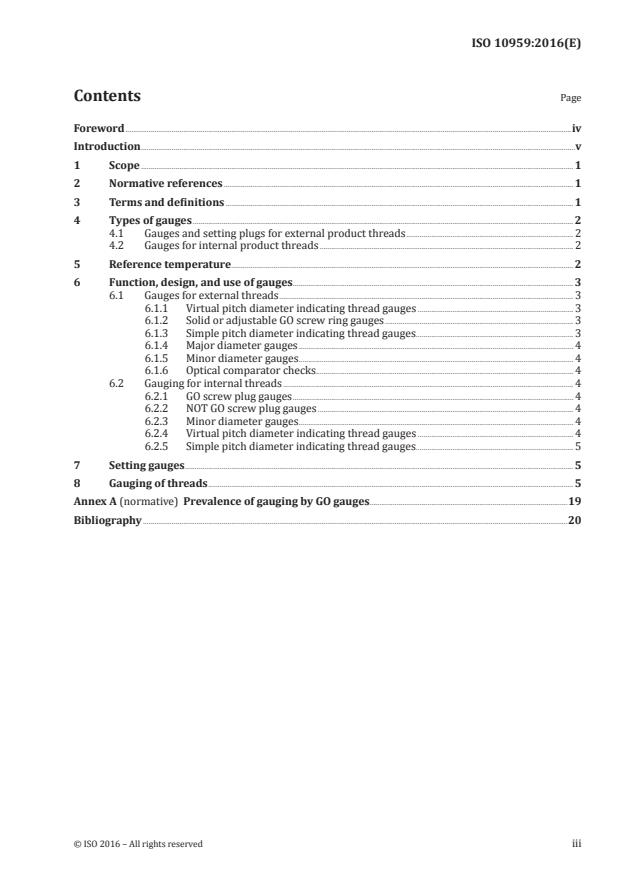
Contents Page
Foreword .iv
Introduction .v
1 Scope . 1
2 Normative references . 1
3 Terms and definitions . 1
4 Types of gauges . 2
4.1 Gauges and setting plugs for external product threads . 2
4.2 Gauges for internal product threads . 2
5 Reference temperature . 2
6 Function, design, and use of gauges . 3
6.1 Gauges for external threads . 3
6.1.1 Virtual pitch diameter indicating thread gauges . 3
6.1.2 Solid or adjustable GO screw ring gauges . 3
6.1.3 Simple pitch diameter indicating thread gauges . . 3
6.1.4 Major diameter gauges . 4
6.1.5 Minor diameter gauges. 4
6.1.6 Optical comparator checks . 4
6.2 Gauging for internal threads . 4
6.2.1 GO screw plug gauges . 4
6.2.2 NOT GO screw plug gauges . 4
6.2.3 Minor diameter gauges. 4
6.2.4 Virtual pitch diameter indicating thread gauges . 4
6.2.5 Simple pitch diameter indicating thread gauges . . 5
7 Setting gauges . 5
8 Gauging of threads . 5
Annex A (normative) Prevalence of gauging by GO gauges .19
Bibliography .20
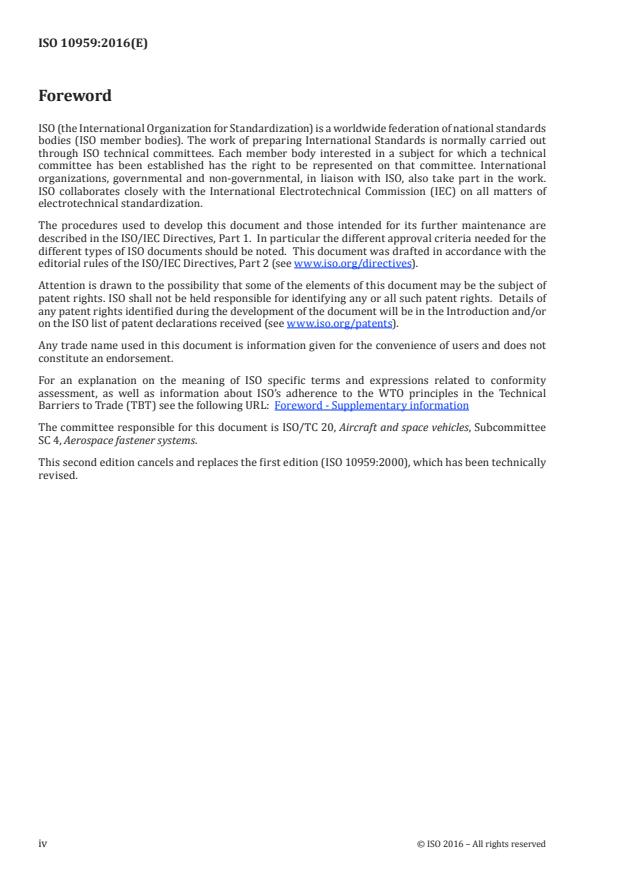
Foreword
ISO (the International Organization for Standardization) is a worldwide federation of national standards
bodies (ISO member bodies). The work of preparing International Standards is normally carried out
through ISO technical committees. Each member body interested in a subject for which a technical
committee has been established has the right to be represented on that committee. International
organizations, governmental and non-governmental, in liaison with ISO, also take part in the work.
ISO collaborates closely with the International Electrotechnical Commission (IEC) on all matters of
electrotechnical standardization.
The procedures used to develop this document and those intended for its further maintenance are
described in the ISO/IEC Directives, Part 1. In particular the different approval criteria needed for the
different types of ISO documents should be noted. This document was drafted in accordance with the
editorial rules of the ISO/IEC Directives, Part 2 (see www.iso.org/directives).
Attention is drawn to the possibility that some of the elements of this document may be the subject of
patent rights. ISO shall not be held responsible for identifying any or all such patent rights. Details of
any patent rights identified during the development of the document will be in the Introduction and/or
on the ISO list of patent declarations received (see www.iso.org/patents).
Any trade name used in this document is information given for the convenience of users and does not
constitute an endorsement.
For an explanation on the meaning of ISO specific terms and expressions related to conformity
assessment, as well as information about ISO’s adherence to the WTO principles in the Technical
Barriers to Trade (TBT) see the following URL: Foreword - Supplementary information
The committee responsible for this document is ISO/TC 20, Aircraft and space vehicles, Subcommittee
SC 4, Aerospace fastener systems.
This second edition cancels and replaces the first edition (ISO 10959:2000), which has been technically
revised.
iv © ISO 2016 – All rights reserved
Introduction
The purpose of this International Standard, which differs from ISO 1502, is to take into account the
basic characteristics of the ISO MJ threads (restricted form variation and increased root radius of
the external thread) as well as the specific tolerances and to standardize the gauging principles for
ISO MJ threads, intended for products for aerospace applications.
INTERNATIONAL STANDARD ISO 10959:2016(E)
Aerospace — MJ threads — Gauging
1 Scope
This International Standard contains information for the gauging of ISO MJ threads in accordance with
ISO 5855-1, ISO 5855-2, and ISO 5855-3.
Other methods of ensuring that the product is within the specified limits may be used provided
correlation with the specified gauges is established [see 8.2, e)].
2 Normative references
The following documents, in whole or in part, are normatively referenced in this document and are
indispensable for its application. For dated references, only the edition cited applies. For undated
references, the latest edition of the referenced document (including any amendments) applies.
ISO 1, Geometrical Product Specifications (GPS) — Standard reference temperature for geometrical
product specification and verification
ISO 1502:1996, ISO general-purpose metric screw threads — Gauges and gauging
ISO 5408, Screw threads — Vocabulary
ISO 5855-1, Aerospace — MJ threads — Part 1: General requirements
ISO 5855-2, Aerospace — MJ threads — Part 2: Limit dimensions for bolts and nuts
ISO 5855-3, Aerospace — MJ threads — Part 3: Limit dimensions for fittings for fluid systems
3 Terms and definitions
For the purposes of this document, the terms and definitions given in ISO 5408 and the following apply.
3.1
best wire size
cylinder or sphere which has a radius so that it will contact the thread flanks at the pitch cylinder
intersection
Note 1 to entry: The radius of the best wire or sphere is theoretically equal to 0,288 68 P.
3.2
indicating gauge
device having contacts which will precisely compare the size of a work piece thread to a setting
standard of known dimensions
Note 1 to entry: The value for the indicated characteristic thus established is the dimensional value attributed
to the work piece. An indicating gauge may have contacts designed to measure any thread characteristic. This
International Standard specifies the characteristics and designs for ISO MJ threads.
3.3
simple pitch diameter
diameter of an imaginary cylinder intersecting an actual thread over the width of one groove where
that width is equal to one half of the basic pitch
3.4
virtual pitch diameter
pitch diameter of the smallest (for external threads) or largest (for internal threads) perfect thread
form with GO gauge profile which can engage the product threads for a distance equal to the GO gauge
thread engagement
4 Types of gauges
4.1 Gauges and setting plugs for external product threads
Gauge type Reference
a) GO screw ring gauges 6.1.2
b) Setting plug for adjustable GO screw ring and indicating thread gauges 7.1
c) Virtual pitch diameter indicating thread gauges 6.1.1
d) Simple pitch diameter indicating thread gauges 6.1.3
e) Flat contact gauges for major diameter 6.1.4
f) Point contact indicating thread gauges for minor diameter 6.1.5
g) Optical comparator for root radius and minor diameter 6.1.6
4.2 Gauges for internal product threads
Gauge type Reference
a) GO screw plug gauges 6.2.1
b) NOT GO screw plug gauges 6.2.2
c) Plain gauges for minor diameter (plug gauge) 6.2.3
d) GO full form screw plug gauges 6.2.3.2
e) Virtual pitch diameter indicating thread gauges 6.2.4
f) Simple pitch diameter indicating thread gauges 6.2.5
5 Reference temperature
In accordance with ISO 1, the dimensions of the gauge and the product shall be checked at the
temperature of 20 °C.
If the product and the gauge have the same coefficients of linear expansion, the temperature may
deviate from 20 °C, provided the temperature of the product and the gauge are the same.
If the product and the gauge have different coefficients of linear expansion, the temperature of both, at
the time of gauging, shall be
a) 20 °C ± 2 °C for sizes MJ24 and smaller, and
b) 20 °C ± 1 °C for larger threads.
2 © ISO 2016 – All rights reserved
6 Function, design, and use of gauges
6.1 Gauges for external threads
6.1.1 Virtual pitch diameter indicating thread gauges
6.1.1.1 It measures, on two or three segments or rolls, the maximum material virtual pitch diameter,
taking into account variations of form such as pitch variation, helix and flank variations, roundness, and
taper which produces an enlargement of the virtual pitch diameter. In addition, virtual pitch diameter
control ensures the flank angle contact is sufficient to ensure that the root radius does not exceed the
maximum limit. Measurement of virtual pitch diameter with indicating gauges shall be obtained to
calculate virtual-minus-simple pitch-diameter differential unless the simple pitch diameter limits, gauged
in accordance with the measurements given in 6.1.3, are within the limits defined by the maximum pitch
diameter and the form variation limits in ISO 5855-1.
6.1.1.2 Indicating gauges have two or three contacts at 180° or 120° respectively. Gauges with segments
or rolls are designed with the length of the GO virtual maximum material gauging elements equal to the
GO ring gauge length (see Table 1). For configuration and profile requirements, see Figure 1.
6.1.1.3 The minor diameter of the GO virtual maximum material thread segments and the diameter
of the circle surrounded by the roll cluster of GO virtual maximum material rolls shall be equal to the
pitch diameter of the product minus 0,375 H, less the T , minus tolerance when assembled in the gauge
PL
frame, where T is specified in ISO 1502. This corresponds to a flat width of 0,312 5 P on the minor crest
PL
for the thread. The crest shall be flat in an axial plane and parallel to the axis of the segments or rolls.
6.1.1.4 The major diameter of the GO virtual maximum material segments and the root of the GO virtual
maximum material rolls shall be cleared beyond a 0,125 P flat, either by an extension of the flanks of the
thread toward a sharp vee or by an undercut no greater than 0,125 P maximum width and approximately
central. The root clearance shall be such that the major diameter of the full form section of the thread
setting plug gauge is cleared after the assembled gauge has been properly set to size. Optional clearance
specifications given in ISO 1502 may be used.
6.1.1.5 The simple pitch diameter cylinder axis of threaded segments and rolls shall be straight within
the diameter tolerance zone equal to T as specified in ISO 1502. The segment or roll thread profile,
PL
lead, pitch, and the half-angle variations shall be within the limits specified in ISO 1502.
6.1.2 Solid or adjustable GO screw ring gauges
To ensure the ease of assembly of product threads and conformance to the maximum material virtual
pitch diameter limits, GO screw ring gauges with thread form as shown in Figure 1 and setting gauges
in accordance with the details described in 6.1 may be used. Solid GO screw ring gauges shall not be
permitted to exceed the product thread dimensional limits. The gauge thickness/length shall be
standardized as shown in Table 1. The gauge tolerances, W , shall be in accordance with ISO 1502.
GO
6.1.3 Simple pitch diameter indicating thread gauges
The simple pitch diameter indicating gauge with cone and vee rolls or segments or rolls with the
best wire size radius allows to ensure that the pitch diameter is greater than the minimum limit. The
indicators are set to the GO threaded setting plug gauge. Readings indicate the position of the pitch
diameter and the minimum measurement shall be no less than the minimum pitch diameter limit. The
minimum measured pitch diameter shall be within the ISO 5855-1 form variation limit compared to the
virtual pitch diameter measurement in accordance with the differential value given in 6.1.1.
The simple pitch diameter contacts have cone and vee rolls or segments which contact the product
pitch cylinder. Other designs have two or three rolls with radii on annular ribs on rolls made to best
wire size. The product thread contacts is restricted to 1,5 pitch lengths. See Figures 2 and 3 for design
and contact form.
6.1.4 Major diameter gauges
The maximum limit of the major diameter may be checked with a plain ring gauge, a plain GO calliper,
or plain diameter measuring device (see Figure 4). The minimum limit of the major diameter shall be
measured with a plain diameter measuring device set to a plain diameter plug with H tolerance in
P
accordance with ISO 1502. Plain micrometer calliper may be used to measure the major diameter and
may have standard ga
...


Questions, Comments and Discussion
Ask us and Technical Secretary will try to provide an answer. You can facilitate discussion about the standard in here.
Loading comments...