Technical product documentation — Document types

ISO 29845:2011 establishes and defines the types of documents required to be in the documentation for the specification of products, equipment and plants at all levels of complexity. It deals with the range of document types used from the conceptual phase to finished product, in all engineering fields. The purpose of ISO 29845:2011 is to facilitate a structure for (data modelling) product data management systems, to facilitate searching and retrieval of documents, to establish document types for the purpose of better communication and understanding between parties involved in document interchange, and to fulfil the requirement in ISO 7200:2004 regarding document type fields.

Documentation technique de produits — Types de document

General Information

Status
Published
Publication Date
16-Aug-2011
Current Stage
9093 - International Standard confirmed
Completion Date
30-Nov-2020
Ref Project

Buy Standard

Standard
ISO 29845:2011 - Technical product documentation -- Document types
English language
59 pages
sale 15% off
Preview
sale 15% off
Preview

Standards Content (Sample)

INTERNATIONAL ISO
STANDARD 29845
First edition
2011-09-01


Technical product documentation —
Document types
Documentation technique de produits — Types de document


Reference number
ISO 29845:2011(E)
©
ISO 2011

---------------------- Page: 1 ----------------------
ISO 29845:2011(E)

COPYRIGHT PROTECTED DOCUMENT


©  ISO 2011
All rights reserved. Unless otherwise specified, no part of this publication may be reproduced or utilized in any form or by any means,
electronic or mechanical, including photocopying and microfilm, without permission in writing from either ISO at the address below or
ISO's member body in the country of the requester.
ISO copyright office
Case postale 56 • CH-1211 Geneva 20
Tel. + 41 22 749 01 11
Fax + 41 22 749 09 47
E-mail copyright@iso.org
Web www.iso.org
Published in Switzerland

ii © ISO 2011 – All rights reserved

---------------------- Page: 2 ----------------------
ISO 29845:2011(E)
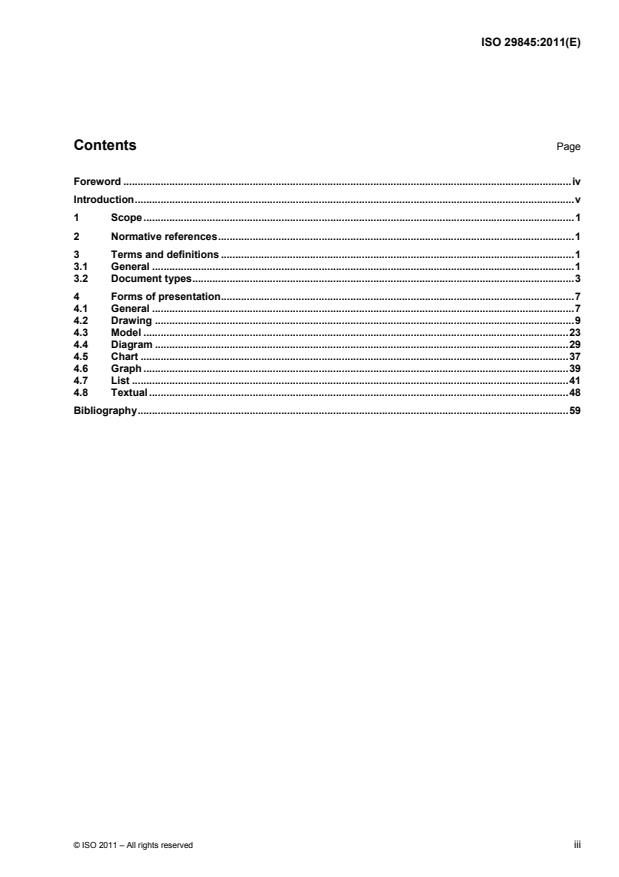
Contents Page
Foreword .iv
Introduction.v
1 Scope.1
2 Normative references.1
3 Terms and definitions .1
3.1 General .1
3.2 Document types.3
4 Forms of presentation.7
4.1 General .7
4.2 Drawing .9
4.3 Model .23
4.4 Diagram .29
4.5 Chart .37
4.6 Graph .39
4.7 List .41
4.8 Textual .48
Bibliography.59

© ISO 2011 – All rights reserved iii

---------------------- Page: 3 ----------------------
ISO 29845:2011(E)
Foreword
ISO (the International Organization for Standardization) is a worldwide federation of national standards bodies
(ISO member bodies). The work of preparing International Standards is normally carried out through ISO
technical committees. Each member body interested in a subject for which a technical committee has been
established has the right to be represented on that committee. International organizations, governmental and
non-governmental, in liaison with ISO, also take part in the work. ISO collaborates closely with the
International Electrotechnical Commission (IEC) on all matters of electrotechnical standardization.
International Standards are drafted in accordance with the rules given in the ISO/IEC Directives, Part 2.
The main task of technical committees is to prepare International Standards. Draft International Standards
adopted by the technical committees are circulated to the member bodies for voting. Publication as an
International Standard requires approval by at least 75 % of the member bodies casting a vote.
Attention is drawn to the possibility that some of the elements of this document may be the subject of patent
rights. ISO shall not be held responsible for identifying any or all such patent rights.
ISO 29845 was prepared by Technical Committee ISO/TC 10, Technical product documentation,
Subcommittee SC 1, Basic conventions.
iv © ISO 2011 – All rights reserved

---------------------- Page: 4 ----------------------
ISO 29845:2011(E)
Introduction
The figures in this International Standard are intended only as illustrations to aid the user in understanding the
practices elaborated in the text. In some cases, the figures show the level of detail needed for emphasis; in
others, they are only complete enough to illustrate a concept or facet thereof. The absence of figures has no
bearing on the applicability of the specified requirement or practice.
© ISO 2011 – All rights reserved v

---------------------- Page: 5 ----------------------
INTERNATIONAL STANDARD ISO 29845:2011(E)

Technical product documentation — Document types
1 Scope
This International Standard establishes and defines the types of documents required to be in the
documentation for the specification of products, equipment and plants at all levels of complexity. It deals with
the range of document types used from the conceptual phase to finished product, in all engineering fields.
The purpose of this International Standard is
⎯ to facilitate a structure for (data modelling) product data management systems,
⎯ to facilitate searching and retrieval of documents,
⎯ to establish document types for the purpose of better communication and understanding between parties
involved in document interchange, and
⎯ to fulfil the requirement in ISO 7200:2004 regarding document type fields.
NOTE The figures in this International Standard are intended only as illustrations to aid the user in understanding the
document types described by the text. Consequently, the figures are simplified in such a way that the content presented in
illustrated document types may not always apply all ISO rules regarding the presentation of drawings and other types of
documents.
2 Normative references
The following referenced documents are indispensable for the application of this document. For dated
references, only the edition cited applies. For undated references, the latest edition of the referenced
document (including any amendments) applies.
ISO 7200:2004, Technical product documentation — Data fields in title blocks and document headers
3 Terms and definitions
For the purposes of this document, the following terms and definitions apply.
3.1 General
3.1.1
document
fixed and structured amount of information that can be managed and interchanged as a unit between users
and systems
[ISO 11442:2006, 3.10]
3.1.2
documentation
collection of documents related to a given subject
[IEC 82045-1, 2001]
© ISO 2011 – All rights reserved 1

---------------------- Page: 6 ----------------------
ISO 29845:2011(E)
3.1.3
document type
document defined with respect to its specified content of information, function and form of presentation
NOTE Adapted from IEC 61082-1:2006.
3.1.4
object
entity treated in the process of design, engineering, realisation, operation, maintenance and demolition
[ISO 15519-1:2010, 3.3.2]
3.1.5
product
intended or accomplished result of labour, or of a natural or artificial process
[IEC 82045-1:2001]
NOTE 1 A product usually has a part number, type designation, and/or a name.
NOTE 2 A technical system, building, plant or services can be considered as a product.
3.1.6
drawing
technical information, given on an information carrier, graphically presented in accordance with agreed rules
and usually to scale
[ISO 10209-1:1992, 2.11]
3.1.7
model
three-dimensional physical or digital description of the ideal shape of an object
3.1.8
design model
portion of the data set that contains model and supplemental geometry
[ISO 16792:2006, 3.10]
3.1.9
diagram
technical document showing the functions of the objects composing a system and their interrelations using
graphical symbols
3.1.10
chart
document of information in the form of a table, graph, or diagram
3.1.11
graph
diagram showing the relation between variable quantities, typically of two variables, each measured along a
pair of lines at right angles
3.1.12
list
document in which the information is presented in columns and rows
2 © ISO 2011 – All rights reserved

---------------------- Page: 7 ----------------------
ISO 29845:2011(E)
3.1.13
sketch
drawing prepared freehand or in a CAD system and not necessarily to scale
3.1.14
textual
presentation form using characters, for example in written instructions and descriptions
3.1.15
report
account given of a matter after investigation or consideration
3.2 Document types
3.2.1
part drawing
drawing depicting a single part which cannot be further disassembled and which includes all the necessary
information required for the definition of the part
[ISO 10209-1:1992, 3.16]
3.2.2
assembly drawing
drawing representing the relative position and/or shape of a group of assembled parts
[ISO 10209-1:1992, 3.2]
3.2.3
tabular drawing
drawing listing differing variations of a specific configuration using a single, common illustration
3.2.4
fabrication drawing
part drawing of an assembly of fully specified items, permanently joined together
3.2.5
installation drawing
drawing showing the general configuration of an item and the necessary information to install the item relative
to its mating structures or associated items
[ISO 10209-1:1992, 3.16]
3.2.6
layout drawing
drawing showing the location of sites, structures, buildings, spaces, elements, assemblies or components
[ISO 10209-1:1992,3.13]
3.2.7
interface drawing
drawing giving information for the assembly and matching of two parts, concerning, for example, their
dimensions, configuration limitations, performance and test requirements
[ISO 10209-1:1992, 3.11]
© ISO 2011 – All rights reserved 3

---------------------- Page: 8 ----------------------
ISO 29845:2011(E)
3.2.8
outline drawing
drawing giving the outside peripheral envelope, overall dimensions and mass of an object
NOTE Adapted from ISO 10209-1:1992.
3.2.9
supplier drawing
drawing defining a part developed and owned by an external supplier
3.2.10
illustration drawing
drawing showing figures and sketches for any general purpose which is not covered by the more specific
document types
3.2.11
space envelope drawing
drawing showing the maximum space which can occupied for an intended design solution and the
geometrically significant interfaces of components and assemblies which are not yet designed in detail
3.2.12
block plan
drawing which identifies a site and locates the outlines of construction works in relation to a town plan or
similar document
[ISO 10209-1:1992, 3.3]
3.2.13
site plan
layout drawing giving the position of construction works in relation to the setting out points, the means of
access and the general layout of a site
NOTE Adapted from ISO 10209-1:1992.
3.2.14
part model
model in which the product described is one single item
3.2.15
assembly model
model in which the product described is an assembly of two or more items
[ISO 16792:2006, 3.3]
3.2.16
installation model
model in which the product described is an installation, showing parts or assemblies and a partial or complete
representation of the installation site
[ISO 16792:2006, 3.17]
3.2.17
interference model
model that shows the overall geometry and the space required as well as possible collisions
3.2.18
space envelope model
model showing the maximum space which can occupied for an intended design solution and the geometrically
significant interfaces of components and assemblies which are not yet designed in detail
4 © ISO 2011 – All rights reserved

---------------------- Page: 9 ----------------------
ISO 29845:2011(E)
3.2.19
annotated design model
combination of design model, annotation and attributes that describes a product
3.2.20
overview diagram
diagram providing a comprehensive view of an object with low degree of detailing
3.2.21
network map
overview diagram showing a network on a map
[ISO 14617-15:2002, 3.2]
3.2.22
block diagram
overview diagram predominantly using block symbols
[ISO 10209-4:1999, 5.15.8.1]
3.2.23
network diagram
overview diagram which shows the connections between different kinds of installations for transmitting of
electricity, fluids (e.g. water, gas) or heating/cooling, sewage system, telecommunications, equipment, etc.
NOTE Adapted from ISO 10209-4:1999.
3.2.24
circuit diagram
diagram providing information about the circuitry of an object(s)
[ISO 15519-1:2010, 3.2.8]
3.2.25
function diagram
diagram providing information about the functional behaviour of a system
[ISO 15519-1:2010, 3.2.7]
3.2.26
process flow diagram
diagram illustrating the configuration of a process system or process plant by means of graphical symbols
[ISO 15519-1:2010, 3.2.6]
3.2.27
piping and instrumentation diagram
P&I diagram
process flow diagram representing the technical realization of a process system by means of graphical
symbols for equipment, connections and process measurement and control functions
[ISO 15519-1:2010, 3.2.9]
3.2.28
angular chart
chart showing the relation between the angular position of an object and the function
© ISO 2011 – All rights reserved 5

---------------------- Page: 10 ----------------------
ISO 29845:2011(E)
3.2.29
structure diagram
chart which shows the relation between different objects in a system or a product from different points of view
presented graphically as a hierarchical tree
3.2.30
graph
diagram showing the relation between variable quantities, typically of two variables, each measured along a
pair of lines at right angles
3.2.31
parts list
list of elements of an object(s)
[ISO 15519-1:2010, 3.2.11]
3.2.32
document list
formally built-up inventory in which all relevant documents for a specific purpose are listed
3.2.33
bill-of-material
BOM
presentation of the constituents in a product structure with the possibility to adopt the level of decomposition to
actual need
3.2.34
signal list
list providing information about signals defined as input or output of functional units
3.2.35
coordinate data list
list providing information about certain positions on a part represented in a Cartesian coordinate system
3.2.36
apparatus list
list providing information about the constituent functional components included in a system
3.2.37
connection table
connection table lists the connections on different levels, internal and external, of the installation
3.2.38
standard
document established by consensus and approved by a recognized body, that provides, for common and
repeated use, rules, guidelines and characteristics or their results, aimed at the achievement of the optimum
degree of order in a given context
[ISO/IEC Guide 2:2004, 3.2]
3.2.39
technical specification
document specifying the requirements for one specific part or for a group of parts with equal characteristics
3.2.40
requirement specification
document compiled and evaluated with the requirements from the markets (customer), authorities, and the
company itself
6 © ISO 2011 – All rights reserved

---------------------- Page: 11 ----------------------
ISO 29845:2011(E)
3.2.41
part definition
text-based document that may be supplied with a drawing image of the defined part, specifying property
requirements for the part described by the document
3.2.42
calculation sheet
document providing the results of calculations regarding essential product characteristics
3.2.43
process specification
document that defines the type and sequence of steps of a process used to produce a part
3.2.44
assembly instruction
document providing information of how and in what sequence the different part shall be assembled to receive
a specific end product
3.2.45
test specification
specification explaining how to perform the test activities according to the test plan
3.2.46
test plan
document describing the scope realization resources and plans for the intended test activities
3.2.47
quality plan
document defining a set of activities planned that helps achieve quality in the project being executed
3.2.48
test report
compilation of tests carried out at a new part, assembly, product or system and documentation of test results
4 Forms of presentation
4.1 General
The forms of presentation identified in Table 1 are the main types of documents used in the field of
engineering. The table also shows where the documents are commonly used. However, the document types
can also occur in other technical areas than those shown in Table 1 depending on company standards,
technical discipline, etc.


© ISO 2011 – All rights reserved 7

---------------------- Page: 12 ----------------------
ISO 29845:2011(E)
Table 1 — Presentation formats
a
Presentation format Description
Application
1 Drawing Graphical presentation depicting the shape, size, etc. of a physical A
part or assembly, usually to scale
2 Model Three-dimensional physical or digital description of the ideal shape A
of an object.
3 Diagram Graphical presentation showing the functions of the objects A
composing a system and their interrelations using graphical
elements and symbols
4 Chart Document of information in the form of a table, graph, or diagram. B, D
5 Graph Diagram showing the relation between variable quantities, typically B, D
of two variables, each measured along a pair of lines at right angles.
6 List Document in which the information is presented in columns and A
rows
7 Textual Presentation form using characters, for example in written A
instructions and descriptions
a
See Table 2.

The application code identifies the technical area in which the presentation format is used.
Table 2 — Application codes
Code Technical area
A overall technology
B construction engineering (building construction and civil engineering
C mechanical engineering
D process plant engineering

NOTE The figures in the following subclauses are typical examples of the described document types. The information
in the title blocks is identical throughout this International Standard except for the document types and titles.
8 © ISO 2011 – All rights reserved

---------------------- Page: 13 ----------------------
ISO 29845:2011(E)
4.2 Drawing
4.2.1 Part drawing
A part drawing (see Figure 1) depicts a single part which cannot be further disassembled. The drawing
includes information required for the definition of the part, e.g. material properties, dimensions, tolerances,
surface texture.
Geometrical tolerances ISO 1101
Material: Steel EN 10025 1990 Fe360BFN
For complete definition of the part, this drawing
shall be used together with model AB 234567-9
Responsible dept. Technical reference Document type Document status
ABC 2 Patricia Johnson Part drawing Released
Created by
Title, Supplementary title
Jane Smith AB123 456-7
Flange
Legal owner
Approved by Rev. Date of issue Lang.
Sheet
David Brown A 2008-02-17 en 1

Figure 1 — Part drawing
Examples of part drawings from the construction field include the following:
⎯ a detail drawing which can show the appearance and properties of a part as well as its relation to and
mounting with other parts;
⎯ a manufacturing drawing, e.g. for beams, columns, floor slabs or other structural elements.
© ISO 2011 – All rights reserved 9

---------------------- Page: 14 ----------------------
ISO 29845:2011(E)
4.2.2 Assembly drawing
An assembly drawing (see Figure 2) is a drawing representing the relative position and/or shape of a group of
assembled parts. It depicts the constituents of a parts list. Relevant information may be added.
The list of parts is normally provided in a separate document, i.e. a parts list, but it can be included within the
drawing.

Responsible dept. Technical reference Document type Document status
Patricia Johnson Assembly drawing Released
ABC 2
Created by
Title, Supplementary title
Jane Smith AB123 456-7
Control unit
Legal owner
Approved by
Rev. Date of issue Lang. Sheet
David Brown A 2008-02-18 en 1

Figure 2 — Assembly drawing
Examples of assembly drawings from the construction field include the following:
⎯ a general arrangement drawing (showing an entire building or a technical system within a building, such
as the structural system or the ventilation system);
⎯ an assembly drawing (showing a more limited assembly, such as a kitchen);
⎯ a dimensional drawing (specifiing dimensions necessary for construction or production, sometimes
used for separating dimensions from the drawing that specifies identities/types of parts, especially for
architectural and structural drawings).
10 © ISO 2011 – All rights reserved

---------------------- Page: 15 ----------------------
ISO 29845:2011(E)
4.2.3 Tabular drawing
A tabular drawing (see Figure 3) uses a method of dimensioning that enables a series of variable common
features of a part or assembly to be presented in a tabular form.
Mass
Responsible dept. Technical reference Document type Document status
ABC 2 Patricia Johnson Tabular drawing Released
Created by
Title, Supplementary title
Jane Smith AB123 456-7
Hexagon nut, waxed
Legal owner
Approved by
Stainless steel Rev. Date of issue Lang. Sheet
David Brown
A 2008-02-17 en 1

Figure 3 — Tabular drawing
An example of a tabular drawing from the construction field is a component schedule. This often covers a
number of variants that have a general type in common, but differ both in geometrical specification and other
features. For example, a door schedule may cover all steel doors, both single- and double-swing variants.
Some subtypes are given below:
⎯ a door schedule;
⎯ a window schedule;
⎯ a bar schedule.

© ISO 2011 – All rights reserved 11

---------------------- Page: 16 ----------------------
ISO 29845:2011(E)
4.2.4 Fabrication drawing
A fabrication drawing (see Figure 4) is a part drawing of an assembly of items permanently joined together,
e.g. by welding, soldering or adhesive. The constituents shall be fully specified.
Remark 1: Steel according to ISO 630 E 275
3 - S235JR T=12 1
1 Top plate
2 - S235JR 8x20 T=8 1
2 Rib
1 1 - Side plate S235JR T=12 1
Part Qty Part number Part name Technical data, designation Rem.
General tolerances for
ref.
Responsible dept. Technical reference Document type Document status
welded constructions
ABC 2 Patricia Johnson Fabrication drawing Released
according to ISO 13920-BF
Created by
Title, Supplementary title
Jane Smith AB123 456-7
Bracket
Legal owner
Approved by Rev. Date of issue Lang.
Sheet
David Brown A 2008-01-25 en 1

Figure 4 — Fabrication drawing
An example of a fabrication drawing from the construction field is a manufacturing drawing for welded
components such as banisters or railings. The subdivision of manufacturing drawings normally just depends
on which manufacturer supplies the part or assembly, not on the method of fabrication, such as whether items
are permanently joined together.
12 © ISO 2011 – All rights reserved

---------------------- Page: 17 ----------------------
ISO 29845:2011(E)
4.2.5 Installation drawing
An installation drawing (see Figure 5) shows the general configuration of an item and the necessary
information to install the item relative to its mating structures or associated items.

Responsible dept. Technical reference Document type Document status
ABC 2 Patricia Johnson Installation drawing Released
Created by
Non toleranced dimensions Title, Supplementary title
Jane Smith AB123 456-7
Assembling of lock
according to ISO 2768-m Legal owner
Approved by Rev. Date of issue Lang. Sheet
David Brown A 2008-02-17 en 1

Figure 5 — Installation drawing
An example of an installation drawing from the construction field is a detail drawing. This can show the
appearance and properties of a part as well as its relation to and mounting with other parts, cf. 4.2.1.
© ISO 2011 – All rights reserved 13

---------------------- Page: 18 ----------------------
ISO 29845:2011(E)
4.2.6 Layout drawing
A layout drawing (see Figure 6) shows the location of sites, structures, buildings, spaces, elements,
assemblies or components. It may also show the important parts of a design and their technical and functional
interrelation.
Responsible dept. Technical reference Document type Document status
Patricia Johnson Layout drawing Released
ABC 2
Created by
Title, Supplementary title
AB123 456-7
Jane Smith
Living quarter
Legal owner
Approved by
Rev. Date of issue Lang. Sheet
Level one
David Brown
A 2007-10-12 en 1

Figure 6 — Layout drawing
An example of a layout drawing from the construction field is a general arrangement drawing. The
illustration shows one type of general arrangement drawing; elevations/facades and sections are other
common types. General arrangement drawings are mostly specific to technical disciplines, e.g. architectural,
structural, water and sewage, HVAC, power and lighting, alarm, data networks, furnishing, catering and fire
protection.
14 © ISO 2011 – All rights reserved

---------------------- Page: 19 ----------------------
ISO 29845:2011(E)
4.2.7 Interface drawing
An interface drawing (see Figure 7) gives information for the assembly and matching of two parts, concerning,
for example, their dimensions, configuration limitations, performance and test requirements.
Responsible dept. Technical reference Document type Document status
ABC 2 Patricia Johnson Interface drawing Released
Created by
Title, Supplementary title
Jane Smith AB123 456-7
Hole pattern gearbox
Non toleranced dimensions Legal owner
Approved by
Rev. Date of issue Lang. Sheet
according to ISO 2768-m
David Brown A 2008-02-19 en 1

Figure 7 — Interface drawing
This type of drawing is not directly applicable to construction. Interfaces such as hole patterns may be
included in detail drawings or manufacturing drawings.
© ISO 2011 – All rights reserved 15

---------------------- Page: 20 ----------------------
ISO 29845:2011(E)
4.2.8 Outline drawing
An outline drawing (see Figure 8) provides the outside peripheral envelope, overall dimensions and the mass
of an object, used in the determination of packaging and transportation requirements.
Damping ratio: 30 kNs / m
Mass: 30 kg
Responsible dept. Technical reference Document type Document status
ABC 2 Patricia Johnson Outline drawing Released
Created by
Title, Supplementary title
Jane Smith AB123 456-7
Hydraulic damper
Legal owner
Approved by
Rev. Date of issue Lang. Sheet
David Brown
A 2008-02-19 en 1

Figure 8 — Outline drawing
16 © ISO 2011 – All rights reserved

---------------------- Page: 21 ----------------------
ISO 29845:2011(E)
4.2.9 Supplier drawing
A supplier drawing (see Figure 9) defines a part developed and owned by an external supplier; it can be
redrawn [see Figure 9 a)], or pasted on the using company’s drawing sheet [see Figure 9 b)].
Mass 0,023 kg
Mounting hole 22,5 mm
Rated voltage 110-130 V
Kind of current AC
Rated current 15 mA
Colour Green
Luminance 126 mcd
Wave length 520 nm
Protection class IP 65
Service life < 50 000 h
Manufacturer AAA Company
Type designation  BCD
Responsible dept. Technical reference Document type Document status
ABC 2 Patricia Johnson Supplier drawing Released
Created by
Title, Supplementary title
Jane Smith AB123 456-7
Pilot light
Legal owner
Approved by Rev. Date of issue Lang.
Sheet
David Brown A 2008-02-19 en 1

a) Supplier drawing (redrawn)
Figure 9 — Supplier drawings (continued on next page)
© ISO 2011 – All rights reserved 17

---------------------- Page: 22 ----------------------
ISO 29845:2011(E)
Responsible dept. Technical reference Document type Document status
ABC 2 Patricia Johnson Supplier drawing Released
Created by
Title, Supplementary title
AB123 456-7
Jane Smith Pilot light
Legal owner
Approved by
Rev. Date of issue Lang. Sheet
David Brown
A 2008-02-19 en 1

b) Supplier drawing (pasted)
Figure 9 — Supplier drawings

An example of a supplier drawing from the construction field is a manufacturing drawing.

18 © ISO 2011 – All rights reserved

---------------------- Page: 23 ----------------------
ISO 29845:2011(E)
4.2.10 Illustration drawing
An illustration drawing (see Figure 10) shows figures and sketches for any general purpose which is not
covered by the more specific document types such as assembly drawing, outline drawing, etc.
Responsible dept. Technical reference Document type Document status
ABC 2 Patricia Johnson Illustration drawing Released
Created by
Title, Supplementary title
Jane Smith AB123 456-7
Gearbox
Legal owner
Approved by Rev. Date of issue Lang.
Sheet
David Brown A 2008-02-19 en 1

Figure 10 — Illustration drawing
Examples of illustration drawings from
...

Questions, Comments and Discussion

Ask us and Technical Secretary will try to provide an answer. You can facilitate discussion about the standard in here.