ISO 4928:2006
(Main)Road vehicles — Elastomeric cups and seals for cylinders for hydraulic braking systems using a non-petroleum base hydraulic brake fluid (Service temperature 120 degrees C max.)
Road vehicles — Elastomeric cups and seals for cylinders for hydraulic braking systems using a non-petroleum base hydraulic brake fluid (Service temperature 120 degrees C max.)
ISO 4928:2006 specifies performance tests of brake cups and seals for hydraulic braking systems for road vehicles; it does not include requirements relating to chemical composition, tensile strength and elongation of the rubber compound. Disc brake seals are not covered by this International Standard. ISO 4928:2006 is applicable to moulded seals (cups or double-lipped type gland seals), 60 mm in diameter and smaller, compounded from high temperature-resistant rubber, for use in hydraulic actuating cylinders using road vehicle non-petroleum base hydraulic brake fluid conforming to the requirements of ISO 4925.
Véhicules routiers — Coupelles et joints en caoutchouc pour cylindres de dispositifs de freinage hydrauliques utilisant un liquide de frein à base non pétrolière (Température maximale d'utilisation 120 degrés C)
General Information
Relations
Standards Content (Sample)
INTERNATIONAL ISO
STANDARD 4928
Third edition
2006-07-15
Road vehicles — Elastomeric cups and
seals for cylinders for hydraulic braking
systems using a non-petroleum base
hydraulic brake fluid (Service
temperature 120 °C max.)
Véhicules routiers — Coupelles et joints en caoutchouc pour cylindres
de dispositifs de freinage hydrauliques utilisant un liquide de frein à
base non pétrolière (Température maximale d'utilisation 120 °C)
Reference number
©
ISO 2006
PDF disclaimer
This PDF file may contain embedded typefaces. In accordance with Adobe's licensing policy, this file may be printed or viewed but
shall not be edited unless the typefaces which are embedded are licensed to and installed on the computer performing the editing. In
downloading this file, parties accept therein the responsibility of not infringing Adobe's licensing policy. The ISO Central Secretariat
accepts no liability in this area.
Adobe is a trademark of Adobe Systems Incorporated.
Details of the software products used to create this PDF file can be found in the General Info relative to the file; the PDF-creation
parameters were optimized for printing. Every care has been taken to ensure that the file is suitable for use by ISO member bodies. In
the unlikely event that a problem relating to it is found, please inform the Central Secretariat at the address given below.
© ISO 2006
All rights reserved. Unless otherwise specified, no part of this publication may be reproduced or utilized in any form or by any means,
electronic or mechanical, including photocopying and microfilm, without permission in writing from either ISO at the address below or
ISO's member body in the country of the requester.
ISO copyright office
Case postale 56 • CH-1211 Geneva 20
Tel. + 41 22 749 01 11
Fax + 41 22 749 09 47
E-mail copyright@iso.org
Web www.iso.org
Published in Switzerland
ii © ISO 2006 – All rights reserved
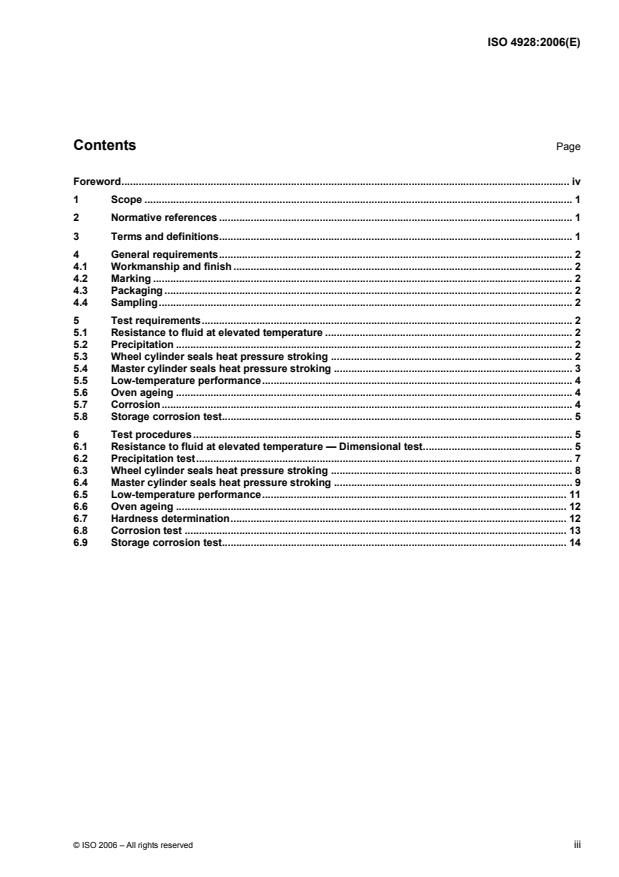
Contents Page
Foreword. iv
1 Scope . 1
2 Normative references . 1
3 Terms and definitions. 1
4 General requirements. 2
4.1 Workmanship and finish . 2
4.2 Marking . 2
4.3 Packaging . 2
4.4 Sampling. 2
5 Test requirements. 2
5.1 Resistance to fluid at elevated temperature . 2
5.2 Precipitation . 2
5.3 Wheel cylinder seals heat pressure stroking . 2
5.4 Master cylinder seals heat pressure stroking . 3
5.5 Low-temperature performance. 4
5.6 Oven ageing . 4
5.7 Corrosion. 4
5.8 Storage corrosion test. 5
6 Test procedures . 5
6.1 Resistance to fluid at elevated temperature — Dimensional test. 5
6.2 Precipitation test. 7
6.3 Wheel cylinder seals heat pressure stroking . 8
6.4 Master cylinder seals heat pressure stroking . 9
6.5 Low-temperature performance. 11
6.6 Oven ageing . 12
6.7 Hardness determination. 12
6.8 Corrosion test . 13
6.9 Storage corrosion test. 14
Foreword
ISO (the International Organization for Standardization) is a worldwide federation of national standards bodies
(ISO member bodies). The work of preparing International Standards is normally carried out through ISO
technical committees. Each member body interested in a subject for which a technical committee has been
established has the right to be represented on that committee. International organizations, governmental and
non-governmental, in liaison with ISO, also take part in the work. ISO collaborates closely with the
International Electrotechnical Commission (IEC) on all matters of electrotechnical standardization.
International Standards are drafted in accordance with the rules given in the ISO/IEC Directives, Part 2.
The main task of technical committees is to prepare International Standards. Draft International Standards
adopted by the technical committees are circulated to the member bodies for voting. Publication as an
International Standard requires approval by at least 75 % of the member bodies casting a vote.
Attention is drawn to the possibility that some of the elements of this document may be the subject of patent
rights. ISO shall not be held responsible for identifying any or all such patent rights.
ISO 40421 was prepared by Technical Committee ISO/TC 22, Road vehicles, Subcommittee SC 2, Braking
and systems equipment.
This third edition cancels and replaces the second edition (ISO 4928:1980), which has been technically
revised.
iv © ISO 2006 – All rights reserved
INTERNATIONAL STANDARD ISO 4928:2006(E)
Road vehicles — Elastomeric cups and seals for cylinders for
hydraulic braking systems using a non-petroleum base
hydraulic brake fluid (Service temperature 120 °C max.)
1 Scope
This International Standard specifies performance tests of brake cups and seals for hydraulic braking systems
for road vehicles; it does not include requirements relating to chemical composition, tensile strength and
elongation of the rubber compound. Disc brake seals are not covered by this International Standard.
This International Standard is applicable to moulded seals (cups or double-lipped type gland seals), 60 mm in
diameter and smaller, compounded from high temperature-resistant rubber, for use in hydraulic actuating
cylinders using road vehicle non-petroleum base hydraulic brake fluid conforming to the requirements of
ISO 4925.
2 Normative references
The following referenced documents are indispensable for the application of this document. For dated
references, only the edition cited applies. For undated references, the latest edition of the referenced
document (including any amendments) applies.
ISO 48, Rubber, vulcanized or thermoplastic — Determination of hardness (hardness between 10 IRHD and
100 IRHD)
ISO 188:1998, Rubber, vulcanized or thermoplastic — Accelerated ageing and heat resistance tests
ISO 1250, Mineral solvents for paints — White spirits and related hydrocarbon solvents
ISO 4925, Road vehicles — Specification of non-petroleum-base brake fluids for hydraulic systems
ISO 4926, Road vehicles — Hydraulic braking systems — Non-petroleum base reference fluids
3 Terms and definitions
For the purposes of this document, the following terms and definitions apply.
3.1
sloughing
release of carbon black on the surface of the rubber
3.2
scoring
formation of grooves in the rubber parallel to the direction of travel of the piston or seal
3.3
scuffing
visible erosion of the outer surface of the rubber
4 General requirements
4.1 Workmanship and finish
Seals shall be free from blisters, pin-holes, cracks, protuberances, embedded foreign material or other
physical defects which can be detected by thorough inspection, and shall conform to the dimensions specified
on the drawings.
4.2 Marking
The identification mark of the manufacturer and other details as specified on drawings shall be moulded into
each seal. Each seal in conformity with this International Standard may also have the following mark:
“ISO 4928”.
4.3 Packaging
Seals shall be packaged to meet requirements specified by the purchaser.
4.4 Sampling
The minimum lot on which complete specification tests shall be conducted for quality control testing, or the
frequency of any specific type test used to control production, shall be agreed upon by the manufacturer and
the purchaser.
5 Test requirements
5.1 Resistance to fluid at elevated temperature
After being subjected to the test for resistance to compatibility fluid at elevated temperature as prescribed in
6.1, the seals shall conform to the requirements specified in Table 1, and shall show no excessive
disintegration as evidenced by blisters or sloughing.
Table 1 — Requirements for fluid resistance at elevated temperature (120 °C)
Characteristics Permitted change
Volume From 0,0 % to + 20,0 %
Outside diameter, lip From 0,0 % to + 5,75 %
Outside diameter, base From 0,0 % to + 5,75 %
Hardness From − 15 IRHD to 0 IRHD
5.2 Precipitation
Not more than 0,3 % sediment by volume shall be formed in the centrifuge tube after the seals have been
tested as specified in 6.2.
5.3 Wheel cylinder seals heat pressure stroking
5.3.1 General
Wheel cylinder seals, when tested by the procedure specified in 6.3, shall meet the performance requirements
specified in 5.3.2 to 5.3.6.
2 © ISO 2006 – All rights reserved
5.3.2 Lip diameter change
The minimum lip diameter of wheel cylinder seals after the stroking test shall be greater than the wheel
cylinder bore by the minimum dimensions specified in Table 2.
Table 2 — Lip diameter change of wheel cylinder seals
Dimensions in millimetres
Diameter of wheel cylinder bore Minimum excess over bore
u 19,05 0,40
> 19,05; u 25,4 0,50
> 25,4; u 38,1 0,65
> 38,1; u 60 0,75
5.3.3 Leakage
No constant dampness past the seals or fluid discoloration of the filter paper on two or more inspections shall
occur.
5.3.4 Corrosion
Pistons and cylinder bore shall not show corrosion as evidenced by pitting to an extent discernible to the
naked eye, but staining or discoloration shall be permitted.
5.3.5 Change in hardness
Rubber seals shall not decrease in hardness by more than 15 IRHD when tested in accordance with the
procedure as specified in 6.7.
5.3.6 Condition of test seals
Wheel cylinder seals shall not show excessive deterioration such as scoring, scuffing, blistering, cracking,
chipping (heel abrasion) or change in shape from original appearance.
5.4 Master cylinder seals heat pressure stroking
5.4.1 General
Master cylinder seals, when tested by the procedure specified in 6.4, shall meet the performance
requirements specified in 5.4.2 to 5.4.6.
5.4.2 Lip diameter change
The minimum lip diameter of master cylinder seals after the stroking test shall be greater than the master
cylinder bore by the minimum dimensions specified in Table 3.
Table 3 — Lip diameter change of master cylinder seals
Dimensions in millimetres
Diameter of master cylinder bore Minimum excess over bore
u 19,05 0,30
> 19,05; u 25,4 0,40
> 25,4; u 38,1 0,50
> 38,1; u 60 0,65
5.4.3 Leakage
The same requirement as specified for wheel cylinder seals shall be applied (see 5.3.3).
5.4.4 Corrosion
The same requirement as specified for wheel cylinder seals shall be applied (see 5.3.4).
5.4.5 Change in hardness
The same requirement as specified for wheel cylinder seals shall be applied (see 5.3.5).
5.4.6 Condition of test seals
The same requirement as specified for wheel cylinder seals shall be applied (see 5.3.6).
5.5 Low-temperature performance
5.5.1 Leakage
No leakage of fluid shall occur when seals are tested according to the procedure specified in 6.5.1.
5.5.2 Bend test
The seal shall not crack and shall return to approximately its original shape within 1 min when tested
according to the procedure specified in 6.5.2.
5.6 Oven ageing
5.6.1 General
Seals, when tested according to the procedure specified in 6.6, shall meet the requirements specified in 5.6.2
and 5.6.3.
5.6.2 Change in hardness
The change in hardness shall be within the limits of ± 5 IRHD.
5.6.3 Condition of test seals
The seal shall show no ev
...


Questions, Comments and Discussion
Ask us and Technical Secretary will try to provide an answer. You can facilitate discussion about the standard in here.