ASTM C1509-02(2018)
(Specification)Standard Specification for Beaded Process Glass Pipe and Fittings (Withdrawn 2019)
Standard Specification for Beaded Process Glass Pipe and Fittings (Withdrawn 2019)
ABSTRACT
This specification covers chemically resistant, low expansion borosilicate glasses (Type I, Class A) used to manufacture beaded and end flanged-glass pipes and fittings for pressure and vacuum applications. Both the inside and outside surfaces of the glass shall be reasonably free of surface defects, such as open blisters or airlines and scratches, and shall be completely free of chips and checks. Pipe and fittings may be suitably heat treated (tempered) or annealed as specified by the manufacturer. Products should adhere to chemical, physical, and dimensional requirements, as well as minimum and maximum operating temperature, thermal shock resistance, and pressure ratings.
SCOPE
1.1 This specification covers chemically resistant, low expansion Type-I borosilicate glass, Class A, (see Specification E438) used to manufacture beaded end flanged-glass pipe and fittings for pressure and vacuum applications.
1.2 This international standard was developed in accordance with internationally recognized principles on standardization established in the Decision on Principles for the Development of International Standards, Guides and Recommendations issued by the World Trade Organization Technical Barriers to Trade (TBT) Committee.
WITHDRAWN RATIONALE
This specification covers chemically resistant, low ex- pansion Type-I borosilicate glass, Class A, (see Specification E438) used to manufacture beaded end flanged-glass pipe and fittings for pressure and vacuum applications.
Formerly under the jurisdiction of Committee C14 on Glass and Glass Products, this test method was withdrawn in November 2019. This standard is being withdrawn without replacement due to its limited use by industry.
General Information
Relations
Standards Content (Sample)
NOTICE: This standard has either been superseded and replaced by a new version or withdrawn.
Contact ASTM International (www.astm.org) for the latest information
Designation:C1509 −02 (Reapproved 2018)
Standard Specification for
Beaded Process Glass Pipe and Fittings
This standard is issued under the fixed designation C1509; the number immediately following the designation indicates the year of
original adoption or, in the case of revision, the year of last revision. A number in parentheses indicates the year of last reapproval. A
superscript epsilon (´) indicates an editorial change since the last revision or reapproval.
1. Scope 4.2 Heat Treatment or Annealing—Pipe and fittings may be
suitably heat treated (tempered) or annealed as specified by the
1.1 This specification covers chemically resistant, low ex-
manufacturer.
pansion Type-I borosilicate glass, Class A, (see Specification
E438) used to manufacture beaded end flanged-glass pipe and
5. Chemical Requirements
fittings for pressure and vacuum applications.
5.1 The chemical requirements shall be in accordance with
1.2 This international standard was developed in accor-
Specification E438.
dance with internationally recognized principles on standard-
ization established in the Decision on Principles for the
6. Physical Requirements
Development of International Standards, Guides and Recom-
mendations issued by the World Trade Organization Technical
6.1 The physical requirements shall be as described in
Barriers to Trade (TBT) Committee. Specification E438.
6.2 Refer also to Annex A1 for additional physical require-
2. Referenced Documents
ments.
2.1 ASTM Standards:
C162 Terminology of Glass and Glass Products
7. Operating Temperatures
C600 Test Method of Thermal Shock Test on Glass Pipe
7.1 Minimum Operating Temperature—The minimum rated
C601 Test Method for Pressure Test on Glass Pipe
operating temperature for all sizes shall be 0°F (–18°C)
C623 Test Method for Young’s Modulus, Shear Modulus,
provided that the temperature of the material being conveyed is
and Poisson’s Ratio for Glass and Glass-Ceramics by
above the freezing point.
Resonance
7.2 Maximum Operating Temperature—The maximum
C693 Test Method for Density of Glass by Buoyancy
rated operating temperature for all sizes shall be 350°F
E438 Specification for Glasses in Laboratory Apparatus
(177°C).
3. Terminology
7.3 Thermal Shock Resistance—The maximum allowable
sudden temperature differential for properly installed systems
3.1 For definitions of terms used in this specification, refer
shall be in accordance with Table 1 for the various pipe sizes.
to Terminology C162.
7.3.1 Maximum temperature differential refers to an almost
4. Materials and Manufacture instantaneous temperature change, such as low-pressure steam
followed directly by a flush of ice cold water, or the reverse.
4.1 The glass shall be reasonably free of surface defects,
Maximum temperature differential pertains to inside and out-
such as open blisters or airlines and scratches, and shall be
side surfaces, exclusive of sign.
completely free of chips and checks. This is applicable to both
7.3.2 The test method for thermal shock is not ordinarily
the inside and outside surfaces. It shall represent good work-
performed, but in those cases where thermal shock resistance
manship as consistent with standard glass process capabilities.
may be questioned, it may be performed in accordance with
Method C600. Acceptance of this test shall be that all tested
ware shall pass. If one or more failures do occur, a second
This specification is under the jurisdiction of ASTM Committee C14 on Glass
and Glass Products and is the direct responsibility of Subcommittee C14.05 on samplingtwicethepopulationof thefirst, shall be tested. If any
Glass Pipe.
failures occur in the second sampling, the entire shipment shall
Current edition approved Sept. 1, 2018. Published September 2018. Originally
be rejected.
approved in 2001. Last previous edition approved in 2012 as C1509 – 02 (2012).
DOI: 10.1520/C1509-02R18.
For referenced ASTM standards, visit the ASTM website, www.astm.org, or 8. Pressure Rating
contact ASTM Customer Service at service@astm.org. For Annual Book of ASTM
8.1 Maximum recommended working pressure for beaded
Standards volume information, refer to the standard’s Document Summary page on
the ASTM website. glass process pipe and fittings shall be in accordance with
Copyright © ASTM International, 100 Barr Harbor Drive, PO Box C700, West Conshohocken, PA 19428-2959. United States
C1509−02 (2018)
TABLE 1 Maximum Temperature Differential TABLE 3 Flange Face Squareness
Nominal Pipe Size, Sudden Temperature Squareness
Nominal Pipe or
in. Difference, max, °F (°C) Measurement
Fitting Size, in.
max, in.
1 to 2 200 (93)
3 180 (82) 1to2 ⁄32
4 140 (60) 3 ⁄64
4 ⁄16
6 122 (50)
6 ⁄64
Table 2, when the pipe is installed in accordance with manu- 9.1.2.2 Pipe fittings shall be measured for flange squareness
facturer’s recommendations, and when operated within the
with a gage having flat plates constructed at the angle required
maximum temperature differential and temperature limit. See by that fitting. One flange shall be firmly placed on one plate,
8.3 for vacuum service.
and the difference between the remaining flange face and the
other surface plate shall not exceed the amount shown in Table
8.2 Acceptance Pressure Test—Individual lengths of beaded
3 for the respective fitting size.
process pipe or fittings shall withstand an internal hydrostatic
9.1.3 Flange Dimensions and Specifications—Beaded
pressure test when tested in accordance with Method C601.
flange dimensions shall be as required by the manufacturer for
Acceptance of this test shall be that all tested ware shall pass.
the system.
If one or more failures do occur, a second sampling twice the
population of the first shall be tested. If any failures occur in 9.2 Bow:
the second sampling, the entire shipment shall be rejected.
9.2.1 Bow for All Pipe Diameters—Bow shall be measured
by supporting the pipe on “V” blocks, mounted in-line on the
8.3 All pipe sizes are suitable for vacuum applications.
same plane, approximately 2 in. from each end of the pipe. A
dial gage in contact with pipe at midlength measures variation
9. Dimensions and Permissible Variations
by rotating the pipe 360°. Bow is defined as half of the
9.1 Beaded Flanges:
measured variation, and shall not exceed 0.25 % of the total
9.1.1 Flange Face Flatness—Maximum permissible devia-
length of the pipe.
tion from a flat plane across the face of the flange on all sizes
9.3 Dimensions of All Pipe and Fittings (see Annex A1):
shall be ⁄16 in. (1.6 mm).
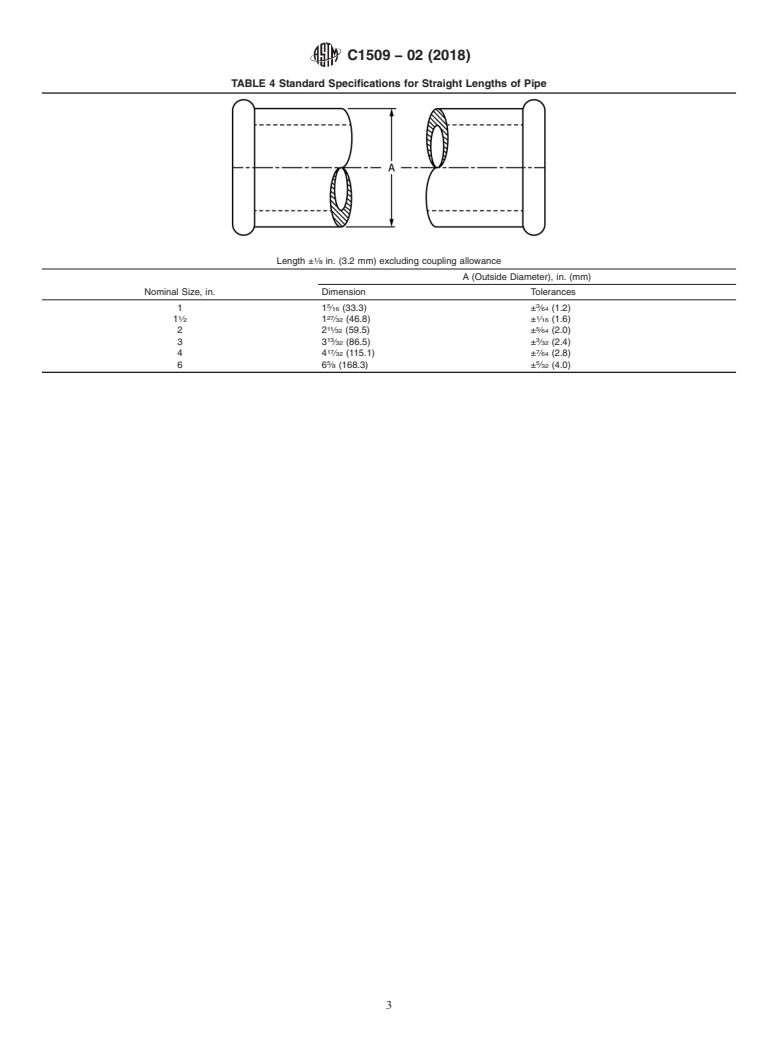
9.1.2 Flange Face Squareness—Flange faces of both pipe 9.3.1 Straight Pipe (Dimensions)—Dimensional specifica-
tions for straight lengths shall be accordance with Table 4.
and fittings shall be square to the centerline within the limit
prescribed in Table 3. 9.3.2 Fittings (Dimensions)—Dimensional specifications
for common fittings shall be in accordance with Tables 5-11.
9.1.2.1 Squareness of straight pipe lengths shall be mea-
sured by placing the pipe on rollers, located approximately 2
10. Inspection
in. (51 mm) from each end, and butting one
...


Questions, Comments and Discussion
Ask us and Technical Secretary will try to provide an answer. You can facilitate discussion about the standard in here.