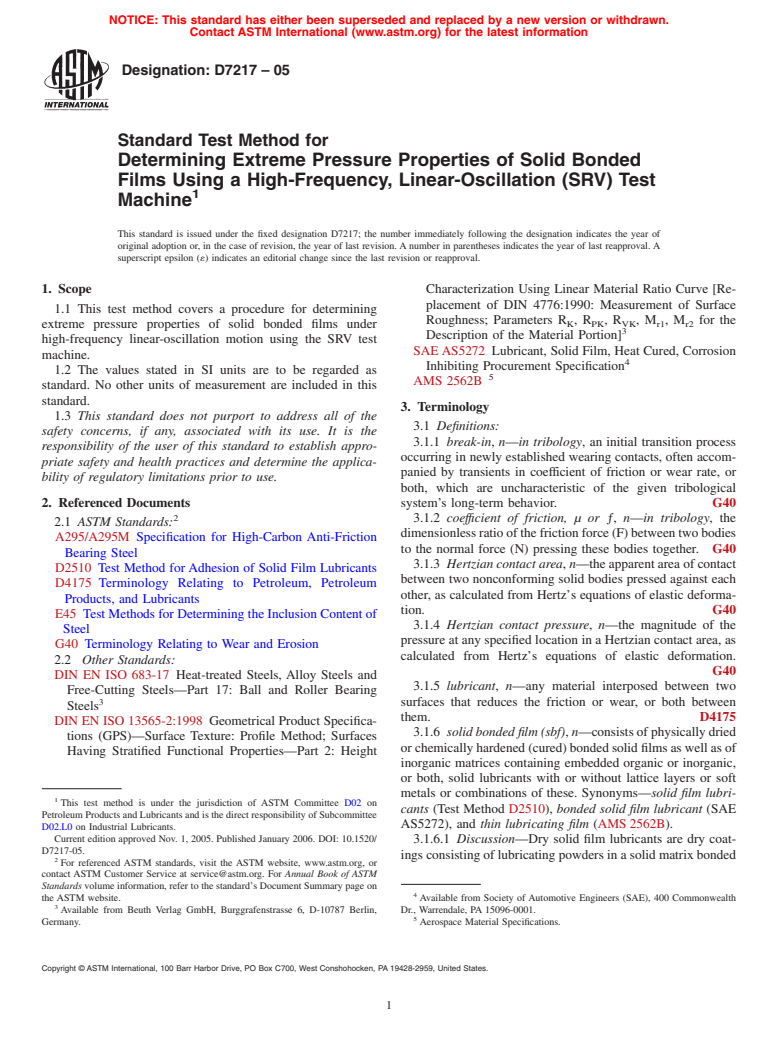
ASTM D7217-05
(Test Method)Standard Test Method for Determining Extreme Pressure Properties of Solid Bonded Films Using a High-Frequency, Linear-Oscillation (SRV) Test Machine
Standard Test Method for Determining Extreme Pressure Properties of Solid Bonded Films Using a High-Frequency, Linear-Oscillation (SRV) Test Machine
SCOPE
1.1 This test method covers a procedure for determining extreme pressure properties of solid bonded films under high-frequency linear-oscillation motion using the SRV test machine.
1.2 The values stated in SI units are to be regarded as the standard. The values given in parentheses are for information only.
This standard does not purport to address all of the safety concerns, if any, associated with its use. It is the responsibility of the user of this standard to establish appropriate safety and health practices and determine the applicability of regulatory limitations prior to use.
General Information
Relations
Standards Content (Sample)
NOTICE: This standard has either been superseded and replaced by a new version or withdrawn.
Contact ASTM International (www.astm.org) for the latest information
Designation:D7217–05
Standard Test Method for
Determining Extreme Pressure Properties of Solid Bonded
Films Using a High-Frequency, Linear-Oscillation (SRV) Test
Machine
This standard is issued under the fixed designation D7217; the number immediately following the designation indicates the year of
original adoption or, in the case of revision, the year of last revision. A number in parentheses indicates the year of last reapproval. A
superscript epsilon (´) indicates an editorial change since the last revision or reapproval.
1. Scope Characterization Using Linear Material Ratio Curve [Re-
placement of DIN 4776:1990: Measurement of Surface
1.1 This test method covers a procedure for determining
Roughness; Parameters R ,R ,R ,M ,M for the
K PK VK r1 r2
extreme pressure properties of solid bonded films under
Description of the Material Portion]
high-frequency linear-oscillation motion using the SRV test
SAEAS5272 Lubricant, Solid Film, Heat Cured, Corrosion
machine.
Inhibiting Procurement Specification
1.2 The values stated in SI units are to be regarded as
AMS 2562B
standard. No other units of measurement are included in this
standard.
3. Terminology
1.3 This standard does not purport to address all of the
3.1 Definitions:
safety concerns, if any, associated with its use. It is the
3.1.1 break-in, n—in tribology, an initial transition process
responsibility of the user of this standard to establish appro-
occurring in newly established wearing contacts, often accom-
priate safety and health practices and determine the applica-
panied by transients in coefficient of friction or wear rate, or
bility of regulatory limitations prior to use.
both, which are uncharacteristic of the given tribological
2. Referenced Documents system’s long-term behavior. G40
3.1.2 coeffıcient of friction, µ or ƒ, n—in tribology, the
2.1 ASTM Standards:
dimensionlessratioofthefrictionforce(F)betweentwobodies
A295/A295M Specification for High-Carbon Anti-Friction
to the normal force (N) pressing these bodies together. G40
Bearing Steel
3.1.3 Hertzian contact area, n—the apparent area of contact
D2510 Test Method for Adhesion of Solid Film Lubricants
between two nonconforming solid bodies pressed against each
D4175 Terminology Relating to Petroleum, Petroleum
other, as calculated from Hertz’s equations of elastic deforma-
Products, and Lubricants
tion. G40
E45 Test Methods for Determining the Inclusion Content of
3.1.4 Hertzian contact pressure, n—the magnitude of the
Steel
pressure at any specified location in a Hertzian contact area, as
G40 Terminology Relating to Wear and Erosion
calculated from Hertz’s equations of elastic deformation.
2.2 Other Standards:
G40
DIN EN ISO 683-17 Heat-treated Steels, Alloy Steels and
3.1.5 lubricant, n—any material interposed between two
Free-Cutting Steels—Part 17: Ball and Roller Bearing
3 surfaces that reduces the friction or wear, or both between
Steels
them. D4175
DIN EN ISO 13565-2:1998 Geometrical Product Specifica-
3.1.6 solid bonded film (sbf), n—consistsofphysicallydried
tions (GPS)—Surface Texture: Profile Method; Surfaces
orchemicallyhardened(cured)bondedsolidfilmsaswellasof
Having Stratified Functional Properties—Part 2: Height
inorganic matrices containing embedded organic or inorganic,
or both, solid lubricants with or without lattice layers or soft
metals or combinations of these. Synonyms—solid film lubri-
This test method is under the jurisdiction of ASTM Committee D02 on
cants (Test Method D2510), bonded solid film lubricant (SAE
Petroleum Products and Lubricants and is the direct responsibility of Subcommittee
AS5272), and thin lubricating film (AMS 2562B).
D02.L0 on Industrial Lubricants.
Current edition approved Nov. 1, 2005. Published January 2006. DOI: 10.1520/
3.1.6.1 Discussion—Dry solid film lubricants are dry coat-
D7217-05.
ings consisting of lubricating powders in a solid matrix bonded
For referenced ASTM standards, visit the ASTM website, www.astm.org, or
contact ASTM Customer Service at service@astm.org. For Annual Book of ASTM
Standards volume information, refer to the standard’s Document Summary page on
the ASTM website. Available from Society of Automotive Engineers (SAE), 400 Commonwealth
Available from Beuth Verlag GmbH, Burggrafenstrasse 6, D-10787 Berlin, Dr., Warrendale, PA 15096-0001.
Germany. Aerospace Material Specifications.
Copyright © ASTM International, 100 Barr Harbor Drive, PO Box C700, West Conshohocken, PA 19428-2959, United States.
D7217–05
to one or both surfaces to be lubricated. D2510
3.1.7 Ra (C.L.A.), n—in measuring surface finish, the arith-
metic average of the absolute distances of all profile points
from the mean line for a given distance.
3.1.8 Rz (DIN), n—in measuring surface finish, the average
of all Ry values (peak to valley heights) in the assessment
length.
3.1.9 Rpk, n—reduced peak height according to DIN EN
ISO13565-2:1998.Rpkisthemeanheightofthepeaksticking
out above the core profile section.
3.1.10 Rvk, n—reduced valley height according to DIN EN
ISO 13565-2:1998. Rvk is the mean depth of the valley
reaching into the material below the core profile section.
3.2 Definitions of Terms Specific to This Standard:
3.2.1 extreme pressure, adj—in lubrication, characterized
by metal surfaces in contact under high-stress rubbing condi-
FIG. 1 SRV Test Machine, Model III
tions.
3.2.2 seizure, n—localized fusion of metal between the
rubbing surfaces of the test pieces.
6. Apparatus
3.2.2.1 Discussion—Seizure is indicated by a sharp rise in 8
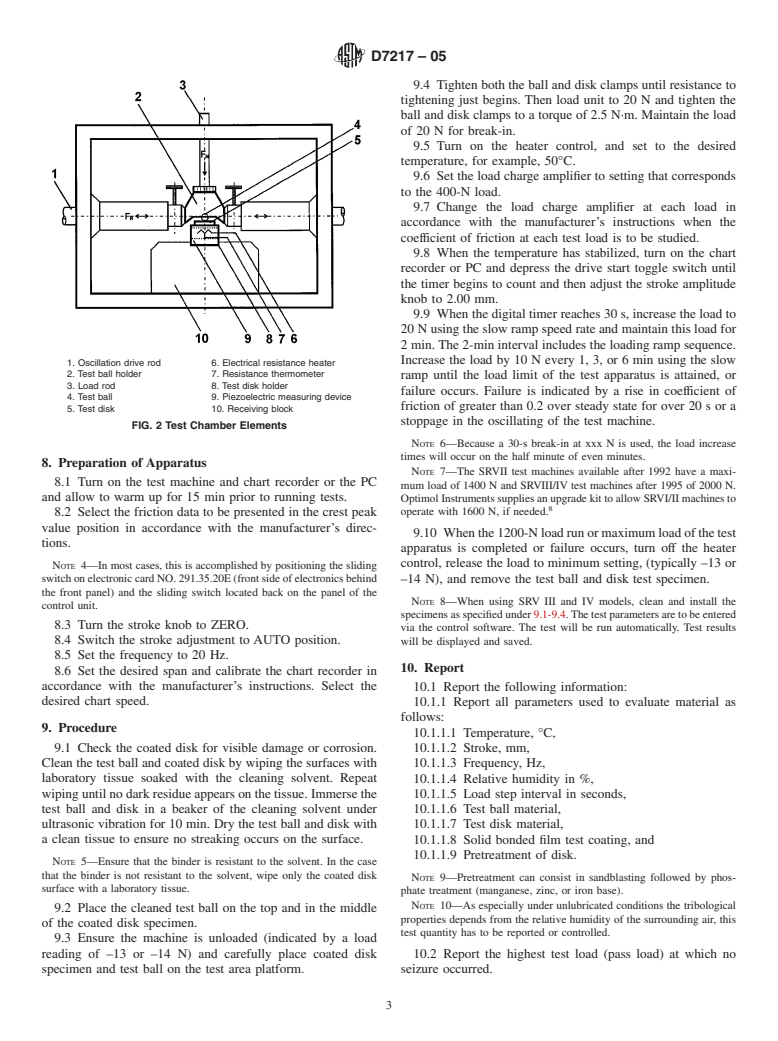
6.1 SRV Test Machine, illustrated in Figs. 1 and 2.
the coefficient of friction, over steady state, of greater than 0.2
for over 20 s. In severe cases, a stoppage in the motor will
7. Reagents and Materials
occur.
7.1 Test Balls, 52100 steel, 60 6 2 Rc hardness, 0.025 6
3.2.3 SRV, n—Schwingung, Reibung, Verschleiss (Ger-
0.005-µm Ra surface finish, Ø = 10-mm diameter.
man); oscillating, friction, wear (English translation).
NOTE 2—The test can also be performed using rollers of antifriction
bearings (Ø = 15 mm; length = 22 mm, parabolic border regions). Using
4. Summary of Test Method
2000 N as normal force possible in SRV III models conducts only to a
4.1 This test method is performed on an SRV test machine maximum Hertzian contact pressure of 808 MPa, which is far away from
the capability of most SBFs.
using a steel test ball oscillating against a steel test disk with
lubricant between them. Test load is increased in 100-N
7.2 Lower Test Disk vacuum arc remelted (VAR) AISI
increments until seizure occurs.The load, immediately prior to
52100 steel with a inclusion rating using method D,TypeA, as
the load at which seizure occurs, is measured and reported.
severity level number of 0.5 according to Test Methods E45,
SpecificationA295/A295M or a inclusion sum value K1# 10
NOTE 1—Test frequency, stroke length, temperature, and ball and disk
according to DIN EN ISO 683-17 and spherodized annealed to
material can be varied to simulate field conditions. The test ball yields
obtainglobularcarbide,60 62Rchardness,thesurfacesofthe
point-contact geometry. To obtain line or area contact, test pieces of
differing configurations can be substituted for the test balls. disk being lapped and free of lapping raw materials. The
topography of the disk will be determined by four values: 0.5
5. Significance and Use
µm < Rz < 0.650 µm; 0.035 µm < C.L.A. (Ra) < 0.050 µm,
0.020 µm < Rpk < 0.035 µm and 0.050 µm < Rvk < 0.075 µm,
5.1 This laboratory test method can be used to quickly
Ø = 24-mm diameter by 7.85 mm thick.
determine extreme pressure properties of parts coated with
solid bonded films at selected temperatures specified for use in
NOTE 3—The DIN 17230-1980 was replaced by DIN EN ISO 683-17.
unlubricatedapplicationswherehigh-speedvibrationalorstart-
7.3 n-Heptane, reagent grade. (Warning—Flammable.
stop motions are present with high Hertzian point contact.This
Health hazard.)
test method has found wide application in qualifying solid
7.4 Isopropanol, reagent grade. (Warning—Flammable.
bonded films used in automotive door lock mechanisms, hinge
Health hazard.)
joints, bolts, and in aerospace. This test method is a material
7.5 Toluene, reagent grade. (Warning—Flammable. Health
and application oriented approach for characterizing the tribo-
hazard.)
logical behaviour using random, discrete and constant param-
7.6 Cleaning Solvent, a mixture of equal volumes of
eter combinations Users of this test method should determine
n-heptane, ispropanol, and toluene. (Warning—Flammable.
whether results correlate with field performance or other
Health hazard.)
applications.
The sole source of supply of the apparatus known to the committee at this time
Amstutz, Hu, “Surface Texture: The Parameters,” Bulletin MI-TP-003-0785, is Optimol Instruments GmbH,Westendstr. 125, D-80339 Munich, Germany. If you
Sheffield Measurement Division, Warner and Swasey, 1985, p. 21. are aware of alternative suppliers, please provide this information with round robin
Amstutz, Hu, “Surface Texture: The Parameters,” Bulletin MI-TP-003-0785, data toASTM Headquarters. Your comments will receive careful consideration at a
Sheffield Measurement Division, Warner and Swasey, 1985, pp. 31, 29. meeting of the responsible technical committee, which you may attend.
D7217–05
9.4 Tighten both the ball and disk clamps until resistance to
tightening just begins. Then load unit to 20 N and tighten the
ball and disk clamps to a torque of 2.5 N·m. Maintain the load
of 20 N for break-in.
9.5 Turn on the heater control, and set to the desired
temperature, for example, 50°C.
9.6 Set the load charge amplifier to setting that corresponds
to the 400-N load.
9.7 Change the load charge amplifier at each load in
accordance with the manufacturer’s instructions when the
coefficient of friction at each test load is to be studied.
9.8 When the temperature has stabilized, turn on the chart
recorder or PC and depress the drive start toggle switch until
the timer begins to count and then adjust the stroke amplitude
knob to 2.00 mm.
9.9 When the digital timer reaches 30 s, increase the load to
20 N using the slow ramp speed rate and maintain this load for
2 min. The 2-min interval includes the loading ramp sequence.
Increase the load by 10 N every 1, 3, or 6 min using the slow
1. Oscillation drive rod 6. Electrical resistance heater
2. Test ball holder 7. Resistance thermometer
ramp until the load limit of the test apparatus is attained, or
3. Load rod 8. Test disk holder
failure occurs. Failure is indicated by a rise in coefficient of
4. Test ball 9. Piezoelectric measuring device
friction of greater than 0.2 over steady state for over 20 s or a
5. Test disk 10. Receiving block
stoppage in the oscillating of the test machine.
FIG. 2 Test Chamber Elements
NOTE 6—Because a 30-s break-in at
...


Questions, Comments and Discussion
Ask us and Technical Secretary will try to provide an answer. You can facilitate discussion about the standard in here.