ASTM F140-98(2008)
(Practice)Standard Practice for Making Reference Glass-Metal Butt Seals and Testing for Expansion Characteristics by Polarimetric Methods
Standard Practice for Making Reference Glass-Metal Butt Seals and Testing for Expansion Characteristics by Polarimetric Methods
SIGNIFICANCE AND USE
The term “reference” as employed in this practice implies that either the glass or the metal of the reference glass-metal seal will be a “standard reference material” such as those supplied for other physical tests by the National Institute for Standards and Technology (NIST), or a secondary reference material whose sealing characteristics have been determined by seals to a standard reference material. Until standard reference materials for seals are established by the NIST, secondary reference materials may be agreed upon between manufacturer and purchaser.
SCOPE
1.1 This practice covers the preparation and testing of reference glass-metal butt seals of two general configurations: one applicable to determining stress in the glass and the other to determining the degree of mismatch of thermal expansion (or contraction). Tests are in accordance with Test Method F 218 (Section 1.1).
1.2 This practice applies to all glass and metal (or alloy) combinations normally sealed together in the production of electronic components. It should not be attempted with glass-metal combinations having widely divergent thermal expansion (or contraction) properties.
General Information
Relations
Buy Standard
Standards Content (Sample)
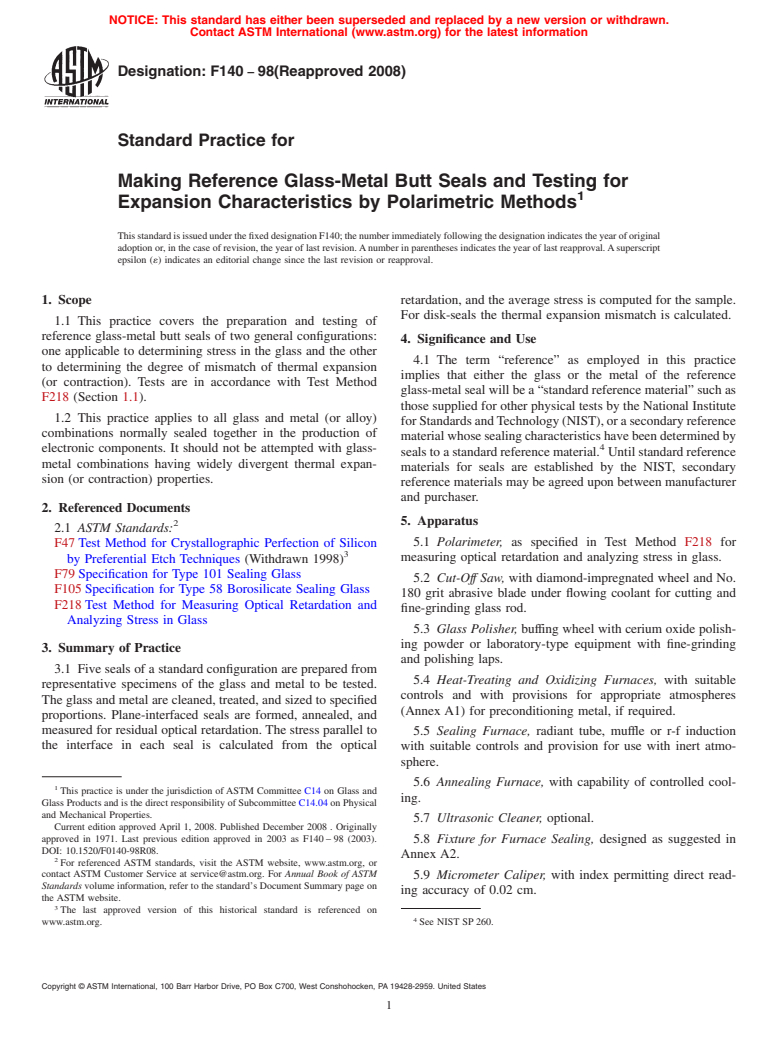
NOTICE: This standard has either been superseded and replaced by a new version or withdrawn.
Contact ASTM International (www.astm.org) for the latest information
Designation: F140 − 98(Reapproved 2008)
Standard Practice for
Making Reference Glass-Metal Butt Seals and Testing for
Expansion Characteristics by Polarimetric Methods
ThisstandardisissuedunderthefixeddesignationF140;thenumberimmediatelyfollowingthedesignationindicatestheyearoforiginal
adoptionor,inthecaseofrevision,theyearoflastrevision.Anumberinparenthesesindicatestheyearoflastreapproval.Asuperscript
epsilon (´) indicates an editorial change since the last revision or reapproval.
1. Scope retardation, and the average stress is computed for the sample.
For disk-seals the thermal expansion mismatch is calculated.
1.1 This practice covers the preparation and testing of
reference glass-metal butt seals of two general configurations:
4. Significance and Use
one applicable to determining stress in the glass and the other
4.1 The term “reference” as employed in this practice
to determining the degree of mismatch of thermal expansion
implies that either the glass or the metal of the reference
(or contraction). Tests are in accordance with Test Method
glass-metalsealwillbea“standardreferencematerial”suchas
F218 (Section 1.1).
those supplied for other physical tests by the National Institute
1.2 This practice applies to all glass and metal (or alloy)
forStandardsandTechnology(NIST),orasecondaryreference
combinations normally sealed together in the production of
materialwhosesealingcharacteristicshavebeendeterminedby
electronic components. It should not be attempted with glass-
sealstoastandardreferencematerial. Untilstandardreference
metal combinations having widely divergent thermal expan-
materials for seals are established by the NIST, secondary
sion (or contraction) properties.
reference materials may be agreed upon between manufacturer
and purchaser.
2. Referenced Documents
5. Apparatus
2.1 ASTM Standards:
5.1 Polarimeter, as specified in Test Method F218 for
F47Test Method for Crystallographic Perfection of Silicon
measuring optical retardation and analyzing stress in glass.
by Preferential Etch Techniques (Withdrawn 1998)
F79Specification for Type 101 Sealing Glass
5.2 Cut-Off Saw, with diamond-impregnated wheel and No.
F105Specification for Type 58 Borosilicate Sealing Glass
180 grit abrasive blade under flowing coolant for cutting and
F218Test Method for Measuring Optical Retardation and
fine-grinding glass rod.
Analyzing Stress in Glass
5.3 Glass Polisher, buffing wheel with cerium oxide polish-
ing powder or laboratory-type equipment with fine-grinding
3. Summary of Practice
and polishing laps.
3.1 Five seals of a standard configuration are prepared from
5.4 Heat-Treating and Oxidizing Furnaces, with suitable
representative specimens of the glass and metal to be tested.
controls and with provisions for appropriate atmospheres
The glass and metal are cleaned, treated, and sized to specified
(Annex A1) for preconditioning metal, if required.
proportions. Plane-interfaced seals are formed, annealed, and
measured for residual optical retardation.The stress parallel to 5.5 Sealing Furnace, radiant tube, muffle or r-f induction
the interface in each seal is calculated from the optical
with suitable controls and provision for use with inert atmo-
sphere.
5.6 Annealing Furnace, with capability of controlled cool-
This practice is under the jurisdiction ofASTM Committee C14 on Glass and
ing.
Glass Products and is the direct responsibility of Subcommittee C14.04 on Physical
and Mechanical Properties.
5.7 Ultrasonic Cleaner, optional.
Current edition approved April 1, 2008. Published December 2008 . Originally
approved in 1971. Last previous edition approved in 2003 as F140–98 (2003).
5.8 Fixture for Furnace Sealing, designed as suggested in
DOI: 10.1520/F0140-98R08.
Annex A2.
For referenced ASTM standards, visit the ASTM website, www.astm.org, or
contact ASTM Customer Service at service@astm.org. For Annual Book of ASTM
5.9 Micrometer Caliper, with index permitting direct read-
Standards volume information, refer to the standard’s Document Summary page on
ing accuracy of 0.02 cm.
the ASTM website.
The last approved version of this historical standard is referenced on
www.astm.org. See NIST SP260.
Copyright © ASTM International, 100 Barr Harbor Drive, PO Box C700, West Conshohocken, PA 19428-2959. United States
F140 − 98(Reapproved 2008)
5.10 Immersion Mercury Thermometer.
F140 − 98 (2008)
6. Materials
6.1 Metal—Representativespecimenpairsofthemetalfrom
either rod or plate stock with dimensions satisfying the
requirements of 7.2 or 7.3.The surfaces to be sealed should be
relatively free of scratches, machine marks, pits, or inclusions
that would induce localized stresses. The sealing surfaces
should terminate in sharp edges at the peripheral corners to act
as a glass stop. Edges that are rounded, such as appear on
tumbled parts, will have the tendency to permit glass overflow.
6.2 Glass—Representative specimens of rod or plate glass,
cut with either diamond-impregnated or other abrasive cutting
wheelsunderflowingwater.Dimensions(volume)shallsatisfy
the requirements of 7.2 or 7.3.
7. Test Specimen
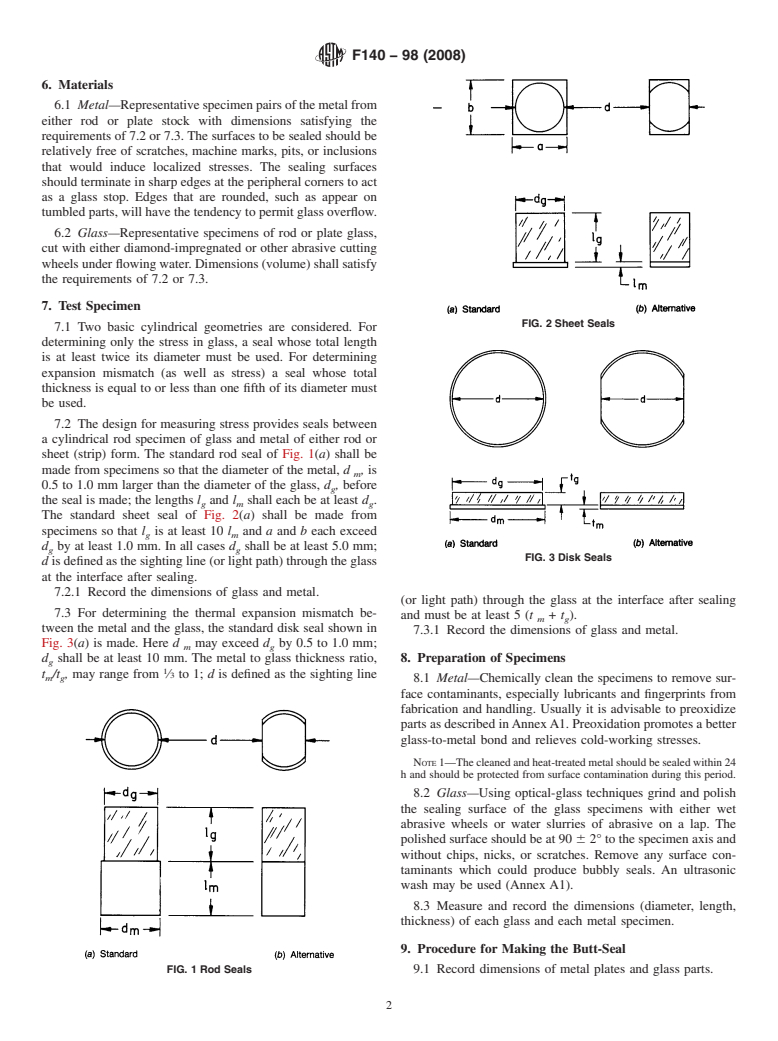
FIG. 2 Sheet Seals
7.1 Two basic cylindrical geometries are considered. For
determining only the stress in glass, a seal whose total length
is at least twice its diameter must be used. For determining
expansion mismatch (as well as stress) a seal whose total
thickness is equal to or less than one fifth of its diameter must
be used.
7.2 The design for measuring stress provides seals between
a cylindrical rod specimen of glass and metal of either rod or
sheet (strip) form. The standard rod seal of Fig. 1(a) shall be
made from specimens so that the diameter of the metal, d , is
m
0.5 to 1.0 mm larger than the diameter of the glass, d , before
g
the seal is made; the lengths l and l shall each be at least d .
g m g
The standard sheet seal of Fig. 2(a) shall be made from
specimens so that l is at least 10 l and a and b each exceed
g m
d by at least 1.0 mm. In all cases d shall be at least 5.0 mm;
g g
FIG. 3 Disk Seals
disdefinedasthesightingline(orlightpath)throughtheglass
at the interface after sealing.
7.2.1 Record the dimensions of glass and metal.
(or light path) through the glass at the interface after sealing
7.3 For determining the thermal expansion mismatch be-
and must be at least 5 (t + t ).
m g
tween the metal and the glass, the standard disk seal shown in
7.3.1 Record the dimensions of glass and metal.
Fig. 3(a) is made. Here d may exceed d by 0.5 to 1.0 mm;
m g
8. Preparation of Specimens
d shall be at least 10 mm. The metal to glass thickness ratio,
g
t /t , may range from ⁄3 to 1; d is defined as the sighting line
m g
8.1 Metal—Chemically clean the specimens to remove sur-
face contaminants, especially lubricants and fingerprints from
fabrication and handling. Usually it is advisable to preoxidize
partsasdescribedinAnnexA1.Preoxidationpromotesabetter
glass-to-metal bond and relieves cold-working stresses.
NOTE1—Thecleanedandheat-treatedmetalshouldbesealedwithin24
h and should be protected from surface contamination during this period.
8.2 Glass—Using optical-glass techniques grind and polish
the sealing surface of the glass specimens with either wet
abrasive wheels or water slurries of abrasive on a lap. The
polishedsurfaceshouldbeat90 62°tothespecimenaxisand
without chips, nicks, or scratches. Remove any surface con-
taminants which could produce bubbly seals. An ultrasonic
wash may be used (Annex A1).
8.3 Measure and record the dimensions (diameter, length,
thickness) of each glass and each metal specimen.
9. Procedure for Making the Butt-Seal
FIG. 1 Rod Seals 9.1 Record dimensions of metal plates and glass parts.
F140 − 98 (2008)
NOTE 4—If it is desired to minimize any uncertainties about measuring
9.2 Make the seal in a furnace, by flame, or by induction
through the curved surfaces, these may be ground after annealing to
heating of the metal, utilizing suitable specimen holders or
conformtothealternateshapesofFig.1(b),2( b),or3(b).Opposingfaces
supports under controlled conditions of temperature and time
shouldbegroundsoastobeparalleltoeachotherandnormaltotheplane
(Annex A2). 1
ofthesealinterfaceeachwithin ⁄2°.Forrodsealsorsheetseals,grinding
should be such that in Fig. 1( b) and 2(b) the dimension d is not less than
0.8 d . In the case of the alternative disk seal of Fig. 3(b), d must still be
10. Annealing g
at least 5(t + t ). Grinding should be followed by reannealing before
m g
10.1 Once a symmetrical, bubble-free seal has been made,
measuring retardation. It should be borne in mind that grinding may
produce micro or macro cracks at the interface with the uncertainties
proper annealing of the seal becomes the most critical part of
associated with these conditions.
the procedure. It is by this operation that all stresses are
relieved except those due to the difference in thermal contrac- 11.1.3 If an immersion liquid is used record the nominal
tion of the two materials from annealing temperature levels. index of refraction, n , of the liquid, and measure and record
D
This process involves heating the seal to a temperature to the nearest 0.1°C the temperature of the liquid using an
somewhat higher than the annealing point of the glass and immersion mercury thermometer.
11.1.4 Record the type of light source and the effective
maintaining the temperature for a time sufficient to relieve the
existing strain. The test specimen is then cooled slowly at a wavelength, L, in nanometres of the light for which the
retardation has been measured. Record the interface extinction
constant rate.As an alternative, annealing can proceed directly
on cooling during the making of a seal. angle and sense (tension or compression) as defined in Test
Method F218.
10.2 Seal stress and associated expansion mismatch can be
11.1.5 Measure the length d along the light path (Fig. 1,2,
varied markedly by annealing schedule modification. For this
and 3) using a micrometer caliper with an index permitting
reason, when the test is used as an acceptance specification, it
direct reading of 0.002 mm.
is strongly recommended that producer and user mutually
definetheannealingscheduleandestablishrigidcontrolsforits
12. Calculations
maintenance.
12.1 Calculate the retardation per unit length of each speci-
men as follows:
11. Procedure for Measuring Optical Retardation
R 5 LA/180d (1)
11.1 For each specimen measure the retardation in the
annealed seal due to the stress parallel to the interface
where:
according to Test Method F218.
R = retardatio
...
This document is not anASTM standard and is intended only to provide the user of anASTM standard an indication of what changes have been made to the previous version. Because
it may not be technically possible to adequately depict all changes accurately, ASTM recommends that users consult prior editions as appropriate. In all cases only the current version
of the standard as published by ASTM is to be considered the official document.
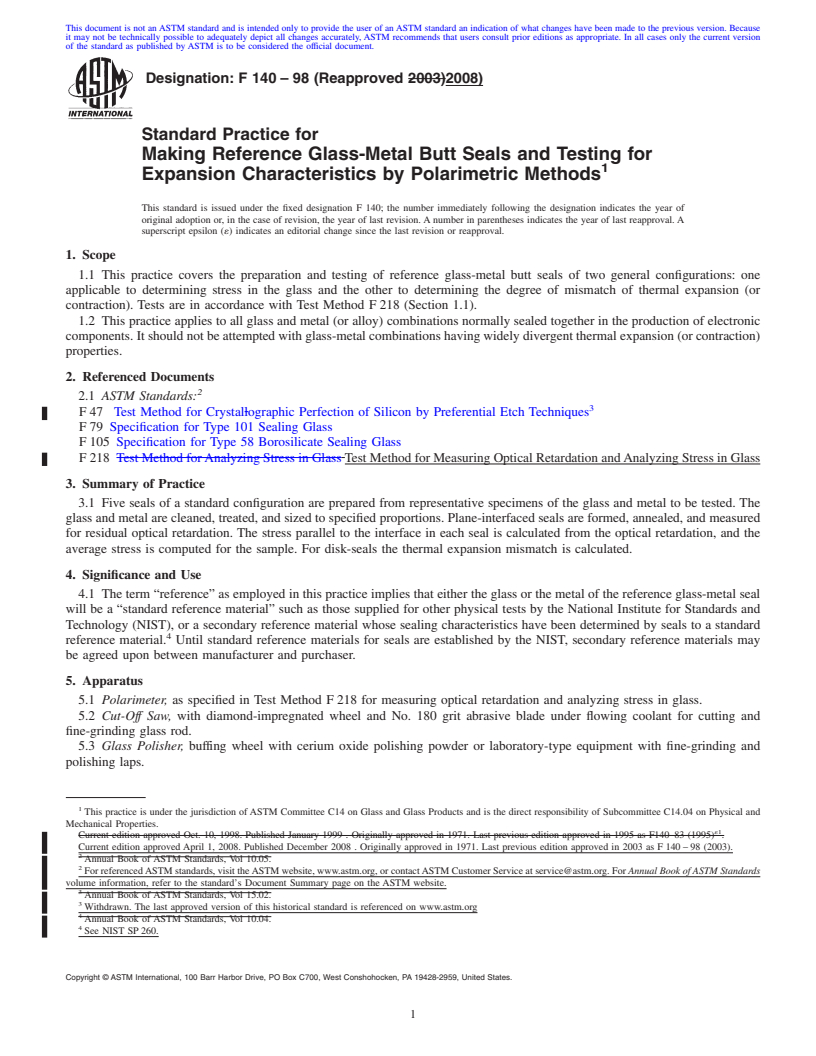
Designation: F 140 – 98 (Reapproved 2003)2008)
Standard Practice for
Making Reference Glass-Metal Butt Seals and Testing for
Expansion Characteristics by Polarimetric Methods
This standard is issued under the fixed designation F 140; the number immediately following the designation indicates the year of
original adoption or, in the case of revision, the year of last revision.Anumber in parentheses indicates the year of last reapproval.A
superscript epsilon (´) indicates an editorial change since the last revision or reapproval.
1. Scope
1.1 This practice covers the preparation and testing of reference glass-metal butt seals of two general configurations: one
applicable to determining stress in the glass and the other to determining the degree of mismatch of thermal expansion (or
contraction). Tests are in accordance with Test Method F218 (Section 1.1).
1.2 This practice applies to all glass and metal (or alloy) combinations normally sealed together in the production of electronic
components.Itshouldnotbeattemptedwithglass-metalcombinationshavingwidelydivergentthermalexpansion(orcontraction)
properties.
2. Referenced Documents
2.1 ASTM Standards:
F47 Test Method for Crystallographic Perfection of Silicon by Preferential Etch Techniques
F79 Specification for Type 101 Sealing Glass
F105 Specification for Type 58 Borosilicate Sealing Glass
F218 TestMethodforAnalyzingStressinGlassTestMethodforMeasuringOpticalRetardationandAnalyzingStressinGlass
3. Summary of Practice
3.1 Five seals of a standard configuration are prepared from representative specimens of the glass and metal to be tested. The
glass and metal are cleaned, treated, and sized to specified proportions. Plane-interfaced seals are formed, annealed, and measured
for residual optical retardation. The stress parallel to the interface in each seal is calculated from the optical retardation, and the
average stress is computed for the sample. For disk-seals the thermal expansion mismatch is calculated.
4. Significance and Use
4.1 The term “reference” as employed in this practice implies that either the glass or the metal of the reference glass-metal seal
will be a “standard reference material” such as those supplied for other physical tests by the National Institute for Standards and
Technology (NIST), or a secondary reference material whose sealing characteristics have been determined by seals to a standard
reference material. Until standard reference materials for seals are established by the NIST, secondary reference materials may
be agreed upon between manufacturer and purchaser.
5. Apparatus
5.1 Polarimeter, as specified in Test Method F218 for measuring optical retardation and analyzing stress in glass.
5.2 Cut-Off Saw, with diamond-impregnated wheel and No. 180 grit abrasive blade under flowing coolant for cutting and
fine-grinding glass rod.
5.3 Glass Polisher, buffing wheel with cerium oxide polishing powder or laboratory-type equipment with fine-grinding and
polishing laps.
This practice is under the jurisdiction ofASTM Committee C14 on Glass and Glass Products and is the direct responsibility of Subcommittee C14.04 on Physical and
Mechanical Properties.
´1
Current edition approved Oct. 10, 1998. Published January 1999 . Originally approved in 1971. Last previous edition approved in 1995 as F140–83 (1995) .
Current edition approved April 1, 2008. Published December 2008 . Originally approved in 1971. Last previous edition approved in 2003 as F140–98 (2003).
Annual Book of ASTM Standards, Vol 10.05.
ForreferencedASTMstandards,visittheASTMwebsite,www.astm.org,orcontactASTMCustomerServiceatservice@astm.org.For Annual Book ofASTM Standards
volume information, refer to the standard’s Document Summary page on the ASTM website.
Annual Book of ASTM Standards, Vol 15.02.
Withdrawn. The last approved version of this historical standard is referenced on www.astm.org
Annual Book of ASTM Standards, Vol 10.04.
See NIST SP260.
Copyright © ASTM International, 100 Barr Harbor Drive, PO Box C700, West Conshohocken, PA 19428-2959, United States.
F 140 – 98 (2003)(2008)
5.4 Heat-Treating and Oxidizing Furnaces, with suitable controls and with provisions for appropriate atmospheres (AnnexA1)
for preconditioning metal, if required.
5.5 Sealing Furnace, radiant tube, muffle or r-f induction with suitable controls and provision for use with inert atmosphere.
5.6 Annealing Furnace, with capability of controlled cooling.
5.7 Ultrasonic Cleaner, optional.
5.8 Fixture for Furnace Sealing, designed as suggested in Annex A2.
5.9 Micrometer Caliper, with index permitting direct reading accuracy of 0.02 cm.
5.10 Immersion Mercury Thermometer.
6. Materials
6.1 Metal—Representative specimen pairs of the metal from either rod or plate stock with dimensions satisfying the
requirements of 7.2 or 7.3.The surfaces to be sealed should be relatively free of scratches, machine marks, pits, or inclusions that
would induce localized stresses. The sealing surfaces should terminate in sharp edges at the peripheral corners to act as a glass
stop. Edges that are rounded, such as appear on tumbled parts, will have the tendency to permit glass overflow.
6.2 Glass—Representative specimens of rod or plate glass, cut with either diamond-impregnated or other abrasive cutting
wheels under flowing water. Dimensions (volume) shall satisfy the requirements of 7.2 or 7.3.
7. Test Specimen
7.1 Twobasiccylindricalgeometriesareconsidered.Fordeterminingonlythestressinglass,asealwhosetotallengthisatleast
twice its diameter must be used. For determining expansion mismatch (as well as stress) a seal whose total thickness is equal to
or less than one fifth of its diameter must be used.
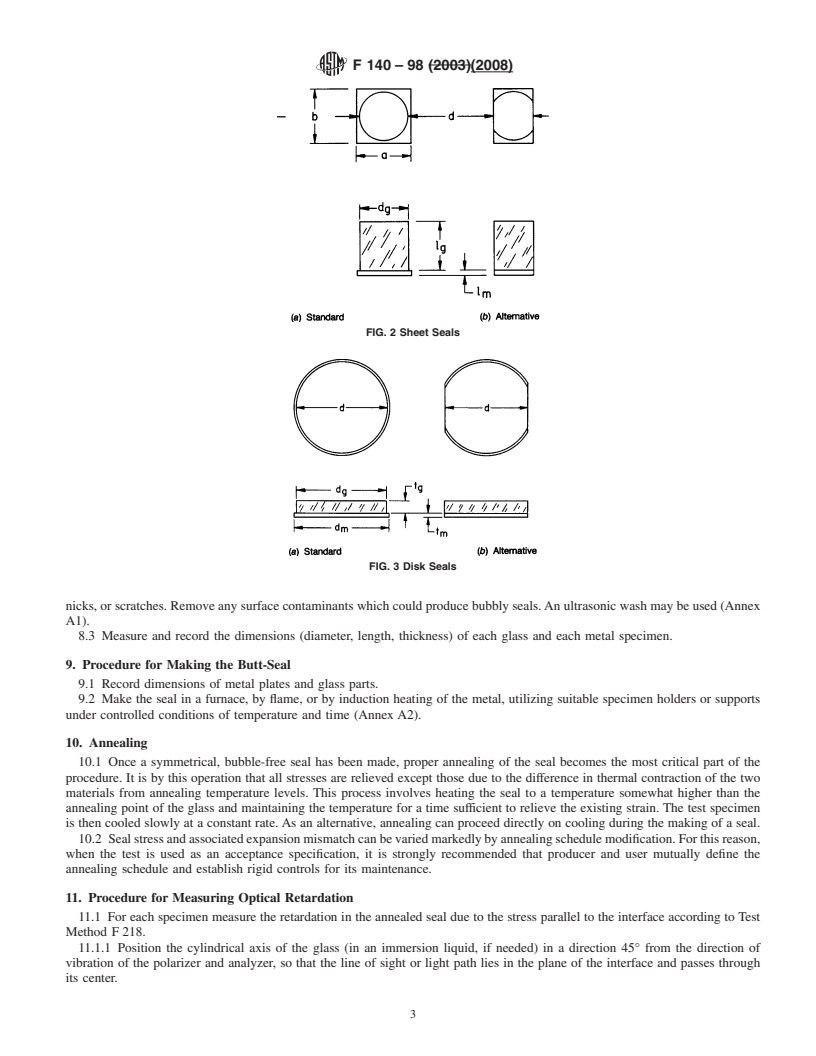
7.2 The design for measuring stress provides seals between a cylindrical rod specimen of glass and metal of either rod or sheet
(strip) form. The standard rod seal of Fig. 1(a) shall be made from specimens so that the diameter of the metal, d , is 0.5 to 1.0
m
mm larger than the diameter of the glass, d , before the seal is made; the lengths l and l shall each be at least d . The standard
g g m g
sheet seal of Fig. 2(a) shall be made from specimens so that l is at least 10 l and a and b each exceed d by at least 1.0 mm.
g m g
Inallcasesd shallbeatleast5.0mm;disdefinedasthesightingline(orlightpath)throughtheglassattheinterfaceaftersealing.
g
7.2.1 Record the dimensions of glass and metal.
7.3 For determining the thermal expansion mismatch between the metal and the glass, the standard disk seal shown in Fig. 3(a)
is made. Here d may exceed d by 0.5 to 1.0 mm; d shall be at least 10 mm.The metal to glass thickness ratio, t /t , may range
m g g m g
from ⁄3 to 1; d is defined as the sighting line (or light path) through the glass at the interface after sealing and must be at least
5(t + t ).
m g
7.3.1 Record the dimensions of glass and metal.
8. Preparation of Specimens
8.1 Metal—Chemically clean the specimens to remove surface contaminants, especially lubricants and fingerprints from
fabrication and handling. Usually it is advisable to preoxidize parts as described in Annex A1. Preoxidation promotes a better
glass-to-metal bond and relieves cold-working stresses.
NOTE 1—The cleaned and heat-treated metal should be sealed within 24 h and should be protected from surface contamination during this period.
8.2 Glass—Using optical-glass techniques grind and polish the sealing surface of the glass specimens with either wet abrasive
wheels or water slurries of abrasive on a lap. The polished surface should be at 90 6 2° to the specimen axis and without chips,
FIG. 1 Rod Seals
F 140 – 98 (2003)(2008)
FIG. 2 Sheet Seals
FIG. 3 Disk Seals
nicks,orscratches.Removeanysurfacecontaminantswhichcouldproducebubblyseals.Anultrasonicwashmaybeused(Annex
A1).
8.3 Measure and record the dimensions (diameter, length, thickness) of each glass and each metal specimen.
9. Procedure for Making the Butt-Seal
9.1 Record dimensions of metal plates and glass parts.
9.2 Make the seal in a furnace, by flame, or by induction heating of the metal, utilizing suitable specimen holders or supports
under controlled conditions of temperature and time (Annex A2).
10. Annealing
10.1 Once a symmetrical, bubble-free seal has been made, proper annealing of the seal becomes the most critical part of the
procedure. It is by this operation that all stresses are relieved except those due to the difference in thermal contraction of the two
materials from annealing temperature levels. This process involves heating the seal to a temperature somewhat higher than the
annealing point of the glass and maintaining the temperature for a time sufficient to relieve the existing strain. The test specimen
is then cooled slowly at a constant rate.As an alternative, annealing can proceed directly on cooling during the making of a seal.
10.2 Sealstressandassociatedexpansionmismatchcanbevariedmarkedlybyannealingschedulemodification.Forthisreason,
when the test is used as an acceptance specification, it is strongly recommended that producer and user mutually define the
annealing schedule and establish rigid controls for its maintenance.
11. Procedure for Measuring Optical Retardation
11.1 For each specimen measure the retardation in the annealed seal due to the stress parallel to the interface according to Test
Method F218.
11.1.1 Position the cylindrical axis of the glass (in an immersion liquid, if needed) in a direction 45° from the direction of
vibration of the polarizer and analyzer, so that the line of sight or light path lies in the plane of the interface and passes through
its center.
F 140 – 98 (2003)(2008)
11.1.2 Determine the retardation along the light path in terms of degrees of rotation of the analyzer. Rotate the analyzer in a
directionthatcausesthecurvedblackfringeseenwithintheglasstoappeartomoveuptobutnotbeyondtheglass-metalinterface
(as though into the metal). Rotate the analyzer so that any light or “gray” area which may exist between the darkest part of the
fringe (its center of width) and the surface of the metal disappears; this condition is termed “extinction.” When extinction is
achieved correctly, the width of the black fringe should appear to be about half its initial value, the other half apparently being
obscured by the metal. Record the rotation of the analyzer required to produce extinction.
NOTE 2—Sealing combinations may exist in which the thermal expansion coefficients of glass and metal at room temperature may differ significantly.
In these cases i
...


Questions, Comments and Discussion
Ask us and Technical Secretary will try to provide an answer. You can facilitate discussion about the standard in here.