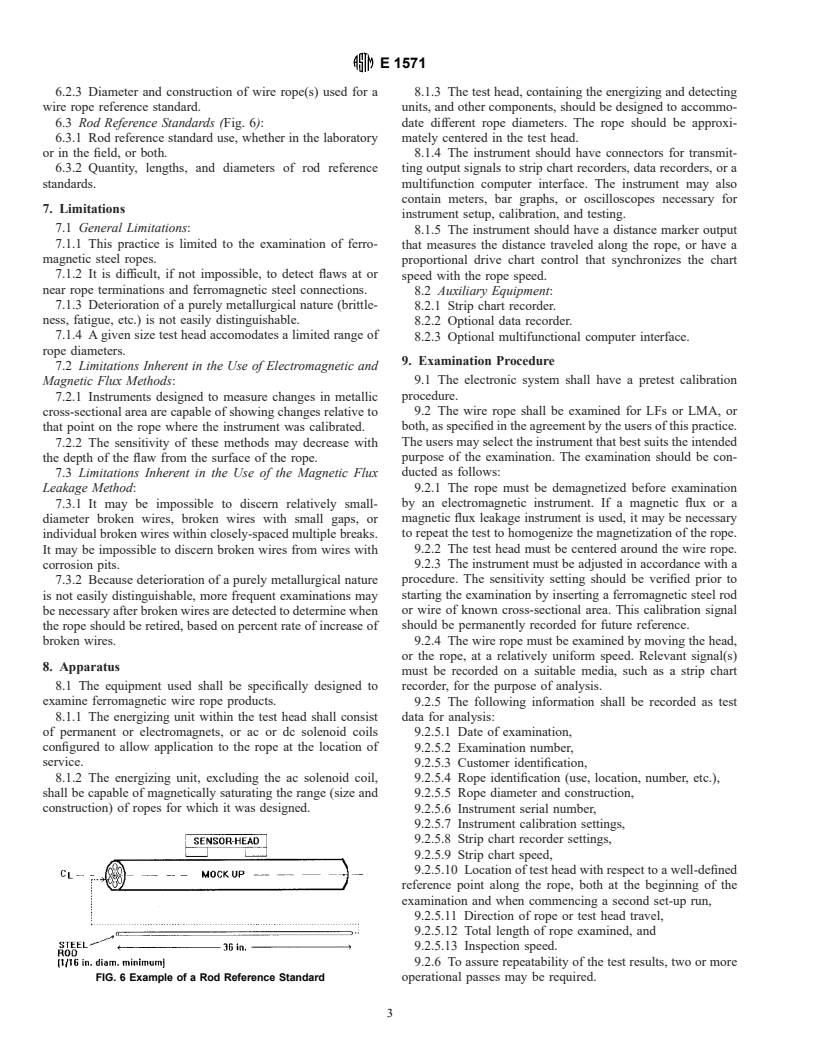
ASTM E1571-96
(Practice)Standard Practice for Electromagnetic Examination of Ferromagnetic Steel Wire Rope
Standard Practice for Electromagnetic Examination of Ferromagnetic Steel Wire Rope
SCOPE
1.1 This practice covers the application and standardization of instruments that use the electromagnetic, the magnetic flux, and the magnetic flux leakage examination method to detect flaws and changes in metallic cross-sectional areas in ferromagnetic wire rope products.
1.1.1 This practice includes rope diameters up to 2.5 in. (63.5 mm). Larger diameters may be included, subject to agreement by the users of this practice.
1.2 This standard does not purport to address all of the safety concerns, if any, associated with its use. It is the responsibility of the user of this standard to establish appropriate safety and health practices and determine the applicability of regulatory limitations prior to use.
General Information
Relations
Standards Content (Sample)
NOTICE: This standard has either been superseded and replaced by a new version or discontinued.
Contact ASTM International (www.astm.org) for the latest information.
Designation: E 1571 – 96 An American National Standard
Standard Practice for
Electromagnetic Examination of Ferromagnetic Steel Wire
Rope
This standard is issued under the fixed designation E 1571; the number immediately following the designation indicates the year of
original adoption or, in the case of revision, the year of last revision. A number in parentheses indicates the year of last reapproval. A
superscript epsilon (e) indicates an editorial change since the last revision or reapproval.
1. Scope maximum metallic cross-sectional area, as measured with an
instrument.
1.1 This practice covers the application and calibration of
3.2.4 single-function instrument—a wire rope test instru-
instruments that use the electromagnetic, the magnetic flux,
ment designed to detect and display either changes in metallic
and the magnetic flux leakage test method to detect flaws and
cross-sectional area or local flaws, but not both, on a strip chart
changes in metallic cross-sectional areas in ferromagnetic wire
recorder or another appropriate device.
rope products.
1.1.1 This practice includes rope diameters up to 2.5 in.
4. Summary of Practice
(63.5 mm). Larger diameters may be included, subject to
4.1 The principle of operation of a wire rope nondestructive
agreement by the users of this practice.
testing instrument is as follows:
1.2 This standard does not purport to address all of the
4.1.1 Electromagnetic Instrument—An electromagnetic
safety concerns, if any, associated with its use. It is the
wire rope testing instrument works on the transformer principle
responsibility of the user of this standard to establish appro-
with primary and secondary coils wound around the rope (Fig.
priate safety and health practices and determine the applica-
1). The rope acts as the transformer core. The primary (exciter)
bility of regulatory limitations prior to use.
coil is energized with a low frequency alternating current (ac),
2. Referenced Documents typically in the 10 to 30 Hz range. The secondary (search) coil
measures the magnetic characteristics of the rope. Any signifi-
2.1 ASTM Standards:
cant change in the magnetic characteristics in the core (wire
E 543 Practice for Agencies Performing Nondestructive
rope) will be reflected as voltage changes (amplitude and
Testing
phase) in the secondary coil. Electromagnetic instruments
E 1316 Terminology for Nondestructive Examinations
operate at relatively low magnetic field strengths; therefore, it
3. Terminology is necessary to completely demagnetize the rope before the
start of an examination. This type of instrument is designed to
3.1 Definitions—See Terminology E 1316 for general ter-
detect changes in metallic cross-sectional area.
minology applicable to this practice.
4.1.2 Direct Current and Permanent Magnet (Magnetic
3.2 Definitions of Terms Specific to This Standard:
Flux) Instruments—Direct current (dc) and permanent magnet
3.2.1 dual-function instrument—a wire rope NDT instru-
instruments (Figs. 2 and 3) supply a constant flux that
ment designed to detect and display changes of metallic
magnetizes a length of rope as it passes through the test head
cross-sectional area on one channel and local flaws on another
(magnetizing circuit). The total axial magnetic flux in the rope
channel of a dual-channel strip chart recorder or another
can be measured either by Hall effect sensors, an encircling
appropriate device.
(sense) coil, or by any other appropriate device that can
3.2.2 local flaw (LF)—a discontinuity in a rope, such as a
measure absolute magnetic fields or variations in a steady
broken or damaged wire, a corrosion pit on a wire, a groove
magnetic field. The signal from the sensors is electronically
worn into a wire, or any other physical condition that degrades
processed, and the output voltage is proportional to the volume
the integrity of the rope.
of steel or the change in metallic cross-sectional area, within
3.2.3 loss of metallic cross-sectional area (LMA)—a rela-
the region of influence of the magnetizing circuit. This type of
tive measure of the amount of material (mass) missing from a
instrument measures changes in metallic cross-sectional area.
location along the wire rope and is measured by comparing a
4.1.3 Magnetic Flux Leakage Instrument—A direct current
point with a reference point on the rope that represents
or permanent magnet instrument (Fig. 4) is used to supply a
constant flux that magnetizes a length of rope as it passes
This practice is under the jurisdiction of ASTM Committee E-7 on Nonde-
through the test head (magnetizing circuit). The magnetic flux
structive Testing and is the direct responsibility of Subcommittee E07.07 on
leakage created by a discontinuity in the rope, such as a broken
Electromagnetic Method.
Current edition approved Dec. 10, 1996. Published February 1997. Originally
wire, can be measured with a differential sensor, such as a Hall
published as E 1571–93. Last previous edition E 1571–94.
effect sensor, sensor coils, or by any appropriate device. The
Annual Book of ASTM Standards, Vol 03.03.
Copyright © ASTM, 100 Barr Harbor Drive, West Conshohocken, PA 19428-2959, United States.
E 1571
can be determined by using an instrument operating according
to the principle discussed in 4.1.1 and 4.1.2. Broken wires and
internal (or external) corrosion can be detected by using a
magnetic flux leakage instrument as described in 4.1.3. The
examination procedure must conform with Section 9. One
instrument may incorporate both magnetic flux and magnetic
flux leakage principles.
5. Significance and Use
5.1 This practice outlines a procedure to calibrate an instru-
FIG. 1 Schematic Representation of an Electromagnetic
ment and to use the instrument to examine ferromagnetic wire
Instrument Sensor-Head
rope products in which the electromagnetic, magnetic flux,
magnetic flux leakage, or any combination of these methods is
used. If properly applied, the electromagnetic and the magnetic
flux methods are capable of detecting the presence, location,
and magnitude of metal loss from wear and corrosion, and the
magnetic flux leakage method is capable of detecting flaws
such as broken wires and corrosion pits.
5.2 The instrument’s response to fabrication, installation,
and in-service-induced flaws can be significantly different from
the instrument’s response to artificial flaws such as wire gaps
or added wires. For this reason, it is preferable to detect and
mark (using set-up standards that represent) real flaws whose
characteristics will adversely affect the serviceability of the
wire rope.
FIG. 2 Schematic Representation of a Permanent Magnet
Equipped Sensor-Head Using a Sense Coil to Measure the Loss
6. Basis of Application
of Metallic Cross-Sectional Area
6.1 The following items require agreement by the users of
this practice and should be included in the inspection contract:
6.1.1 Acceptance criteria.
6.1.2 Determination of LMA, or the display of LFs, or both.
6.1.3 Extent of rope examination (that is, full length that
may require several setups or partial length with one setup).
6.1.4 Calibration method to be used: wire rope reference
standard, rod reference standards, or a combination thereof.
6.1.5 Maximum time interval between equipment calibra-
tions.
FIG. 3 Schematic Representation of a Permanent Magnet
Equipped Sensor-Head Using Hall Devices to Measure the Loss 6.2 Wire Rope Reference Standard (Fig. 5):
of Metallic Cross-Sectional Area
6.2.1 Type, dimension, location, and number of artificial
anomalies to be placed on a wire rope reference standard.
6.2.2 Methods of verifying dimensions of artificial anoma-
lies placed on a wire rope reference standard and allowable
tolerances.
FIG. 4 Illustration of the Leakage Flux Produced by a Broken
Wire
signal from the sensor is electronically processed and recorded.
This type of instrument measures LFs. While the information is
not quantitative, some conclusions can be drawn as to the
presence of broken wires, internal corrosion, and fretting of
wires in the rope.
4.2 The examination is conducted using one or more tech-
niques discussed in 4.1. Loss of metallic cross-sectional area FIG. 5 Example of a Wire Rope Reference Standard
E 1571
6.2.3 Diameter and construction of wire rope(s) used for a 8.1.3 The test head, containing the energizing and detecting
wire rope reference standard. units, and other components, should be designed to accommo-
6.3 Rod Reference Standards (Fig. 6): date different rope diameters. The rope should be approxi-
6.3.1 Rod reference standard use, whether in the laboratory mately centered in the test head.
or in the field, or both. 8.1.4 The instrument should have connectors for transmit-
6.3.2 Quantity, lengths, and diameters of rod reference ting output signals to strip chart recorders, data recorders, or a
standards. multifunction computer interface. The instrument may also
contain meters, bar graphs, or oscilloscopes necessary for
7. Limitations
instrument setup, calibration, and testing.
7.1 General Limitations:
8.1.5 The instrument should have a distance marker output
7.1.1 This practice is limited to the examination of ferro-
that measures the distance traveled along the rope, or have a
magnetic steel ropes.
proportional drive chart control that synchronizes the chart
7.1.2 It is difficult, if not impossible, to detect flaws at or
speed with the rope speed.
near rope terminations and ferromagnetic steel connections.
8.2 Auxiliary Equipment:
7.1.3 Deterioration of a purely metallurgical nature (brittle-
8.2.1 Strip chart recorder.
ness, fatigue, etc.) is not easily distinguishable.
8.2.2 Optional data recorder.
7.1.4 A given size test head accomodates a limited range of
8.2.3 Optional multifunctional computer interface.
rope diameters.
9. Examination Procedure
7.2 Limitations Inherent in the Use of Electromagnetic and
9.1 The electronic system shall have a pretest calibration
Magnetic Flux Methods:
procedure.
7.2.1 Instruments designed to measure chang
...


Questions, Comments and Discussion
Ask us and Technical Secretary will try to provide an answer. You can facilitate discussion about the standard in here.