ASTM A675/A675M-03(2009)
(Specification)Standard Specification for Steel Bars, Carbon, Hot-Wrought, Special Quality, Mechanical Properties
Standard Specification for Steel Bars, Carbon, Hot-Wrought, Special Quality, Mechanical Properties
ABSTRACT
This guide covers standard specification for hot-wrought special quality carbon steel bars and bar size shapes produced to mechanical property requirements and intended for general constructional applications. Heat analysis shall be performed wherein the material shall conform to the required chemical composition for phosphorus, sulfur, copper, and lead. The steel shall meet the required tensile properties such as tensile strength, yield strength, and elongation. The test specimen shall undergo mechanical tests such as tension test and bend test.
SCOPE
1.1 This specification covers hot-wrought special quality carbon steel bars and bar size shapes produced to mechanical property requirements and intended for general constructional applications.
1.2 The bars are available in nine strength grades designated 45, 50, 55, 60, 65, 70, 75, 80, and 90 [310, 345, 380, 415, 450, 485, 515, 550, and 620] corresponding to the minimum ultimate tensile strength in ksi [MPa]. The chemical composition is selected by the manufacturer to develop the required mechanical properties.
1.3 Hot-wrought special quality carbon steel bars subject to mechanical property requirements are hot wrought in straight lengths only. Sections and sizes available are covered in Specification A 29/A 29M.
1.4 Some applications may require one or more of the available designations shown under Supplementary Requirements.
Note 1—Merchant-quality hot-wrought carbon steel bars subject to mechanical property requirements are covered in Specification A 663/A 663M.
1.5 The values stated in either SI units or inch-pound units are to be regarded separately as standard. The values stated in each system may not be exact equivalents; therefore, each system shall be used independently of the other. Combining values from the two systems may result in non-conformance with the standard.
General Information
Relations
Buy Standard
Standards Content (Sample)
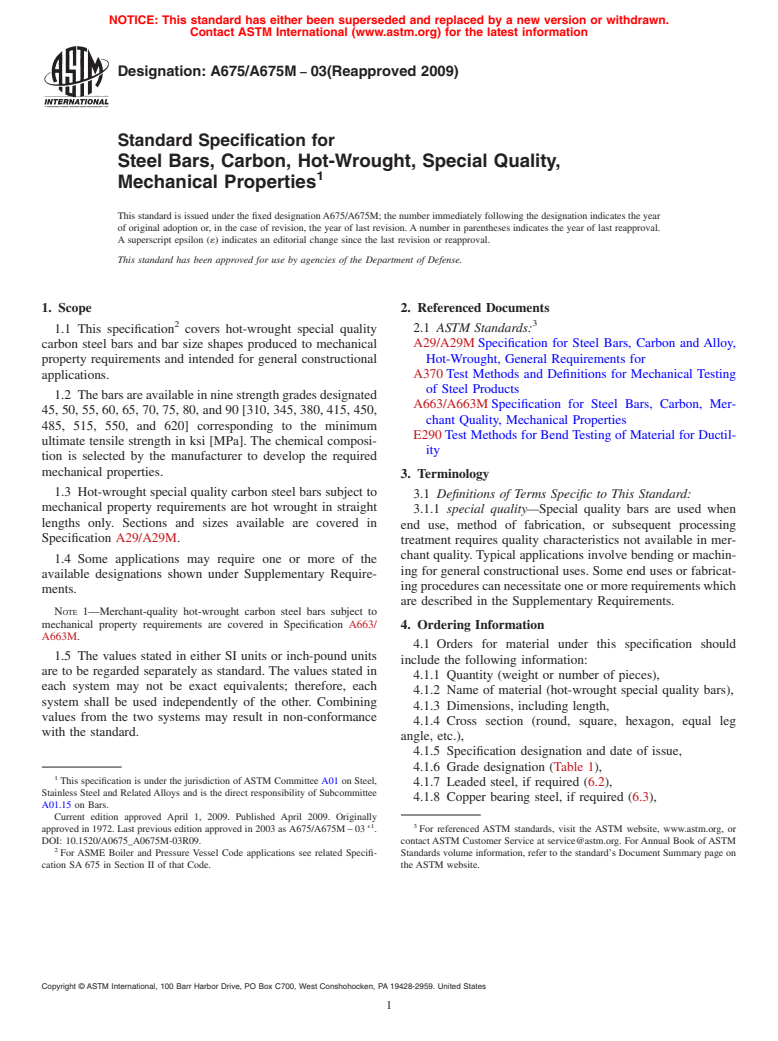
NOTICE: This standard has either been superseded and replaced by a new version or withdrawn.
Contact ASTM International (www.astm.org) for the latest information
Designation:A675/A675M −03(Reapproved 2009)
Standard Specification for
Steel Bars, Carbon, Hot-Wrought, Special Quality,
Mechanical Properties
This standard is issued under the fixed designationA675/A675M; the number immediately following the designation indicates the year
of original adoption or, in the case of revision, the year of last revision.Anumber in parentheses indicates the year of last reapproval.
A superscript epsilon (´) indicates an editorial change since the last revision or reapproval.
This standard has been approved for use by agencies of the Department of Defense.
1. Scope 2. Referenced Documents
2 3
1.1 This specification covers hot-wrought special quality 2.1 ASTM Standards:
A29/A29MSpecification for Steel Bars, Carbon and Alloy,
carbon steel bars and bar size shapes produced to mechanical
property requirements and intended for general constructional Hot-Wrought, General Requirements for
A370Test Methods and Definitions for Mechanical Testing
applications.
of Steel Products
1.2 Thebarsareavailableinninestrengthgradesdesignated
A663/A663MSpecification for Steel Bars, Carbon, Mer-
45, 50, 55, 60, 65, 70, 75, 80, and 90 [310, 345, 380, 415, 450,
chant Quality, Mechanical Properties
485, 515, 550, and 620] corresponding to the minimum
E290Test Methods for Bend Testing of Material for Ductil-
ultimate tensile strength in ksi [MPa]. The chemical composi-
ity
tion is selected by the manufacturer to develop the required
mechanical properties.
3. Terminology
1.3 Hot-wrought special quality carbon steel bars subject to
3.1 Definitions of Terms Specific to This Standard:
mechanical property requirements are hot wrought in straight
3.1.1 special quality—Special quality bars are used when
lengths only. Sections and sizes available are covered in
end use, method of fabrication, or subsequent processing
Specification A29/A29M.
treatment requires quality characteristics not available in mer-
chant quality. Typical applications involve bending or machin-
1.4 Some applications may require one or more of the
ing for general constructional uses. Some end uses or fabricat-
available designations shown under Supplementary Require-
ingprocedurescannecessitateoneormorerequirementswhich
ments.
are described in the Supplementary Requirements.
NOTE 1—Merchant-quality hot-wrought carbon steel bars subject to
mechanical property requirements are covered in Specification A663/ 4. Ordering Information
A663M.
4.1 Orders for material under this specification should
1.5 The values stated in either SI units or inch-pound units
include the following information:
are to be regarded separately as standard. The values stated in
4.1.1 Quantity (weight or number of pieces),
each system may not be exact equivalents; therefore, each
4.1.2 Name of material (hot-wrought special quality bars),
system shall be used independently of the other. Combining
4.1.3 Dimensions, including length,
values from the two systems may result in non-conformance
4.1.4 Cross section (round, square, hexagon, equal leg
with the standard.
angle, etc.),
4.1.5 Specification designation and date of issue,
4.1.6 Grade designation (Table 1),
This specification is under the jurisdiction ofASTM Committee A01 on Steel,
4.1.7 Leaded steel, if required (6.2),
Stainless Steel and RelatedAlloys and is the direct responsibility of Subcommittee
4.1.8 Copper bearing steel, if required (6.3),
A01.15 on Bars.
Current edition approved April 1, 2009. Published April 2009. Originally
ϵ1 3
approved in 1972. Last previous edition approved in 2003 as A675/A675M–03 . For referenced ASTM standards, visit the ASTM website, www.astm.org, or
DOI: 10.1520/A0675_A0675M-03R09. contactASTM Customer Service at service@astm.org. ForAnnual Book ofASTM
For ASME Boiler and Pressure Vessel Code applications see related Specifi- Standards volume information, refer to the standard’s Document Summary page on
cation SA 675 in Section II of that Code. the ASTM website.
Copyright © ASTM International, 100 Barr Harbor Drive, PO Box C700, West Conshohocken, PA 19428-2959. United States
A675/A675M−03 (2009)
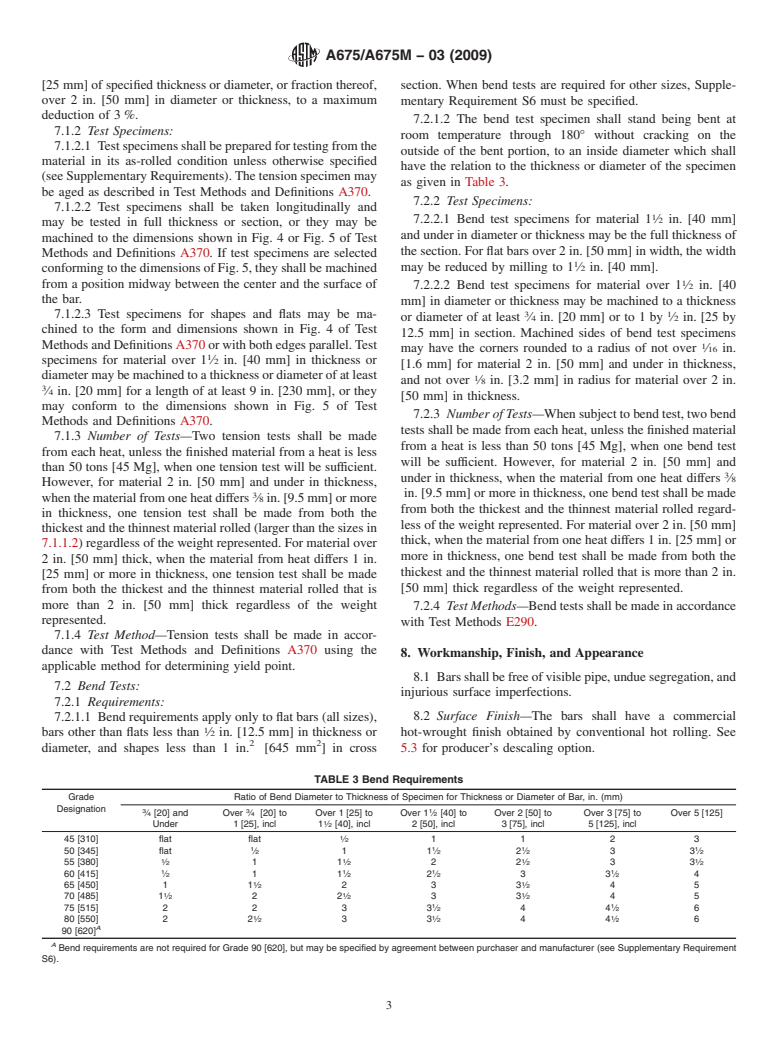
TABLE 1 Tensile Requirements
B C
Grade Tensile Strength Yield Point, min Elongation, min, %
Designa-
ksi [MPa] ksi [MPa] 8 in. or [200 mm] 2 in. or [50 mm]
A
tion
Gage Length Gage Length
45 [310] 45 to 55 [310 to 380] 22.5 [155] 27 33
50 [345] 50 to 60 [345 to 415] 25 [170] 25 30
55 [380] 55 to 65 [380 to 450] 27.5 [190] 23 26
60 [415] 60 to 72 [415 to 495] 30 [205] 21 22
65 [450] 65 to 77 [450 to 530] 32.5 [225] 17 20
70 [485] 70 to 85 [485 to 585] 35 [240] 14 18
75 [515] 75 to 90 [515 to 620] 37.5 [260] 14 18
80 [550] 80 min [550 min] 40 [275] 13 17
90 [620] 90 min [620 min] 55 [380] 10 14
A
When lead is required, add the letter “L” after the grade designation, for example, 45L.
B
When the tension test does not show a yield point (drop of the beam, halt of the pointer or sharp-kneed stress-strain diagram), yield strength shall be determined by
either 0.5 % extension-under-load or 0.2 % offset. The minimum ksi (MPa) requirement does not change. The test report, if required, shall show yield strength.
C
See 7.1.1.3 through 7.1.1.6 for deduction in elongation due to section size.
4.1.9 Test report, if required (Section 10), 6.2 Leaded Steel—When required, lead may be specified as
4.1.10 Supplementary Requirements or special require- an added element.When lead is specified as an added element,
ments if required, and a range from 0.15 to 0.35% inclusive shall be furnished. Such
4.1.11 Application and processing. a steel is identified by adding the letter L after the grade
designation, for example 60L [415L].
NOTE 2—Atypical ordering description is as follows: 10 000 lb, [5000
kg] Hot Wrought Special Quality Carbon Steel Bars, 1 in. diameter × 10
6.3 Copper-Bearing Steel—When required copper may be
ft,[25m×3m]Round,ASTMA675/A675Mdated____,Grade50,[345]
specified as an added element. Copper-bearing steel is identi-
Copper Bearing, Test Report Required, S3 Special Straightness, Boiler
fied by stating “copper-bearing” on the purchase order.
Supports.
6.4 When tension tests are waived in accordance with
5. Materials and Manufacture
7.1.1.2, chemistry consistent with the mechanical properties
5.1 Melting Practice—The steel shall be made by one or
desired shall be applied.
more of the following primary processes: open-hearth, basic-
oxygen, or electric-furnace. The primary melting may incor-
7. Mechanical Properties
porate separate degassing or refining and may be followed by
7.1 Tension Tests
secondary melting using electroslag remelting or vacuum-arc
7.1.1 Requirements:
remelting. Where secondary melting is employed, the heat
7.1.1.1 The material as represented by the test specimen
shall be defined as all of the ingots remelted from a single
shall conform to the applicable requirements in Table 1.
primary heat.
2 2
7.1.1.2 Shapes less than 1 in. [645 mm ] in cross section
5.2 Deoxidation:
and bars (other than flats) less than ⁄2 in. [12.5 mm] in
5.2.1 Unless otherwise specified, the steel shall be rimmed,
thicknessordiameterneednotbesubjecttotensiontestsbythe
capped, semi-killed, or killed at the producer’s option.
manufacturer.
5.2.2 When required, the purchaser may specify the re-
7.1.1.3 For material over ⁄4 in. [19 mm] in thickness or
quired deoxidation practice, dependent upon strength grade
diameter, a deduction of 0.25% from the percentage of
specified, purchaser’s methods of fabrication, and end use
elongationin8in.[200mm]specifiedinTable1shallbemade
requirements. Killed steels can be produced to coarse or fine
for each increase of ⁄32 in. [0.8 mm] in the specified thickness
austenitic grain size (Supplementary Requirement S1).
or diameter above ⁄4 in. [19 mm].
5.3 Condition—Unlessotherwisespecified,thebarsshallbe 5
7.1.1.4 For material under ⁄16 in. [8 mm] in thickness or
furnished as-rolled and not pickled, blast cleaned, or oiled.At
diameter, a deduction of 2.00% from the percentage of
the producer’s option, bars may be cleaned for inspection.
elongationin8in.[200mm]specifiedinTable1shallbemade
foreachdecreaseof ⁄32 in.[0.8mm]inthespecifiedthickness
6. Chemical Composition
or diameter below ⁄16 in. [8 mm].
6.1 The steel shall conform to the chemical requirements
7.1.1.5 For Grades 45, 50, 55, 60, and 65 [310, 345, 380,
specified in Table 2.
and 415] for material over 2 in. [50 mm] in thickness or
diameter, a deduction of 1.00% from the percentage of
TABLE 2 Chemical Requirements (Heat Analysis)
elongation in 2 in. [50 mm] specified in Table 1 shall be made
Element for each 1 in. [25 mm] of specified thickness or diameter or
Phosphorus, max 0.040 fraction thereof over 2 in. [50 mm] in thickness or diameter.
Sulfur, max 0.050
7.1.1.6 For Grades 70, 75, 80, and 90 [485, 515, 550 and
Copper, when copper steel is specified, min 0.20
A
620] for material over 2 in. [50 mm] in thickness or diameter,
Lead
A a deduction of 1.00% from the percentage of elongation in 2
When required, lead may be specified as an added element. See 6.2.
in. [50 mm] specified in Table 1 shall be made for each 1 in.
----------------
...
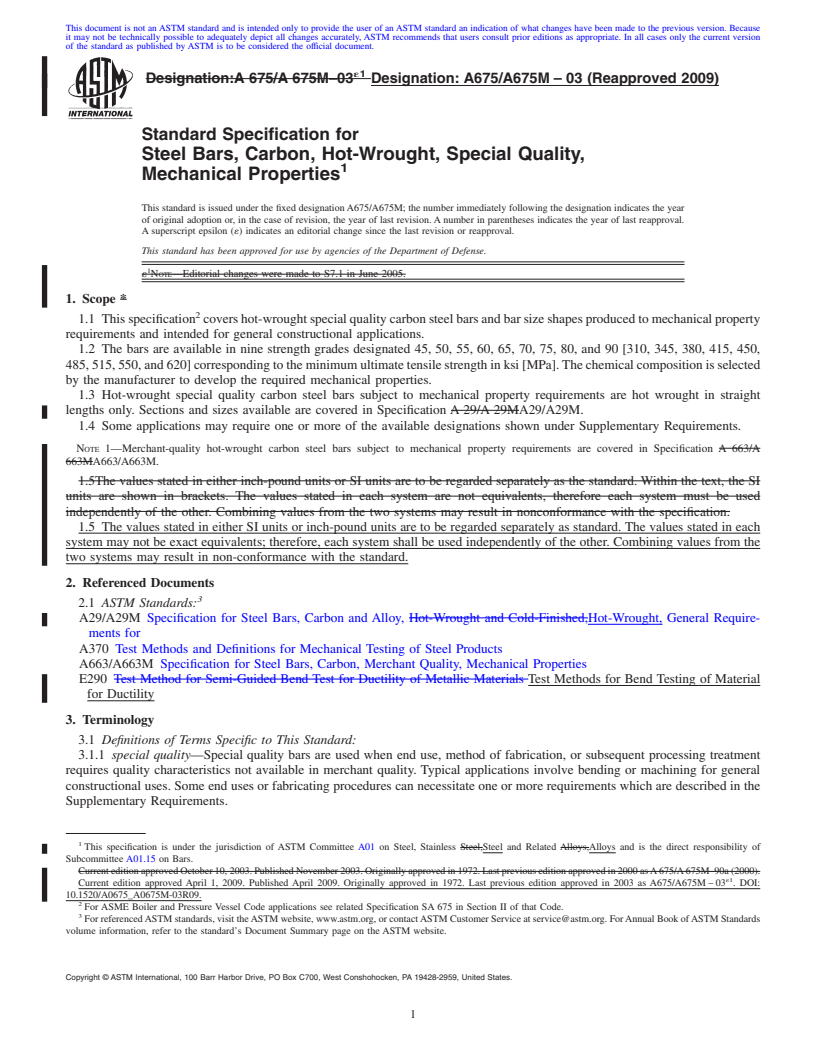
This document is not an ASTM standard and is intended only to provide the user of an ASTM standard an indication of what changes have been made to the previous version. Because
it may not be technically possible to adequately depict all changes accurately, ASTM recommends that users consult prior editions as appropriate. In all cases only the current version
of the standard as published by ASTM is to be considered the official document.
´1
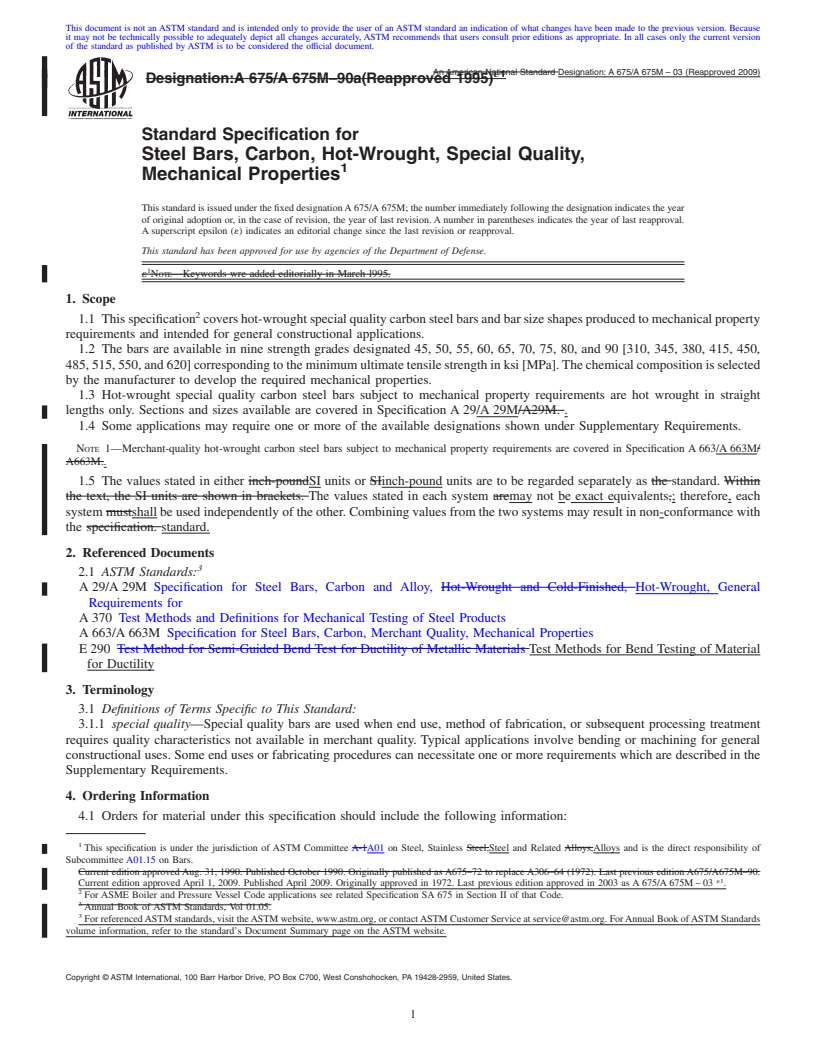
Designation:A 675/A 675M–03 Designation: A675/A675M – 03 (Reapproved 2009)
Standard Specification for
Steel Bars, Carbon, Hot-Wrought, Special Quality,
Mechanical Properties
This standard is issued under the fixed designationA675/A675M; the number immediately following the designation indicates the year
of original adoption or, in the case of revision, the year of last revision. A number in parentheses indicates the year of last reapproval.
A superscript epsilon (´) indicates an editorial change since the last revision or reapproval.
This standard has been approved for use by agencies of the Department of Defense.
´ NOTE—Editorial changes were made to S7.1 in June 2005.
1. Scope *
1.1 Thisspecification covershot-wroughtspecialqualitycarbonsteelbarsandbarsizeshapesproducedtomechanicalproperty
requirements and intended for general constructional applications.
1.2 The bars are available in nine strength grades designated 45, 50, 55, 60, 65, 70, 75, 80, and 90 [310, 345, 380, 415, 450,
485,515,550,and620]correspondingtotheminimumultimatetensilestrengthinksi[MPa].Thechemicalcompositionisselected
by the manufacturer to develop the required mechanical properties.
1.3 Hot-wrought special quality carbon steel bars subject to mechanical property requirements are hot wrought in straight
lengths only. Sections and sizes available are covered in Specification A 29/A 29MA29/A29M.
1.4 Some applications may require one or more of the available designations shown under Supplementary Requirements.
NOTE 1—Merchant-quality hot-wrought carbon steel bars subject to mechanical property requirements are covered in Specification A 663/A
663MA663/A663M.
1.5The values stated in either inch-pound units or SI units are to be regarded separately as the standard. Within the text, the SI
units are shown in brackets. The values stated in each system are not equivalents, therefore each system must be used
independently of the other. Combining values from the two systems may result in nonconformance with the specification.
1.5 The values stated in either SI units or inch-pound units are to be regarded separately as standard. The values stated in each
system may not be exact equivalents; therefore, each system shall be used independently of the other. Combining values from the
two systems may result in non-conformance with the standard.
2. Referenced Documents
2.1 ASTM Standards:
A29/A29M Specification for Steel Bars, Carbon and Alloy, Hot-Wrought and Cold-Finished,Hot-Wrought, General Require-
ments for
A370 Test Methods and Definitions for Mechanical Testing of Steel Products
A663/A663M Specification for Steel Bars, Carbon, Merchant Quality, Mechanical Properties
E290 Test Method for Semi-Guided Bend Test for Ductility of Metallic Materials Test Methods for Bend Testing of Material
for Ductility
3. Terminology
3.1 Definitions of Terms Specific to This Standard:
3.1.1 special quality—Special quality bars are used when end use, method of fabrication, or subsequent processing treatment
requires quality characteristics not available in merchant quality. Typical applications involve bending or machining for general
constructional uses. Some end uses or fabricating procedures can necessitate one or more requirements which are described in the
Supplementary Requirements.
This specification is under the jurisdiction of ASTM Committee A01 on Steel, Stainless Steel,Steel and Related Alloys,Alloys and is the direct responsibility of
Subcommittee A01.15 on Bars.
CurrenteditionapprovedOctober10,2003.PublishedNovember2003.Originallyapprovedin1972.Lastpreviouseditionapprovedin2000asA675/A675M–90a(2000).
´1
Current edition approved April 1, 2009. Published April 2009. Originally approved in 1972. Last previous edition approved in 2003 as A675/A675M – 03 . DOI:
10.1520/A0675_A0675M-03R09.
For ASME Boiler and Pressure Vessel Code applications see related Specification SA 675 in Section II of that Code.
ForreferencedASTMstandards,visittheASTMwebsite,www.astm.org,orcontactASTMCustomerServiceatservice@astm.org.ForAnnualBookofASTMStandards
volume information, refer to the standard’s Document Summary page on the ASTM website.
Copyright © ASTM International, 100 Barr Harbor Drive, PO Box C700, West Conshohocken, PA 19428-2959, United States.
A675/A675M – 03 (2009)
4. Ordering Information
4.1 Orders for material under this specification should include the following information:
4.1.1 Quantity (weight or number of pieces),
4.1.2 Name of material (hot-wrought special quality bars),
4.1.3 Dimensions, including length,
4.1.4 Cross section (round, square, hexagon, equal leg angle, etc.),
4.1.5 Specification designation and date of issue,
4.1.6 Grade designation (Table 1),
4.1.7 Leaded steel, if required (6.2),
4.1.8 Copper bearing steel, if required (6.3),
4.1.9 Test report, if required (Section 10),
4.1.10 Supplementary Requirements or special requirements if required, and
4.1.11 Application and processing.
NOTE 2—A typical ordering description is as follows: 10 000 lb, [5000 kg] Hot Wrought Special Quality Carbon Steel Bars, 1 in. diameter 3 10 ft,
[25m 3 3m] Round,ASTMA675/A 675M dated ____ , Grade 50, [345] Copper Bearing,Test Report Required, S3 Special Straightness, Boiler Supports.
5. Materials and Manufacture
5.1 Melting Practice—The steel shall be made by one or more of the following primary processes: open-hearth, basic-oxygen,
orelectric-furnace.Theprimarymeltingmayincorporateseparatedegassingorrefiningandmaybefollowedbysecondarymelting
using electroslag remelting or vacuum-arc remelting. Where secondary melting is employed, the heat shall be defined as all of the
ingots remelted from a single primary heat.
5.2 Deoxidation:
5.2.1 Unless otherwise specified, the steel shall be rimmed, capped, semi-killed, or killed at the producer’s option.
5.2.2 When required, the purchaser may specify the required deoxidation practice, dependent upon strength grade specified,
purchaser’s methods of fabrication, and end use requirements. Killed steels can be produced to coarse or fine austenitic grain size
(Supplementary Requirement S1).
5.3 Condition—Unless otherwise specified, the bars shall be furnished as-rolled and not pickled, blast cleaned, or oiled.At the
producer’s option, bars may be cleaned for inspection.
6. Chemical Composition
6.1 The steel shall conform to the chemical requirements specified in Table 2.
6.2 Leaded Steel—When required, lead may be specified as an added element. When lead is specified as an added element, a
range from 0.15 to 0.35 % inclusive shall be furnished. Such a steel is identified by adding the letter Lafter the grade designation,
for example 60L [415L].
6.3 Copper-Bearing Steel—When required copper may be specified as an added element. Copper-bearing steel is identified by
stating “copper-bearing” on the purchase order.
6.4 When tension tests are waived in accordance with 7.1.1.2, chemistry consistent with the mechanical properties desired shall
be applied.
7. Mechanical Properties
7.1 Tension Tests
7.1.1 Requirements:
7.1.1.1 The material as represented by the test specimen shall conform to the applicable requirements in Table 1.
TABLE 1 Tensile Requirements
B C
Grade Tensile Strength Yield Point, min Elongation, min, %
Designa-
ksi [MPa] ksi [MPa] 8 in. or [200 mm] 2 in. or [50 mm]
A
tion
Gage Length Gage Length
45 [310] 45 to 55 [310 to 380] 22.5 [155] 27 33
50 [345] 50 to 60 [345 to 415] 25 [170] 25 30
55 [380] 55 to 65 [380 to 450] 27.5 [190] 23 26
60 [415] 60 to 72 [415 to 495] 30 [205] 21 22
65 [450] 65 to 77 [450 to 530] 32.5 [225] 17 20
70 [485] 70 to 85 [485 to 585] 35 [240] 14 18
75 [515] 75 to 90 [515 to 620] 37.5 [260] 14 18
80 [550] 80 min [550 min] 40 [275] 13 17
90 [620] 90 min [620 min] 55 [380] 10 14
A
When lead is required, add the letter “L” after the grade designation, for example, 45L.
B
When the tension test does not show a yield point (drop of the beam, halt of the pointer or sharp-kneed stress-strain diagram), yield strength shall be determined by
either 0.5 % extension-under-load or 0.2 % offset. The minimum ksi (MPa) requirement does not change. The test report, if required, shall show yield strength.
C
See 7.1.1.3 through 7.1.1.6 for deduction in elongation due to section size.
A675/A675M – 03 (2009)
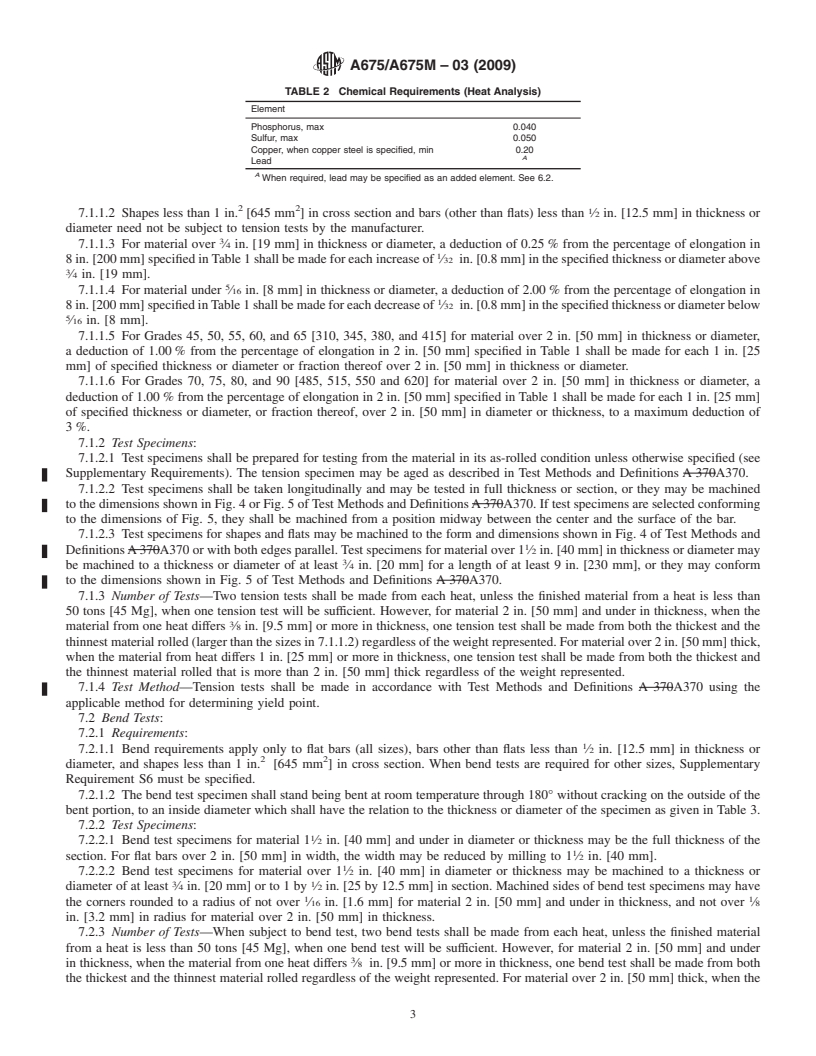
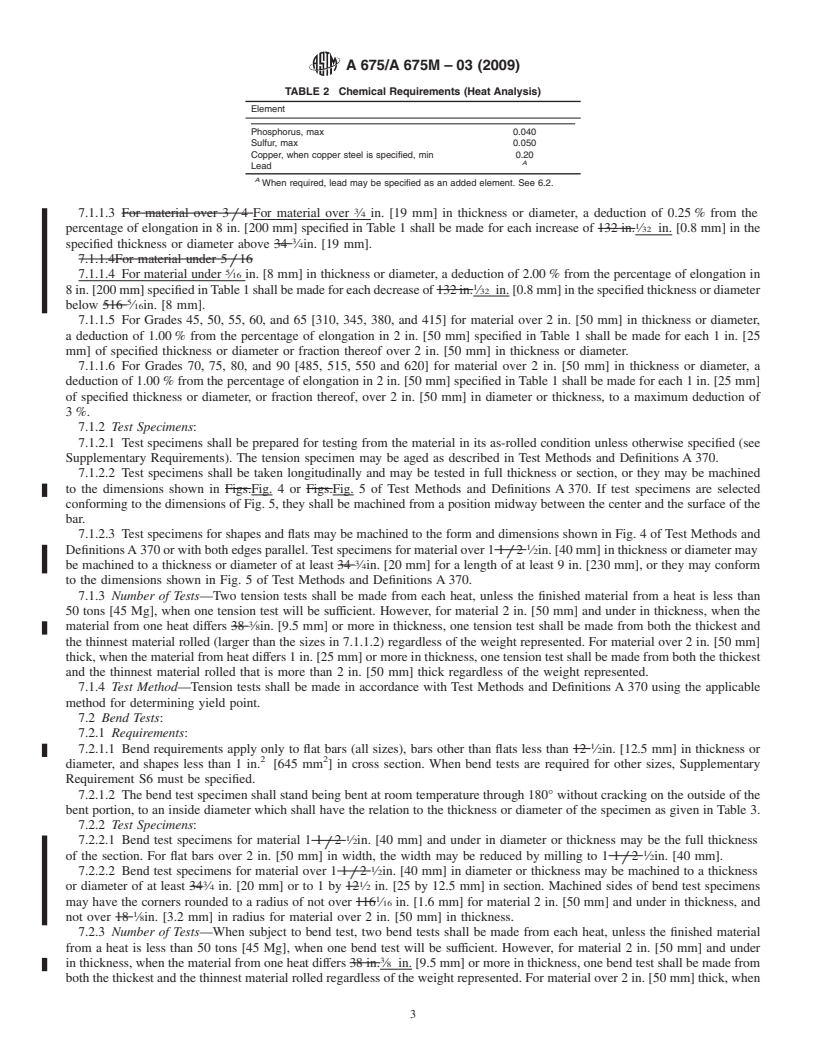
TABLE 2 Chemical Requirements (Heat Analysis)
Element
Phosphorus, max 0.040
Sulfur, max 0.050
Copper, when copper steel is specified, min 0.20
A
Lead
A
When required, lead may be specified as an added element. See 6.2.
2 2
7.1.1.2 Shapes less than 1 in. [645 mm ] in cross section and bars (other than flats) less than ⁄2 in. [12.5 mm] in thickness or
diameter need not be subject to tension tests by the manufacturer.
7.1.1.3 For material over ⁄4 in. [19 mm] in thickness or diameter, a deduction of 0.25 % from the percentage of elongation in
8in.[200mm]specifiedinTable1shallbemadeforeachincreaseof ⁄32 in.[0.8mm]inthespecifiedthicknessordiameterabove
⁄4 in. [19 mm].
7.1.1.4 For material under ⁄16 in. [8 mm] in thickness or diameter, a deduction of 2.00 % from the percentage of elongation in
8in.[200mm]specifiedinTable1shallbemadeforeachdecreaseof ⁄32 in.[0.8mm]inthespecifiedthicknessordiameterbelow
⁄16 in. [8 mm].
7.1.1.5 For Grades 45, 50, 55, 60, and 65 [310, 345, 380, and 415] for material over 2 in. [50 mm] in thickness or diameter,
a deduction of 1.00 % from the percentage of elongation in 2 in. [50 mm] specified in Table 1 shall be made for each 1 in. [25
mm] of specified thickness or diameter or fraction thereof over 2 in. [50 mm] in thickness or diameter.
7.1.1.6 For Grades 70, 75, 80, and
...
This document is not an ASTM standard and is intended only to provide the user of an ASTM standard an indication of what changes have been made to the previous version. Because
it may not be technically possible to adequately depict all changes accurately, ASTM recommends that users consult prior editions as appropriate. In all cases only the current version
of the standard as published by ASTM is to be considered the official document.
An American National Standard Designation: A 675/A 675M – 03 (Reapproved 2009)
´1
Designation:A 675/A 675M–90a(Reapproved 1995)
Standard Specification for
Steel Bars, Carbon, Hot-Wrought, Special Quality,
Mechanical Properties
This standard is issued under the fixed designationA 675/A 675M; the number immediately following the designation indicates the year
of original adoption or, in the case of revision, the year of last revision. A number in parentheses indicates the year of last reapproval.
A superscript epsilon (´) indicates an editorial change since the last revision or reapproval.
This standard has been approved for use by agencies of the Department of Defense.
´ NOTE—Keywords wre added editorially in March l995.
1. Scope
1.1 Thisspecification covershot-wroughtspecialqualitycarbonsteelbarsandbarsizeshapesproducedtomechanicalproperty
requirements and intended for general constructional applications.
1.2 The bars are available in nine strength grades designated 45, 50, 55, 60, 65, 70, 75, 80, and 90 [310, 345, 380, 415, 450,
485,515,550,and620]correspondingtotheminimumultimatetensilestrengthinksi[MPa].Thechemicalcompositionisselected
by the manufacturer to develop the required mechanical properties.
1.3 Hot-wrought special quality carbon steel bars subject to mechanical property requirements are hot wrought in straight
lengths only. Sections and sizes available are covered in Specification A 29/A 29M/A29M. .
1.4 Some applications may require one or more of the available designations shown under Supplementary Requirements.
NOTE 1—Merchant-quality hot-wrought carbon steel bars subject to mechanical property requirements are covered in Specification A 663/A 663M/
A663M.
1.5 The values stated in either inch-poundSI units or SIinch-pound units are to be regarded separately as the standard. Within
the text, the SI units are shown in brackets. The values stated in each system aremay not be exact equivalents,; therefore, each
system mustshall be used independently of the other. Combining values from the two systems may result in non-conformance with
the specification. standard.
2. Referenced Documents
2.1 ASTM Standards:
A 29/A 29M Specification for Steel Bars, Carbon and Alloy, Hot-Wrought and Cold-Finished, Hot-Wrought, General
Requirements for
A 370 Test Methods and Definitions for Mechanical Testing of Steel Products
A 663/A 663M Specification for Steel Bars, Carbon, Merchant Quality, Mechanical Properties
E 290 Test Method for Semi-Guided Bend Test for Ductility of Metallic Materials Test Methods for Bend Testing of Material
for Ductility
3. Terminology
3.1 Definitions of Terms Specific to This Standard:
3.1.1 special quality—Special quality bars are used when end use, method of fabrication, or subsequent processing treatment
requires quality characteristics not available in merchant quality. Typical applications involve bending or machining for general
constructional uses. Some end uses or fabricating procedures can necessitate one or more requirements which are described in the
Supplementary Requirements.
4. Ordering Information
4.1 Orders for material under this specification should include the following information:
This specification is under the jurisdiction of ASTM Committee A-1A01 on Steel, Stainless Steel,Steel and Related Alloys,Alloys and is the direct responsibility of
Subcommittee A01.15 on Bars.
Current edition approved Aug. 31, 1990. Published October 1990. Originally published as A675–72 to replace A306–64 (1972). Last previous edition A675/A675M–90.
´1
Current edition approved April 1, 2009. Published April 2009. Originally approved in 1972. Last previous edition approved in 2003 as A 675/A 675M – 03 .
For ASME Boiler and Pressure Vessel Code applications see related Specification SA 675 in Section II of that Code.
Annual Book of ASTM Standards, Vol 01.05.
ForreferencedASTMstandards,visittheASTMwebsite,www.astm.org,orcontactASTMCustomerServiceatservice@astm.org.ForAnnualBookofASTMStandards
volume information, refer to the standard’s Document Summary page on the ASTM website.
Copyright © ASTM International, 100 Barr Harbor Drive, PO Box C700, West Conshohocken, PA 19428-2959, United States.
A 675/A 675M – 03 (2009)
4.1.1 Quantity (weight or number of pieces),
4.1.2 Name of material (hot-wrought special quality bars),
4.1.3 Dimensions, including length,
4.1.4 Cross section (round, square, hexagon, equal leg angle, etc.),
4.1.5 Specification designation and date of issue,
4.1.6 Grade designation (Table 1),
4.1.7 Leaded steel, if required (6.2),
4.1.8 Copper bearing steel, if required (6.3),
4.1.9 Test report, if required (Section 10),
4.1.10 Supplementary Requirements or special requirements if required, and
4.1.11 Application and processing.
NOTE 2—A typical ordering description is as follows: 10 000 lb, [5000 kg] Hot Wrought Special Quality Carbon Steel Bars, 1 in. diameter 3 10 ft,
[25m 33m]Round,ASTMA 675/A 675Mdated____ ,Grade50,[345]CopperBearing,TestReportRequired,S3SpecialStraightness,BoilerSupports.
5. Materials and Manufacture
5.1 Melting Practice—The steel shall be made by one or more of the following primary processes: open-hearth, basic-oxygen,
orelectric-furnace.Theprimarymeltingmayincorporateseparatedegassingorrefiningandmaybefollowedbysecondarymelting
using electroslag remelting or vacuum-arc remelting. Where secondary melting is employed, the heat shall be defined as all of the
ingots remelted from a single primary heat.
5.2 Deoxidation:
5.2.1 Unless otherwise specified, the steel shall be rimmed, capped, semi-killed, or killed at the producer’s option.
5.2.2 When required, the purchaser may specify the required deoxidation practice, dependent upon strength grade specified,
purchaser’s methods of fabrication, and end use requirements. Killed steels can be produced to coarse or fine austenitic grain size
(Supplementary Requirement S1).
5.3 Condition—Unless otherwise specified, the bars shall be furnished as-rolled and not pickled, blast cleaned, or oiled.At the
producer’s option, bars may be cleaned for inspection.
6. Chemical Composition
6.1 The steel shall conform to the chemical requirements specified in Table 2.
6.2 Leaded Steel—When required, lead may be specified as an added element. When lead is specified as an added element, a
range from 0.15 to 0.35 % inclusive shall be furnished. Such a steel is identified by adding the letter Lafter the grade designation,
for example 60L [415L].
6.3 Copper-Bearing Steel—When required copper may be specified as an added element. Copper-bearing steel is identified by
stating “copper-bearing” on the purchase order.
6.4 When tension tests are waived in accordance with 7.1.1.2, chemistry consistent with the mechanical properties desired shall
be applied.
7. Mechanical Properties
7.1 Tension Tests
7.1.1 Requirements:
7.1.1.1 The material as represented by the test specimen shall conform to the applicable requirements in Table 1.
2 2
7.1.1.2 Shapes less than 1 in. [645 mm ] in cross section and bars (other than flats) less than 12 ⁄2in. [12.5 mm] in thickness
or diameter need not be subject to tension tests by the manufacturer.
TABLE 1 Tensile Requirements
B C
Grade Tensile Strength Yield Point, min Elongation, min, %
Designa-
ksi [MPa] ksi [MPa] 8 in. or [200 mm] 2 in. or [50 mm]
A
tion
Gage Length Gage Length
45 [310] 45 to 55 [310 to 380] 22.5 [155] 27 33
50 [345] 50 to 60 [345 to 415] 25 [170] 25 30
55 [380] 55 to 65 [380 to 450] 27.5 [190] 23 26
60 [415] 60 to 72 [415 to 495] 30 [205] 21 22
65 [450] 65 to 77 [450 to 530] 32.5 [225] 17 20
70 [485] 70 to 85 [485 to 585] 35 [240] 14 18
75 [515] 75 to 90 [515 to 620] 37.5 [260] 14 18
80 [550] 80 min [550 min] 40 [275] 13 17
90 [620] 90 min [620 min] 55 [380] 10 14
A
When lead is required, add the letter “L” after the grade designation, for example, 45L.
B
When the tension test does not show a yield point (drop of the beam, halt of the pointer or sharp-kneed stress-strain diagram), yield strength shall be determined by
either 0.5 % extension-under-load or 0.2 % offset. The minimum ksi (MPa) requirement does not change. The test report, if required, shall show yield strength.
C
See 7.1.1.3 through 7.1.1.6 for deduction in elongation due to section size.
A 675/A 675M – 03 (2009)
TABLE 2 Chemical Requirements (Heat Analysis)
Element
Phosphorus, max 0.040
Sulfur, max 0.050
Copper, when copper steel is specified, min 0.20
A
Lead
A
When required, lead may be specified as an added element. See 6.2.
7.1.1.3 For material over 3 4 For material over ⁄4 in. [19 mm] in thickness or diameter, a deduction of 0.25 % from the
/
percentage of elongation in 8 in. [200 mm] specified in Table 1 shall be made for each increase of 132 in. ⁄32 in. [0.8 mm] in the
specified thickness or diameter above 34 ⁄4in. [19 mm].
7.1.1.4For material under 5 16
/
7.1.1.4 For material under ⁄16 in. [8 mm] in thickness or diameter, a deduction of 2.00 % from the percentage of elongation in
8in.[200mm]specifiedinTable1shallbemadeforeachdecreaseof132in. ⁄32 in.[0.8mm]inthespecifiedthicknessordiameter
below 516 ⁄16in. [8 mm].
7.1.1.5 For Grades 45, 50, 55, 60, and 65 [310, 345, 380, and 415] for material over 2 in. [50 mm] in thickness or diameter,
a deduction of 1.00 % from the percentage of elongation in 2 in. [50 mm] specified in Table 1 shall be made for each 1 in. [25
mm] of specified thickness or diameter or fraction thereof over 2 in. [50 mm] in thickness or diameter.
7.1.1.6 For Grades 70, 75, 80, and 90 [485, 515,
...


Questions, Comments and Discussion
Ask us and Technical Secretary will try to provide an answer. You can facilitate discussion about the standard in here.