ASTM F256-05(2015)
(Specification)Standard Specification for Chromium-Iron Sealing Alloys with 18 or 28 Percent Chromium
Standard Specification for Chromium-Iron Sealing Alloys with 18 or 28 Percent Chromium
ABSTRACT
This specification covers two chromium-iron alloys, one is UNS K91800 with nominally 18% chromium, balance iron, and the other is UNS K92801 with nominally 28% chromium, both in strip, bar, wire, and rod forms intended primarily for sealing to glass in electronic applications. The alloys are classified by nominal chemical composition, specifically by chromium content, in two types: Type I (UNS K91800) and Type II (UNS K92801). The materials shall show no evidence of transformation to martensite. For Type I alloy, the austenite formed during heat treating will transform to martensite at or above room temperature. The presence of austenite, as may be noted in Type II alloy, is acceptable if the thermal expansion requirement is met. Different tests shall be performed in order to determine the following properties of the alloys: thermal expansion, Rockwell hardness, and tensile strength.
SCOPE
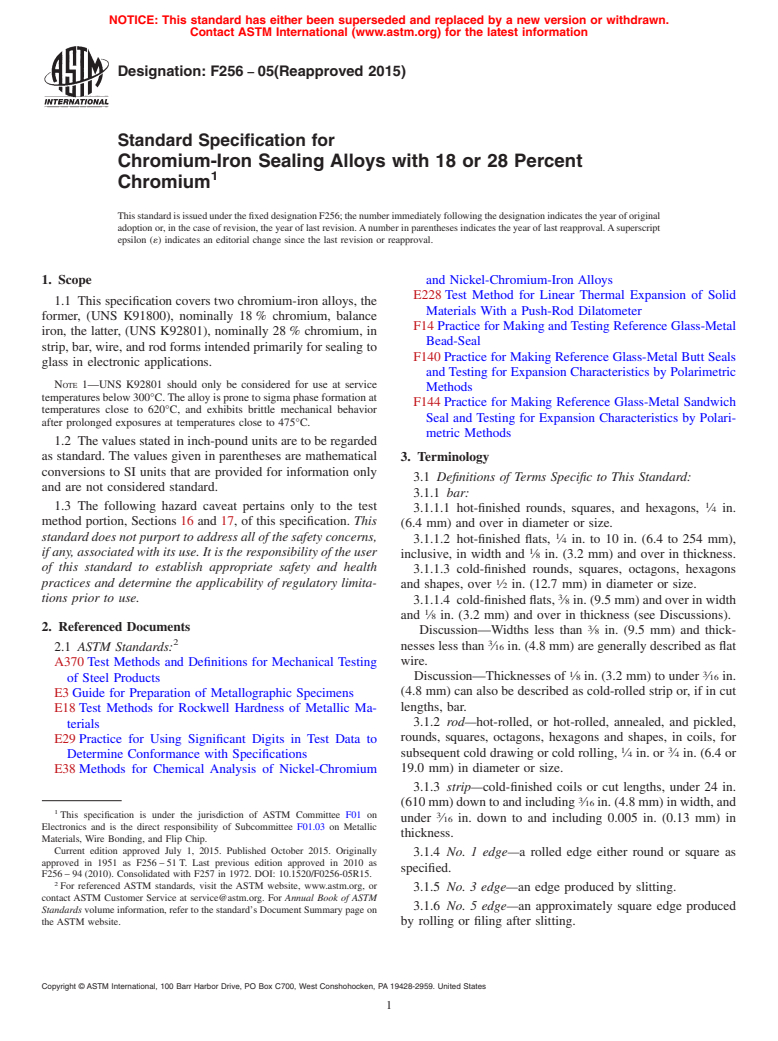
1.1 This specification covers two chromium-iron alloys, the former, (UNS K91800), nominally 18 % chromium, balance iron, the latter, (UNS K92801), nominally 28 % chromium, in strip, bar, wire, and rod forms intended primarily for sealing to glass in electronic applications.
Note 1: UNS K92801 should only be considered for use at service temperatures below 300°C. The alloy is prone to sigma phase formation at temperatures close to 620°C, and exhibits brittle mechanical behavior after prolonged exposures at temperatures close to 475°C.
1.2 The values stated in inch-pound units are to be regarded as standard. The values given in parentheses are mathematical conversions to SI units that are provided for information only and are not considered standard.
1.3 The following hazard caveat pertains only to the test method portion, Sections 16 and 17, of this specification. This standard does not purport to address all of the safety concerns, if any, associated with its use. It is the responsibility of the user of this standard to establish appropriate safety and health practices and determine the applicability of regulatory limitations prior to use.
General Information
Relations
Buy Standard
Standards Content (Sample)
NOTICE: This standard has either been superseded and replaced by a new version or withdrawn.
Contact ASTM International (www.astm.org) for the latest information
Designation:F256 −05(Reapproved 2015)
Standard Specification for
Chromium-Iron Sealing Alloys with 18 or 28 Percent
1
Chromium
ThisstandardisissuedunderthefixeddesignationF256;thenumberimmediatelyfollowingthedesignationindicatestheyearoforiginal
adoptionor,inthecaseofrevision,theyearoflastrevision.Anumberinparenthesesindicatestheyearoflastreapproval.Asuperscript
epsilon (´) indicates an editorial change since the last revision or reapproval.
1. Scope and Nickel-Chromium-Iron Alloys
E228Test Method for Linear Thermal Expansion of Solid
1.1 This specification covers two chromium-iron alloys, the
Materials With a Push-Rod Dilatometer
former, (UNS K91800), nominally 18% chromium, balance
F14Practice for Making andTesting Reference Glass-Metal
iron, the latter, (UNS K92801), nominally 28% chromium, in
Bead-Seal
strip, bar, wire, and rod forms intended primarily for sealing to
F140Practice for Making Reference Glass-Metal Butt Seals
glass in electronic applications.
and Testing for Expansion Characteristics by Polarimetric
NOTE 1—UNS K92801 should only be considered for use at service
Methods
temperaturesbelow300°C.Thealloyispronetosigmaphaseformationat
F144Practice for Making Reference Glass-Metal Sandwich
temperatures close to 620°C, and exhibits brittle mechanical behavior
Seal and Testing for Expansion Characteristics by Polari-
after prolonged exposures at temperatures close to 475°C.
metric Methods
1.2 The values stated in inch-pound units are to be regarded
as standard. The values given in parentheses are mathematical
3. Terminology
conversions to SI units that are provided for information only
3.1 Definitions of Terms Specific to This Standard:
and are not considered standard.
3.1.1 bar:
1
1.3 The following hazard caveat pertains only to the test
3.1.1.1 hot-finished rounds, squares, and hexagons, ⁄4 in.
method portion, Sections 16 and 17, of this specification. This
(6.4 mm) and over in diameter or size.
1
standard does not purport to address all of the safety concerns,
3.1.1.2 hot-finished flats, ⁄4 in. to 10 in. (6.4 to 254 mm),
1
if any, associated with its use. It is the responsibility of the user
inclusive, in width and ⁄8 in. (3.2 mm) and over in thickness.
of this standard to establish appropriate safety and health
3.1.1.3 cold-finished rounds, squares, octagons, hexagons
1
practices and determine the applicability of regulatory limita-
and shapes, over ⁄2 in. (12.7 mm) in diameter or size.
3
tions prior to use.
3.1.1.4 cold-finishedflats, ⁄8in.(9.5mm)andoverinwidth
1
and ⁄8 in. (3.2 mm) and over in thickness (see Discussions).
2. Referenced Documents 3
Discussion—Widths less than ⁄8 in. (9.5 mm) and thick-
2
3
nesseslessthan ⁄16in.(4.8mm)aregenerallydescribedasflat
2.1 ASTM Standards:
wire.
A370Test Methods and Definitions for Mechanical Testing
1 3
Discussion—Thicknesses of ⁄8 in. (3.2 mm) to under ⁄16 in.
of Steel Products
(4.8 mm) can also be described as cold-rolled strip or, if in cut
E3Guide for Preparation of Metallographic Specimens
lengths, bar.
E18Test Methods for Rockwell Hardness of Metallic Ma-
3.1.2 rod—hot-rolled, or hot-rolled, annealed, and pickled,
terials
rounds, squares, octagons, hexagons and shapes, in coils, for
E29Practice for Using Significant Digits in Test Data to
1 3
subsequent cold drawing or cold rolling, ⁄4 in. or ⁄4 in. (6.4 or
Determine Conformance with Specifications
19.0 mm) in diameter or size.
E38Methods for Chemical Analysis of Nickel-Chromium
3.1.3 strip—cold-finished coils or cut lengths, under 24 in.
3
(610mm)downtoandincluding ⁄16in.(4.8mm)inwidth,and
1
This specification is under the jurisdiction of ASTM Committee F01 on
3
under ⁄16 in. down to and including 0.005 in. (0.13 mm) in
Electronics and is the direct responsibility of Subcommittee F01.03 on Metallic
thickness.
Materials, Wire Bonding, and Flip Chip.
Current edition approved July 1, 2015. Published October 2015. Originally
3.1.4 No. 1 edge—a rolled edge either round or square as
approved in 1951 as F256–51T. Last previous edition approved in 2010 as
specified.
F256–94(2010). Consolidated with F257 in 1972. DOI: 10.1520/F0256-05R15.
2
For referenced ASTM standards, visit the ASTM website, www.astm.org, or
3.1.5 No. 3 edge—an edge produced by slitting.
contact ASTM Customer Service at service@astm.org. For Annual Book of ASTM
3.1.6 No. 5 edge—an approximately square edge produced
Standards volume information, refer to the standard’s Document Summary page on
the ASTM website. by rolling or filing after slitting.
Copyright © ASTM International, 100 Barr Harbor Drive, PO Box C700, West Conshohocken, PA 19428-2959. United States
1
---------------------- Page: 1 ----------------------
F256−05(2015)
Discussion—Cold-finished product 0.005 in. (0.13 mm) in 7.1.4 As hot rolled.
thickness and under 24 in. (609.6 mm) in width is sometimes
7.2 The desired surface of
...
This document is not an ASTM standard and is intended only to provide the user of an ASTM standard an indication of what changes have been made to the previous version. Because
it may not be technically possible to adequately depict all changes accurately, ASTM recommends that users consult prior editions as appropriate. In all cases only the current version
of the standard as published by ASTM is to be considered the official document.
Designation: F256 − 05(Reapproved 2010) F256 − 05(Reapproved 2015)
Standard Specification for
Chromium-Iron Sealing Alloys with 18 or 28 Percent
1
Chromium
This standard is issued under the fixed designation F256; the number immediately following the designation indicates the year of original
adoption or, in the case of revision, the year of last revision. A number in parentheses indicates the year of last reapproval. A superscript
epsilon (´) indicates an editorial change since the last revision or reapproval.
1. Scope
1.1 This specification covers two chromium-iron alloys, the former, (UNS K91800), nominally 18 % chromium, balance iron,
the latter, (UNS K92801), nominally 28 % chromium, in strip, bar, wire, and rod forms intended primarily for sealing to glass in
electronic applications.
NOTE 1—UNS K92801 should only be considered for use at service temperatures below 300°C. The alloy is prone to sigma phase formation at
temperatures close to 620°C, and exhibits brittle mechanical behavior after prolonged exposures at temperatures close to 475°C.
1.2 The values stated in inch-pound units are to be regarded as standard. The values given in parentheses are mathematical
conversions to SI units that are provided for information only and are not considered standard.
1.3 The following hazard caveat pertains only to the test method portion, Sections 16 and 17, of this specification. This standard
does not purport to address all of the safety concerns, if any, associated with its use. It is the responsibility of the user of this
standard to establish appropriate safety and health practices and determine the applicability of regulatory limitations prior to use.
2. Referenced Documents
2
2.1 ASTM Standards:
A370 Test Methods and Definitions for Mechanical Testing of Steel Products
E3 Guide for Preparation of Metallographic Specimens
E18 Test Methods for Rockwell Hardness of Metallic Materials
E29 Practice for Using Significant Digits in Test Data to Determine Conformance with Specifications
E38 Methods for Chemical Analysis of Nickel-Chromium and Nickel-Chromium-Iron Alloys
E228 Test Method for Linear Thermal Expansion of Solid Materials With a Push-Rod Dilatometer
F14 Practice for Making and Testing Reference Glass-Metal Bead-Seal
F140 Practice for Making Reference Glass-Metal Butt Seals and Testing for Expansion Characteristics by Polarimetric Methods
F144 Practice for Making Reference Glass-Metal Sandwich Seal and Testing for Expansion Characteristics by Polarimetric
Methods
3. Terminology
3.1 Definitions of Terms Specific to This Standard:
3.1.1 bar:
1
3.1.1.1 hot-finished rounds, squares, and hexagons, ⁄4 in. (6.4 mm) and over in diameter or size.
1 1
3.1.1.2 hot-finished flats, ⁄4 in. to 10 in. (6.4 to 254 mm), inclusive, in width and ⁄8 in. (3.2 mm) and over in thickness.
1
3.1.1.3 cold-finished rounds, squares, octagons, hexagons and shapes, over ⁄2 in. (12.7 mm) in diameter or size.
3 1
3.1.1.4 cold-finished flats, ⁄8 in. (9.5 mm) and over in width and ⁄8 in. (3.2 mm) and over in thickness (see Discussions).
3 3
Discussion—Widths less than ⁄8 in. (9.5 mm) and thicknesses less than ⁄16 in. (4.8 mm) are generally described as flat wire.
1 3
Discussion—Thicknesses of ⁄8 in. (3.2 mm) to under ⁄16 in. (4.8 mm) can also be described as cold-rolled strip or, if in cut
lengths, bar.
1
This specification is under the jurisdiction of ASTM Committee F01 on Electronics and is the direct responsibility of Subcommittee F01.03 on Metallic
MaterialsMaterials, Wire Bonding, and Flip Chip.
Current edition approved Oct. 1, 2010July 1, 2015. Published November 2010October 2015. Originally approved in 1951 as F256 – 51 T. Last previous edition approved
ε1
in 20052010 as F256 – 94 (2005)(2010). . Consolidated with F257 in 1972. DOI: 10.1520/F0256-05R10.10.1520/F0256-05R15.
2
For referenced ASTM standards, visit the ASTM website, www.astm.org, or contact ASTM Customer Service at service@astm.org. For Annual Book of ASTM Standards
volume information, refer to the standard’s Document Summary page on the ASTM website.
Copyright © ASTM International, 100 Barr Harbor Drive, PO Box C700, West Conshohocken, PA 19428-2959. United States
1
---------------------- Page: 1 ----------------------
F256 − 05(2015)
3.1.2 rod—hot-rolled, or hot-rolled, annealed, and pickled, rounds, squares, octagons, hexagons and shapes, in coils, for
1 3
subsequent cold drawing or cold rolling, ⁄4 in. or ⁄4 in. (6.4 or 19.0 mm) in diameter or size.
3
3.1.3 strip—cold-finished coils or cut lengths, under 24 in. (610 mm) down to and including
...


Questions, Comments and Discussion
Ask us and Technical Secretary will try to provide an answer. You can facilitate discussion about the standard in here.