ASTM D732-17
(Test Method)Standard Test Method for Shear Strength of Plastics by Punch Tool
Standard Test Method for Shear Strength of Plastics by Punch Tool
SIGNIFICANCE AND USE
4.1 Shear strength obtained by the use of punch-type tooling is one of the recognized methods of comparing materials, or obtaining data for engineering design purposes, or both. However, it must be recognized that for end-use applications there are likely to be many factors not taken into account in this test method, such as stress-concentrating geometries and rates of shear, which can profoundly affect the measured shear strength. Moreover, the fact that the shear strength is calculated by dividing the load by the area of the sheared edge (punch circumference X specimen thickness) does not interpret as indicating the shear strength value so obtained is solely a material property, independent of thickness.
4.2 For many materials, it is possible that there is a specification that requires the use of this test method, but with some procedural modifications that take precedence when adhering to the specification. Therefore, it is advisable to refer to that material specification before using this test method. Table 1 of Classification System D4000 lists the ASTM materials standards that currently exist.
SCOPE
1.1 This test method covers the procedure for determining the shear strength of plastics in the form of sheets, plates, and molded shapes in thicknesses from 1.27 to 12.7 mm (0.050 to 0.500 in.).
1.2 The values stated in SI units are to be regarded as the standard. The values given in parentheses are for information only.
1.3 This standard does not purport to address all of the safety concerns, if any, associated with its use. It is the responsibility of the user of this standard to establish appropriate safety and health practices and determine the applicability of regulatory limitations prior to use.
Note 1: There is no known ISO equivalent to this standard.
1.4 This international standard was developed in accordance with internationally recognized principles on standardization established in the Decision on Principles for the Development of International Standards, Guides and Recommendations issued by the World Trade Organization Technical Barriers to Trade (TBT) Committee.
General Information
- Status
- Published
- Publication Date
- 30-Apr-2017
- Technical Committee
- D20 - Plastics
- Drafting Committee
- D20.10 - Mechanical Properties
Relations
- Effective Date
- 01-May-2017
- Effective Date
- 01-Jun-2014
- Effective Date
- 01-May-2013
- Effective Date
- 01-May-2012
- Effective Date
- 01-Nov-2011
- Effective Date
- 01-Apr-2011
- Effective Date
- 01-Jul-2010
- Effective Date
- 01-Jun-2010
- Effective Date
- 01-May-2010
- Effective Date
- 01-Nov-2009
- Effective Date
- 15-Sep-2009
- Effective Date
- 01-Apr-2009
- Effective Date
- 01-Jan-2009
- Effective Date
- 01-Jan-2009
- Effective Date
- 01-Dec-2008
Overview
ASTM D732-17: Standard Test Method for Shear Strength of Plastics by Punch Tool is a widely-recognized standard developed by ASTM International for testing and comparing the shear strength of plastics. This method is applicable to plastics in the form of sheets, plates, and molded shapes with thicknesses ranging from 1.27 mm to 12.7 mm (0.050 to 0.500 in.). Using a punch-type shear tool, the standard outlines consistent procedures for determining the shear strength of plastics, providing essential data for engineering design and material selection in a variety of industries.
Key Topics
Shear Strength Measurement: The primary focus of ASTM D732-17 is the determination of a material's shear strength using a punch-type tool. The test calculates this strength by dividing the load required to shear the specimen by the area of the sheared edge.
Test Specimens: The standard specifies specimen geometry and dimensions, including squares or disks, with thickness requirements between 1.27 mm and 12.7 mm. Proper specimen preparation ensures test repeatability and accurate comparison.
Conditioning and Test Conditions: Test specimens must be conditioned in accordance with established practices (e.g., ASTM D618), ensuring consistent temperature and humidity prior to testing for reliable and repeatable results.
Apparatus Requirements: A suitable testing machine capable of maintaining a constant crosshead speed and accurate load indication is required. The punch tool must securely clamp the specimen to minimize deflection during testing.
Calculation and Reporting: Shear strength is expressed in megapascals (MPa) or pounds-force per square inch (psi). The standard also details data reporting procedures, including identification of material, specimen details, test conditions, and statistical metrics such as average and standard deviation.
Applications
ASTM D732-17 holds practical value across multiple fields:
- Material Comparison: Engineers and manufacturers use shear strength data to compare different plastics for applications requiring resistance to shearing forces.
- Quality Control: Consistent test methods allow manufacturers to maintain material specifications and ensure product reliability.
- Design and Engineering: Reliable shear strength values provide essential input for component design, particularly where plastics are subjected to shearing stresses.
- Research and Development: The standard is valuable for developing novel polymer blends and composites by providing a consistent benchmark for mechanical properties.
- Regulatory Compliance: Some material specifications reference this standard to meet industry or customer requirements.
Related Standards
ASTM D732-17 is often used in conjunction with other ASTM and industry standards:
- ASTM D618 - Practice for Conditioning Plastics for Testing
- ASTM D4000 - Classification System for Specifying Plastic Materials
- ASTM D5947 - Test Methods for Physical Dimensions of Solid Plastics Specimens
- ASTM E4 - Practices for Force Verification of Testing Machines
- ASTM E691 - Practice for Conducting an Interlaboratory Study to Determine the Precision of a Test Method
Note: There is currently no ISO equivalent to ASTM D732-17.
Practical Value
Implementing ASTM D732-17 supports:
- Improved product consistency by using a recognized method for assessing shear strength.
- Enhanced confidence in material selection for critical applications.
- Effective communication of material properties among suppliers, manufacturers, and customers.
Keywords: ASTM D732-17, shear strength, plastics, punch tool, material testing, engineering design, polymer sheets, quality control, mechanical properties, ASTM standards.
Buy Documents
ASTM D732-17 - Standard Test Method for Shear Strength of Plastics by Punch Tool
REDLINE ASTM D732-17 - Standard Test Method for Shear Strength of Plastics by Punch Tool
Get Certified
Connect with accredited certification bodies for this standard

Smithers Quality Assessments
US management systems and product certification.

DIN CERTCO
DIN Group product certification.
Sponsored listings
Frequently Asked Questions
ASTM D732-17 is a standard published by ASTM International. Its full title is "Standard Test Method for Shear Strength of Plastics by Punch Tool". This standard covers: SIGNIFICANCE AND USE 4.1 Shear strength obtained by the use of punch-type tooling is one of the recognized methods of comparing materials, or obtaining data for engineering design purposes, or both. However, it must be recognized that for end-use applications there are likely to be many factors not taken into account in this test method, such as stress-concentrating geometries and rates of shear, which can profoundly affect the measured shear strength. Moreover, the fact that the shear strength is calculated by dividing the load by the area of the sheared edge (punch circumference X specimen thickness) does not interpret as indicating the shear strength value so obtained is solely a material property, independent of thickness. 4.2 For many materials, it is possible that there is a specification that requires the use of this test method, but with some procedural modifications that take precedence when adhering to the specification. Therefore, it is advisable to refer to that material specification before using this test method. Table 1 of Classification System D4000 lists the ASTM materials standards that currently exist. SCOPE 1.1 This test method covers the procedure for determining the shear strength of plastics in the form of sheets, plates, and molded shapes in thicknesses from 1.27 to 12.7 mm (0.050 to 0.500 in.). 1.2 The values stated in SI units are to be regarded as the standard. The values given in parentheses are for information only. 1.3 This standard does not purport to address all of the safety concerns, if any, associated with its use. It is the responsibility of the user of this standard to establish appropriate safety and health practices and determine the applicability of regulatory limitations prior to use. Note 1: There is no known ISO equivalent to this standard. 1.4 This international standard was developed in accordance with internationally recognized principles on standardization established in the Decision on Principles for the Development of International Standards, Guides and Recommendations issued by the World Trade Organization Technical Barriers to Trade (TBT) Committee.
SIGNIFICANCE AND USE 4.1 Shear strength obtained by the use of punch-type tooling is one of the recognized methods of comparing materials, or obtaining data for engineering design purposes, or both. However, it must be recognized that for end-use applications there are likely to be many factors not taken into account in this test method, such as stress-concentrating geometries and rates of shear, which can profoundly affect the measured shear strength. Moreover, the fact that the shear strength is calculated by dividing the load by the area of the sheared edge (punch circumference X specimen thickness) does not interpret as indicating the shear strength value so obtained is solely a material property, independent of thickness. 4.2 For many materials, it is possible that there is a specification that requires the use of this test method, but with some procedural modifications that take precedence when adhering to the specification. Therefore, it is advisable to refer to that material specification before using this test method. Table 1 of Classification System D4000 lists the ASTM materials standards that currently exist. SCOPE 1.1 This test method covers the procedure for determining the shear strength of plastics in the form of sheets, plates, and molded shapes in thicknesses from 1.27 to 12.7 mm (0.050 to 0.500 in.). 1.2 The values stated in SI units are to be regarded as the standard. The values given in parentheses are for information only. 1.3 This standard does not purport to address all of the safety concerns, if any, associated with its use. It is the responsibility of the user of this standard to establish appropriate safety and health practices and determine the applicability of regulatory limitations prior to use. Note 1: There is no known ISO equivalent to this standard. 1.4 This international standard was developed in accordance with internationally recognized principles on standardization established in the Decision on Principles for the Development of International Standards, Guides and Recommendations issued by the World Trade Organization Technical Barriers to Trade (TBT) Committee.
ASTM D732-17 is classified under the following ICS (International Classification for Standards) categories: 83.080.01 - Plastics in general. The ICS classification helps identify the subject area and facilitates finding related standards.
ASTM D732-17 has the following relationships with other standards: It is inter standard links to ASTM D732-10, ASTM E4-14, ASTM E691-13, ASTM D4000-12, ASTM E691-11, ASTM D4000-11, ASTM D4000-10a, ASTM E4-10, ASTM D4000-10, ASTM E4-09a, ASTM D4000-09b, ASTM E4-09, ASTM D4000-09, ASTM D4000-09a, ASTM E4-08. Understanding these relationships helps ensure you are using the most current and applicable version of the standard.
ASTM D732-17 is available in PDF format for immediate download after purchase. The document can be added to your cart and obtained through the secure checkout process. Digital delivery ensures instant access to the complete standard document.
Standards Content (Sample)
This international standard was developed in accordance with internationally recognized principles on standardization established in the Decision on Principles for the
Development of International Standards, Guides and Recommendations issued by the World Trade Organization Technical Barriers to Trade (TBT) Committee.
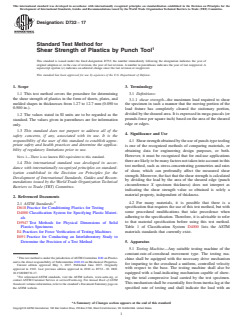
Designation: D732 − 17
Standard Test Method for
Shear Strength of Plastics by Punch Tool
This standard is issued under the fixed designation D732; the number immediately following the designation indicates the year of
original adoption or, in the case of revision, the year of last revision. A number in parentheses indicates the year of last reapproval. A
superscript epsilon (´) indicates an editorial change since the last revision or reapproval.
This standard has been approved for use by agencies of the U.S. Department of Defense.
1. Scope 3. Terminology
1.1 This test method covers the procedure for determining 3.1 Definitions:
the shear strength of plastics in the form of sheets, plates, and
3.1.1 shear strength—the maximum load required to shear
molded shapes in thicknesses from 1.27 to 12.7 mm (0.050 to
the specimen in such a manner that the moving portion of the
0.500 in.).
load fixture has completely cleared the stationary portion,
divided by the sheared area. It is expressed in mega-pascals (or
1.2 The values stated in SI units are to be regarded as the
pounds-force per square inch) based on the area of the sheared
standard. The values given in parentheses are for information
edge or edges.
only.
1.3 This standard does not purport to address all of the
4. Significance and Use
safety concerns, if any, associated with its use. It is the
responsibility of the user of this standard to establish appro-
4.1 Shearstrengthobtainedbytheuseofpunch-typetooling
priate safety and health practices and determine the applica-
is one of the recognized methods of comparing materials, or
bility of regulatory limitations prior to use.
obtaining data for engineering design purposes, or both.
However, it must be recognized that for end-use applications
NOTE 1—There is no known ISO equivalent to this standard.
therearelikelytobemanyfactorsnottakenintoaccountinthis
1.4 This international standard was developed in accor-
test method, such as stress-concentrating geometries and rates
dance with internationally recognized principles on standard-
of shear, which can profoundly affect the measured shear
ization established in the Decision on Principles for the
strength.Moreover,thefactthattheshearstrengthiscalculated
Development of International Standards, Guides and Recom-
by dividing the load by the area of the sheared edge (punch
mendations issued by the World Trade Organization Technical
circumference X specimen thickness) does not interpret as
Barriers to Trade (TBT) Committee.
indicating the shear strength value so obtained is solely a
material property, independent of thickness.
2. Referenced Documents
4.2 For many materials, it is possible that there is a
2.1 ASTM Standards:
specification that requires the use of this test method, but with
D618 Practice for Conditioning Plastics for Testing
some procedural modifications that take precedence when
D4000 Classification System for Specifying Plastic Materi-
adhering to the specification. Therefore, it is advisable to refer
als
to that material specification before using this test method.
D5947 Test Methods for Physical Dimensions of Solid
Table 1 of Classification System D4000 lists the ASTM
Plastics Specimens
materials standards that currently exist.
E4 Practices for Force Verification of Testing Machines
E691 Practice for Conducting an Interlaboratory Study to
Determine the Precision of a Test Method 5. Apparatus
5.1 Testing Machine—Any suitable testing machine of the
constant-rate-of-crosshead movement type. The testing ma-
This test method is under the jurisdiction ofASTM Committee D20 on Plastics
chine shall be equipped with the necessary drive mechanism
and is the direct responsibility of Subcommittee D20.10 on Mechanical Properties.
for imparting to the crosshead a uniform, controlled velocity
Current edition approved May 1, 2017. Published June 2017. Originally
with respect to the base. The testing machine shall also be
approved in 1943. Last previous edition approved in 2010 as D732 – 10. DOI:
10.1520/D0732-17.
equipped with a load-indicating mechanism capable of show-
For referenced ASTM standards, visit the ASTM website, www.astm.org, or
ing the total compressive load carried by the test specimen.
contact ASTM Customer Service at service@astm.org. For Annual Book of ASTM
This mechanism shall be essentially free from inertia-lag at the
Standards volume information, refer to the standard’s Document Summary page on
the ASTM website. specified rate of testing and shall indicate the load with an
*A Summary of Changes section appears at the end of this standard
Copyright © ASTM International, 100 Barr Harbor Drive, PO Box C700, West Conshohocken, PA 19428-2959. United States
D732 − 17
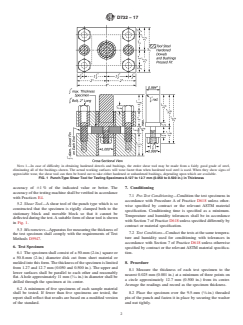
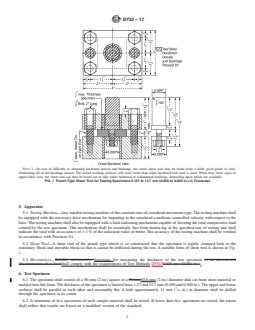
NOTE 1—In case of difficulty in obtaining hardened dowels and bushings, the entire shear tool may be made from a fairly good grade of steel,
eliminating all of the bushings shown. The actual working surfaces will wear faster than when hardened tool steel is used. When they show signs of
appreciable wear, the shear tool can then be bored out to take either hardened or unhardened bushings, depending upon which are available.
FIG. 1 Punch-Type Shear Tool for Testing Specimens 0.127 to 12.7 mm (0.050 to 0.500 in.) in Thickness
accuracy of 61 % of the indicated value or better. The 7. Conditioning
accuracy of the testing machine shall be verified in accordance
7.1 Pre-Test Conditioning—Condition the test specimens in
with Practices E4.
accordance with Procedure A of Practice D618 unless other-
5.2 Shear Tool—A shear tool of the punch type which is so
wise specified by contract or the relevant ASTM material
constructed that the specimen is rigidly clamped both to the
specification. Conditioning time is specified as a minimum.
stationary block and movable block so that it cannot be
Temperature and humidity tolerances shall be in accordance
deflected during the test.Asuitable form of shear tool is shown
with Section 7 of Practice D618 unless specified differently by
in Fig. 1.
contract or material specification.
5.3 Micrometers—Apparatus for measuring the thickness of
7.2 Test Conditions—Conduct the tests at the same tempera-
the test specimen shall comply with the requirements of Test
ture and humidity used for conditioning with tolerances in
Methods D5947.
accordance with Section 7 of Practice D618 unless otherwise
6. Test Specimen
specified by contract or the relevant ASTM material specifica-
tion.
6.1 The specimen shall consist of a 50-mm (2-in.) square or
a 50.8-mm (2-in.) diameter disk cut from sheet material or
molded into this form.The thickness of the specimen is limited 8. Procedure
from 1.27 and 12.7 mm (0.050 and 0.500 in.). The upper and
8.1 Measure the thickness of each test specimen to the
lower surfaces shall be parallel to each other and reasonably
nearest 0.025 mm (0.001 in.) at a minimum of three points on
flat.Ahole approximately 11 mm ( ⁄16 in.) in diameter shall be
a circle approximately 12.7 mm (0.500 in.) from its center.
drilled through the specimen at its center.
Average the readings and record as the specimen thickness.
6.2 A minimum of five specimens of each sample material
8.2 Place the specimen over the 9.5-mm ( ⁄8
...
This document is not an ASTM standard and is intended only to provide the user of an ASTM standard an indication of what changes have been made to the previous version. Because
it may not be technically possible to adequately depict all changes accurately, ASTM recommends that users consult prior editions as appropriate. In all cases only the current version
of the standard as published by ASTM is to be considered the official document.
Designation: D732 − 10 D732 − 17
Standard Test Method for
Shear Strength of Plastics by Punch Tool
This standard is issued under the fixed designation D732; the number immediately following the designation indicates the year of
original adoption or, in the case of revision, the year of last revision. A number in parentheses indicates the year of last reapproval. A
superscript epsilon (´) indicates an editorial change since the last revision or reapproval.
This standard has been approved for use by agencies of the U.S. Department of Defense.
1. Scope*Scope
1.1 This test method covers the procedure for determining the shear strength of composite materials plastics in the form of
sheets, plates, and molded shapes in thicknesses from 1.27 to 12.7 mm (0.050 to 0.500 in.).
1.2 The values stated in SI units are to be regarded as the standard. The values given in parentheses are for information only.
1.3 This standard does not purport to address all of the safety concerns, if any, associated with its use. It is the responsibility
of the user of this standard to establish appropriate safety and health practices and determine the applicability of regulatory
limitations prior to use.
NOTE 1—There is no known ISO equivalent to this standard.
1.4 This international standard was developed in accordance with internationally recognized principles on standardization
established in the Decision on Principles for the Development of International Standards, Guides and Recommendations issued
by the World Trade Organization Technical Barriers to Trade (TBT) Committee.
2. Referenced Documents
2.1 ASTM Standards:
D618 Practice for Conditioning Plastics for Testing
D4000 Classification System for Specifying Plastic Materials
D5947 Test Methods for Physical Dimensions of Solid Plastics Specimens
E4 Practices for Force Verification of Testing Machines
E691 Practice for Conducting an Interlaboratory Study to Determine the Precision of a Test Method
3. Terminology
3.1 Definitions:
3.1.1 shear strength—the maximum load required to shear the specimen in such a manner that the moving portion of the load
fixture has completely cleared the stationary portion, divided by the sheared area. It is expressed in megapascalsmega-pascals (or
pounds-force per square inch) based on the area of the sheared edge or edges.
4. Significance and Use
4.1 Shear strength obtained by the use of punch-type tooling is one of the recognized methods of comparing materials, or
obtaining data for engineering design purposes, or both. However, it must be recognized that for end-use applications there are
likely to be many factors not taken into account in this test method, such as stress-concentrating geometries and rates of shear,
which can profoundly affect the measured shear strength. Moreover, the fact that the shear strength is calculated by dividing the
load by the area of the sheared edge (punch circumference X specimen thickness) does not interpret as indicating the shear strength
value so obtained is solely a material property, independent of thickness.
4.2 For many materials, it is possible that there is a specification that requires the use of this test method, but with some
procedural modifications that take precedence when adhering to the specification. Therefore, it is advisable to refer to that material
specification before using this test method. Table 1 of Classification System D4000 lists the ASTM materials standards that
currently exist.
This test method is under the jurisdiction of ASTM Committee D20 on Plastics and is the direct responsibility of Subcommittee D20.10 on Mechanical Properties.
Current edition approved April 1, 2010May 1, 2017. Published April 2010June 2017. Originally approved in 1943. Last previous edition approved in 20092010 as
D732 – 09.D732 – 10. DOI: 10.1520/D0732-10.10.1520/D0732-17.
For referenced ASTM standards, visit the ASTM website, www.astm.org, or contact ASTM Customer Service at service@astm.org. For Annual Book of ASTM Standards
volume information, refer to the standard’s Document Summary page on the ASTM website.
*A Summary of Changes section appears at the end of this standard
Copyright © ASTM International, 100 Barr Harbor Drive, PO Box C700, West Conshohocken, PA 19428-2959. United States
D732 − 17
NOTE 1—In case of difficulty in obtaining hardened dowels and bushings, the entire shear tool may be made from a fairly good grade of steel,
eliminating all of the bushings shown. The actual working surfaces will wear faster than when hardened tool steel is used. When they show signs of
appreciable wear, the shear tool can then be bored out to take either hardened or unhardened bushings, depending upon which are available.
FIG. 1 Punch-Type Shear Tool for Testing Specimens 0.127 to 12.7 mm (0.050 to 0.500 in.) in Thickness
5. Apparatus
5.1 Testing Machine—Any suitable testing machine of the constant-rate-of-crosshead movement type. The testing machine shall
be equipped with the necessary drive mechanism for imparting to the crosshead a uniform, controlled velocity with respect to the
base. The testing machine shall also be equipped with a load-indicating mechanism capable of showing the total compressive load
carried by the test specimen. This mechanism shall be essentially free from inertia-lag at the specified rate of testing and shall
indicate the load with an accuracy of 61 % of the indicated value or better. The accuracy of the testing machine shall be verified
in accordance with Practices E4.
5.2 Shear Tool—A shear tool of the punch type which is so constructed that the specimen is rigidly clamped both to the
stationary block and movable block so that it cannot be deflected during the test. A suitable form of shear tool is shown in Fig.
1.
5.3 Micrometers—Suitable micrometers Apparatus for measuring the thickness of the test specimen to an incremental
discrimination of at leastshall comply with the requirements of Test Methods D59470.025 mm (0.001 in.).
6. Test Specimen
6.1 The specimen shall consist of a 50-mm (2-in.) square or a 50-mm50.8-mm (2-in.) diameter disk cut from sheet material or
molded into this form. The thickness of the specimen is limited from 1.27 and 12.7 mm (0.050 and 0.500 in.). The upper and lower
surfaces shall be parallel to each other and reasonably flat. A hole approximately 11 mm ( ⁄16 in.) in diameter shall be drilled
through the specimen at its center.
6.2 A minimum of five specimens of each sample material shall be tested. If fewer than five specimens are tested, the report
shall reflect that results are based on a modified version of the standard.
D732 − 17
7. Conditioning
7.1 Pre-Test Conditioning—Condition the test specimens in accordance with Procedure A of Practice D618 unless otherwise
specified by contract or the relevant ASTM material specification. Conditioning time is specified as a minimum. Temperature and
humidity tolerances shall be in accordance with Section 7 of Practice D618 unless specified differently by contract or material
specification.
7.2 Test Conditions—Conduct the tests at the same temperature and humidity used for conditioning with tolerances in
accordance with Section 7 of Practice D618 unless otherwise specified by contract or the relevant ASTM material specification.
8. Procedure
8.1 Measure the thickness of each test specimen to the nearest 0.025 mm (0.001 in.) at a minimum of three points on a circle
approximately 12.7 mm (0.500 in.) from its center. Average the readings and record as the specimen thickness.
8.2 Place the specimen over the 9.5-mm ( ⁄8-in.) threaded pin of the punch and fasten it in place by securing the washer and
nut tightly.
8.3 Center the specimen and punch on the support fixture and complete the assembly of the clamping fixture being sure to
tighten the bolts securely.
8.4 Load the test specimen at a crosshead speed of 1.251.27 mm (0.05 in.)/min. The tolerances shall be 1.3 6 0.3 mm (0.050
6 0.010 in.)/min.
8.5 Push the punch far enough through the specimen so that the sheared section clears the specimen proper. T
...

Questions, Comments and Discussion
Ask us and Technical Secretary will try to provide an answer. You can facilitate discussion about the standard in here.
Loading comments...