ASTM D785-08(2015)
(Test Method)Standard Test Method for Rockwell Hardness of Plastics and Electrical Insulating Materials
Standard Test Method for Rockwell Hardness of Plastics and Electrical Insulating Materials
SIGNIFICANCE AND USE
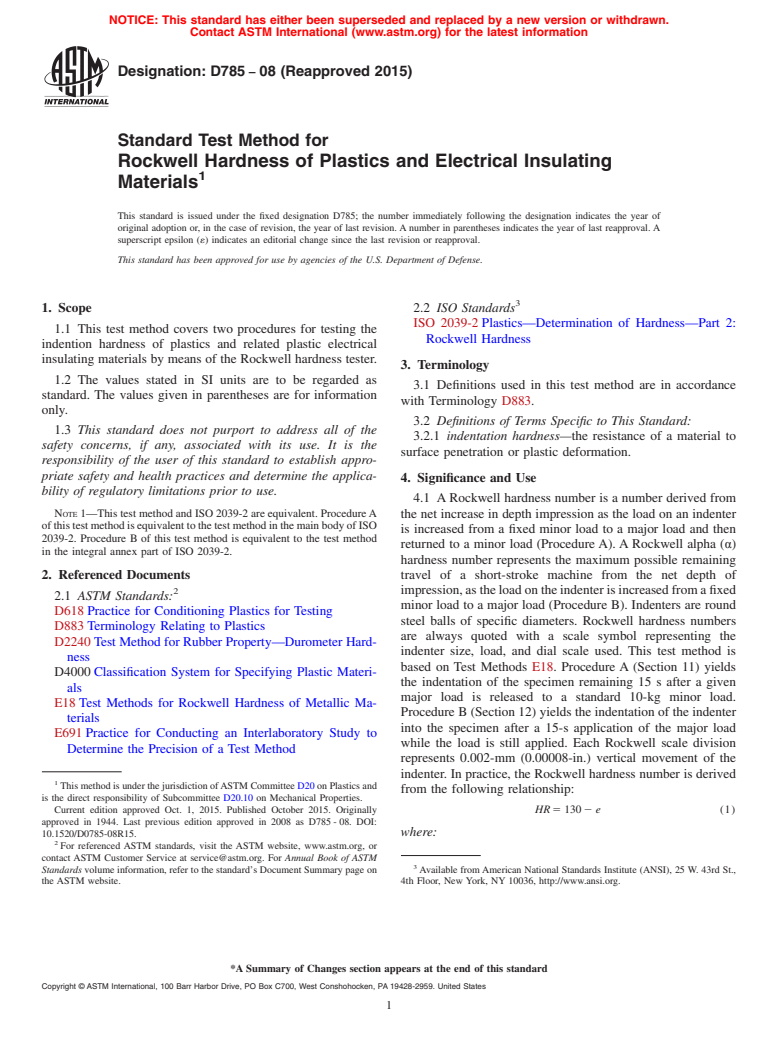
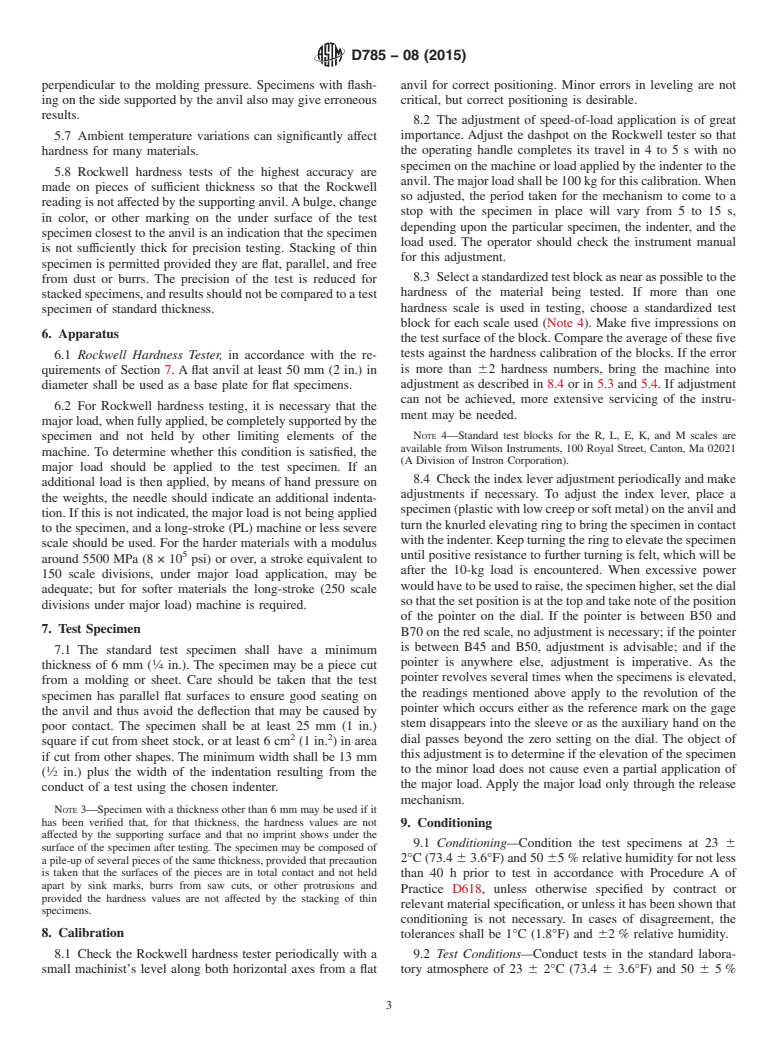
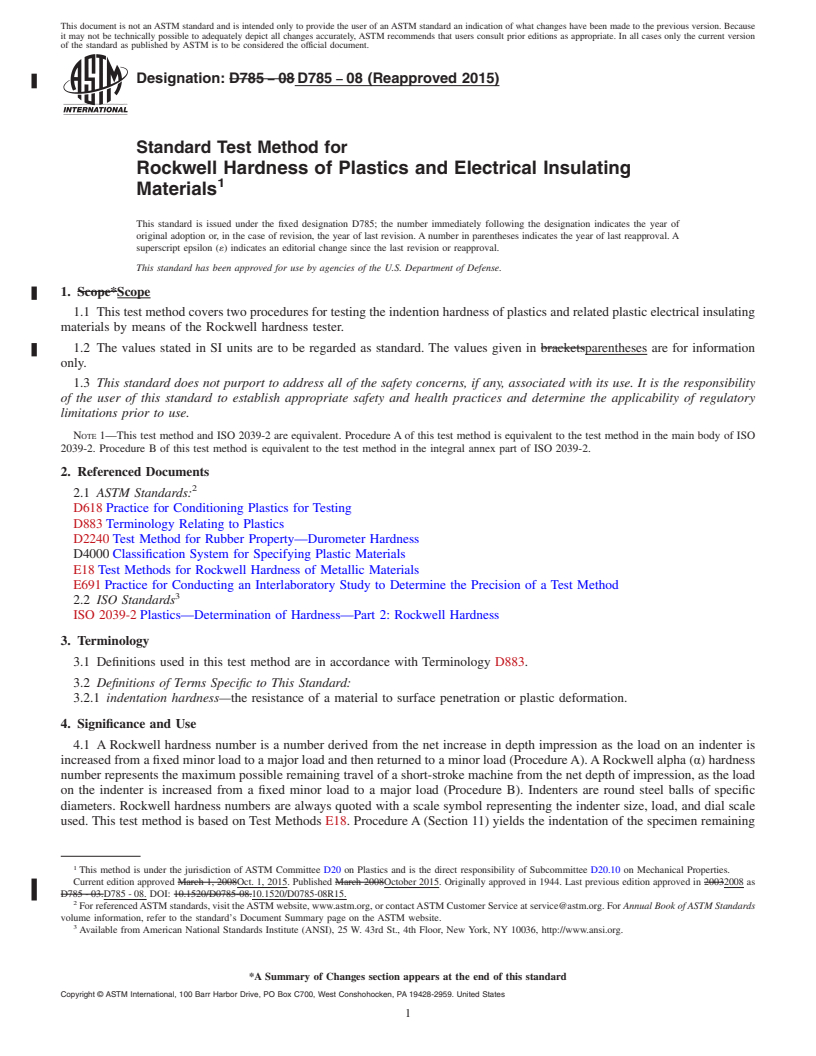
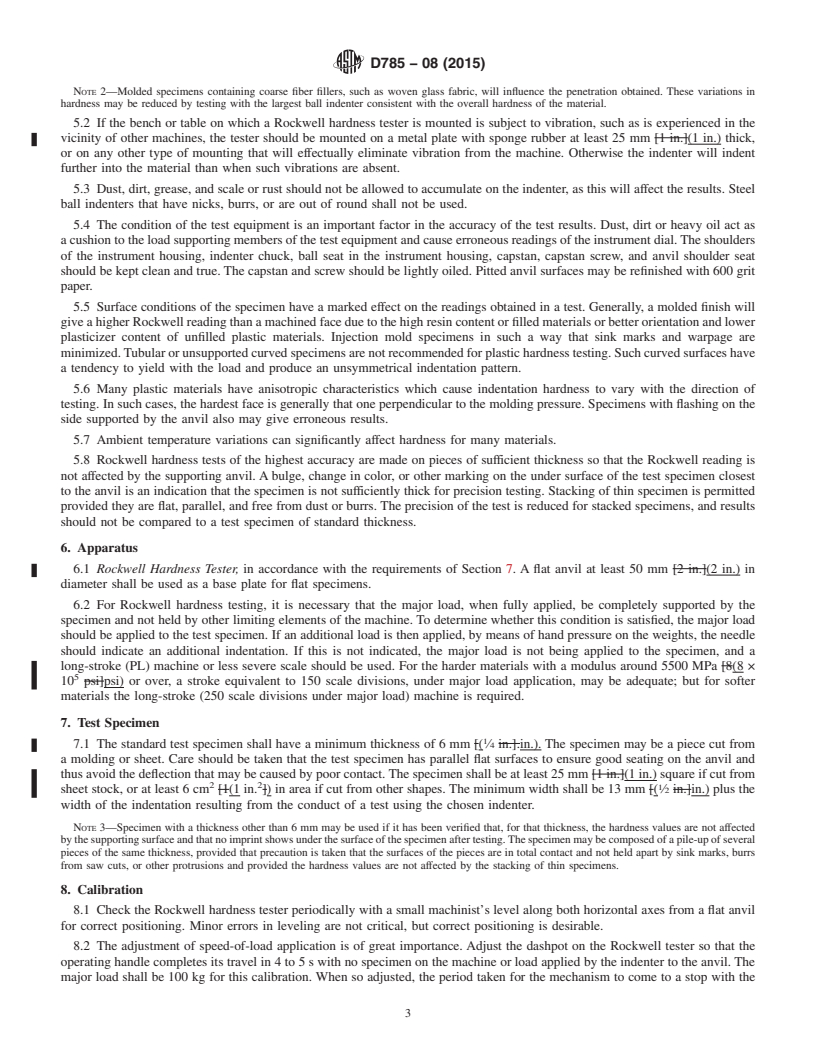
4.1 A Rockwell hardness number is a number derived from the net increase in depth impression as the load on an indenter is increased from a fixed minor load to a major load and then returned to a minor load (Procedure A). A Rockwell alpha (α) hardness number represents the maximum possible remaining travel of a short-stroke machine from the net depth of impression, as the load on the indenter is increased from a fixed minor load to a major load (Procedure B). Indenters are round steel balls of specific diameters. Rockwell hardness numbers are always quoted with a scale symbol representing the indenter size, load, and dial scale used. This test method is based on Test Methods E18. Procedure A (Section 11) yields the indentation of the specimen remaining 15 s after a given major load is released to a standard 10-kg minor load. Procedure B (Section 12) yields the indentation of the indenter into the specimen after a 15-s application of the major load while the load is still applied. Each Rockwell scale division represents 0.002-mm (0.00008-in.) vertical movement of the indenter. In practice, the Rockwell hardness number is derived from the following relationship:
where:
HR = the Rockwell hardness number, and e = the depth of impression after removal of the major load, in units of 0.002 mm. This relation only holds for the E, M, L, R, and K scales.
4.2 A Rockwell hardness number is directly related to the indentation hardness of a plastic material, with the higher the reading the harder the material. An α hardness number is equal to 150 minus the instrument reading. Due to a short overlap of Rockwell hardness scales by Procedure A, two different dial readings on different scales may be obtained on the same material, both of which may be technically correct.
4.3 For certain types of materials having creep and recovery, the time factors involved in applications of major and minor loads have a considerable effect on the results of the measureme...
SCOPE
1.1 This test method covers two procedures for testing the indention hardness of plastics and related plastic electrical insulating materials by means of the Rockwell hardness tester.
1.2 The values stated in SI units are to be regarded as standard. The values given in parentheses are for information only.
1.3 This standard does not purport to address all of the safety concerns, if any, associated with its use. It is the responsibility of the user of this standard to establish appropriate safety and health practices and determine the applicability of regulatory limitations prior to use.
Note 1: This test method and ISO 2039-2 are equivalent. Procedure A of this test method is equivalent to the test method in the main body of ISO 2039-2. Procedure B of this test method is equivalent to the test method in the integral annex part of ISO 2039-2.
General Information
Buy Standard
Standards Content (Sample)
NOTICE: This standard has either been superseded and replaced by a new version or withdrawn.
Contact ASTM International (www.astm.org) for the latest information
Designation: D785 − 08 (Reapproved 2015)
Standard Test Method for
Rockwell Hardness of Plastics and Electrical Insulating
1
Materials
This standard is issued under the fixed designation D785; the number immediately following the designation indicates the year of
original adoption or, in the case of revision, the year of last revision. A number in parentheses indicates the year of last reapproval. A
superscript epsilon (´) indicates an editorial change since the last revision or reapproval.
This standard has been approved for use by agencies of the U.S. Department of Defense.
3
1. Scope 2.2 ISO Standards
ISO 2039-2 Plastics—Determination of Hardness—Part 2:
1.1 This test method covers two procedures for testing the
Rockwell Hardness
indention hardness of plastics and related plastic electrical
insulating materials by means of the Rockwell hardness tester.
3. Terminology
1.2 The values stated in SI units are to be regarded as
3.1 Definitions used in this test method are in accordance
standard. The values given in parentheses are for information
with Terminology D883.
only.
3.2 Definitions of Terms Specific to This Standard:
1.3 This standard does not purport to address all of the
3.2.1 indentation hardness—the resistance of a material to
safety concerns, if any, associated with its use. It is the
surface penetration or plastic deformation.
responsibility of the user of this standard to establish appro-
priate safety and health practices and determine the applica-
4. Significance and Use
bility of regulatory limitations prior to use.
4.1 A Rockwell hardness number is a number derived from
NOTE 1—This test method and ISO 2039-2 are equivalent. Procedure A
the net increase in depth impression as the load on an indenter
of this test method is equivalent to the test method in the main body of ISO
is increased from a fixed minor load to a major load and then
2039-2. Procedure B of this test method is equivalent to the test method
returned to a minor load (Procedure A). A Rockwell alpha (α)
in the integral annex part of ISO 2039-2.
hardness number represents the maximum possible remaining
2. Referenced Documents travel of a short-stroke machine from the net depth of
2 impression, as the load on the indenter is increased from a fixed
2.1 ASTM Standards:
minor load to a major load (Procedure B). Indenters are round
D618 Practice for Conditioning Plastics for Testing
steel balls of specific diameters. Rockwell hardness numbers
D883 Terminology Relating to Plastics
are always quoted with a scale symbol representing the
D2240 Test Method for Rubber Property—Durometer Hard-
indenter size, load, and dial scale used. This test method is
ness
based on Test Methods E18. Procedure A (Section 11) yields
D4000 Classification System for Specifying Plastic Materi-
the indentation of the specimen remaining 15 s after a given
als
major load is released to a standard 10-kg minor load.
E18 Test Methods for Rockwell Hardness of Metallic Ma-
Procedure B (Section 12) yields the indentation of the indenter
terials
into the specimen after a 15-s application of the major load
E691 Practice for Conducting an Interlaboratory Study to
while the load is still applied. Each Rockwell scale division
Determine the Precision of a Test Method
represents 0.002-mm (0.00008-in.) vertical movement of the
indenter. In practice, the Rockwell hardness number is derived
1
This method is under the jurisdiction of ASTM Committee D20 on Plastics and
from the following relationship:
is the direct responsibility of Subcommittee D20.10 on Mechanical Properties.
Current edition approved Oct. 1, 2015. Published October 2015. Originally
HR5 1302 e (1)
approved in 1944. Last previous edition approved in 2008 as D785 - 08. DOI:
10.1520/D0785-08R15. where:
2
For referenced ASTM standards, visit the ASTM website, www.astm.org, or
contact ASTM Customer Service at service@astm.org. For Annual Book of ASTM
3
Standards volume information, refer to the standard’s Document Summary page on Available from American National Standards Institute (ANSI), 25 W. 43rd St.,
the ASTM website. 4th Floor, New York, NY 10036, http://www.ansi.org.
*A Summary of Changes section appears at the end of this standard
Copyright © ASTM International, 100 Barr Harbor Drive, PO Box C700, West Conshohocken, PA 19428-2959. United States
1
---------------------- Page: 1 ----------------------
D785 − 08 (2015)
5
Young’s modulus in compression over 3400 MPa (5 × 10 psi).
HR = the Rockwell hardness number, and
Softer plastics and coarse-filled materials will have a wider
e = the depth of impression after removal of the major
range of variation. A large ball indenter will distribute the load
load, in units of 0.002 mm. This relation only holds for
the E, M, L, R, and K scales. more evenly and decrease the range of test results (Note 2). The
s
...
This document is not an ASTM standard and is intended only to provide the user of an ASTM standard an indication of what changes have been made to the previous version. Because
it may not be technically possible to adequately depict all changes accurately, ASTM recommends that users consult prior editions as appropriate. In all cases only the current version
of the standard as published by ASTM is to be considered the official document.
Designation: D785 − 08 D785 − 08 (Reapproved 2015)
Standard Test Method for
Rockwell Hardness of Plastics and Electrical Insulating
1
Materials
This standard is issued under the fixed designation D785; the number immediately following the designation indicates the year of
original adoption or, in the case of revision, the year of last revision. A number in parentheses indicates the year of last reapproval. A
superscript epsilon (´) indicates an editorial change since the last revision or reapproval.
This standard has been approved for use by agencies of the U.S. Department of Defense.
1. Scope*Scope
1.1 This test method covers two procedures for testing the indention hardness of plastics and related plastic electrical insulating
materials by means of the Rockwell hardness tester.
1.2 The values stated in SI units are to be regarded as standard. The values given in bracketsparentheses are for information
only.
1.3 This standard does not purport to address all of the safety concerns, if any, associated with its use. It is the responsibility
of the user of this standard to establish appropriate safety and health practices and determine the applicability of regulatory
limitations prior to use.
NOTE 1—This test method and ISO 2039-2 are equivalent. Procedure A of this test method is equivalent to the test method in the main body of ISO
2039-2. Procedure B of this test method is equivalent to the test method in the integral annex part of ISO 2039-2.
2. Referenced Documents
2
2.1 ASTM Standards:
D618 Practice for Conditioning Plastics for Testing
D883 Terminology Relating to Plastics
D2240 Test Method for Rubber Property—Durometer Hardness
D4000 Classification System for Specifying Plastic Materials
E18 Test Methods for Rockwell Hardness of Metallic Materials
E691 Practice for Conducting an Interlaboratory Study to Determine the Precision of a Test Method
3
2.2 ISO Standards
ISO 2039-2 Plastics—Determination of Hardness—Part 2: Rockwell Hardness
3. Terminology
3.1 Definitions used in this test method are in accordance with Terminology D883.
3.2 Definitions of Terms Specific to This Standard:
3.2.1 indentation hardness—the resistance of a material to surface penetration or plastic deformation.
4. Significance and Use
4.1 A Rockwell hardness number is a number derived from the net increase in depth impression as the load on an indenter is
increased from a fixed minor load to a major load and then returned to a minor load (Procedure A). A Rockwell alpha (α) hardness
number represents the maximum possible remaining travel of a short-stroke machine from the net depth of impression, as the load
on the indenter is increased from a fixed minor load to a major load (Procedure B). Indenters are round steel balls of specific
diameters. Rockwell hardness numbers are always quoted with a scale symbol representing the indenter size, load, and dial scale
used. This test method is based on Test Methods E18. Procedure A (Section 11) yields the indentation of the specimen remaining
1
This method is under the jurisdiction of ASTM Committee D20 on Plastics and is the direct responsibility of Subcommittee D20.10 on Mechanical Properties.
Current edition approved March 1, 2008Oct. 1, 2015. Published March 2008October 2015. Originally approved in 1944. Last previous edition approved in 20032008 as
D785 - 03.D785 - 08. DOI: 10.1520/D0785-08.10.1520/D0785-08R15.
2
For referenced ASTM standards, visit the ASTM website, www.astm.org, or contact ASTM Customer Service at service@astm.org. For Annual Book of ASTM Standards
volume information, refer to the standard’s Document Summary page on the ASTM website.
3
Available from American National Standards Institute (ANSI), 25 W. 43rd St., 4th Floor, New York, NY 10036, http://www.ansi.org.
*A Summary of Changes section appears at the end of this standard
Copyright © ASTM International, 100 Barr Harbor Drive, PO Box C700, West Conshohocken, PA 19428-2959. United States
1
---------------------- Page: 1 ----------------------
D785 − 08 (2015)
15 s after a given major load is released to a standard 10-kg minor load. Procedure B (Section 12) yields the indentation of the
indenter into the specimen after a 15-s application of the major load while the load is still applied. Each Rockwell scale division
represents 0.002-mm [0.00008-in.](0.00008-in.) vertical movement of the indenter. In practice, the Rockwell hardness number is
derived from the following relationship:
HR 5 130 2 e (1)
where:
HR = the Rockwell hardness number, and
e = the depth of impression after removal of t
...


Questions, Comments and Discussion
Ask us and Technical Secretary will try to provide an answer. You can facilitate discussion about the standard in here.