ASTM E1085-22
(Test Method)Standard Test Method for Analysis of Low-Alloy Steels by Wavelength Dispersive X-Ray Fluorescence Spectrometry
Standard Test Method for Analysis of Low-Alloy Steels by Wavelength Dispersive X-Ray Fluorescence Spectrometry
SIGNIFICANCE AND USE
5.1 This test method is suitable for manufacturing control and for verifying that a product meets specifications. This test method provides rapid, multi-element determinations with sufficient accuracy to ensure product quality and to minimize production delays. The analytical performance data may be used as a benchmark to determine if similar X-ray spectrometers provide equivalent precision and accuracy, or if the performance of a particular X-ray spectrometer has changed.
5.2 Calcium is sometimes added to steel to affect inclusion shape which enhances certain mechanical properties of steel. This test method is useful for determining the residual calcium in the steel after such treatment.
5.2.1 Because calcium occurs primarily in inclusions, the precision of this test method is a function of the distribution of the calcium-bearing inclusions in the steel. The variation of determinations on freshly prepared surfaces will give some indication of the distribution of these inclusions.
SCOPE
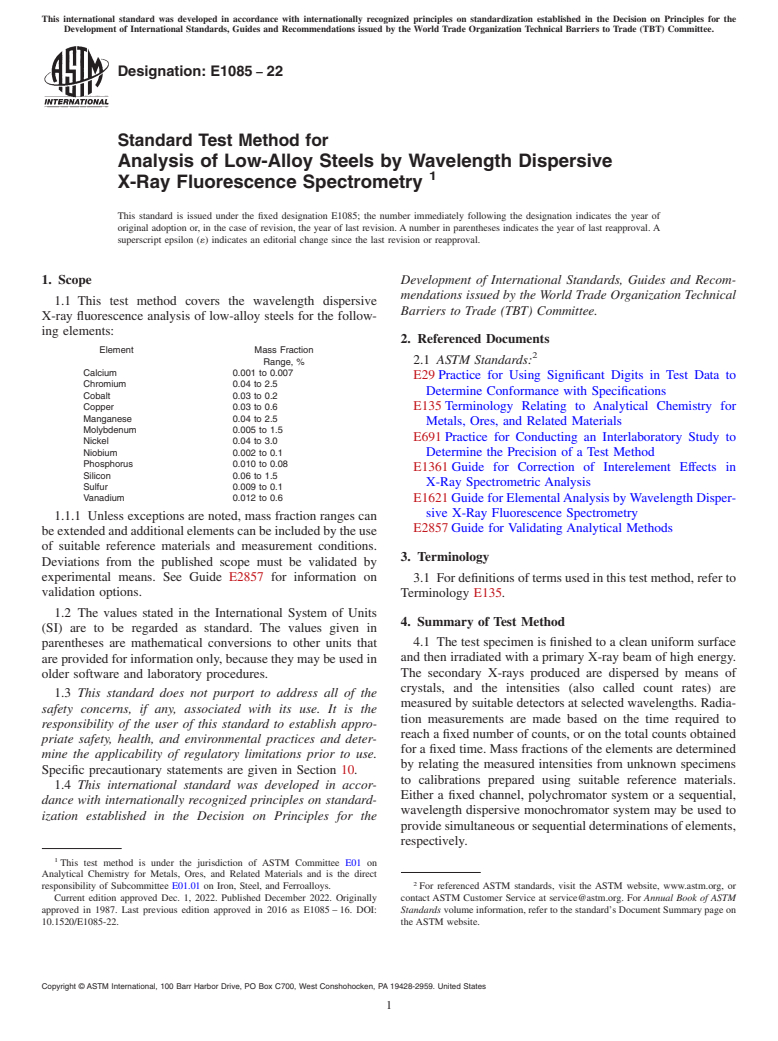
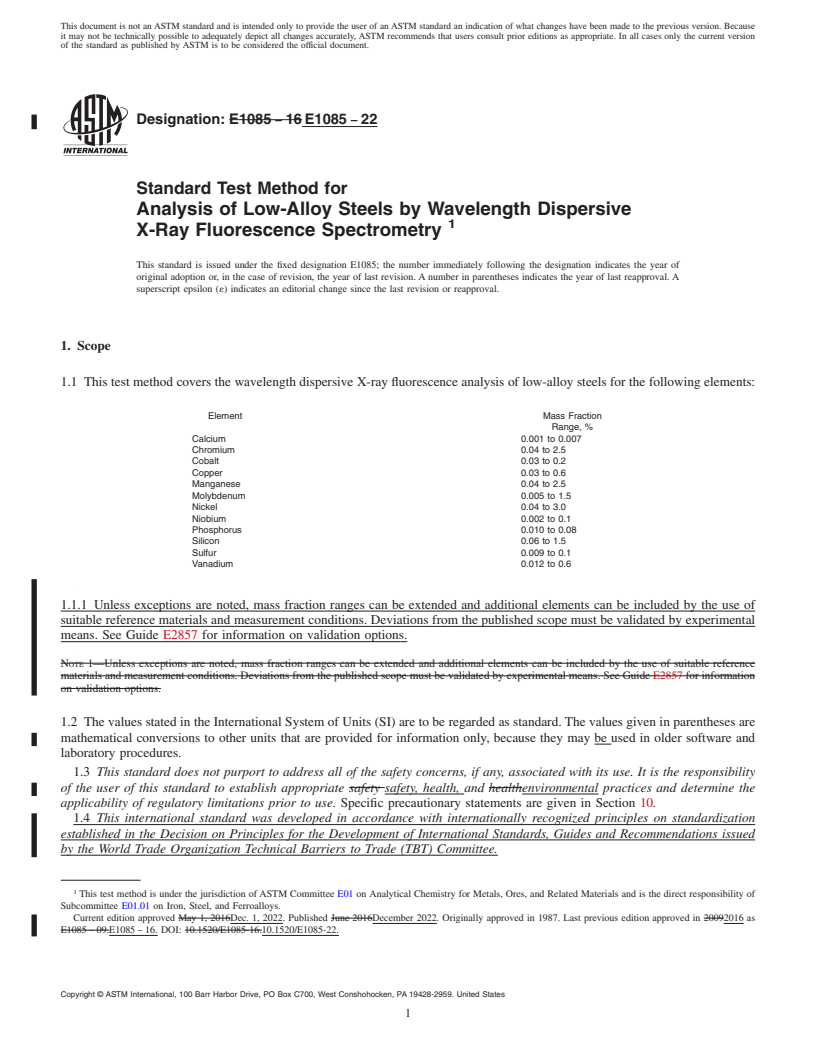
1.1 This test method covers the wavelength dispersive X-ray fluorescence analysis of low-alloy steels for the following elements:
Element
Mass Fraction
Range, %
Calcium
0.001 to 0.007
Chromium
0.04 to 2.5
Cobalt
0.03 to 0.2
Copper
0.03 to 0.6
Manganese
0.04 to 2.5
Molybdenum
0.005 to 1.5
Nickel
0.04 to 3.0
Niobium
0.002 to 0.1
Phosphorus
0.010 to 0.08
Silicon
0.06 to 1.5
Sulfur
0.009 to 0.1
Vanadium
0.012 to 0.6
1.1.1 Unless exceptions are noted, mass fraction ranges can be extended and additional elements can be included by the use of suitable reference materials and measurement conditions. Deviations from the published scope must be validated by experimental means. See Guide E2857 for information on validation options.
1.2 The values stated in the International System of Units (SI) are to be regarded as standard. The values given in parentheses are mathematical conversions to other units that are provided for information only, because they may be used in older software and laboratory procedures.
1.3 This standard does not purport to address all of the safety concerns, if any, associated with its use. It is the responsibility of the user of this standard to establish appropriate safety, health, and environmental practices and determine the applicability of regulatory limitations prior to use. Specific precautionary statements are given in Section 10.
1.4 This international standard was developed in accordance with internationally recognized principles on standardization established in the Decision on Principles for the Development of International Standards, Guides and Recommendations issued by the World Trade Organization Technical Barriers to Trade (TBT) Committee.
General Information
Buy Standard
Standards Content (Sample)
This international standard was developed in accordance with internationally recognized principles on standardization established in the Decision on Principles for the
Development of International Standards, Guides and Recommendations issued by the World Trade Organization Technical Barriers to Trade (TBT) Committee.
Designation: E1085 − 22
Standard Test Method for
Analysis of Low-Alloy Steels by Wavelength Dispersive
1
X-Ray Fluorescence Spectrometry
This standard is issued under the fixed designation E1085; the number immediately following the designation indicates the year of
original adoption or, in the case of revision, the year of last revision. A number in parentheses indicates the year of last reapproval. A
superscript epsilon (´) indicates an editorial change since the last revision or reapproval.
1. Scope Development of International Standards, Guides and Recom-
mendations issued by the World Trade Organization Technical
1.1 This test method covers the wavelength dispersive
Barriers to Trade (TBT) Committee.
X-ray fluorescence analysis of low-alloy steels for the follow-
ing elements:
2. Referenced Documents
Element Mass Fraction
2
Range, % 2.1 ASTM Standards:
Calcium 0.001 to 0.007
E29 Practice for Using Significant Digits in Test Data to
Chromium 0.04 to 2.5
Determine Conformance with Specifications
Cobalt 0.03 to 0.2
E135 Terminology Relating to Analytical Chemistry for
Copper 0.03 to 0.6
Manganese 0.04 to 2.5
Metals, Ores, and Related Materials
Molybdenum 0.005 to 1.5
E691 Practice for Conducting an Interlaboratory Study to
Nickel 0.04 to 3.0
Niobium 0.002 to 0.1 Determine the Precision of a Test Method
Phosphorus 0.010 to 0.08
E1361 Guide for Correction of Interelement Effects in
Silicon 0.06 to 1.5
X-Ray Spectrometric Analysis
Sulfur 0.009 to 0.1
Vanadium 0.012 to 0.6 E1621 Guide for ElementalAnalysis by Wavelength Disper-
sive X-Ray Fluorescence Spectrometry
1.1.1 Unless exceptions are noted, mass fraction ranges can
E2857 Guide for Validating Analytical Methods
beextendedandadditionalelementscanbeincludedbytheuse
of suitable reference materials and measurement conditions.
3. Terminology
Deviations from the published scope must be validated by
experimental means. See Guide E2857 for information on 3.1 For definitions of terms used in this test method, refer to
validation options.
Terminology E135.
1.2 The values stated in the International System of Units
4. Summary of Test Method
(SI) are to be regarded as standard. The values given in
4.1 The test specimen is finished to a clean uniform surface
parentheses are mathematical conversions to other units that
and then irradiated with a primary X-ray beam of high energy.
are provided for information only, because they may be used in
The secondary X-rays produced are dispersed by means of
older software and laboratory procedures.
crystals, and the intensities (also called count rates) are
1.3 This standard does not purport to address all of the
measured by suitable detectors at selected wavelengths. Radia-
safety concerns, if any, associated with its use. It is the
tion measurements are made based on the time required to
responsibility of the user of this standard to establish appro-
reach a fixed number of counts, or on the total counts obtained
priate safety, health, and environmental practices and deter-
for a fixed time. Mass fractions of the elements are determined
mine the applicability of regulatory limitations prior to use.
by relating the measured intensities from unknown specimens
Specific precautionary statements are given in Section 10.
to calibrations prepared using suitable reference materials.
1.4 This international standard was developed in accor-
Either a fixed channel, polychromator system or a sequential,
dance with internationally recognized principles on standard-
wavelength dispersive monochromator system may be used to
ization established in the Decision on Principles for the
providesimultaneousorsequentialdeterminationsofelements,
respectively.
1
This test method is under the jurisdiction of ASTM Committee E01 on
Analytical Chemistry for Metals, Ores, and Related Materials and is the direct
2
responsibility of Subcommittee E01.01 on Iron, Steel, and Ferroalloys. For referenced ASTM standards, visit the ASTM website, www.astm.org, or
Current edition approved Dec. 1, 2022. Published December 2022. Originally contact ASTM Customer Service at service@astm.org. For Annual Book of ASTM
approved in 1987. Last previous edition approved in 2016 as E1085 – 16. DOI: Standards volume information, refer to the standard’s Document Summary page on
10.1520/E1085-22. the ASTM website.
Copyright © ASTM International, 100 Barr Harbor Drive, PO Box C700, West Conshohocken, PA 19428-2959. United States
1
---------------------- Page: 1 ----------------------
E1085 − 22
5. Significance and Use 7.2.1.1 For the determination of calcium, only chromium
target tubes were tested. Other targets may be used provided
5.1 This test method is suitable for manuf
...
This document is not an ASTM standard and is intended only to provide the user of an ASTM standard an indication of what changes have been made to the previous version. Because
it may not be technically possible to adequately depict all changes accurately, ASTM recommends that users consult prior editions as appropriate. In all cases only the current version
of the standard as published by ASTM is to be considered the official document.
Designation: E1085 − 16 E1085 − 22
Standard Test Method for
Analysis of Low-Alloy Steels by Wavelength Dispersive
1
X-Ray Fluorescence Spectrometry
This standard is issued under the fixed designation E1085; the number immediately following the designation indicates the year of
original adoption or, in the case of revision, the year of last revision. A number in parentheses indicates the year of last reapproval. A
superscript epsilon (´) indicates an editorial change since the last revision or reapproval.
1. Scope
1.1 This test method covers the wavelength dispersive X-ray fluorescence analysis of low-alloy steels for the following elements:
Element Mass Fraction
Range, %
Calcium 0.001 to 0.007
Chromium 0.04 to 2.5
Cobalt 0.03 to 0.2
Copper 0.03 to 0.6
Manganese 0.04 to 2.5
Molybdenum 0.005 to 1.5
Nickel 0.04 to 3.0
Niobium 0.002 to 0.1
Phosphorus 0.010 to 0.08
Silicon 0.06 to 1.5
Sulfur 0.009 to 0.1
Vanadium 0.012 to 0.6
1.1.1 Unless exceptions are noted, mass fraction ranges can be extended and additional elements can be included by the use of
suitable reference materials and measurement conditions. Deviations from the published scope must be validated by experimental
means. See Guide E2857 for information on validation options.
NOTE 1—Unless exceptions are noted, mass fraction ranges can be extended and additional elements can be included by the use of suitable reference
materials and measurement conditions. Deviations from the published scope must be validated by experimental means. See Guide E2857 for information
on validation options.
1.2 The values stated in the International System of Units (SI) are to be regarded as standard. The values given in parentheses are
mathematical conversions to other units that are provided for information only, because they may be used in older software and
laboratory procedures.
1.3 This standard does not purport to address all of the safety concerns, if any, associated with its use. It is the responsibility
of the user of this standard to establish appropriate safety safety, health, and healthenvironmental practices and determine the
applicability of regulatory limitations prior to use. Specific precautionary statements are given in Section 10.
1.4 This international standard was developed in accordance with internationally recognized principles on standardization
established in the Decision on Principles for the Development of International Standards, Guides and Recommendations issued
by the World Trade Organization Technical Barriers to Trade (TBT) Committee.
1
This test method is under the jurisdiction of ASTM Committee E01 on Analytical Chemistry for Metals, Ores, and Related Materials and is the direct responsibility of
Subcommittee E01.01 on Iron, Steel, and Ferroalloys.
Current edition approved May 1, 2016Dec. 1, 2022. Published June 2016December 2022. Originally approved in 1987. Last previous edition approved in 20092016 as
E1085 – 09.E1085 – 16. DOI: 10.1520/E1085-16.10.1520/E1085-22.
Copyright © ASTM International, 100 Barr Harbor Drive, PO Box C700, West Conshohocken, PA 19428-2959. United States
1
---------------------- Page: 1 ----------------------
E1085 − 22
2. Referenced Documents
2
2.1 ASTM Standards:
E29 Practice for Using Significant Digits in Test Data to Determine Conformance with Specifications
E135 Terminology Relating to Analytical Chemistry for Metals, Ores, and Related Materials
E691 Practice for Conducting an Interlaboratory Study to Determine the Precision of a Test Method
E1361 Guide for Correction of Interelement Effects in X-Ray Spectrometric Analysis
E1621 Guide for Elemental Analysis by Wavelength Dispersive X-Ray Fluorescence Spectrometry
E2857 Guide for Validating Analytical Methods
3. Terminology
3.1 For definitions of terms used in this test method, refer to Terminology E135.
4. Summary of Test Method
4.1 The test specimen is finished to a clean uniform surface and then irradiated with a primary X-ray beam of high energy. The
secondary X-rays produced are dispersed by means of crystals, and the intensities (also called count rates) are measured by suitable
detectors at selected wavelengths. Radiation measurements are made based on the time required to reach a fixed number of counts,
or on the total counts obtained for a fixed time. Mass fractions of the elements are determined by relating the measured intensities
from unknown specimens to analytical curves calibrations prepared withusing suitable reference materials. Either a fixed-channel,
fixed channel, polychromator system or a sequential, wavelength d
...


Questions, Comments and Discussion
Ask us and Technical Secretary will try to provide an answer. You can facilitate discussion about the standard in here.