ASTM A304-11
(Specification)Standard Specification for Carbon and Alloy Steel Bars Subject to End-Quench Hardenability Requirements
Standard Specification for Carbon and Alloy Steel Bars Subject to End-Quench Hardenability Requirements
ABSTRACT
This specification covers carbon and alloy steel bars subject to end-quench hardenability requirements. The methods for estimating the hardness value of the material are presented. Method A is the minimum and maximum hardness values at any desired distance, Method B is the minimum and maximum distances at which any desired hardness value occurs, Method C is the two maximum hardness values at two desired distances, Method D is the two minimum hardness values at two desired distances, and Method E is any minimum hardness plus any maximum hardness. The heat analysis shall conform to the requirements as to chemical composition. The fine austenitic grain size requirements of the steel material are presented in details. The end-quench hardenability shall conform to the requirements specified on the purchase order. The test specimen requirements indicates that, the number and location of test specimens shall be in accordance with the manufacturers standard practice and shall adequately represent the hardenability of each heat, also, all forged or rolled hardenability test specimens must be normalized prior to testing. The grain size and end-quench hardenability test methods are presented in details.
SCOPE
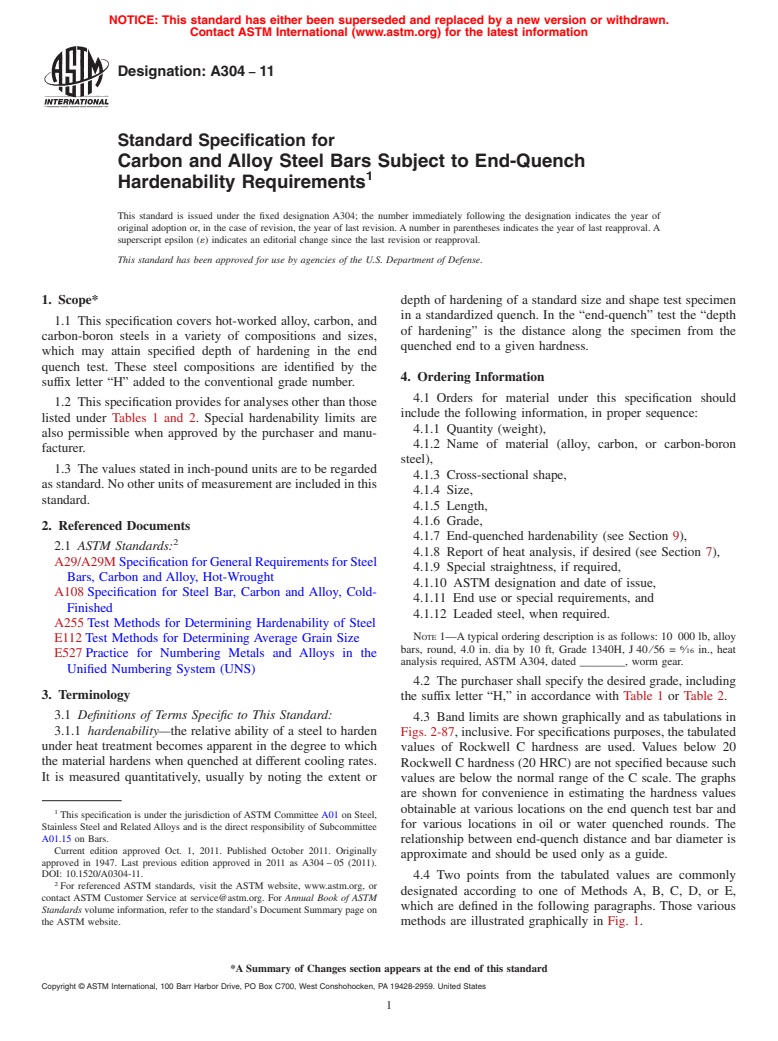
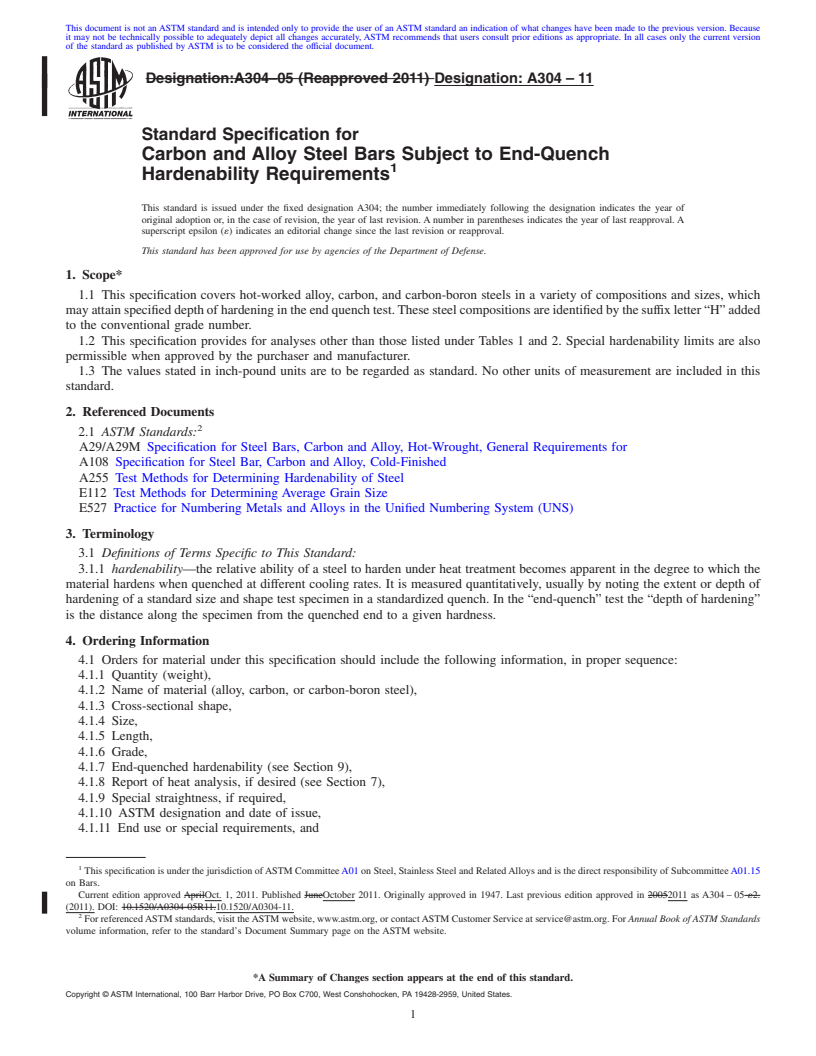
1.1 This specification covers hot-worked alloy, carbon, and carbon-boron steels in a variety of compositions and sizes, which may attain specified depth of hardening in the end quench test. These steel compositions are identified by the suffix letter “H” added to the conventional grade number.
1.2 This specification provides for analyses other than those listed under Tables 1 and 2. Special hardenability limits are also permissible when approved by the purchaser and manufacturer.
1.3 The values stated in inch-pound units are to be regarded as standard. No other units of measurement are included in this standard.
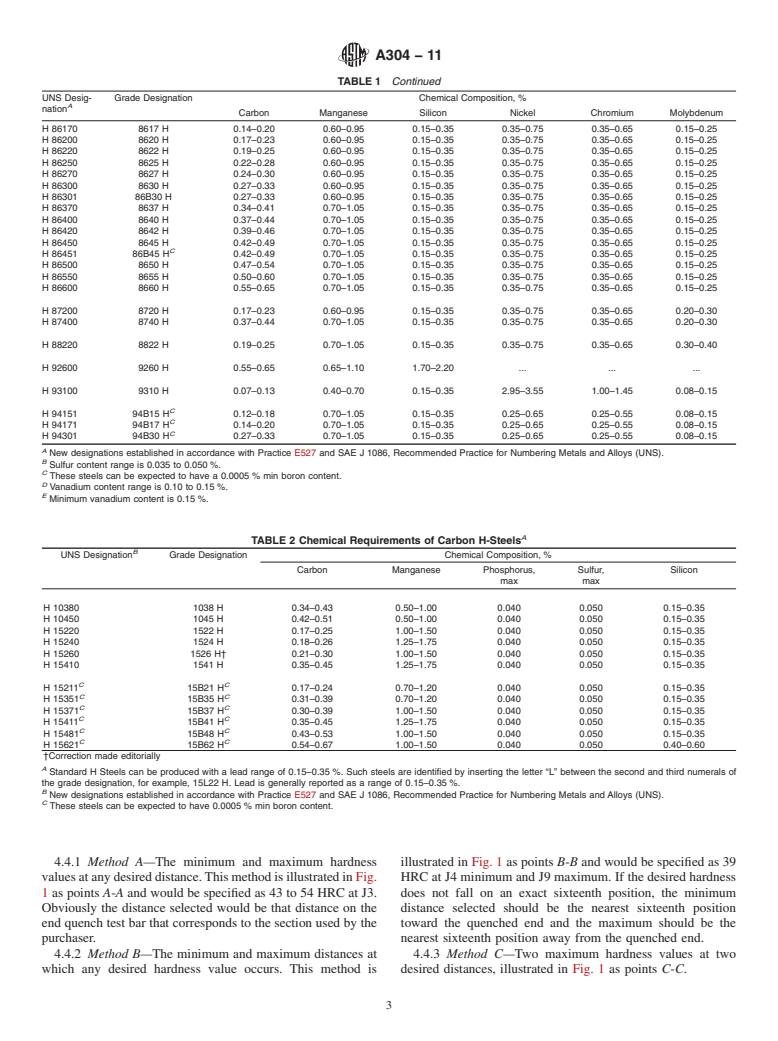
TABLE 2 Chemical Requirements of Carbon H-SteelsA UNS DesignationB
Grade Designation
Chemical Composition, %
Carbon
Manganese
Phosphorus,
max
Sulfur,
max
Silicon
H 10380 1038 H0.34–0.430.50–1.00 0.0400.0500.15–0.35 H 10450 1045 H0.42–0.510.50–1.00 0.0400.0500.15–0.35 H 15220 1522 H0.17–0.251.00–1.50 0.0400.0500.15–0.35 H 15240 1524 H0.18–0.261.25–1.75 0.0400.0500.15–0.35 H 15260 1526 H†0.21–0.301.00–1.50 0.0400.0500.15–0.35 H 15410 1541 H0.35–0.451.25–1.75 0.0400.0500.15–0.35 H 15211C15B21 HC0.17–0.24 0.70–1.200.0400.050 0.15–0.35 H 15351C15B35 HC0.31–0.39 0.70–1.200.0400.050 0.15–0.35 H 15371C15B37 HC0.30–0.39 1.00–1.500.0400.050 0.15–0.35 H 15411C15B41 HC0.35–0.45 1.25–1.750.0400.050 0.15–0.35 H 15481C15B48 HC0.43–0.53 1.00–1.500.0400.050 0.15–0.35 H 15621C15B62 HC0.54–0.67 1.00–1.500.0400.050 0.40–0.60 †Correction made editorially
A Standard H Steels can be produced with a lead range of 0.15–0.35 %. Such steels are identified by inserting the letter “L” between the second and third numerals of the grade designation, for example, 15L22 H. Lead is generally reported as a range of 0.15–0.35 %.
B New designations established in accordance with Practice E527 and SAE J 1086, Recommended Practice for Numbering Metals and Alloys (UNS).
C These steels can be expected to have 0.0005 % min boron content.
General Information
Relations
Buy Standard
Standards Content (Sample)
NOTICE: This standard has either been superseded and replaced by a new version or withdrawn.
Contact ASTM International (www.astm.org) for the latest information
Designation:A304 −11
Standard Specification for
Carbon and Alloy Steel Bars Subject to End-Quench
1
Hardenability Requirements
This standard is issued under the fixed designation A304; the number immediately following the designation indicates the year of
original adoption or, in the case of revision, the year of last revision. A number in parentheses indicates the year of last reapproval. A
superscript epsilon (´) indicates an editorial change since the last revision or reapproval.
This standard has been approved for use by agencies of the U.S. Department of Defense.
1. Scope* depth of hardening of a standard size and shape test specimen
in a standardized quench. In the “end-quench” test the “depth
1.1 This specification covers hot-worked alloy, carbon, and
of hardening” is the distance along the specimen from the
carbon-boron steels in a variety of compositions and sizes,
quenched end to a given hardness.
which may attain specified depth of hardening in the end
quench test. These steel compositions are identified by the
4. Ordering Information
suffix letter “H” added to the conventional grade number.
4.1 Orders for material under this specification should
1.2 This specification provides for analyses other than those
include the following information, in proper sequence:
listed under Tables 1 and 2. Special hardenability limits are
4.1.1 Quantity (weight),
also permissible when approved by the purchaser and manu-
4.1.2 Name of material (alloy, carbon, or carbon-boron
facturer.
steel),
1.3 The values stated in inch-pound units are to be regarded
4.1.3 Cross-sectional shape,
as standard. No other units of measurement are included in this
4.1.4 Size,
standard.
4.1.5 Length,
4.1.6 Grade,
2. Referenced Documents
4.1.7 End-quenched hardenability (see Section 9),
2
2.1 ASTM Standards:
4.1.8 Report of heat analysis, if desired (see Section 7),
A29/A29M SpecificationforGeneralRequirementsforSteel
4.1.9 Special straightness, if required,
Bars, Carbon and Alloy, Hot-Wrought
4.1.10 ASTM designation and date of issue,
A108 Specification for Steel Bar, Carbon and Alloy, Cold-
4.1.11 End use or special requirements, and
Finished
4.1.12 Leaded steel, when required.
A255 Test Methods for Determining Hardenability of Steel
NOTE 1—A typical ordering description is as follows: 10 000 lb, alloy
E112 Test Methods for Determining Average Grain Size
6
bars, round, 4.0 in. dia by 10 ft, Grade 1340H, J 40⁄56 = ⁄16 in., heat
E527 Practice for Numbering Metals and Alloys in the
analysis required, ASTM A304, dated ________, worm gear.
Unified Numbering System (UNS)
4.2 The purchaser shall specify the desired grade, including
3. Terminology
the suffix letter “H,” in accordance with Table 1 or Table 2.
3.1 Definitions of Terms Specific to This Standard:
4.3 Band limits are shown graphically and as tabulations in
3.1.1 hardenability—the relative ability of a steel to harden
Figs. 2-87, inclusive. For specifications purposes, the tabulated
under heat treatment becomes apparent in the degree to which
values of Rockwell C hardness are used. Values below 20
the material hardens when quenched at different cooling rates.
Rockwell C hardness (20 HRC) are not specified because such
It is measured quantitatively, usually by noting the extent or
values are below the normal range of the C scale. The graphs
are shown for convenience in estimating the hardness values
obtainable at various locations on the end quench test bar and
1
This specification is under the jurisdiction ofASTM Committee A01 on Steel,
for various locations in oil or water quenched rounds. The
Stainless Steel and Related Alloys and is the direct responsibility of Subcommittee
A01.15 on Bars.
relationship between end-quench distance and bar diameter is
Current edition approved Oct. 1, 2011. Published October 2011. Originally
approximate and should be used only as a guide.
approved in 1947. Last previous edition approved in 2011 as A304 – 05 (2011).
DOI: 10.1520/A0304-11.
4.4 Two points from the tabulated values are commonly
2
For referenced ASTM standards, visit the ASTM website, www.astm.org, or
designated according to one of Methods A, B, C, D, or E,
contact ASTM Customer Service at service@astm.org. For Annual Book of ASTM
which are defined in the following paragraphs. Those various
Standards volume information, refer to the standard’s Document Summary page on
the ASTM website. methods are illustrated graphically in Fig. 1.
*A Summary of Changes section appears at the end of this standard
Copyright © ASTM International, 100 Barr Harbor Drive, PO Box C700, West Conshohocken, PA 19428-2959. United States
1
---------------------- Page: 1 ----------------------
A304−11
A
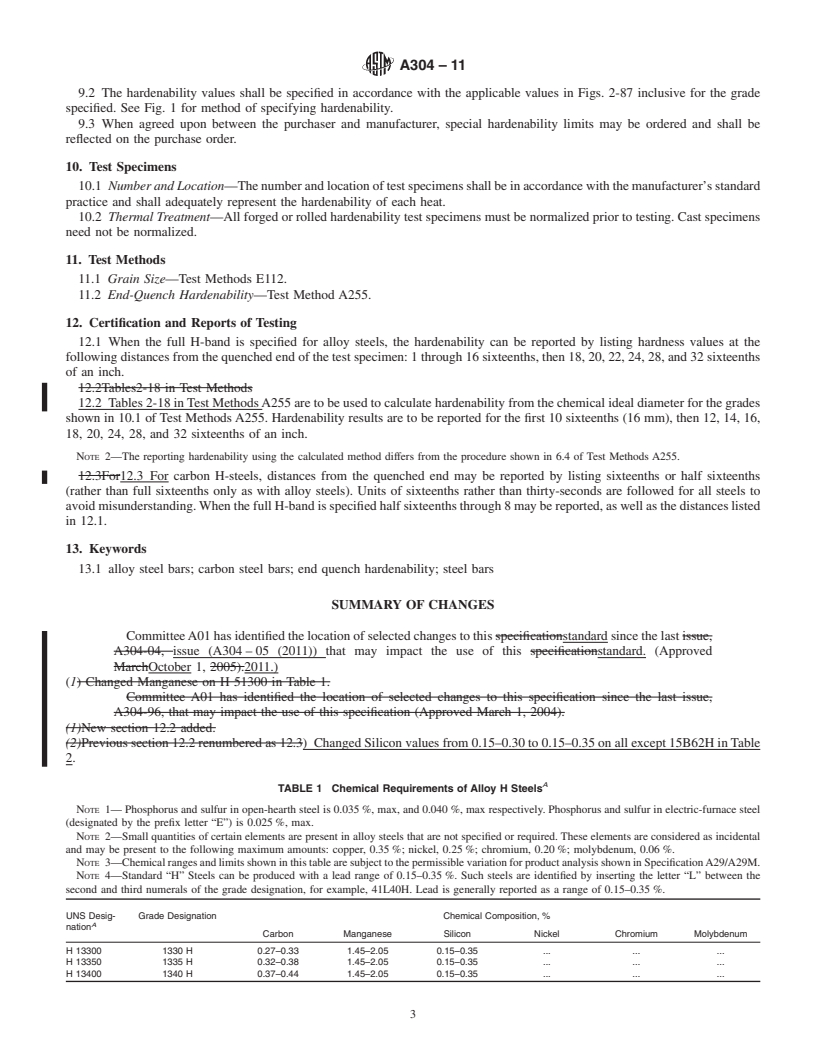
TABLE 1 Chemical Requirements of Alloy H Steels
NOTE 1— Phosphorus and sulfur in open-hearth steel is 0.035 %, max, and 0.040 %, max respectively. Phosphorus and sulf
...
This document is not an ASTM standard and is intended only to provide the user of an ASTM standard an indication of what changes have been made to the previous version. Because
it may not be technically possible to adequately depict all changes accurately, ASTM recommends that users consult prior editions as appropriate. In all cases only the current version
of the standard as published by ASTM is to be considered the official document.
Designation:A304–05 (Reapproved 2011) Designation: A304 – 11
Standard Specification for
Carbon and Alloy Steel Bars Subject to End-Quench
1
Hardenability Requirements
This standard is issued under the fixed designation A304; the number immediately following the designation indicates the year of
original adoption or, in the case of revision, the year of last revision. A number in parentheses indicates the year of last reapproval. A
superscript epsilon (´) indicates an editorial change since the last revision or reapproval.
This standard has been approved for use by agencies of the Department of Defense.
1. Scope*
1.1 This specification covers hot-worked alloy, carbon, and carbon-boron steels in a variety of compositions and sizes, which
mayattainspecifieddepthofhardeningintheendquenchtest.Thesesteelcompositionsareidentifiedbythesuffixletter“H”added
to the conventional grade number.
1.2 This specification provides for analyses other than those listed under Tables 1 and 2. Special hardenability limits are also
permissible when approved by the purchaser and manufacturer.
1.3 The values stated in inch-pound units are to be regarded as standard. No other units of measurement are included in this
standard.
2. Referenced Documents
2
2.1 ASTM Standards:
A29/A29M Specification for Steel Bars, Carbon and Alloy, Hot-Wrought, General Requirements for
A108 Specification for Steel Bar, Carbon and Alloy, Cold-Finished
A255 Test Methods for Determining Hardenability of Steel
E112 Test Methods for Determining Average Grain Size
E527 Practice for Numbering Metals and Alloys in the Unified Numbering System (UNS)
3. Terminology
3.1 Definitions of Terms Specific to This Standard:
3.1.1 hardenability—the relative ability of a steel to harden under heat treatment becomes apparent in the degree to which the
material hardens when quenched at different cooling rates. It is measured quantitatively, usually by noting the extent or depth of
hardening of a standard size and shape test specimen in a standardized quench. In the “end-quench” test the “depth of hardening”
is the distance along the specimen from the quenched end to a given hardness.
4. Ordering Information
4.1 Orders for material under this specification should include the following information, in proper sequence:
4.1.1 Quantity (weight),
4.1.2 Name of material (alloy, carbon, or carbon-boron steel),
4.1.3 Cross-sectional shape,
4.1.4 Size,
4.1.5 Length,
4.1.6 Grade,
4.1.7 End-quenched hardenability (see Section 9),
4.1.8 Report of heat analysis, if desired (see Section 7),
4.1.9 Special straightness, if required,
4.1.10 ASTM designation and date of issue,
4.1.11 End use or special requirements, and
1
This specification is under the jurisdiction ofASTM CommitteeA01 on Steel, Stainless Steel and RelatedAlloys and is the direct responsibility of SubcommitteeA01.15
on Bars.
Current edition approved AprilOct. 1, 2011. Published JuneOctober 2011. Originally approved in 1947. Last previous edition approved in 20052011 as A304 – 05 ´2.
(2011). DOI: 10.1520/A0304-05R11.10.1520/A0304-11.
2
For referencedASTM standards, visit theASTM website, www.astm.org, or contactASTM Customer Service at service@astm.org. For Annual Book of ASTM Standards
volume information, refer to the standard’s Document Summary page on the ASTM website.
*A Summary of Changes section appears at the end of this standard.
Copyright © ASTM International, 100 Barr Harbor Drive, PO Box C700, West Conshohocken, PA 19428-2959, United States.
1
---------------------- Page: 1 ----------------------
A304 – 11
4.1.12 Leaded steel, when required.
6
NOTE 1—Atypical ordering description is as follows: 10 000 lb, alloy bars, round, 4.0 in. dia by 10 ft, Grade 1340H, J 40/56 = ⁄16 in., heat analysis
required, ASTM A304, dated ________, worm gear.
4.2 The purchaser shall specify the desired grade, including the suffix letter “H,” in accordance with Table 1 or Table 2.
4.3 Band limits are shown graphically and as tabulations in Figs. 2-87, inclusive. For specifications purposes, the tabulated
values of Rockwell C hardness are used. Values below 20 Rockwell C hardness (20 HRC) are not specified because such values
are below the normal range of the C scale. The graphs are shown for convenience in estimating the hardness values obtainable at
various locations on the end quench test bar and for various locations in oil or water quenched rounds. The relationship between
end-quench distance and bar diameter is approximate and should be used only as a guide.
4.4 Two points from the tabulated values are commonly de
...


Questions, Comments and Discussion
Ask us and Technical Secretary will try to provide an answer. You can facilitate discussion about the standard in here.