ASTM D4385-08
(Practice)Standard Practice for Classifying Visual Defects in Thermosetting Reinforced Plastic Pultruded Products
Standard Practice for Classifying Visual Defects in Thermosetting Reinforced Plastic Pultruded Products
ABSTRACT
This practice focuses on the establishment of acceptance levels and criteria upon inspection of visual defects in thermosetting reinforced plastic pultruded rods, bars, shapes, and sheets. Presented here is the definition of possible defects to serve as a guide for contracts, drawings, product specifications, and final inspection. This practice also categorizes different inspection requirements for three grades of product quality.
SCOPE
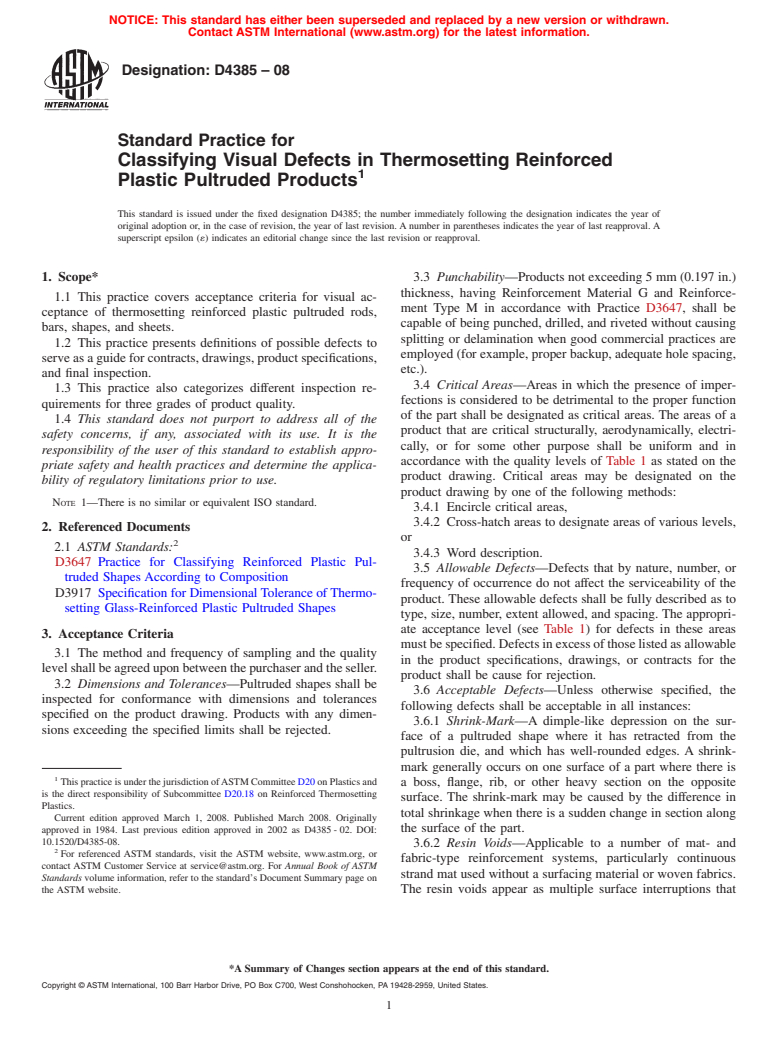
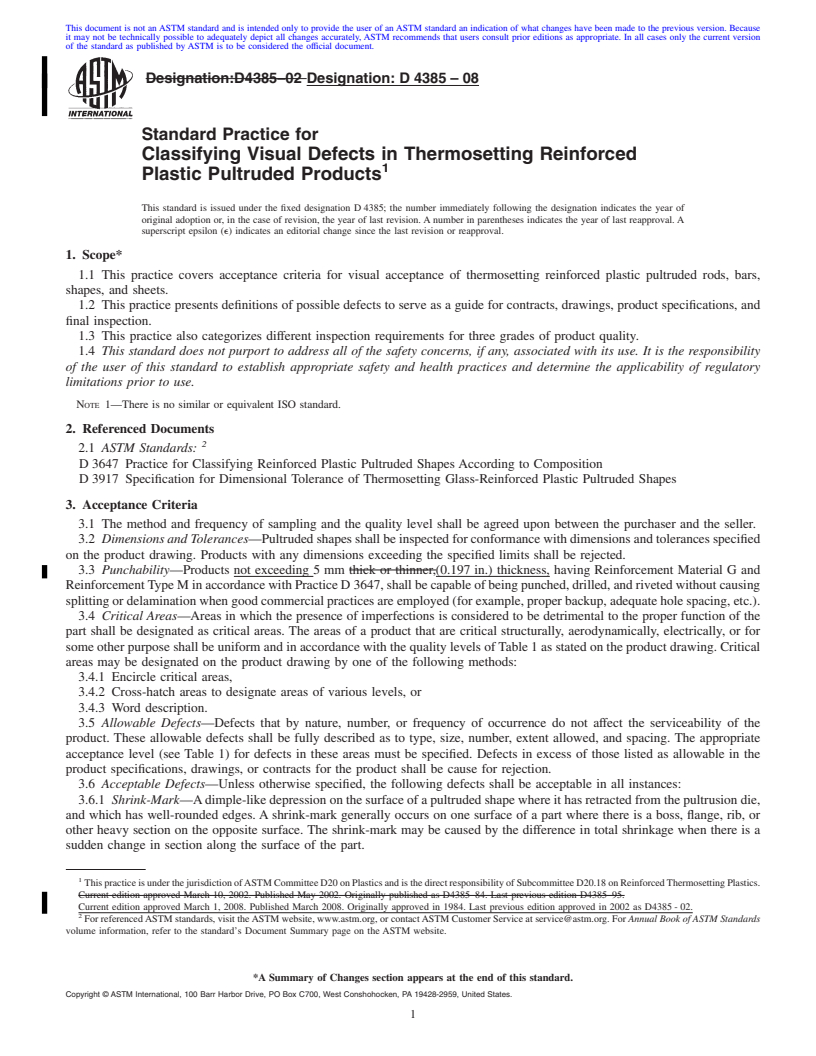
1.1 This practice covers acceptance criteria for visual acceptance of thermosetting reinforced plastic pultruded rods, bars, shapes, and sheets.
1.2 This practice presents definitions of possible defects to serve as a guide for contracts, drawings, product specifications, and final inspection.
1.3 This practice also categorizes different inspection requirements for three grades of product quality.
1.4 This standard does not purport to address all of the safety concerns, if any, associated with its use. It is the responsibility of the user of this standard to establish appropriate safety and health practices and determine the applicability of regulatory limitations prior to use.
Note 1—There is no similar or equivalent ISO standard.
General Information
Relations
Buy Standard
Standards Content (Sample)
NOTICE: This standard has either been superseded and replaced by a new version or withdrawn.
Contact ASTM International (www.astm.org) for the latest information.
Designation:D4385–08
Standard Practice for
Classifying Visual Defects in Thermosetting Reinforced
1
Plastic Pultruded Products
This standard is issued under the fixed designation D4385; the number immediately following the designation indicates the year of
original adoption or, in the case of revision, the year of last revision. A number in parentheses indicates the year of last reapproval. A
superscript epsilon (´) indicates an editorial change since the last revision or reapproval.
1. Scope* 3.3 Punchability—Products not exceeding 5 mm (0.197 in.)
thickness, having Reinforcement Material G and Reinforce-
1.1 This practice covers acceptance criteria for visual ac-
ment Type M in accordance with Practice D3647, shall be
ceptance of thermosetting reinforced plastic pultruded rods,
capable of being punched, drilled, and riveted without causing
bars, shapes, and sheets.
splitting or delamination when good commercial practices are
1.2 This practice presents definitions of possible defects to
employed (for example, proper backup, adequate hole spacing,
serve as a guide for contracts, drawings, product specifications,
etc.).
and final inspection.
3.4 Critical Areas—Areas in which the presence of imper-
1.3 This practice also categorizes different inspection re-
fections is considered to be detrimental to the proper function
quirements for three grades of product quality.
of the part shall be designated as critical areas. The areas of a
1.4 This standard does not purport to address all of the
product that are critical structurally, aerodynamically, electri-
safety concerns, if any, associated with its use. It is the
cally, or for some other purpose shall be uniform and in
responsibility of the user of this standard to establish appro-
accordance with the quality levels of Table 1 as stated on the
priate safety and health practices and determine the applica-
product drawing. Critical areas may be designated on the
bility of regulatory limitations prior to use.
product drawing by one of the following methods:
NOTE 1—There is no similar or equivalent ISO standard.
3.4.1 Encircle critical areas,
3.4.2 Cross-hatch areas to designate areas of various levels,
2. Referenced Documents
or
2
2.1 ASTM Standards:
3.4.3 Word description.
D3647 Practice for Classifying Reinforced Plastic Pul-
3.5 Allowable Defects—Defects that by nature, number, or
truded Shapes According to Composition
frequency of occurrence do not affect the serviceability of the
D3917 Specification for DimensionalTolerance ofThermo-
product. These allowable defects shall be fully described as to
setting Glass-Reinforced Plastic Pultruded Shapes
type, size, number, extent allowed, and spacing. The appropri-
ate acceptance level (see Table 1) for defects in these areas
3. Acceptance Criteria
mustbespecified.Defectsinexcessofthoselistedasallowable
3.1 The method and frequency of sampling and the quality
in the product specifications, drawings, or contracts for the
levelshallbeagreeduponbetweenthepurchaserandtheseller.
product shall be cause for rejection.
3.2 Dimensions and Tolerances—Pultruded shapes shall be
3.6 Acceptable Defects—Unless otherwise specified, the
inspected for conformance with dimensions and tolerances
following defects shall be acceptable in all instances:
specified on the product drawing. Products with any dimen-
3.6.1 Shrink-Mark—A dimple-like depression on the sur-
sions exceeding the specified limits shall be rejected.
face of a pultruded shape where it has retracted from the
pultrusion die, and which has well-rounded edges. A shrink-
mark generally occurs on one surface of a part where there is
1
ThispracticeisunderthejurisdictionofASTMCommitteeD20onPlasticsand
a boss, flange, rib, or other heavy section on the opposite
is the direct responsibility of Subcommittee D20.18 on Reinforced Thermosetting
surface. The shrink-mark may be caused by the difference in
Plastics.
total shrinkage when there is a sudden change in section along
Current edition approved March 1, 2008. Published March 2008. Originally
the surface of the part.
approved in 1984. Last previous edition approved in 2002 as D4385 - 02. DOI:
10.1520/D4385-08.
3.6.2 Resin Voids—Applicable to a number of mat- and
2
For referenced ASTM standards, visit the ASTM website, www.astm.org, or
fabric-type reinforcement systems, particularly continuous
contact ASTM Customer Service at service@astm.org. For Annual Book of ASTM
strand mat used without a surfacing material or woven fabrics.
Standards volume information, refer to the standard’s Document Summary page on
the ASTM website. The resin voids appear as multiple surface interruptions that
*ASummary of Changes section appears at the end of this standard.
Copyright © ASTM International, 100 Barr Harbor Drive, PO Box C700, West Conshohocken, PA 19428-2959, United States.
1
-----------
...
This document is not anASTM standard and is intended only to provide the user of anASTM standard an indication of what changes have been made to the previous version. Because
it may not be technically possible to adequately depict all changes accurately, ASTM recommends that users consult prior editions as appropriate. In all cases only the current version
of the standard as published by ASTM is to be considered the official document.
Designation:D4385–02 Designation:D4385–08
Standard Practice for
Classifying Visual Defects in Thermosetting Reinforced
1
Plastic Pultruded Products
This standard is issued under the fixed designation D 4385; the number immediately following the designation indicates the year of
original adoption or, in the case of revision, the year of last revision. A number in parentheses indicates the year of last reapproval. A
superscript epsilon (e) indicates an editorial change since the last revision or reapproval.
1. Scope*
1.1 This practice covers acceptance criteria for visual acceptance of thermosetting reinforced plastic pultruded rods, bars,
shapes, and sheets.
1.2 This practice presents definitions of possible defects to serve as a guide for contracts, drawings, product specifications, and
final inspection.
1.3 This practice also categorizes different inspection requirements for three grades of product quality.
1.4 This standard does not purport to address all of the safety concerns, if any, associated with its use. It is the responsibility
of the user of this standard to establish appropriate safety and health practices and determine the applicability of regulatory
limitations prior to use.
NOTE 1—There is no similar or equivalent ISO standard.
2. Referenced Documents
2
2.1 ASTM Standards:
D 3647 Practice for Classifying Reinforced Plastic Pultruded Shapes According to Composition
D 3917 Specification for Dimensional Tolerance of Thermosetting Glass-Reinforced Plastic Pultruded Shapes
3. Acceptance Criteria
3.1 The method and frequency of sampling and the quality level shall be agreed upon between the purchaser and the seller.
3.2 DimensionsandTolerances—Pultrudedshapesshallbeinspectedforconformancewithdimensionsandtolerancesspecified
on the product drawing. Products with any dimensions exceeding the specified limits shall be rejected.
3.3 Punchability—Products not exceeding 5 mm thick or thinner,(0.197 in.) thickness, having Reinforcement Material G and
ReinforcementTypeMinaccordancewithPracticeD 3647,shallbecapableofbeingpunched,drilled,andrivetedwithoutcausing
splittingordelaminationwhengoodcommercialpracticesareemployed(forexample,properbackup,adequateholespacing,etc.).
3.4 Critical Areas—Areas in which the presence of imperfections is considered to be detrimental to the proper function of the
part shall be designated as critical areas. The areas of a product that are critical structurally, aerodynamically, electrically, or for
some other purpose shall be uniform and in accordance with the quality levels ofTable 1 as stated on the product drawing. Critical
areas may be designated on the product drawing by one of the following methods:
3.4.1 Encircle critical areas,
3.4.2 Cross-hatch areas to designate areas of various levels, or
3.4.3 Word description.
3.5 Allowable Defects—Defects that by nature, number, or frequency of occurrence do not affect the serviceability of the
product. These allowable defects shall be fully described as to type, size, number, extent allowed, and spacing. The appropriate
acceptance level (see Table 1) for defects in these areas must be specified. Defects in excess of those listed as allowable in the
product specifications, drawings, or contracts for the product shall be cause for rejection.
3.6 Acceptable Defects—Unless otherwise specified, the following defects shall be acceptable in all instances:
3.6.1 Shrink-Mark—Adimple-like depression on the surface of a pultruded shape where it has retracted from the pultrusion die,
and which has well-rounded edges. A shrink-mark generally occurs on one surface of a part where there is a boss, flange, rib, or
other heavy section on the opposite surface. The shrink-mark may be caused by the difference in total shrinkage when there is a
sudden change in section along the surface of the part.
1
ThispracticeisunderthejurisdictionofASTMCommitteeD20onPlasticsandisthedirectresponsibilityofSubcommitteeD20.18onReinforcedThermosettingPlastics.
Current edition approved March 10, 2002. Published May 2002. Originally published as D4385–84. Last previous edition D4385–95.
Current edition approved March 1, 2008. Published March 2008. Originally approved in 1984. Last previous edition approved in 2002 as D4385 - 02.
2
For referencedASTM standards, visit theASTM website, www.astm.org, or contactASTM Customer Service at service@astm.org. For Annual Book ofASTM Standards
volume information, refer to the standard’s Document Summary page on the ASTM website.
*ASummary of Changes section appears at the end of this standard.
Copyright © AST
...


Questions, Comments and Discussion
Ask us and Technical Secretary will try to provide an answer. You can facilitate discussion about the standard in here.