ASTM E571-19
(Practice)Standard Practice for Electromagnetic (Eddy-Current) Examination of Nickel and Nickel Alloy Tubular Products
Standard Practice for Electromagnetic (Eddy-Current) Examination of Nickel and Nickel Alloy Tubular Products
SIGNIFICANCE AND USE
5.1 Eddy-current testing is a nondestructive method of locating discontinuities in metallic materials. Signals can be produced by discontinuities originating on either the external or internal surfaces of the tube or by discontinuities totally contained within the wall. Since the density of eddy currents decreases nearly exponentially with increasing distance from the surface nearest the coil, the response to deep-seated defects decreases correspondingly. Phase changes are also associated with changes in depth, allowing the use of phase analysis techniques.
5.2 The response from natural discontinuities can be significantly different than that from artificial discontinuities, such as drilled holes or notches. For this reason, sufficient work should be done to establish the sensitivity level and setup required to detect natural discontinuities of consequence to the end use of the product.
5.3 Some indications obtained by this method may not be relevant to product quality; for example, an irrelevant indication may be caused by minute dents or tool chatter marks, which are not detrimental to the end use of the product. Irrelevant indications can mask unacceptable discontinuities. Relevant indications are those which result from discontinuities. Any indication that exceeds the rejection level shall be treated as a relevant indication until it can be demonstrated that it is irrelevant.
5.4 Generally, eddy-current examination systems are not sensitive to discontinuities adjacent to the ends of the tube (end effect).
5.5 Discontinuities such as scratches or seams that are continuous and uniform over the full length of the tube may not always be detected with differential encircling coils or probes scanned along the tube length.
5.6 For material that is magnetic, a strong magnetic field shall be placed in the region of the examining coil. A magnetic field may also be used to improve the signal-to-noise ratio in tubing that exhibits slight residual magnetism.
SCOPE
1.1 This practice2 covers the procedures for eddy-current examination of nickel and nickel alloy tubes. These procedures are applicable for tubes with outside diameters up to 2 in. (50.8 mm), incl, and wall thicknesses from 0.035 to 0.120 in. (0.889 to 3.04 mm), incl. This standard applies to procedures where the sensor is placed on the outside surface of the tube. These procedures may be used for tubes beyond the size range recommended, by contractual agreement between the purchaser and the producer.
1.2 The procedures described in this practice make use of fixed encircling test coils or probe systems.
1.3 Units—The values stated in inch-pound units are to be regarded as standard. The values given in parentheses are mathematical conversions to SI units that are provided for information only and are not considered standard.
Note 1: For convenience, the term “tube” or “tubular product” will hereinafter be used to refer to both pipe and tubing.
1.4 This standard does not purport to address all of the safety concerns, if any, associated with its use. It is the responsibility of the user of this standard to establish appropriate safety, health, and environmental practices and determine the applicability of regulatory limitations prior to use.
1.5 This international standard was developed in accordance with internationally recognized principles on standardization established in the Decision on Principles for the Development of International Standards, Guides and Recommendations issued by the World Trade Organization Technical Barriers to Trade (TBT) Committee.
General Information
- Status
- Published
- Publication Date
- 30-Jun-2019
- Technical Committee
- E07 - Nondestructive Testing
- Drafting Committee
- E07.07 - Electromagnetic Method
Relations
- Effective Date
- 01-Jul-2019
- Effective Date
- 01-Feb-2024
- Effective Date
- 01-Dec-2019
- Effective Date
- 01-Mar-2019
- Effective Date
- 01-Jan-2018
- Effective Date
- 15-Jun-2017
- Effective Date
- 01-Feb-2017
- Effective Date
- 01-Aug-2016
- Effective Date
- 01-Feb-2016
- Effective Date
- 01-Dec-2015
- Effective Date
- 01-Sep-2015
- Effective Date
- 01-Jun-2014
- Effective Date
- 01-Jun-2014
- Effective Date
- 01-Dec-2013
- Effective Date
- 15-Jun-2013
Overview
ASTM E571-19 is an internationally recognized standard that specifies the practice for electromagnetic (eddy-current) examination of nickel and nickel alloy tubular products. Developed by ASTM International Committee E07 on Nondestructive Testing, this standard outlines procedures for the nondestructive testing of tubes and pipes to detect discontinuities, ensuring product quality in critical applications. The method is particularly suited for tubular products with outside diameters up to 2 inches (50.8 mm) and wall thicknesses from 0.035 to 0.120 inches (0.889 to 3.04 mm), but may be adapted for other sizes by agreement between purchaser and producer.
Eddy-current examination, as described in ASTM E571-19, offers a reliable, efficient, and noninvasive way to identify surface or near-surface flaws, inclusions, or other anomalies in metallic tubular products used in various industries.
Key Topics
- Nondestructive Testing (NDT): ASTM E571-19 covers procedures designed to locate discontinuities in nickel and nickel alloy tubes without damaging the material.
- Examination Techniques: The standard describes two main techniques:
- Encircling Coil Technique: The tube passes through an encircling coil energized with alternating current to detect changes caused by discontinuities.
- Probe Coil Technique: Probes are placed close to the tube surface to scan specific areas, especially useful for examining welds or targeted zones.
- Sensitivity and Standardization: Emphasis is placed on establishing the proper sensitivity and setup using reference standards that closely match the actual tubes in material and dimensions.
- Magnetic Saturation: For magnetic or slightly magnetic materials, a strong magnetic field is used to reduce the effects of permeability and improve flaw detection.
- Relevance of Indications: The practice distinguishes between relevant indications (actual flaws) and irrelevant indications (e.g., minor dents, tool marks), ensuring that only critical defects are addressed.
- Operator Qualification: The standard references recognized personnel qualification programs (such as SNT-TC-1A, NAS-410, ISO 9712) to ensure examinations are performed by competent and certified operators.
- Limitations: Not all flaws, especially those at tube ends or uniform, continuous indications, may be reliably detected with this method.
Applications
ASTM E571-19 is widely applied in industries where the integrity of nickel and nickel alloy tubular products is essential. Typical users include manufacturers in:
- Petrochemical and Chemical Processing: To ensure corrosion-resistant tubing is free from critical defects before installation.
- Power Generation: For the inspection of heat exchanger tubes and high-pressure components.
- Aerospace and Defense: Where the reliability of alloy tubing in structural and fluid transport systems is critical.
- Food and Pharmaceutical Processing: Where product purity depends on the flaw-free nature of nickel alloy piping.
By employing eddy-current testing as outlined in ASTM E571-19, companies gain a non-destructive, fast, and accurate means of quality control, supporting compliance, safety, and performance requirements.
Related Standards
For organizations implementing ASTM E571-19, the following standards are also commonly referenced for complementary practices and terminology:
- ASTM E309: Practice for Eddy Current Examination of Steel Tubular Products Using Magnetic Saturation.
- ASTM E543: Specification for Agencies Performing Nondestructive Testing (useful for qualifying NDT agencies).
- ASTM E1316: Terminology for Nondestructive Examinations.
- ANSI/ASNT-CP-189: Standard for Qualification and Certification of Nondestructive Testing Personnel.
- SNT-TC-1A: Recommended Practice for Personnel Qualification and Certification in NDT.
- NAS-410: Certification and Qualification of Nondestructive Testing Personnel for Aerospace Applications.
- ISO 9712: Non-destructive Testing - Qualification and Certification of NDT Personnel.
- ASME Boiler and Pressure Vessel Code, Section II: Reference for integration and alignment with broader code requirements.
ASTM E571-19 serves as an essential tool for the effective eddy-current examination of nickel and nickel alloy tubing, supporting high product quality and safety in critical industry sectors.
Buy Documents
ASTM E571-19 - Standard Practice for Electromagnetic (Eddy-Current) Examination of Nickel and Nickel Alloy Tubular Products
REDLINE ASTM E571-19 - Standard Practice for Electromagnetic (Eddy-Current) Examination of Nickel and Nickel Alloy Tubular Products
Get Certified
Connect with accredited certification bodies for this standard

Element Materials Technology
Materials testing and product certification.

Inštitut za kovinske materiale in tehnologije
Institute of Metals and Technology. Materials testing, metallurgical analysis, NDT.
Sponsored listings
Frequently Asked Questions
ASTM E571-19 is a standard published by ASTM International. Its full title is "Standard Practice for Electromagnetic (Eddy-Current) Examination of Nickel and Nickel Alloy Tubular Products". This standard covers: SIGNIFICANCE AND USE 5.1 Eddy-current testing is a nondestructive method of locating discontinuities in metallic materials. Signals can be produced by discontinuities originating on either the external or internal surfaces of the tube or by discontinuities totally contained within the wall. Since the density of eddy currents decreases nearly exponentially with increasing distance from the surface nearest the coil, the response to deep-seated defects decreases correspondingly. Phase changes are also associated with changes in depth, allowing the use of phase analysis techniques. 5.2 The response from natural discontinuities can be significantly different than that from artificial discontinuities, such as drilled holes or notches. For this reason, sufficient work should be done to establish the sensitivity level and setup required to detect natural discontinuities of consequence to the end use of the product. 5.3 Some indications obtained by this method may not be relevant to product quality; for example, an irrelevant indication may be caused by minute dents or tool chatter marks, which are not detrimental to the end use of the product. Irrelevant indications can mask unacceptable discontinuities. Relevant indications are those which result from discontinuities. Any indication that exceeds the rejection level shall be treated as a relevant indication until it can be demonstrated that it is irrelevant. 5.4 Generally, eddy-current examination systems are not sensitive to discontinuities adjacent to the ends of the tube (end effect). 5.5 Discontinuities such as scratches or seams that are continuous and uniform over the full length of the tube may not always be detected with differential encircling coils or probes scanned along the tube length. 5.6 For material that is magnetic, a strong magnetic field shall be placed in the region of the examining coil. A magnetic field may also be used to improve the signal-to-noise ratio in tubing that exhibits slight residual magnetism. SCOPE 1.1 This practice2 covers the procedures for eddy-current examination of nickel and nickel alloy tubes. These procedures are applicable for tubes with outside diameters up to 2 in. (50.8 mm), incl, and wall thicknesses from 0.035 to 0.120 in. (0.889 to 3.04 mm), incl. This standard applies to procedures where the sensor is placed on the outside surface of the tube. These procedures may be used for tubes beyond the size range recommended, by contractual agreement between the purchaser and the producer. 1.2 The procedures described in this practice make use of fixed encircling test coils or probe systems. 1.3 Units—The values stated in inch-pound units are to be regarded as standard. The values given in parentheses are mathematical conversions to SI units that are provided for information only and are not considered standard. Note 1: For convenience, the term “tube” or “tubular product” will hereinafter be used to refer to both pipe and tubing. 1.4 This standard does not purport to address all of the safety concerns, if any, associated with its use. It is the responsibility of the user of this standard to establish appropriate safety, health, and environmental practices and determine the applicability of regulatory limitations prior to use. 1.5 This international standard was developed in accordance with internationally recognized principles on standardization established in the Decision on Principles for the Development of International Standards, Guides and Recommendations issued by the World Trade Organization Technical Barriers to Trade (TBT) Committee.
SIGNIFICANCE AND USE 5.1 Eddy-current testing is a nondestructive method of locating discontinuities in metallic materials. Signals can be produced by discontinuities originating on either the external or internal surfaces of the tube or by discontinuities totally contained within the wall. Since the density of eddy currents decreases nearly exponentially with increasing distance from the surface nearest the coil, the response to deep-seated defects decreases correspondingly. Phase changes are also associated with changes in depth, allowing the use of phase analysis techniques. 5.2 The response from natural discontinuities can be significantly different than that from artificial discontinuities, such as drilled holes or notches. For this reason, sufficient work should be done to establish the sensitivity level and setup required to detect natural discontinuities of consequence to the end use of the product. 5.3 Some indications obtained by this method may not be relevant to product quality; for example, an irrelevant indication may be caused by minute dents or tool chatter marks, which are not detrimental to the end use of the product. Irrelevant indications can mask unacceptable discontinuities. Relevant indications are those which result from discontinuities. Any indication that exceeds the rejection level shall be treated as a relevant indication until it can be demonstrated that it is irrelevant. 5.4 Generally, eddy-current examination systems are not sensitive to discontinuities adjacent to the ends of the tube (end effect). 5.5 Discontinuities such as scratches or seams that are continuous and uniform over the full length of the tube may not always be detected with differential encircling coils or probes scanned along the tube length. 5.6 For material that is magnetic, a strong magnetic field shall be placed in the region of the examining coil. A magnetic field may also be used to improve the signal-to-noise ratio in tubing that exhibits slight residual magnetism. SCOPE 1.1 This practice2 covers the procedures for eddy-current examination of nickel and nickel alloy tubes. These procedures are applicable for tubes with outside diameters up to 2 in. (50.8 mm), incl, and wall thicknesses from 0.035 to 0.120 in. (0.889 to 3.04 mm), incl. This standard applies to procedures where the sensor is placed on the outside surface of the tube. These procedures may be used for tubes beyond the size range recommended, by contractual agreement between the purchaser and the producer. 1.2 The procedures described in this practice make use of fixed encircling test coils or probe systems. 1.3 Units—The values stated in inch-pound units are to be regarded as standard. The values given in parentheses are mathematical conversions to SI units that are provided for information only and are not considered standard. Note 1: For convenience, the term “tube” or “tubular product” will hereinafter be used to refer to both pipe and tubing. 1.4 This standard does not purport to address all of the safety concerns, if any, associated with its use. It is the responsibility of the user of this standard to establish appropriate safety, health, and environmental practices and determine the applicability of regulatory limitations prior to use. 1.5 This international standard was developed in accordance with internationally recognized principles on standardization established in the Decision on Principles for the Development of International Standards, Guides and Recommendations issued by the World Trade Organization Technical Barriers to Trade (TBT) Committee.
ASTM E571-19 is classified under the following ICS (International Classification for Standards) categories: 77.040.20 - Non-destructive testing of metals; 77.150.40 - Nickel and chromium products. The ICS classification helps identify the subject area and facilitates finding related standards.
ASTM E571-19 has the following relationships with other standards: It is inter standard links to ASTM E571-12, ASTM E1316-24, ASTM E1316-19b, ASTM E1316-19, ASTM E1316-18, ASTM E1316-17a, ASTM E1316-17, ASTM E1316-16a, ASTM E1316-16, ASTM E1316-15a, ASTM E1316-15, ASTM E1316-14e1, ASTM E1316-14, ASTM E1316-13d, ASTM E1316-13c. Understanding these relationships helps ensure you are using the most current and applicable version of the standard.
ASTM E571-19 is available in PDF format for immediate download after purchase. The document can be added to your cart and obtained through the secure checkout process. Digital delivery ensures instant access to the complete standard document.
Standards Content (Sample)
This international standard was developed in accordance with internationally recognized principles on standardization established in the Decision on Principles for the
Development of International Standards, Guides and Recommendations issued by the World Trade Organization Technical Barriers to Trade (TBT) Committee.
Designation: E571 − 19
Standard Practice for
Electromagnetic (Eddy-Current) Examination of Nickel and
Nickel Alloy Tubular Products
This standard is issued under the fixed designation E571; the number immediately following the designation indicates the year of
original adoption or, in the case of revision, the year of last revision. A number in parentheses indicates the year of last reapproval. A
superscript epsilon (´) indicates an editorial change since the last revision or reapproval.
1. Scope* 2. Referenced Documents
2.1 ASTM Standards:
1.1 This practice covers the procedures for eddy-current
E309 Practice for Eddy Current Examination of Steel Tubu-
examination of nickel and nickel alloy tubes.These procedures
lar Products Using Magnetic Saturation
are applicable for tubes with outside diameters up to 2 in.
E1316 Terminology for Nondestructive Examinations
(50.8 mm), incl, and wall thicknesses from 0.035 to 0.120 in.
(0.889 to 3.04 mm), incl. This standard applies to procedures 2.2 Other Documents:
where the sensor is placed on the outside surface of the tube. SNT-TC-1A Recommended Practice for Personnel Qualifi-
These procedures may be used for tubes beyond the size range cation and Certification in Nondestructive Testing
recommended, by contractual agreement between the pur- ANSI/ASNT-CP-189 ASNT Standard for Qualification and
chaser and the producer. Certification of Nondestructive Testing Personnel
NAS-410 Certification and Qualification of Nondestructive
1.2 The procedures described in this practice make use of
Personnel (Quality Assurance Committee)
fixed encircling test coils or probe systems.
ISO-9712 Non-destructive testing -- Qualification and certi-
1.3 Units—The values stated in inch-pound units are to be fication of NDT personnel
regarded as standard. The values given in parentheses are
3. Terminology
mathematical conversions to SI units that are provided for
information only and are not considered standard.
3.1 Standardterminologyrelatingtoelectromagnetictesting
NOTE 1—For convenience, the term “tube” or “tubular product” will
may be found in Terminology E1316, Section C, Electromag-
hereinafter be used to refer to both pipe and tubing.
netic Testing.
1.4 This standard does not purport to address all of the
4. Summary of Practice
safety concerns, if any, associated with its use. It is the
responsibility of the user of this standard to establish appro-
4.1 Examination is usually performed by the use of one of
priate safety, health, and environmental practices and deter-
two general techniques:
mine the applicability of regulatory limitations prior to use.
4.1.1 Encircling Coil Technique—Examinationisperformed
1.5 This international standard was developed in accor- by passing the tube lengthwise through a coil energized with
alternating current at one or more frequencies. See Fig. 1. The
dance with internationally recognized principles on standard-
ization established in the Decision on Principles for the electrical impedance of the coil is modified by the proximity of
Development of International Standards, Guides and Recom- the tube, the tube dimensions, electrical conductivity, saturat-
mendations issued by the World Trade Organization Technical ing magnetic field, magnetic permeability, and metallurgical or
Barriers to Trade (TBT) Committee.
For referenced ASTM standards, visit the ASTM website, www.astm.org, or
contact ASTM Customer Service at service@astm.org. For Annual Book of ASTM
This practice is under the jurisdiction of ASTM Committee E07 on Nonde- Standards volume information, refer to the standard’s Document Summary page on
structive Testing and is the direct responsibility of Subcommittee E07.07 on the ASTM website.
Electromagnetic Method. AvailablefromAmericanSocietyforNondestructiveTesting(ASNT),P.O.Box
Current edition approved July 1, 2019. Published September 2019. Originally 28518, 1711 Arlingate Ln., Columbus, OH 43228-0518, http://www.asnt.org.
approved in 1976. Last previous edition approved in 2012 as E571 – 12. DOI: Available fromAerospace IndustriesAssociation ofAmerica, Inc. (AIA), 1000
10.1520/E0571-19. WilsonBlvd.,Suite1700,Arlington,VA22209-3928,http://www.aia-aerospace.org.
2 6
For ASME Boiler and Pressure Vessel Code applications see related Practice Available from International Organization for Standardization (ISO), 1, ch. de
SE-571 in Section II of that Code. la Voie-Creuse, CP 56, CH-1211 Geneva 20, Switzerland, http://www.iso.org.
*A Summary of Changes section appears at the end of this standard
Copyright © ASTM International, 100 Barr Harbor Drive, PO Box C700, West Conshohocken, PA 19428-2959. United States
E571 − 19
tubular products can cause spurious test results. A useful
solution to this problem involves the application of a strong
external magnetic field in the region of the examining coil or
probe. This technique, known as magnetic saturation, causes a
magnetic material to exhibit sufficiently small magnetic char-
acteristics of permeability, hysteresis, and so forth, so that the
material under examination is effectively rendered nonmag-
netic. When achieved, this condition allows an eddy-current
system to measure and detect electrical resistivity and geo-
metrical variations (including defects) independent of concur-
rent variations in magnetic properties.
NOTE 2—Practice E309 may be used for strongly magnetic materials.
4.2.1 During the examination of slightly magnetic tubing
the signals resulting from the variation of magnetic permeabil-
ity can mask the signals resulting from small imperfections. A
magnetic saturation technique can be used to reduce this
interference to an acceptable level.
5. Significance and Use
5.1 Eddy-current testing is a nondestructive method of
locating discontinuities in metallic materials. Signals can be
produced by discontinuities originating on either the external
or internal surfaces of the tube or by discontinuities totally
contained within the wall. Since the density of eddy currents
decreases nearly exponentially with increasing distance from
the surface nearest the coil, the response to deep-seated defects
decreases correspondingly. Phase changes are also associated
with changes in depth, allowing the use of phase analysis
techniques.
5.2 The response from natural discontinuities can be signifi-
FIG. 1 Encircling-Coil and Probe-Coil Techniques for Electro-
magnetic Examination of Tubular Products
cantly different than that from artificial discontinuities, such as
drilled holes or notches. For this reason, sufficient work should
be done to establish the sensitivity level and setup required to
mechanical discontinuities in the tube. As the tube passes
detect natural discontinuities of consequence to the end use of
through the coil, the changes in electromagnetic response
the product.
caused by these variables in the tube change the coil
5.3 Some indications obtained by this method may not be
impedance, which activates an audible or visual signaling
relevant to product quality; for example, an irrelevant indica-
device or a mechanical marker.
tion may be caused by minute dents or tool chatter marks,
4.1.2 Probe Coil Technique—Probe coils are positioned in
which are not detrimental to the end use of the product.
close proximity to the outside diameter or to the inside
Irrelevant indications can mask unacceptable discontinuities.
diameter, or to both diameter surfaces, of the tubular product
Relevant indications are those which result from discontinui-
beingexaminedasshowninFig.1.Sincetheprobeisgenerally
ties. Any indication that exceeds the rejection level shall be
small and does not encircle the tube, it examines only a limited
treated as a relevant indication until it can be demonstrated that
area in the vicinity of the probe. When required to examine the
it is irrelevant.
entire volume of the tubular product, it is common practice to
rotate either the tubular product or the probe around the tube.
5.4 Generally, eddy-current examination systems are not
Frequently, in the case of welded tubular products, only the
sensitive to discontinuities adjacent to the ends of the tube (end
weld is examined by scanning along the weld zone. In the case
effect).
where the tubular products are joined by welding and the probe
5.5 Discontinuities such as scratches or seams that are
is rotated, the probe is orbited about the central axis of the tube
continuousanduniformoverthefulllengthofthetubemaynot
suchthatacircumferentialexaminationofthetubeand/orweld
always be detected with differential encircling coils or probes
may be made. The depth of penetration of the interrogating
scanned along the tube length.
magnetic fields into the tubular product may be smaller for this
type of probe coil compared to the encircling coil.
5.6 For material that is magnetic, a strong magnetic field
4.2 The magnetic permeability of magnetic materials se- shall be placed in the region of the examining coil.Amagnetic
verely limits the depth of penetration of induced eddy currents. field may also be used to improve the signal-to-noise ratio in
Furthermore, the permeability variations inherent in magnetic tubing that exhibits slight residual magnetism.
E571 − 19
6. Basis of Application same nominal alloy, temper, and nominal dimensions as the lot
of tubes to be examined on a production basis. It shall be of
6.1 The following criteria may be specified in the purchase
sufficient length to permit the spacing of artificial discontinui-
specification contractual agreement, or elsewhere, and may
ties to provide good signal resolution, and to be mechanically
require agreement between the purchaser and the supplier.
stable while in the examining position in the apparatus.
6.1.1 Acceptance criteria.
Artificial discontinuities placed in the tube shall be of the
6.1.2 Type, dimensions, and number of artificial disconti-
following types (see Fig. 2):
nuities to be placed in the reference standard.
6.1.3 Extent of examination; that is, full circumference of
outside or inside diameter, or both, or weld only, if welded.
6.1.4 Operator qualifications, if required (see 6.2 below).
6.1.5 Standardization intervals.
6.2 Personnel Qualifications:
6.2.1 Personnel performing examinations to this standard
shall be qualified in accordance with _____ (identify standard
or standards, for example, NAS-410, SNT-TC-1A, ANSI/
ASNT-CP-189, SNT-TC-1A, NAS-410, ISO 9712) and certi-
fied by the employer or certifying agency, as applicable. Other
equivalent qualification documents may be used when speci-
fied in the contract or purchase order. The applicable revision
shall be the latest unless otherwise specified in the contractual
agreement between parties.
7. Apparatus
a = longitudinal notch (milled or EDM)
7.1 Electronic Apparatus—Theelectronicapparatusshallbe
b = transverse notch (milled, filed, or EDM)
capable of energizing the encircling coils or probes with
c = drilled hole (radially through one wall)
FIG. 2 Various Types of Artificial Discontinuities
alternating current of suitable frequencies and shall be capable
of sensing changes in impedance of the encircling coils or
probes. Equipment may include any appropriate signal pro-
8.1.1 Notch—Longitudinal or transverse notches, or both,
cessing circuits such as a phase discriminator, filter circuits,
may be produced by milling, filing, EDM (Electric Discharge
and so forth,
...
This document is not an ASTM standard and is intended only to provide the user of an ASTM standard an indication of what changes have been made to the previous version. Because
it may not be technically possible to adequately depict all changes accurately, ASTM recommends that users consult prior editions as appropriate. In all cases only the current version
of the standard as published by ASTM is to be considered the official document.
Designation: E571 − 12 E571 − 19
Standard Practice for
Electromagnetic (Eddy-Current) Examination of Nickel and
Nickel Alloy Tubular Products
This standard is issued under the fixed designation E571; the number immediately following the designation indicates the year of
original adoption or, in the case of revision, the year of last revision. A number in parentheses indicates the year of last reapproval. A
superscript epsilon (´) indicates an editorial change since the last revision or reapproval.
1. Scope*
1.1 This practice covers the procedures for eddy-current examination of nickel and nickel alloy tubes. These procedures are
applicable for tubes with outside diameters up to 2 in. (50.8 mm), 2 in. (50.8 mm), incl, and wall thicknesses from 0.035 to 0.120
in. 0.120 in. (0.889 to 3.04 mm), incl. 3.04 mm), incl. This standard applies to procedures where the sensor is placed on the outside
surface of the tube. These procedures may be used for tubes beyond the size range recommended, by contractual agreement
between the purchaser and the producer.
1.2 The procedures described in this practice make use of fixed encircling test coils or probe systems.
1.3 Units—The values stated in inch-pound units are to be regarded as standard. The values given in parentheses are
mathematical conversions to SI units that are provided for information only and are not considered standard.
NOTE 1—For convenience, the term “tube” or “tubular product” will hereinafter be used to refer to both pipe and tubing.
1.4 This standard does not purport to address all of the safety concerns, if any, associated with its use. It is the responsibility
of the user of this standard to establish appropriate safety safety, health, and healthenvironmental practices and determine the
applicability of regulatory limitations prior to use.
1.5 This international standard was developed in accordance with internationally recognized principles on standardization
established in the Decision on Principles for the Development of International Standards, Guides and Recommendations issued
by the World Trade Organization Technical Barriers to Trade (TBT) Committee.
2. Referenced Documents
2.1 ASTM Standards:
E309 Practice for Eddy Current Examination of Steel Tubular Products Using Magnetic Saturation
E543 Specification for Agencies Performing Nondestructive Testing
E1316 Terminology for Nondestructive Examinations
2.2 Other Documents:
SNT-TC-1A Recommended Practice for Personnel Qualification and Certification in Nondestructive Testing
ANSI/ASNT-CP-189 ASNT Standard for Qualification and Certification of Nondestructive Testing Personnel
NAS-410 Certification and Qualification of Nondestructive Personnel (Quality Assurance Committee)
ISO-9712 Non-destructive testing -- Qualification and certification of NDT personnel
3. Terminology
3.1 Standard terminology relating to electromagnetic testing may be found in Terminology E1316, Section C, Electromagnetic
Testing.
This practice is under the jurisdiction of ASTM Committee E07 on Nondestructive Testing and is the direct responsibility of Subcommittee E07.07 on Electromagnetic
Method.
Current edition approved Aug. 1, 2012July 1, 2019. Published September 2012September 2019. Originally approved in 1976. Last previous edition approved in 20072012
as E571 - 98E571 – 12.(2007). DOI: 10.1520/E0571-12.10.1520/E0571-19.
For ASME Boiler and Pressure Vessel Code applications see related Practice SE-571 in Section II of that Code.
For referenced ASTM standards, visit the ASTM website, www.astm.org, or contact ASTM Customer Service at service@astm.org. For Annual Book of ASTM Standards
volume information, refer to the standard’s Document Summary page on the ASTM website.
Available from American Society for Nondestructive Testing (ASNT), P.O. Box 28518, 1711 Arlingate Ln., Columbus, OH 43228-0518, http://www.asnt.org.
Available from Aerospace Industries Association of America, Inc. (AIA), 1000 Wilson Blvd., Suite 1700, Arlington, VA 22209-3928, http://www.aia-aerospace.org.
Available from International Organization for Standardization (ISO), 1, ch. de la Voie-Creuse, CP 56, CH-1211 Geneva 20, Switzerland, http://www.iso.org.
*A Summary of Changes section appears at the end of this standard
Copyright © ASTM International, 100 Barr Harbor Drive, PO Box C700, West Conshohocken, PA 19428-2959. United States
E571 − 19
4. Summary of Practice
4.1 Examination is usually performed by the use of one of two general techniques:
4.1.1 Encircling Coil Technique—Examination is performed by passing the tube lengthwise through a coil energized with
alternating current at one or more frequencies. See Fig. 1. The electrical impedance of the coil is modified by the proximity of the
tube, the tube dimensions, electrical conductivity, saturating magnetic field, magnetic permeability, and metallurgical or
mechanical discontinuities in the tube. As the tube passes through the coil, the changes in electromagnetic response caused by these
variables in the tube change the coil impedance, which activates an audible or visual signaling device or a mechanical marker.
4.1.2 Probe Coil Technique—Probe coils are positioned in close proximity to the outside diameter or to the inside diameter, or
to both diameter surfaces, of the tubular product being examined as shown in Fig. 1. Since the probe is generally small and does
not encircle the tube, it examines only a limited area in the vicinity of the probe. When required to examine the entire volume of
the tubular product, it is common practice to rotate either the tubular product or the probe around the tube. Frequently, in the case
of welded tubular products, only the weld is examined by scanning along the weld zone. In the case where the tubular products
are joined by welding and the probe is rotated, the probe is orbited about the central axis of the tube such that a circumferential
examination of the tube and/or weld may be made. The depth of penetration of the interrogating magnetic fields into the tubular
product may be smaller for this type of probe coil compared to the encircling coil.
4.2 The magnetic permeability of magnetic materials severely limits the depth of penetration of induced eddy currents.
Furthermore, the permeability variations inherent in magnetic tubular products can cause spurious test results. A useful solution
to this problem involves the application of a strong external magnetic field in the region of the examining coil or probe. This
technique, known as magnetic saturation, causes a magnetic material to exhibit sufficiently small magnetic characteristics of
permeability, hysteresis, etc.,and so forth, so that the material under examination is effectively rendered nonmagnetic. When
achieved, this condition allows an eddy-current system to measure and detect electrical resistivity and geometrical variations
(including defects) independent of concurrent variations in magnetic properties.
NOTE 2—Practice E309 may be used for strongly magnetic materials.
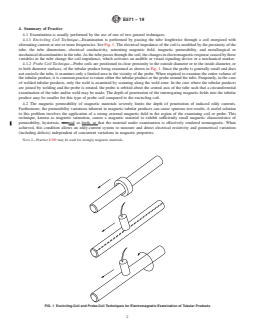
FIG. 1 Encircling-Coil and Probe-Coil Techniques for Electromagnetic Examination of Tubular Products
E571 − 19
4.2.1 During the examination of slightly magnetic tubing the signals resulting from the variation of magnetic permeability can
mask the signals resulting from small imperfections. A magnetic saturation technique can be used to reduce this interference to an
acceptable level.
5. Significance and Use
5.1 Eddy-current testing is a nondestructive method of locating discontinuities in metallic materials. Signals can be produced
by discontinuities originating on either the external or internal surfaces of the tube or by discontinuities totally contained within
the wall. Since the density of eddy currents decreases nearly exponentially with increasing distance from the surface nearest the
coil, the response to deep-seated defects decreases correspondingly. Phase changes are also associated with changes in depth,
allowing the use of phase analysis techniques.
5.2 The response from natural discontinuities can be significantly different than that from artificial discontinuities, such as
drilled holes or notches. For this reason, sufficient work should be done to establish the sensitivity level and setup required to detect
natural discontinuities of consequence to the end use of the product.
5.3 Some indications obtained by this method may not be relevant to product quality; for example, an irrelevant indication may
be caused by minute dents or tool chatter marks, which are not detrimental to the end use of the product. Irrelevant indications
can mask unacceptable discontinuities. Relevant indications are those which result from discontinuities. Any indication that
exceeds the rejection level shall be treated as a relevant indication until it can be demonstrated that it is irrelevant.
5.4 Generally, eddy-current examination systems are not sensitive to discontinuities adjacent to the ends of the tube (end effect).
5.5 Discontinuities such as scratches or seams that are continuous and uniform over the full length of the tube may not always
be detected with differential encircling coils or probes scanned along the tube length.
5.6 For material that is magnetic, a strong magnetic field shall be placed in the region of the examining coil. A magnetic field
may also be used to improve the signal-to-noise ratio in tubing that exhibits slight residual magnetism.
6. Basis of Application
6.1 The following criteria may be specified in the purchase specification contractual agreement, or elsewhere, and may require
agreement between the purchaser and the supplier.
6.1.1 Acceptance criteria.
6.1.2 Type, dimensions, and number of artificial discontinuities to be placed in the reference standard.
6.1.3 Extent of examination; that is, full circumference of outside or inside diameter, or both, or weld only, if welded.
6.1.4 Operator qualifications, if required (see 6.1.66.2 below).
6.1.5 Standardization intervals.
6.1.6 If specified in the contractual agreement, personnel performing examinations to this practice shall be qualified in
accordance with a nationally recognized NDT personnel qualification practice or standard such as ANSI/ASNT-CP-189,
SNT-TC-1A, NAS-410, ASNT-ACCP, or a similar document and certified by the certifying agency as applicable. The practice or
standard used and its applicable revision shall be identified in the contractual agreement between the using parties.
NOTE 3—MIL-STD-410 is canceled and has been replaced with NAS-410, however, it may be used with agreement between contracting parties.
6.1.7 If specified in the contractual agreement, NDT agencies shall be qualified and evaluated in accordance with Specification
E543. The applicable edition of Specification E543 shall be specified in the contractual agreement.
6.2 Personnel Qualifications:
6.2.1 Personnel performing examinations to this standard shall be qualified in accordance with _____ (identify standard or
standards, for example, NAS-410, SNT-TC-1A, ANSI/ASNT-CP-189, SNT-TC-1A, NAS-410, ISO 9712) and certified by the
employer or certifying agency, as applicable. Other equivalent qualification documents may be used when specified in the contract
or purchase order. The applicable revision shall be the latest unless otherwise specified in the contractual agreement between
parties.
7. Apparatus
7.1 Electronic Apparatus—The electronic apparatus shall be capable of energizing the encircling coils or probes with alternating
current of suitable frequencies and shall be capable of sensing changes in impedance of the encircling coils or probes. Equipment
may include any appropriate signal processing circuits such as a phase discriminator, filter circuits, etc., and so forth, as required
for the particular application.
7.2 Encircling Coil Assembly—The encircling coil assembly shall consist of one or more electrical coils which encircle the
article being examined. The inside geometry of the coils should closely approximate the surface geometry of the specimen so that
when the specimen is passed through the coils all points on the outer circumference of the specimen are effectively equidistant
from, and in close proximity to, the inner
...
Questions, Comments and Discussion
Ask us and Technical Secretary will try to provide an answer. You can facilitate discussion about the standard in here.
Loading comments...