ASTM E408-13
(Test Method)Standard Test Methods for Total Normal Emittance of Surfaces Using Inspection-Meter Techniques
Standard Test Methods for Total Normal Emittance of Surfaces Using Inspection-Meter Techniques
ABSTRACT
These test methods cover determination of the total normal emittance of surfaces by means of portable, inspection-meter instruments. At least two different types of instruments are commercially available for performing this measurement. Test Method A uses an instrument which measures radiant energy reflected from the specimen and Test Method B utilizes an instrument which measures radiant energy emitted from the specimen. Both test methods are limited in accuracy by the degree to which the emittance properties of calibrating standards are known and by the angular emittance characteristics of the surfaces being measure. Test Method A is normally subject to a small error caused by the difference in wavelength distributions between the radiant energy emitted by the two cavities at different temperatures, and that emitted by a blackbody at the specimen temperature. Test Method B also has nongray errors since the detector is not at absolute zero temperature. Test Method A is subject to small errors that may be introduced if the orientation of the sensing component is changed between calibration and specimen measurements. This type of error results from minor changes in alignment of the optical system. Test Method A is subject to error when curved specular surfaces of less than about a certain radius are measured. These errors can be minimized by using calibrating standards that have the same radius of curvature as the test surface. Test Method A can measure reflectance on specimens that are either opaque or semi-transparent in the wavelength region of interest. However, if emittance is to be derived from the reflectance data on a semi-transparent specimen, a correction must be made for transmittance losses. Test Method B is subject to several possible significant errors. These may be due to variation of the test surface temperature during measurements, differences in temperature between the calibrating standards and the test surfaces, changes in orientation of the sensing component between calibration and measurement, errors due to irradiation of the specimen with thermal radiation by the sensing component, and errors due to specimen curvature. Test Method B is limited to emittance measurements on specimens that are opaque to infrared radiation in the wavelength region of interest.
SCOPE
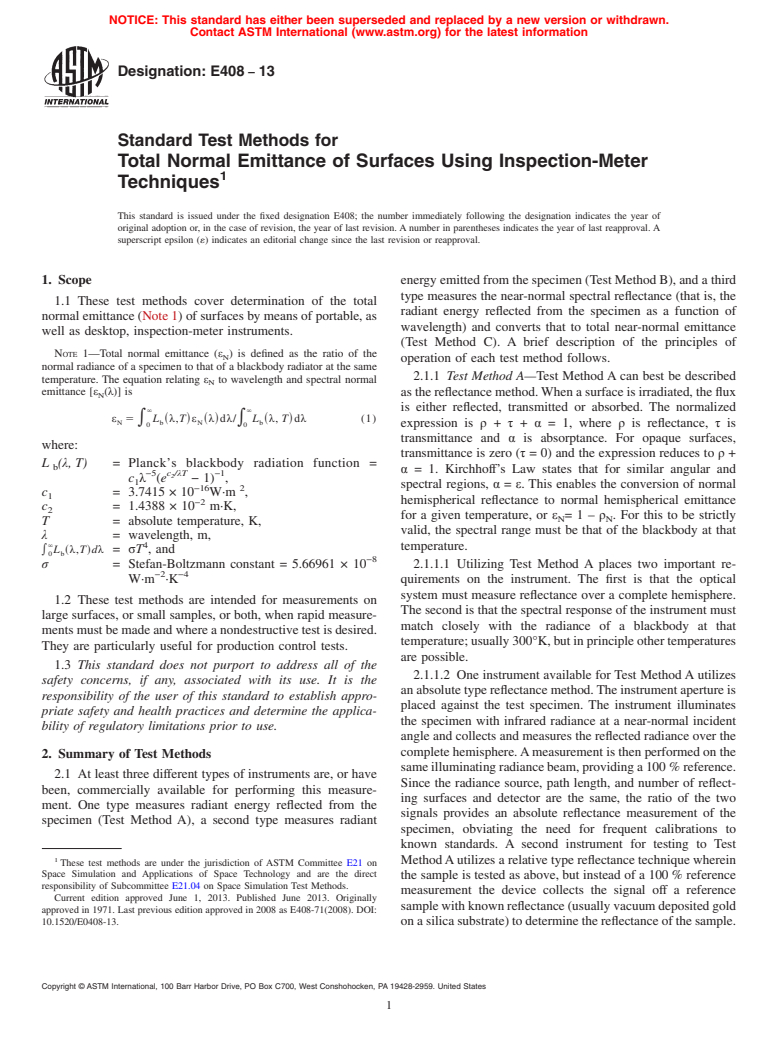
1.1 These test methods cover determination of the total normal emittance (Note 1) of surfaces by means of portable, as well as desktop, inspection-meter instruments. Note 1—Total normal emittance (εN) is defined as the ratio of the normal radiance of a specimen to that of a blackbody radiator at the same temperature. The equation relating εN to wavelength and spectral normal emittance [εN(λ)] is
1.2 These test methods are intended for measurements on large surfaces, or small samples, or both, when rapid measurements must be made and where a nondestructive test is desired. They are particularly useful for production control tests.
1.3 This standard does not purport to address all of the safety concerns, if any, associated with its use. It is the responsibility of the user of this standard to establish appropriate safety and health practices and determine the applicability of regulatory limitations prior to use.
General Information
Relations
Buy Standard
Standards Content (Sample)
NOTICE: This standard has either been superseded and replaced by a new version or withdrawn.
Contact ASTM International (www.astm.org) for the latest information
Designation: E408 − 13
Standard Test Methods for
Total Normal Emittance of Surfaces Using Inspection-Meter
1
Techniques
This standard is issued under the fixed designation E408; the number immediately following the designation indicates the year of
original adoption or, in the case of revision, the year of last revision.Anumber in parentheses indicates the year of last reapproval.A
superscript epsilon (´) indicates an editorial change since the last revision or reapproval.
1. Scope energyemittedfromthespecimen(TestMethodB),andathird
type measures the near-normal spectral reflectance (that is, the
1.1 These test methods cover determination of the total
radiant energy reflected from the specimen as a function of
normalemittance(Note1)ofsurfacesbymeansofportable,as
wavelength) and converts that to total near-normal emittance
well as desktop, inspection-meter instruments.
(Test Method C). A brief description of the principles of
NOTE 1—Total normal emittance (ε ) is defined as the ratio of the
N
operation of each test method follows.
normal radiance of a specimen to that of a blackbody radiator at the same
2.1.1 Test Method A—Test Method A can best be described
temperature. The equation relating ε to wavelength and spectral normal
N
emittance [ε (λ)] is
asthereflectancemethod.Whenasurfaceisirradiated,theflux
N
is either reflected, transmitted or absorbed. The normalized
` `
ε 5 L λ,T ε λ dλ/ L λ, T dλ (1)
* ~ ! ~ ! * ~ !
N b N b
expression is ρ + τ + α = 1, where ρ is reflectance, τ is
0 0
transmittance and α is absorptance. For opaque surfaces,
where:
transmittance is zero (τ = 0) and the expression reduces to ρ +
L (λ,T) = Planck’s blackbody radiation function =
b
α = 1. Kirchhoff’s Law states that for similar angular and
−5 c /λT −1
2
c λ (e −1) ,
1
spectral regions, α = ε. This enables the conversion of normal
−16 2
c = 3.7415 × 10 W·m ,
1
hemispherical reflectance to normal hemispherical emittance
−2
c = 1.4388 × 10 m·K,
2
for a given temperature, or ε =1– ρ . For this to be strictly
N N
T = absolute temperature, K,
valid, the spectral range must be that of the blackbody at that
λ = wavelength, m,
` 4
temperature.
* L ~λ,T!dλ = σT , and
0 b
−8
σ = Stefan-Boltzmann constant = 5.66961 × 10 2.1.1.1 Utilizing Test Method A places two important re-
−2 −4
W·m ·K
quirements on the instrument. The first is that the optical
system must measure reflectance over a complete hemisphere.
1.2 These test methods are intended for measurements on
The second is that the spectral response of the instrument must
large surfaces, or small samples, or both, when rapid measure-
match closely with the radiance of a blackbody at that
mentsmustbemadeandwhereanondestructivetestisdesired.
temperature;usually300°K,butinprincipleothertemperatures
They are particularly useful for production control tests.
are possible.
1.3 This standard does not purport to address all of the
2.1.1.2 One instrument available for Test MethodAutilizes
safety concerns, if any, associated with its use. It is the
anabsolutetypereflectancemethod.Theinstrumentapertureis
responsibility of the user of this standard to establish appro-
placed against the test specimen. The instrument illuminates
priate safety and health practices and determine the applica-
the specimen with infrared radiance at a near-normal incident
bility of regulatory limitations prior to use.
angle and collects and measures the reflected radiance over the
completehemisphere.Ameasurementisthenperformedonthe
2. Summary of Test Methods
sameilluminatingradiancebeam,providinga100%reference.
2.1 At least three different types of instruments are, or have
Since the radiance source, path length, and number of reflect-
been, commercially available for performing this measure-
ing surfaces and detector are the same, the ratio of the two
ment. One type measures radiant energy reflected from the
signals provides an absolute reflectance measurement of the
specimen (Test Method A), a second type measures radiant
specimen, obviating the need for frequent calibrations to
known standards. A second instrument for testing to Test
1
MethodAutilizesarelativetypereflectancetechniquewherein
These test methods are under the jurisdiction of ASTM Committee E21 on
Space Simulation and Applications of Space Technology and are the direct
the sample is tested as above, but instead of a 100% reference
responsibility of Subcommittee E21.04 on Space Simulation Test Methods.
measurement the device collects the signal off a reference
Current edition approved June 1, 2013. Published June 2013. Originally
samplewithknownreflectance(usuallyvacuumdepositedgold
approved in 1971. Last previous edition approved in 2008 as E408-71(2008). DOI:
10.1520/E0408-13. onasilicasubstrate)todeterminethereflectanceofthesample.
Copyright © ASTM International, 100 Barr Harbor Drive, PO Box C700, West Conshohoc
...
This document is not an ASTM standard and is intended only to provide the user of an ASTM standard an indication of what changes have been made to the previous version. Because
it may not be technically possible to adequately depict all changes accurately, ASTM recommends that users consult prior editions as appropriate. In all cases only the current version
of the standard as published by ASTM is to be considered the official document.
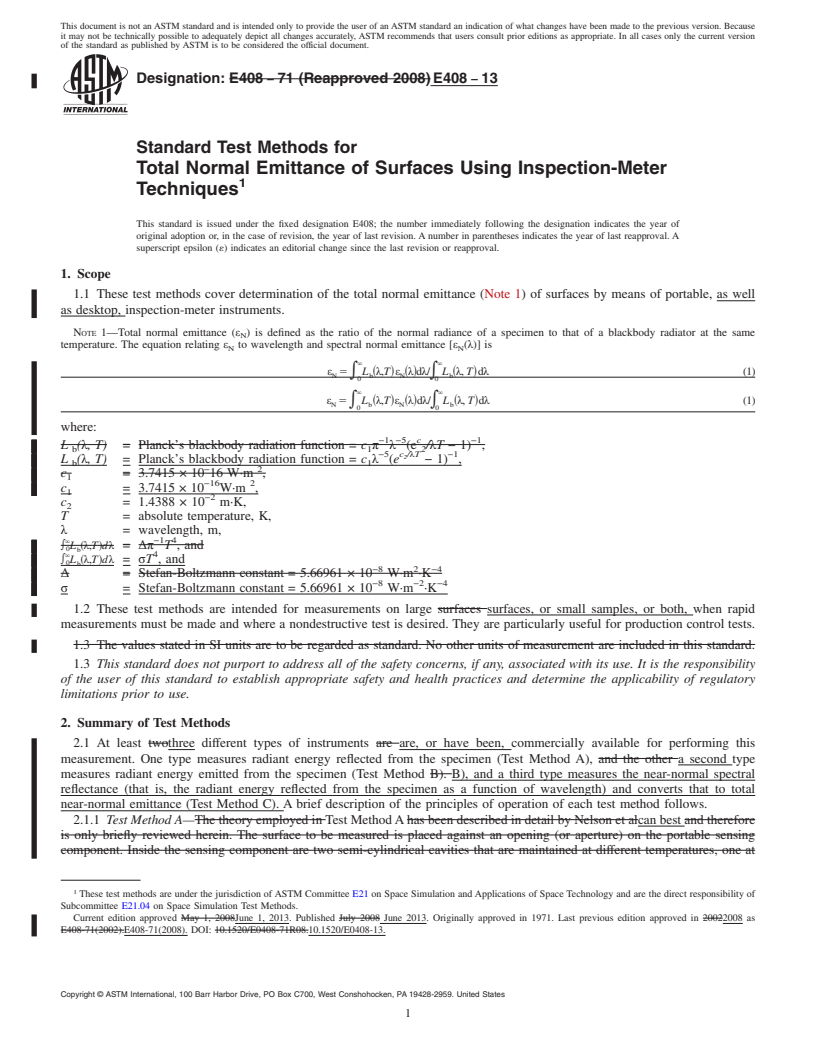
Designation: E408 − 71 (Reapproved 2008) E408 − 13
Standard Test Methods for
Total Normal Emittance of Surfaces Using Inspection-Meter
1
Techniques
This standard is issued under the fixed designation E408; the number immediately following the designation indicates the year of
original adoption or, in the case of revision, the year of last revision. A number in parentheses indicates the year of last reapproval. A
superscript epsilon (´) indicates an editorial change since the last revision or reapproval.
1. Scope
1.1 These test methods cover determination of the total normal emittance (Note 1) of surfaces by means of portable, as well
as desktop, inspection-meter instruments.
NOTE 1—Total normal emittance (ε ) is defined as the ratio of the normal radiance of a specimen to that of a blackbody radiator at the same
N
temperature. The equation relating ε to wavelength and spectral normal emittance [ε (λ)] is
N N
` `
ε 5* L ~λ,T!ε ~λ!dλ/* L ~λ, T!dλ (1)
N b N b
0 0
` `
ε 5 L λ,T ε λ dλ/ L λ, T dλ (1)
* ~ ! ~ ! * ~ !
N b N b
0 0
where:
−1 −5 c −1
L (λ, T) = Planck’s blackbody radiation function = c π λ (e /λT − 1) ,
b 1 2
−5 c /λT −1
2
L (λ, T) = Planck’s blackbody radiation function = c λ (e − 1) ,
b 1
− 2
c = 3.7415 × 10 16 W·m ,
1
−16 2
c = 3.7415 × 10 W·m ,
1
−2
c = 1.4388 × 10 m·K,
2
T = absolute temperature, K,
λ = wavelength, m,
` −1 4
*
L ~λ,T!dλ = Δπ T , and
0
b
` 4
*
L ~λ,T!dλ = σT , and
0
b
−8 2 −4
Δ = Stefan-Boltzmann constant = 5.66961 × 10 W·m ·K
−8 −2 −4
σ = Stefan-Boltzmann constant = 5.66961 × 10 W·m ·K
1.2 These test methods are intended for measurements on large surfaces surfaces, or small samples, or both, when rapid
measurements must be made and where a nondestructive test is desired. They are particularly useful for production control tests.
1.3 The values stated in SI units are to be regarded as standard. No other units of measurement are included in this standard.
1.3 This standard does not purport to address all of the safety concerns, if any, associated with its use. It is the responsibility
of the user of this standard to establish appropriate safety and health practices and determine the applicability of regulatory
limitations prior to use.
2. Summary of Test Methods
2.1 At least twothree different types of instruments are are, or have been, commercially available for performing this
measurement. One type measures radiant energy reflected from the specimen (Test Method A), and the other a second type
measures radiant energy emitted from the specimen (Test Method B). B), and a third type measures the near-normal spectral
reflectance (that is, the radiant energy reflected from the specimen as a function of wavelength) and converts that to total
near-normal emittance (Test Method C). A brief description of the principles of operation of each test method follows.
2.1.1 Test Method A—The theory employed in Test Method A has been described in detail by Nelson et alcan best and therefore
is only briefly reviewed herein. The surface to be measured is placed against an opening (or aperture) on the portable sensing
component. Inside the sensing component are two semi-cylindrical cavities that are maintained at different temperatures, one at
1
These test methods are under the jurisdiction of ASTM Committee E21 on Space Simulation and Applications of Space Technology and are the direct responsibility of
Subcommittee E21.04 on Space Simulation Test Methods.
Current edition approved May 1, 2008June 1, 2013. Published July 2008 June 2013. Originally approved in 1971. Last previous edition approved in 20022008 as
E408-71(2002).E408-71(2008). DOI: 10.1520/E0408-71R08.10.1520/E0408-13.
Copyright © ASTM International, 100 Barr Harbor Drive, PO Box C700, West Conshohocken, PA 19428-2959. United States
1
---------------------- Page: 1 ----------------------
E408 − 13
near ambient and the other at a slightly elevated temperature. A suitable drive mechanism is employed to rotate the cavities
alternately across the aperture. As the cavities rotate past the specimen aperture, the specimen is alternately irradiated with infrared
radiation from the two cavities. The cavity radiation reflected from the specimen is detected with a vacuum thermocouple. The
vacuum thermocouple views the specimen at near normal incidence through an optical system that transmits radiation through slits
in the ends of the cavities. The thermocouple receives both radiation emitted from the specimen and other surfaces, and cavity
radiation which is reflected from the specimen. Only the reflected energy varies
...


Questions, Comments and Discussion
Ask us and Technical Secretary will try to provide an answer. You can facilitate discussion about the standard in here.