ASTM D256-10
(Test Method)Standard Test Methods for Determining the Izod Pendulum Impact Resistance of Plastics
Standard Test Methods for Determining the Izod Pendulum Impact Resistance of Plastics
SIGNIFICANCE AND USE
Before proceeding with these test methods, reference should be made to the specification of the material being tested. Any test specimen preparation, conditioning, dimensions, and testing parameters covered in the materials specification shall take precedence over those mentioned in these test methods. If there is no material specification, then the default conditions apply.
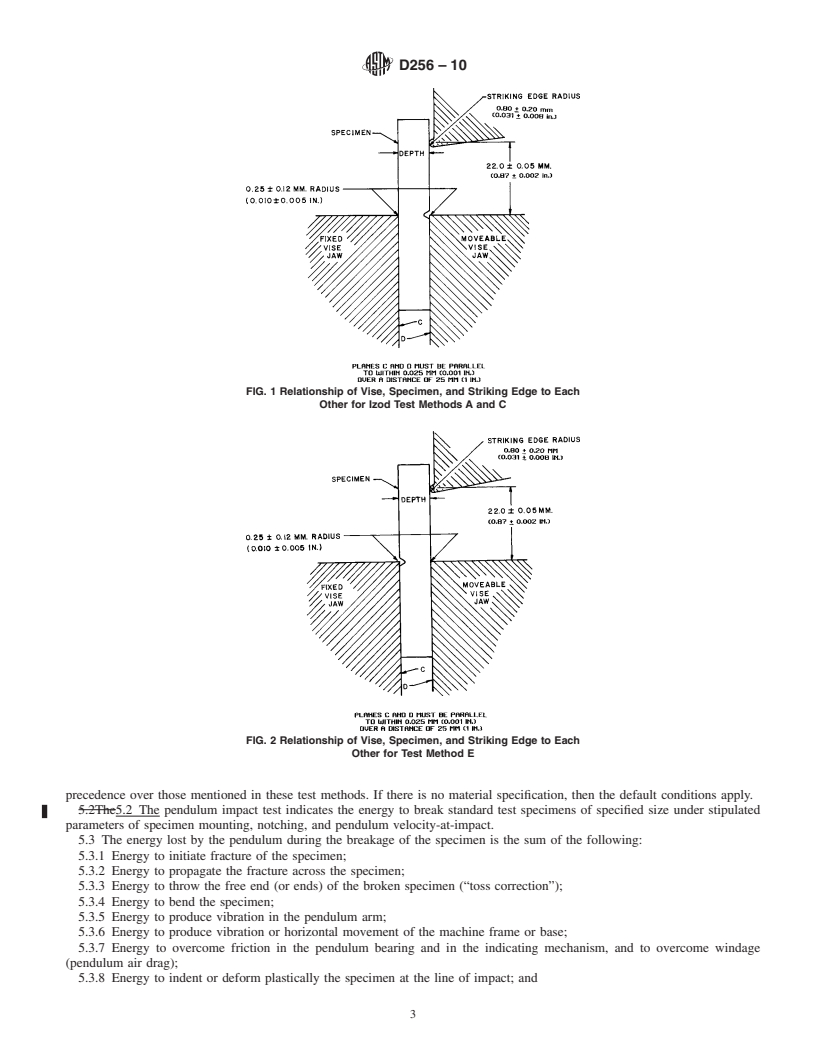
The pendulum impact test indicates the energy to break standard test specimens of specified size under stipulated parameters of specimen mounting, notching, and pendulum velocity-at-impact.
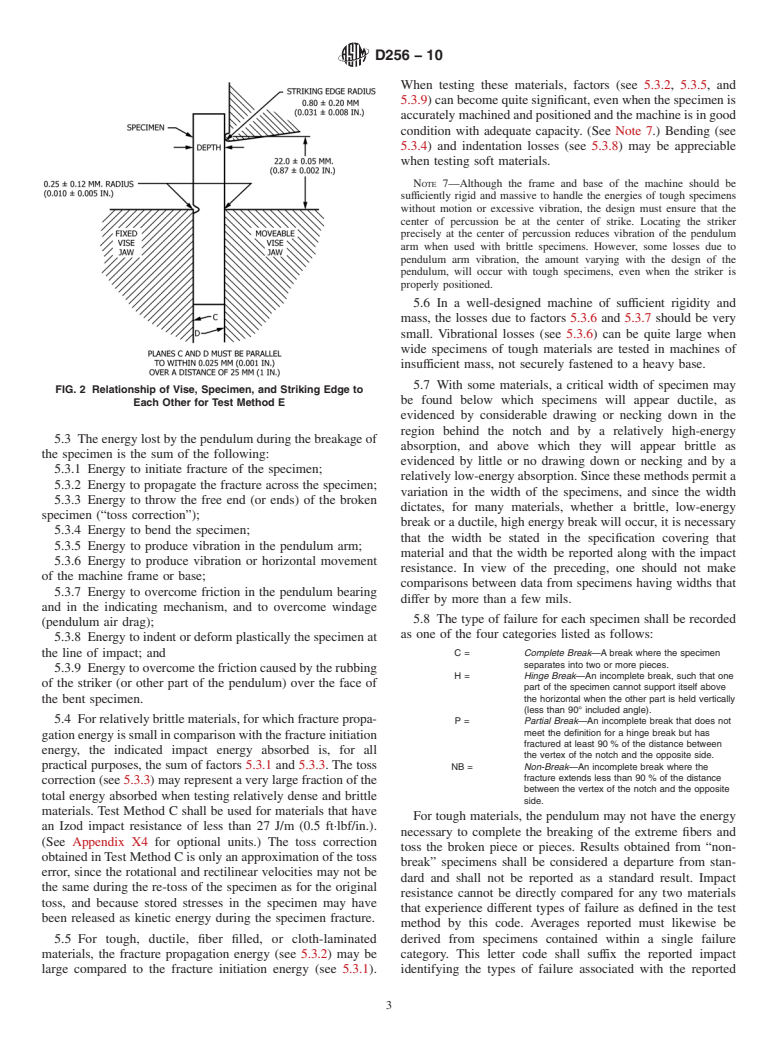
The energy lost by the pendulum during the breakage of the specimen is the sum of the following:
Energy to initiate fracture of the specimen;
Energy to propagate the fracture across the specimen;
Energy to throw the free end (or ends) of the broken specimen (“toss correction”);
Energy to bend the specimen;
Energy to produce vibration in the pendulum arm;
Energy to produce vibration or horizontal movement of the machine frame or base;
Energy to overcome friction in the pendulum bearing and in the indicating mechanism, and to overcome windage (pendulum air drag);
Energy to indent or deform plastically the specimen at the line of impact; and
Energy to overcome the friction caused by the rubbing of the striker (or other part of the pendulum) over the face of the bent specimen.
For relatively brittle materials, for which fracture propagation energy is small in comparison with the fracture initiation energy, the indicated impact energy absorbed is, for all practical purposes, the sum of factors 5.3.1 and 5.3.3. The toss correction (see 5.3.3) may represent a very large fraction of the total energy absorbed when testing relatively dense and brittle materials. Test Method C shall be used for materials that have an Izod impact resistance of less than 27 J/m (0.5 ft·lbf/in.). (See Appendix X4 for optional units.) The toss correction obtained in Test Method C is only an approximation of the tos...
SCOPE
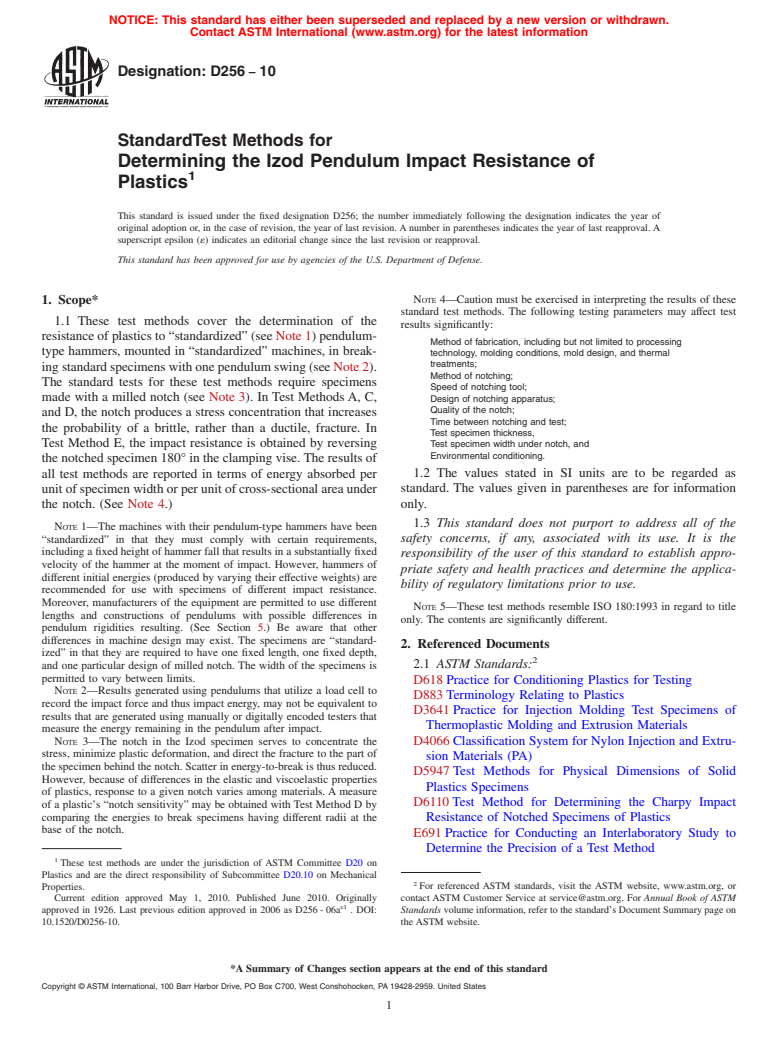
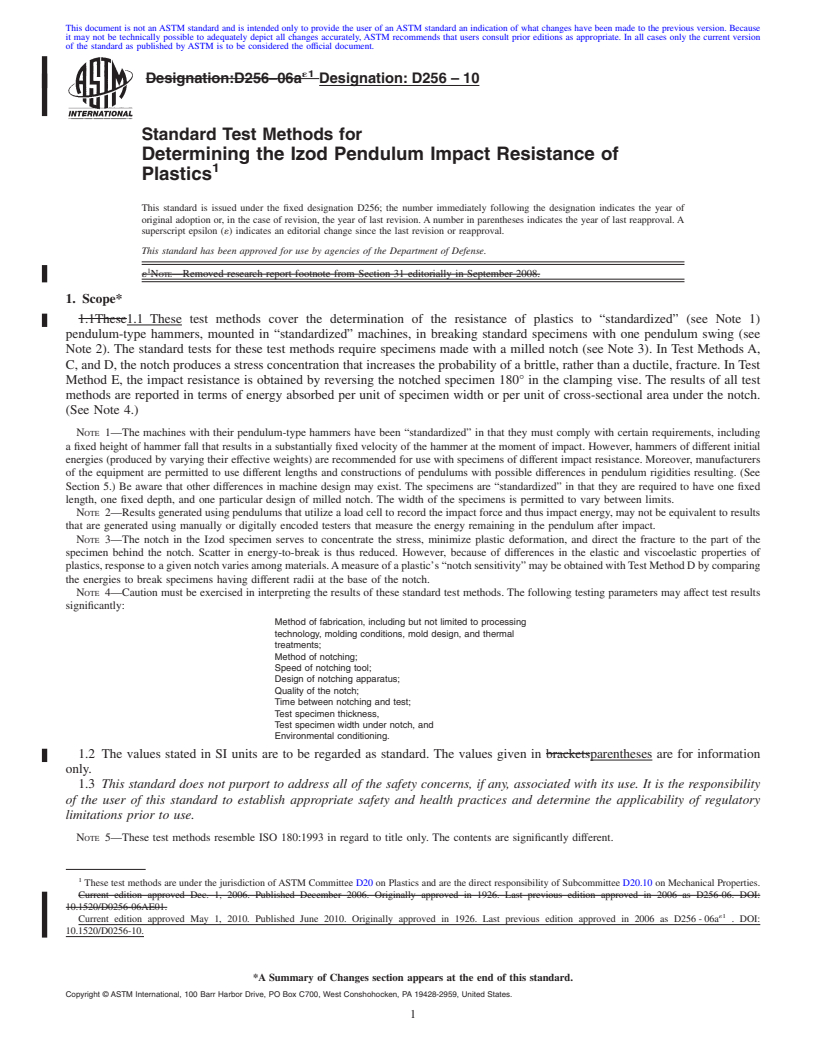
1.1 These test methods cover the determination of the resistance of plastics to “standardized” (see Note 1) pendulum-type hammers, mounted in “standardized” machines, in breaking standard specimens with one pendulum swing (see Note 2). The standard tests for these test methods require specimens made with a milled notch (see Note 3). In Test Methods A, C, and D, the notch produces a stress concentration that increases the probability of a brittle, rather than a ductile, fracture. In Test Method E, the impact resistance is obtained by reversing the notched specimen 180° in the clamping vise. The results of all test methods are reported in terms of energy absorbed per unit of specimen width or per unit of cross-sectional area under the notch. (See Note 4.)
Note 1—The machines with their pendulum-type hammers have been “standardized” in that they must comply with certain requirements, including a fixed height of hammer fall that results in a substantially fixed velocity of the hammer at the moment of impact. However, hammers of different initial energies (produced by varying their effective weights) are recommended for use with specimens of different impact resistance. Moreover, manufacturers of the equipment are permitted to use different lengths and constructions of pendulums with possible differences in pendulum rigidities resulting. (See Section 5.) Be aware that other differences in machine design may exist. The specimens are “standardized” in that they are required to have one fixed length, one fixed depth, and one particular design of milled notch. The width of the specimens is permitted to vary between limits.
Note 2—Results generated using pendulums that utilize a load cell to record the impact force and thus impact energy, may not be equivalent to results that are generated using manually or digitally encoded testers that measure the energy remaining in the pendulum after impact.
Note 3—The notch in the Iz...
General Information
Buy Standard
Standards Content (Sample)
NOTICE: This standard has either been superseded and replaced by a new version or withdrawn.
Contact ASTM International (www.astm.org) for the latest information
Designation: D256 − 10
StandardTest Methods for
Determining the Izod Pendulum Impact Resistance of
1
Plastics
This standard is issued under the fixed designation D256; the number immediately following the designation indicates the year of
original adoption or, in the case of revision, the year of last revision.Anumber in parentheses indicates the year of last reapproval.A
superscript epsilon (´) indicates an editorial change since the last revision or reapproval.
This standard has been approved for use by agencies of the U.S. Department of Defense.
NOTE 4—Caution must be exercised in interpreting the results of these
1. Scope*
standard test methods. The following testing parameters may affect test
1.1 These test methods cover the determination of the
results significantly:
resistanceofplasticsto“standardized”(seeNote1)pendulum-
Method of fabrication, including but not limited to processing
type hammers, mounted in “standardized” machines, in break-
technology, molding conditions, mold design, and thermal
treatments;
ingstandardspecimenswithonependulumswing(seeNote2).
Method of notching;
The standard tests for these test methods require specimens
Speed of notching tool;
made with a milled notch (see Note 3). In Test MethodsA, C, Design of notching apparatus;
Quality of the notch;
and D, the notch produces a stress concentration that increases
Time between notching and test;
the probability of a brittle, rather than a ductile, fracture. In
Test specimen thickness,
Test Method E, the impact resistance is obtained by reversing Test specimen width under notch, and
Environmental conditioning.
thenotchedspecimen180°intheclampingvise.Theresultsof
all test methods are reported in terms of energy absorbed per 1.2 The values stated in SI units are to be regarded as
standard. The values given in parentheses are for information
unitofspecimenwidthorperunitofcross-sectionalareaunder
the notch. (See Note 4.) only.
1.3 This standard does not purport to address all of the
NOTE 1—The machines with their pendulum-type hammers have been
“standardized” in that they must comply with certain requirements, safety concerns, if any, associated with its use. It is the
includingafixedheightofhammerfallthatresultsinasubstantiallyfixed
responsibility of the user of this standard to establish appro-
velocity of the hammer at the moment of impact. However, hammers of
priate safety and health practices and determine the applica-
different initial energies (produced by varying their effective weights) are
bility of regulatory limitations prior to use.
recommended for use with specimens of different impact resistance.
Moreover, manufacturers of the equipment are permitted to use different
NOTE 5—These test methods resemble ISO 180:1993 in regard to title
lengths and constructions of pendulums with possible differences in
only. The contents are significantly different.
pendulum rigidities resulting. (See Section 5.) Be aware that other
differences in machine design may exist. The specimens are “standard-
2. Referenced Documents
ized” in that they are required to have one fixed length, one fixed depth,
2
2.1 ASTM Standards:
and one particular design of milled notch. The width of the specimens is
permitted to vary between limits.
D618Practice for Conditioning Plastics for Testing
NOTE 2—Results generated using pendulums that utilize a load cell to
D883Terminology Relating to Plastics
record the impact force and thus impact energy, may not be equivalent to
D3641Practice for Injection Molding Test Specimens of
results that are generated using manually or digitally encoded testers that
Thermoplastic Molding and Extrusion Materials
measure the energy remaining in the pendulum after impact.
NOTE 3—The notch in the Izod specimen serves to concentrate the D4066Classification System for Nylon Injection and Extru-
stress, minimize plastic deformation, and direct the fracture to the part of
sion Materials (PA)
thespecimenbehindthenotch.Scatterinenergy-to-breakisthusreduced.
D5947Test Methods for Physical Dimensions of Solid
However, because of differences in the elastic and viscoelastic properties
Plastics Specimens
of plastics, response to a given notch varies among materials.Ameasure
D6110Test Method for Determining the Charpy Impact
of a plastic’s “notch sensitivity” may be obtained with Test Method D by
comparing the energies to break specimens having different radii at the Resistance of Notched Specimens of Plastics
base of the notch.
E691Practice for Conducting an Interlaboratory Study to
Determine the Precision of a Test Method
1
These test methods are under the jurisdiction of ASTM Committee D20 on
Plastics and are the direct responsibility of Subcommittee D20.10 on Mechanical
2
Properties. For referenced ASTM standards, visit the ASTM website, www.astm.org, or
Current edition approved May 1, 2
...
This document is not anASTM standard and is intended only to provide the user of anASTM standard an indication of what changes have been made to the previous version. Because
it may not be technically possible to adequately depict all changes accurately, ASTM recommends that users consult prior editions as appropriate. In all cases only the current version
of the standard as published by ASTM is to be considered the official document.
´1
Designation:D256–06a Designation:D256–10
Standard Test Methods for
Determining the Izod Pendulum Impact Resistance of
1
Plastics
This standard is issued under the fixed designation D256; the number immediately following the designation indicates the year of
original adoption or, in the case of revision, the year of last revision.Anumber in parentheses indicates the year of last reapproval.A
superscript epsilon (´) indicates an editorial change since the last revision or reapproval.
This standard has been approved for use by agencies of the Department of Defense.
1
´ NOTE—Removed research report footnote from Section 31 editorially in September 2008.
1. Scope*
1.1These1.1 These test methods cover the determination of the resistance of plastics to “standardized” (see Note 1)
pendulum-type hammers, mounted in “standardized” machines, in breaking standard specimens with one pendulum swing (see
Note 2). The standard tests for these test methods require specimens made with a milled notch (see Note 3). In Test MethodsA,
C, and D, the notch produces a stress concentration that increases the probability of a brittle, rather than a ductile, fracture. InTest
Method E, the impact resistance is obtained by reversing the notched specimen 180° in the clamping vise. The results of all test
methods are reported in terms of energy absorbed per unit of specimen width or per unit of cross-sectional area under the notch.
(See Note 4.)
NOTE 1—The machines with their pendulum-type hammers have been “standardized” in that they must comply with certain requirements, including
a fixed height of hammer fall that results in a substantially fixed velocity of the hammer at the moment of impact. However, hammers of different initial
energies (produced by varying their effective weights) are recommended for use with specimens of different impact resistance. Moreover, manufacturers
of the equipment are permitted to use different lengths and constructions of pendulums with possible differences in pendulum rigidities resulting. (See
Section 5.) Be aware that other differences in machine design may exist. The specimens are “standardized” in that they are required to have one fixed
length, one fixed depth, and one particular design of milled notch. The width of the specimens is permitted to vary between limits.
NOTE 2—Resultsgeneratedusingpendulumsthatutilizealoadcelltorecordtheimpactforceandthusimpactenergy,maynotbeequivalenttoresults
that are generated using manually or digitally encoded testers that measure the energy remaining in the pendulum after impact.
NOTE 3—The notch in the Izod specimen serves to concentrate the stress, minimize plastic deformation, and direct the fracture to the part of the
specimen behind the notch. Scatter in energy-to-break is thus reduced. However, because of differences in the elastic and viscoelastic properties of
plastics,responsetoagivennotchvariesamongmaterials.Ameasureofaplastic’s“notchsensitivity”maybeobtainedwithTestMethodDbycomparing
the energies to break specimens having different radii at the base of the notch.
NOTE 4—Caution must be exercised in interpreting the results of these standard test methods. The following testing parameters may affect test results
significantly:
Method of fabrication, including but not limited to processing
technology, molding conditions, mold design, and thermal
treatments;
Method of notching;
Speed of notching tool;
Design of notching apparatus;
Quality of the notch;
Time between notching and test;
Test specimen thickness,
Test specimen width under notch, and
Environmental conditioning.
1.2 The values stated in SI units are to be regarded as standard. The values given in bracketsparentheses are for information
only.
1.3 This standard does not purport to address all of the safety concerns, if any, associated with its use. It is the responsibility
of the user of this standard to establish appropriate safety and health practices and determine the applicability of regulatory
limitations prior to use.
NOTE 5—These test methods resemble ISO 180:1993 in regard to title only. The contents are significantly different.
1
These test methods are under the jurisdiction ofASTM Committee D20 on Plastics and are the direct responsibility of Subcommittee D20.10 on Mechanical Properties.
Current edition approved Dec. 1, 2006. Published December 2006. Originally approved in 1926. Last previous edition approved in 2006 as D256-06. DOI:
10.1520/D0256-06AE01.
´1
Current edition approved May 1, 2010. Published June 2010. Originally approved in 1926. Last previous ed
...


Questions, Comments and Discussion
Ask us and Technical Secretary will try to provide an answer. You can facilitate discussion about the standard in here.