ASTM B657-11
(Test Method)Guide for Metallographic Identification of Microstructure in Cemented Carbides
Guide for Metallographic Identification of Microstructure in Cemented Carbides
SIGNIFICANCE AND USE
The microstructure of a cemented carbide affects the material’mechanical and physical properties. This guide is not intended to be used as a specification for carbide grades. Producers and users may use the microstructural information as a guide in developing their own specifications.
SCOPE
1.1 This test method covers apparatus and procedures for the metallographic determination of microstructures in cemented tungsten carbides.
1.2 This standard does not purport to address all of the safety concerns, if any, associated with its use. It is the responsibility of the user of this standard to establish appropriate safety and health practices and determine the applicability of regulatory limitations prior to use. Precautions applying to use of hazardous laboratory chemicals should be observed for chemicals specified in Table 1.
General Information
Relations
Buy Standard
Standards Content (Sample)
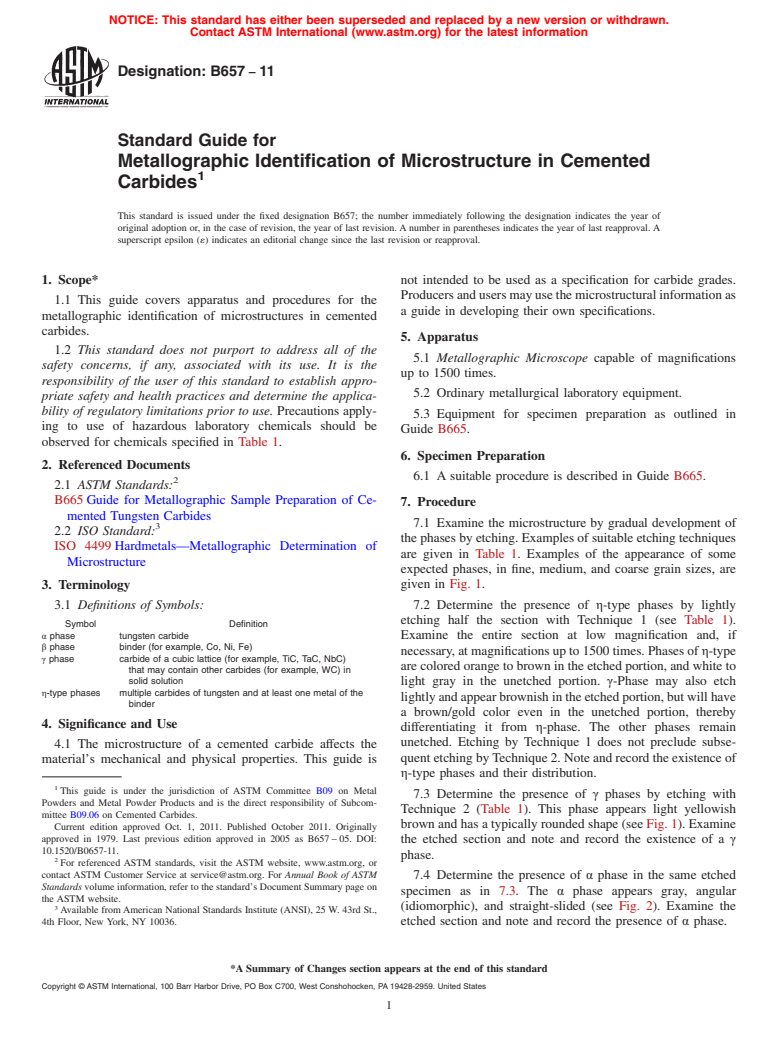
NOTICE: This standard has either been superseded and replaced by a new version or withdrawn.
Contact ASTM International (www.astm.org) for the latest information
Designation:B657 −11
Standard Guide for
Metallographic Identification of Microstructure in Cemented
1
Carbides
This standard is issued under the fixed designation B657; the number immediately following the designation indicates the year of
original adoption or, in the case of revision, the year of last revision. A number in parentheses indicates the year of last reapproval. A
superscript epsilon (´) indicates an editorial change since the last revision or reapproval.
1. Scope* not intended to be used as a specification for carbide grades.
Producersandusersmayusethemicrostructuralinformationas
1.1 This guide covers apparatus and procedures for the
a guide in developing their own specifications.
metallographic identification of microstructures in cemented
carbides.
5. Apparatus
1.2 This standard does not purport to address all of the
5.1 Metallographic Microscope capable of magnifications
safety concerns, if any, associated with its use. It is the
up to 1500 times.
responsibility of the user of this standard to establish appro-
5.2 Ordinary metallurgical laboratory equipment.
priate safety and health practices and determine the applica-
bility of regulatory limitations prior to use. Precautions apply-
5.3 Equipment for specimen preparation as outlined in
ing to use of hazardous laboratory chemicals should be
Guide B665.
observed for chemicals specified in Table 1.
6. Specimen Preparation
2. Referenced Documents
6.1 A suitable procedure is described in Guide B665.
2
2.1 ASTM Standards:
B665 Guide for Metallographic Sample Preparation of Ce-
7. Procedure
mented Tungsten Carbides
7.1 Examine the microstructure by gradual development of
3
2.2 ISO Standard:
the phases by etching. Examples of suitable etching techniques
ISO 4499 Hardmetals—Metallographic Determination of
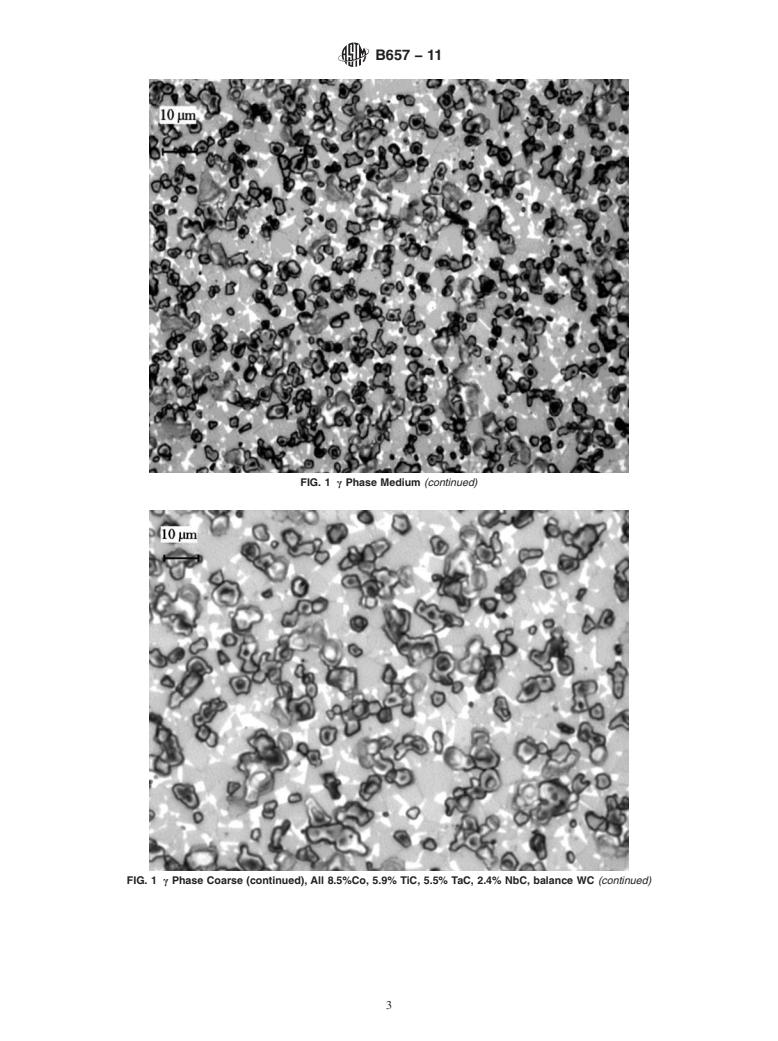
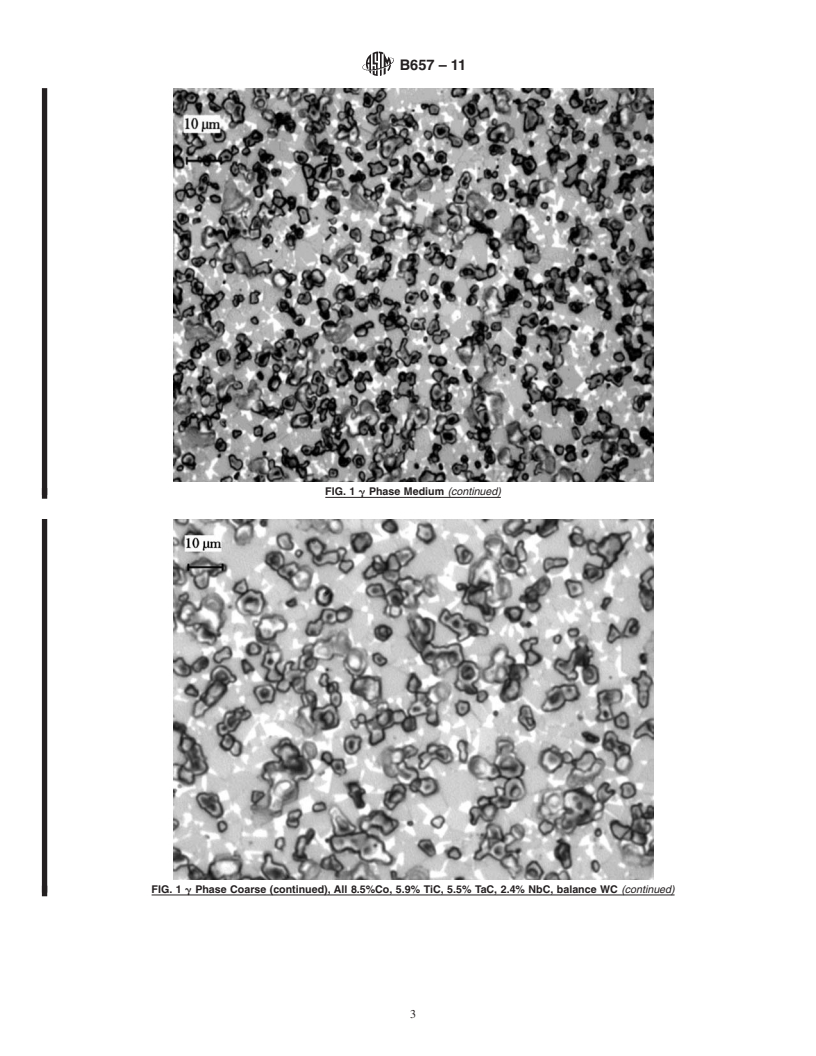
are given in Table 1. Examples of the appearance of some
Microstructure
expected phases, in fine, medium, and coarse grain sizes, are
given in Fig. 1.
3. Terminology
3.1 Definitions of Symbols: 7.2 Determine the presence of η-type phases by lightly
etching half the section with Technique 1 (see Table 1).
Symbol Definition
α phase tungsten carbide
Examine the entire section at low magnification and, if
β phase binder (for example, Co, Ni, Fe)
necessary, at magnifications up to 1500 times. Phases ofη-type
γ phase carbide of a cubic lattice (for example, TiC, TaC, NbC)
are colored orange to brown in the etched portion, and white to
that may contain other carbides (for example, WC) in
solid solution
light gray in the unetched portion. γ-Phase may also etch
η-type phases multiple carbides of tungsten and at least one metal of the
lightlyandappearbrownishintheetchedportion,butwillhave
binder
a brown/gold color even in the unetched portion, thereby
4. Significance and Use
differentiating it from η-phase. The other phases remain
unetched. Etching by Technique 1 does not preclude subse-
4.1 The microstructure of a cemented carbide affects the
quent etching byTechnique 2. Note and record the existence of
material’s mechanical and physical properties. This guide is
η-type phases and their distribution.
1
This guide is under the jurisdiction of ASTM Committee B09 on Metal
7.3 Determine the presence of γ phases by etching with
Powders and Metal Powder Products and is the direct responsibility of Subcom-
Technique 2 (Table 1). This phase appears light yellowish
mittee B09.06 on Cemented Carbides.
brown and has a typically rounded shape (see Fig. 1). Examine
Current edition approved Oct. 1, 2011. Published October 2011. Originally
approved in 1979. Last previous edition approved in 2005 as B657 – 05. DOI:
the etched section and note and record the existence of a γ
10.1520/B0657-11.
phase.
2
For referenced ASTM standards, visit the ASTM website, www.astm.org, or
contact ASTM Customer Service at service@astm.org. For Annual Book of ASTM
7.4 Determine the presence of α phase in the same etched
Standards volume information, refer to the standard’s Document Summary page on
specimen as in 7.3. The α phase appears gray, angular
the ASTM website.
3 (idiomorphic), and straight-slided (see Fig. 2). Examine the
Available from American National Standards Institute (ANSI), 25 W. 43rd St.,
4th Floor, New York, NY 10036. etched section and note and record the presence of α phase.
*A Summary of Changes section appears at the end of this standard
Copyright © ASTM International, 100 Barr Harbor Drive, PO Box C700, West Conshohocken, PA 19428-2959. United States
1
---------------------- Page: 1 ----------------------
B657−11
TABLE 1 Etching Techniques
NOTE 1—The separate solutions of potassium hexacyanoferrate (III) and potassium or sodium hydroxide may be stored for a long time, but must be
freshly mixed each day when used.
Etching
Objective
Tech- Composition of Etchants Conditions of Etching
of Etching
nique
1 Freshly prepared m
...
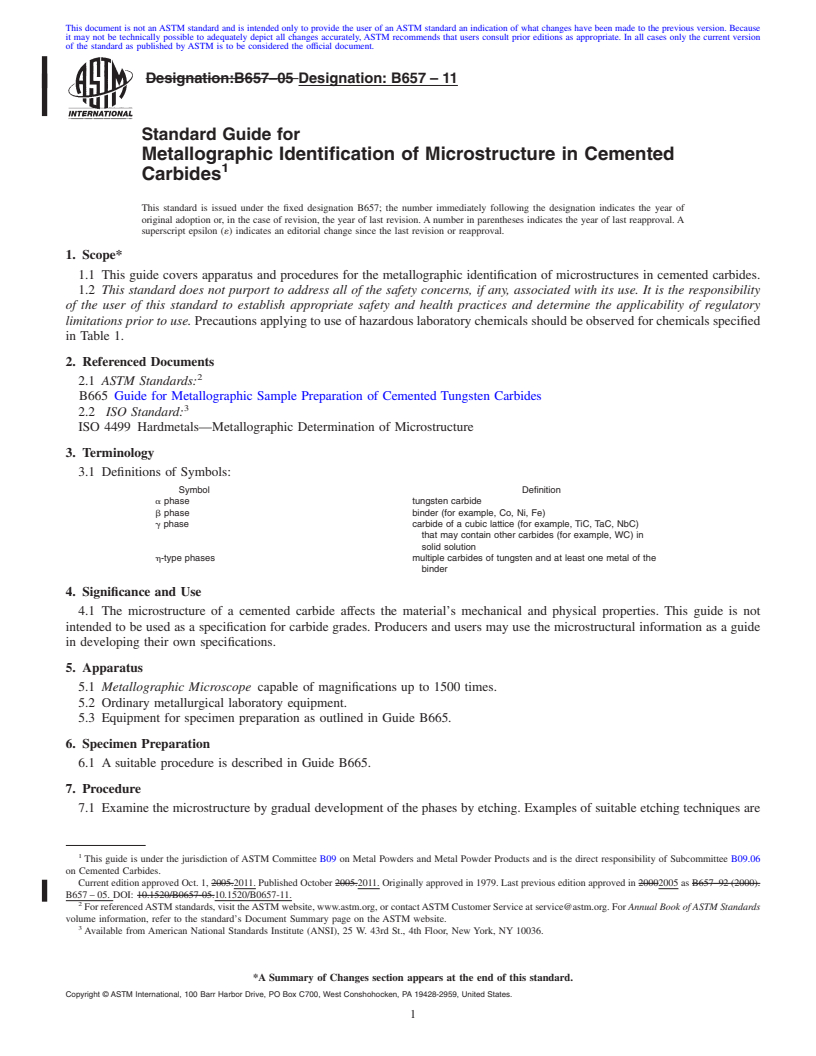
This document is not an ASTM standard and is intended only to provide the user of an ASTM standard an indication of what changes have been made to the previous version. Because
it may not be technically possible to adequately depict all changes accurately, ASTM recommends that users consult prior editions as appropriate. In all cases only the current version
of the standard as published by ASTM is to be considered the official document.
Designation:B657–05 Designation: B657 – 11
Standard Guide for
Metallographic Identification of Microstructure in Cemented
1
Carbides
This standard is issued under the fixed designation B657; the number immediately following the designation indicates the year of
original adoption or, in the case of revision, the year of last revision. A number in parentheses indicates the year of last reapproval. A
superscript epsilon (´) indicates an editorial change since the last revision or reapproval.
1. Scope*
1.1 This guide covers apparatus and procedures for the metallographic identification of microstructures in cemented carbides.
1.2 This standard does not purport to address all of the safety concerns, if any, associated with its use. It is the responsibility
of the user of this standard to establish appropriate safety and health practices and determine the applicability of regulatory
limitations prior to use. Precautions applying to use of hazardous laboratory chemicals should be observed for chemicals specified
in Table 1.
2. Referenced Documents
2
2.1 ASTM Standards:
B665 Guide for Metallographic Sample Preparation of Cemented Tungsten Carbides
3
2.2 ISO Standard:
ISO 4499 Hardmetals—Metallographic Determination of Microstructure
3. Terminology
3.1 Definitions of Symbols:
Symbol Definition
a phase tungsten carbide
b phase binder (for example, Co, Ni, Fe)
g phase carbide of a cubic lattice (for example, TiC, TaC, NbC)
that may contain other carbides (for example, WC) in
solid solution
h-type phases multiple carbides of tungsten and at least one metal of the
binder
4. Significance and Use
4.1 The microstructure of a cemented carbide affects the material’s mechanical and physical properties. This guide is not
intended to be used as a specification for carbide grades. Producers and users may use the microstructural information as a guide
in developing their own specifications.
5. Apparatus
5.1 Metallographic Microscope capable of magnifications up to 1500 times.
5.2 Ordinary metallurgical laboratory equipment.
5.3 Equipment for specimen preparation as outlined in Guide B665.
6. Specimen Preparation
6.1 A suitable procedure is described in Guide B665.
7. Procedure
7.1 Examine the microstructure by gradual development of the phases by etching. Examples of suitable etching techniques are
1
This guide is under the jurisdiction of ASTM Committee B09 on Metal Powders and Metal Powder Products and is the direct responsibility of Subcommittee B09.06
on Cemented Carbides.
Current edition approved Oct. 1, 2005.2011. Published October 2005.2011. Originally approved in 1979. Last previous edition approved in 20002005 as B657–92 (2000).
B657 – 05. DOI: 10.1520/B0657-05.10.1520/B0657-11.
2
For referencedASTM standards, visit theASTM website, www.astm.org, or contactASTM Customer Service at service@astm.org. For Annual Book ofASTM Standards
volume information, refer to the standard’s Document Summary page on the ASTM website.
3
Available from American National Standards Institute (ANSI), 25 W. 43rd St., 4th Floor, New York, NY 10036.
*A Summary of Changes section appears at the end of this standard.
Copyright © ASTM International, 100 Barr Harbor Drive, PO Box C700, West Conshohocken, PA 19428-2959, United States.
1
---------------------- Page: 1 ----------------------
B657 – 11
TABLE 1 Etching Techniques
NOTE 1—The separate solutions of potassium hexacyanoferrate (III) and potassium or sodium hydroxide may be stored for a long time, but must be
freshly mixed each day when used.
Etching
Objective
Tech- Composition of Etchants Conditions of Etching
of Etching
nique
1 Freshly prepared mixture of equal quantities of 10 %(mass/ Etch at approximately 20°C for 2 to 10 s. Flush the test-piece Identification of h
mass) aqueous solutions of K Fe(CN) (III) section with water immediately, without removing the oxide layer. Dry phase
3 6
(potassium ferricyanide) and potassium the surface carefully with acetone or alcohol without wiping.
or sodium hydroxide
2 A Same as 1A Etch at approximately 20°C for 2 to 4 min. Identification of a, b,
and g phases
given in Table 1. Examples of the appearance of some expected phases, in fine, medium, and coarse grain sizes, are given in Fig.
1.
7.2 Determine the presence of h-type phases by lightly etching half the section with Technique 1 (see Table 1). Examine the
entire section at low magnification and, if necessary, at magnifications up to 1500 times. Phases of h-type are colored orange to
brown in the etched portion, and white to light gray in the unetched portion. g-Phase may also
...


Questions, Comments and Discussion
Ask us and Technical Secretary will try to provide an answer. You can facilitate discussion about the standard in here.